Where your coolant level should be on the dashboard depends on your vehicle’s specific design, but generally, it’s indicated by a gauge or warning light; the coolant reservoir itself has “MIN” and “MAX” lines to guide the appropriate fill level. At CAR-TOOL.EDU.VN, we aim to provide you with the knowledge and resources to understand your vehicle’s cooling system and maintain it effectively, ensuring peak performance and longevity. Learn about the significance of maintaining proper coolant levels, identifying warning signs, and understanding the dashboard indicators related to your cooling system.
Contents
- 1. Understanding the Importance of Coolant Level
- 2. Identifying Coolant Level Indicators on Your Dashboard
- 2.1. Coolant Temperature Gauge
- 2.2. Coolant Warning Light
- 2.3. Message Display
- 3. Locating and Inspecting the Coolant Reservoir
- 3.1. Where to Find the Coolant Reservoir
- 3.2. Inspecting the Coolant Level
- 3.3. Safety Precautions
- 4. Understanding Coolant Types and Mixture Ratios
- 4.1. Types of Coolant
- 4.2. Mixture Ratios
- 4.3. Distilled Water vs. Tap Water
- 5. Adding Coolant to Your Vehicle
- 5.1. Gather Supplies
- 5.2. Steps to Add Coolant
- 5.3. What To Do After Adding Coolant
- 6. Diagnosing Coolant Leaks and Other Cooling System Issues
- 6.1. Common Causes of Coolant Leaks
- 6.2. How to Detect Coolant Leaks
- 6.3. Other Cooling System Problems
- 7. The Role of the Radiator Cap
- 7.1. How the Radiator Cap Works
- 7.2. Signs of a Faulty Radiator Cap
- 7.3. Radiator Cap Maintenance
- 8. Maintaining Your Vehicle’s Cooling System
- 8.1. Regular Inspections
- 8.2. Coolant Flushes
- 8.3. Professional Maintenance
- 9. Choosing the Right Coolant for Your Vehicle
- 9.1. Understanding Coolant Specifications
- 9.2. Comparing Coolant Brands
- 9.3. Purchasing Coolant from CAR-TOOL.EDU.VN
- 10. Essential Tools and Equipment for Cooling System Maintenance
- 10.1. Basic Tools
- 10.2. Diagnostic Tools
- 10.3. Safety Equipment
- 10.4. Where to Buy Tools
- 11. How to Bleed Air from the Cooling System
- 11.1. Why Bleeding is Important
- 11.2. Bleeding Procedure
- 11.3. Specific Vehicle Procedures
- 12. Understanding the Coolant Overflow Tank
- 12.1. How the Overflow Tank Works
- 12.2. Overflow Tank Maintenance
- 12.3. Symptoms of a Faulty Overflow Tank
- 13. Addressing Coolant Odors
- 13.1. Common Coolant Odors
- 13.2. Locating the Source of the Odor
- 13.3. Addressing the Issue
- 14. Coolant and Environmental Concerns
- 14.1. Coolant Toxicity
- 14.2. Safe Handling Practices
- 14.3. Proper Disposal Methods
- 15. Understanding Coolant Flushes: Why and When
- 15.1. Why Flush the Coolant?
- 15.2. When to Flush the Coolant?
- 15.3. How to Flush the Coolant
- 16. Upgrading Your Cooling System for Performance
- 16.1. Radiator Upgrades
- 16.2. Fan Upgrades
- 16.3. Thermostat Upgrades
- 16.4. Other Upgrades
- 17. Coolant Additives: Do They Really Work?
- 17.1. Types of Coolant Additives
- 17.2. Effectiveness of Additives
- 17.3. Should You Use Additives?
- 18. Common Myths About Coolant
- 18.1. Myth 1: Coolant Color Matters
- 18.2. Myth 2: You Can Use Any Coolant
- 18.3. Myth 3: You Never Need to Flush Coolant
- 18.4. Myth 4: You Can Use Tap Water Instead of Distilled Water
- 18.5. Myth 5: Coolant Lasts Forever
- 19. The Future of Coolant Technology
- 19.1. New Coolant Formulations
- 19.2. Smart Cooling Systems
- 19.3. Electric Vehicle Cooling
- 20. Seeking Professional Help for Coolant Issues
- 20.1. When to Seek Professional Help
- 20.2. Finding a Reliable Mechanic
- 20.3. Contact CAR-TOOL.EDU.VN for Assistance
1. Understanding the Importance of Coolant Level
Maintaining the correct coolant level is crucial for your vehicle’s engine health. Coolant, also known as antifreeze, plays a vital role in regulating engine temperature, preventing overheating in hot weather and freezing in cold conditions. A proper coolant level ensures efficient heat transfer, protecting the engine from damage.
- Heat Dissipation: Coolant absorbs heat from the engine and dissipates it through the radiator.
- Freeze Protection: Prevents coolant from freezing in cold temperatures, which can cause engine damage.
- Corrosion Prevention: Contains additives to protect the engine and cooling system components from corrosion.
According to a study by the University of Michigan’s Automotive Research Center, maintaining proper coolant levels can extend engine life by up to 20%. This highlights the importance of regularly checking and maintaining your vehicle’s cooling system.
2. Identifying Coolant Level Indicators on Your Dashboard
Your vehicle’s dashboard provides vital information about its operating conditions, including the coolant level. Familiarizing yourself with these indicators can help you identify potential issues early and prevent costly repairs.
2.1. Coolant Temperature Gauge
The coolant temperature gauge is a primary indicator of your engine’s temperature. It typically displays a range from cold to hot, with a normal operating range in the middle. If the needle moves towards the hot end, it indicates that your engine is overheating, which could be due to low coolant levels.
- Normal Range: The needle should stay within the normal operating range, usually marked with a specific temperature range or a shaded area.
- Overheating: If the needle goes into the red zone, your engine is overheating, and you should pull over as soon as it’s safe to do so.
- Cold Engine: When the engine is cold, the needle will be at the lower end of the gauge.
2.2. Coolant Warning Light
Many modern vehicles have a coolant warning light that illuminates when the coolant level is low or the engine is overheating. This light is usually shaped like a thermometer or a coolant reservoir and may be red or yellow.
- Low Coolant Level: The warning light may come on if the coolant level in the reservoir drops below the minimum level.
- Overheating: The light may also illuminate if the engine temperature exceeds a safe threshold, indicating potential overheating.
2.3. Message Display
Some vehicles have a message display that provides specific information about the coolant level. This display may show messages such as “Low Coolant Level” or “Engine Overheating,” providing a clear indication of the issue.
- Specific Messages: Look for messages that directly mention coolant levels or overheating.
- Check Engine Light: In some cases, a check engine light may also illuminate in conjunction with coolant-related messages.
It’s crucial to consult your vehicle’s owner’s manual to understand the specific meaning of each indicator and the recommended course of action.
3. Locating and Inspecting the Coolant Reservoir
The coolant reservoir is a plastic tank located under the hood that holds the engine coolant. Checking the coolant level in the reservoir is a simple and effective way to monitor your vehicle’s cooling system.
3.1. Where to Find the Coolant Reservoir
The coolant reservoir is typically located near the engine, often on the side or near the radiator. It is usually made of translucent plastic, allowing you to see the coolant level inside.
- Check Your Owner’s Manual: If you’re unsure of the location, consult your vehicle’s owner’s manual, which provides a diagram of the engine compartment and identifies the coolant reservoir.
- Look for Markings: The reservoir is usually labeled with symbols or words indicating “coolant” or “antifreeze.”
3.2. Inspecting the Coolant Level
Once you’ve located the coolant reservoir, inspect the coolant level. There are usually “MIN” and “MAX” markings on the side of the reservoir.
- Cold Engine: Always check the coolant level when the engine is cold to get an accurate reading.
- Level Between Markings: The coolant level should be between the “MIN” and “MAX” markings.
- Low Coolant Level: If the coolant level is below the “MIN” marking, you need to add more coolant.
- High Coolant Level: If the coolant level is above the “MAX” marking, you may need to remove some coolant.
3.3. Safety Precautions
- Never Open a Hot Coolant Reservoir: Opening a hot coolant reservoir can be dangerous, as the coolant is under pressure and can cause severe burns.
- Wait for the Engine to Cool: Allow the engine to cool completely before opening the coolant reservoir.
- Use a Rag: When opening the reservoir cap, use a rag to protect your hand and slowly release the pressure.
4. Understanding Coolant Types and Mixture Ratios
Choosing the correct type of coolant and using the proper mixture ratio is essential for maintaining your vehicle’s cooling system. Different coolants have different chemical compositions and are designed for specific types of engines.
4.1. Types of Coolant
- Green Coolant (IAT – Inorganic Additive Technology): This is the traditional type of coolant and is suitable for older vehicles.
- Orange Coolant (OAT – Organic Acid Technology): This type of coolant is designed for newer vehicles and has a longer lifespan.
- Yellow/Gold Coolant (HOAT – Hybrid Organic Acid Technology): This coolant is a hybrid of OAT and IAT and is used in a variety of vehicles.
- Universal Coolant: These coolants are designed to be compatible with most vehicles.
According to a study by the Society of Automotive Engineers (SAE), using the wrong type of coolant can lead to corrosion and damage to the cooling system components. Always consult your vehicle’s owner’s manual to determine the correct type of coolant for your vehicle.
4.2. Mixture Ratios
The standard coolant mixture ratio is 50/50, which means 50% coolant and 50% distilled water. This mixture provides optimal protection against freezing and overheating.
- 50/50 Mixture: Provides protection down to -34°F (-36.7°C) and raises the boiling point to 265°F (129°C).
- 70/30 Mixture: In extremely cold climates, a 70% coolant and 30% distilled water mixture can be used for added freeze protection.
- Never Use Straight Coolant: Never use straight coolant without mixing it with distilled water, as it will not provide adequate cooling and can damage the engine.
4.3. Distilled Water vs. Tap Water
Always use distilled water when mixing coolant, as tap water contains minerals and impurities that can cause corrosion and damage to the cooling system.
- Distilled Water: Pure water that has had minerals and impurities removed.
- Tap Water: Contains minerals and impurities that can cause corrosion and scale buildup.
5. Adding Coolant to Your Vehicle
If your coolant level is low, you need to add more coolant to the reservoir. Follow these steps to add coolant safely and effectively:
5.1. Gather Supplies
- Correct Type of Coolant: Use the type of coolant recommended in your vehicle’s owner’s manual.
- Distilled Water: Use distilled water to mix with the coolant.
- Funnel: A funnel will help you pour the coolant without spilling.
- Rag: Use a rag to wipe up any spills.
5.2. Steps to Add Coolant
- Ensure the Engine is Cool: Make sure the engine is completely cool before opening the coolant reservoir.
- Remove the Reservoir Cap: Slowly remove the reservoir cap, using a rag to protect your hand and release any pressure.
- Mix Coolant and Distilled Water: Mix the coolant and distilled water in a 50/50 ratio.
- Pour Coolant into the Reservoir: Use a funnel to pour the coolant mixture into the reservoir until it reaches the “MAX” marking.
- Replace the Reservoir Cap: Securely replace the reservoir cap.
- Check the Coolant Level: After adding coolant, check the coolant level again to ensure it is between the “MIN” and “MAX” markings.
5.3. What To Do After Adding Coolant
After adding coolant, monitor the coolant level and temperature gauge for a few days to ensure that the cooling system is functioning properly.
- Check for Leaks: Inspect the cooling system components for any leaks.
- Monitor Temperature Gauge: Keep an eye on the temperature gauge to ensure that the engine is not overheating.
- Seek Professional Help: If you notice any issues, such as continued low coolant levels or overheating, seek professional help from a qualified mechanic.
6. Diagnosing Coolant Leaks and Other Cooling System Issues
If you’re constantly adding coolant to your vehicle, it could indicate a leak or other issue in the cooling system. Identifying and addressing these issues promptly can prevent more severe engine damage.
6.1. Common Causes of Coolant Leaks
- Leaking Radiator: The radiator can develop leaks due to corrosion or damage.
- Leaking Hoses: Hoses can become cracked or brittle over time, leading to leaks.
- Leaking Water Pump: The water pump can leak from the seal around the shaft.
- Leaking Head Gasket: A blown head gasket can cause coolant to leak into the engine.
- Leaking Freeze Plugs: Freeze plugs, also known as core plugs, can corrode and leak.
6.2. How to Detect Coolant Leaks
- Check for Puddles: Look for puddles of coolant under your vehicle. Coolant is usually green, orange, or yellow.
- Inspect Hoses and Connections: Check the hoses and connections for signs of leaks or corrosion.
- Pressure Test: A pressure test can help identify leaks in the cooling system.
- Check the Oil: If the head gasket is leaking, coolant may mix with the engine oil, resulting in a milky or frothy appearance.
6.3. Other Cooling System Problems
- Overheating: Overheating can be caused by low coolant levels, a faulty thermostat, a clogged radiator, or a malfunctioning water pump.
- Coolant Contamination: Coolant can become contaminated with oil or rust, reducing its effectiveness.
- Faulty Thermostat: A faulty thermostat can prevent the engine from reaching its optimal operating temperature.
According to the National Institute for Automotive Service Excellence (ASE), regular cooling system maintenance can prevent many of these issues and extend the life of your vehicle.
7. The Role of the Radiator Cap
The radiator cap plays a crucial role in maintaining the pressure within the cooling system and preventing coolant from boiling over. A faulty radiator cap can lead to overheating and other cooling system issues.
7.1. How the Radiator Cap Works
- Pressure Regulation: The radiator cap maintains pressure in the cooling system, raising the boiling point of the coolant.
- Pressure Relief: The cap has a pressure relief valve that releases excess pressure if it exceeds the cap’s rating.
- Vacuum Relief: The cap also has a vacuum relief valve that allows coolant to flow back into the radiator from the overflow tank as the engine cools.
7.2. Signs of a Faulty Radiator Cap
- Overheating: A faulty radiator cap can cause the engine to overheat.
- Coolant Loss: Coolant may leak from the radiator cap.
- Collapsing Hoses: Hoses may collapse due to a lack of vacuum relief.
7.3. Radiator Cap Maintenance
- Inspect the Cap: Regularly inspect the radiator cap for damage or corrosion.
- Pressure Test: A pressure test can verify that the cap is holding the correct pressure.
- Replace the Cap: Replace the radiator cap every two years or as recommended by your vehicle’s manufacturer.
8. Maintaining Your Vehicle’s Cooling System
Regular maintenance is crucial for keeping your vehicle’s cooling system in top condition. Here are some maintenance tips:
8.1. Regular Inspections
- Check Coolant Level: Check the coolant level regularly.
- Inspect Hoses and Connections: Inspect the hoses and connections for leaks or damage.
- Check Radiator Cap: Check the radiator cap for damage or corrosion.
8.2. Coolant Flushes
- Flush the Cooling System: Flush the cooling system every two to three years or as recommended by your vehicle’s manufacturer.
- Use the Correct Coolant: Use the type of coolant recommended in your vehicle’s owner’s manual.
8.3. Professional Maintenance
- Have the Cooling System Inspected: Have the cooling system inspected by a qualified mechanic.
- Address Issues Promptly: Address any cooling system issues promptly to prevent more severe engine damage.
According to a survey by Consumer Reports, regular maintenance can significantly reduce the likelihood of cooling system failures and extend the life of your vehicle.
9. Choosing the Right Coolant for Your Vehicle
Selecting the correct coolant is paramount for your vehicle’s engine health. Different coolants have varying chemical compositions and are designed for specific engine types. Using the wrong coolant can lead to corrosion, reduced cooling efficiency, and potential engine damage.
9.1. Understanding Coolant Specifications
When selecting coolant, pay attention to the following specifications:
- Color: Coolant color is often used to differentiate types (e.g., green, orange, yellow), but it’s not always a reliable indicator of compatibility.
- Composition: Coolants are categorized by their additive technology, such as IAT, OAT, and HOAT.
- Vehicle Manufacturer Recommendations: Always consult your vehicle’s owner’s manual for the manufacturer’s recommended coolant type.
9.2. Comparing Coolant Brands
Several reputable coolant brands are available, each offering different formulations and features. Here’s a comparison of some popular brands:
| Brand | Coolant Type | Key Features |
|---|---|---|
| Prestone | Universal | Compatible with all vehicles, extended life formula |
| Peak | OAT | Long-lasting protection, corrosion inhibitors |
| Zerex | HOAT | Hybrid formula, suitable for a variety of vehicles |
| ACDelco | Dex-Cool | Specifically designed for GM vehicles |
9.3. Purchasing Coolant from CAR-TOOL.EDU.VN
At CAR-TOOL.EDU.VN, we offer a wide selection of high-quality coolants to meet your vehicle’s specific needs. Our knowledgeable staff can help you choose the right coolant and provide expert advice on cooling system maintenance. Contact us at +1 (641) 206-8880 or visit our website at CAR-TOOL.EDU.VN to learn more.
10. Essential Tools and Equipment for Cooling System Maintenance
Maintaining your vehicle’s cooling system requires some essential tools and equipment. Having these tools on hand can make it easier to perform regular inspections, coolant flushes, and minor repairs.
10.1. Basic Tools
- Wrenches: For loosening and tightening hose clamps and other cooling system components.
- Pliers: For removing and installing hoses.
- Funnel: For pouring coolant into the reservoir without spilling.
- Drain Pan: For collecting old coolant during a flush.
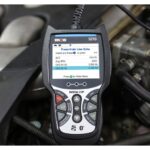
10.2. Diagnostic Tools
- Coolant Tester: For testing the coolant’s freeze protection level.
- Pressure Tester: For testing the cooling system for leaks.
- Infrared Thermometer: For measuring engine temperature and identifying hot spots.
10.3. Safety Equipment
- Gloves: For protecting your hands from coolant and other chemicals.
- Safety Glasses: For protecting your eyes from splashes and debris.
- Rags: For wiping up spills and cleaning tools.
10.4. Where to Buy Tools
CAR-TOOL.EDU.VN offers a comprehensive selection of high-quality tools and equipment for cooling system maintenance. Visit our website or contact us at +1 (641) 206-8880 to learn more.
11. How to Bleed Air from the Cooling System
After refilling the coolant, air pockets can get trapped inside the cooling system, hindering its performance. Bleeding the air out is a crucial step to ensure efficient heat transfer and prevent overheating.
11.1. Why Bleeding is Important
Air pockets in the cooling system can cause:
- Reduced Cooling Efficiency: Air is a poor conductor of heat compared to coolant, reducing the system’s ability to dissipate heat.
- Overheating: Air pockets can create hotspots in the engine, leading to overheating.
- Inaccurate Temperature Readings: Air around the coolant temperature sensor can cause inaccurate readings.
11.2. Bleeding Procedure
The bleeding procedure varies slightly depending on the vehicle model. However, the general steps are as follows:
- Locate the Bleeder Valve: Most vehicles have a bleeder valve located on the thermostat housing or radiator.
- Open the Valve: With the engine cold, open the bleeder valve.
- Add Coolant: Add coolant to the reservoir until a steady stream of coolant comes out of the bleeder valve without any air bubbles.
- Close the Valve: Close the bleeder valve.
- Start the Engine: Start the engine and let it run for a few minutes.
- Check Coolant Level: Check the coolant level and add more if needed.
- Repeat: Repeat the process until no more air bubbles come out of the bleeder valve.
11.3. Specific Vehicle Procedures
Consult your vehicle’s owner’s manual for specific bleeding procedures. Some vehicles may require additional steps, such as raising the front of the vehicle or using a special bleeding tool.
12. Understanding the Coolant Overflow Tank
The coolant overflow tank, also known as the expansion tank, plays a vital role in maintaining the proper coolant level in the cooling system. It allows coolant to expand and contract as the engine heats up and cools down, preventing pressure buildup and coolant loss.
12.1. How the Overflow Tank Works
- Expansion and Contraction: As the engine heats up, the coolant expands and flows into the overflow tank. As the engine cools down, the coolant contracts and is drawn back into the radiator.
- Pressure Regulation: The overflow tank helps maintain a constant pressure in the cooling system.
- Coolant Recovery: The overflow tank recovers coolant that would otherwise be lost through the radiator cap’s pressure relief valve.
12.2. Overflow Tank Maintenance
- Check Coolant Level: Check the coolant level in the overflow tank regularly. The level should be between the “MIN” and “MAX” markings.
- Inspect Hoses: Inspect the hoses connecting the overflow tank to the radiator for leaks or damage.
- Clean the Tank: Clean the overflow tank periodically to remove sediment and debris.
12.3. Symptoms of a Faulty Overflow Tank
- Coolant Loss: Coolant may leak from the overflow tank.
- Overheating: A faulty overflow tank can contribute to overheating.
- Low Coolant Level: The coolant level in the radiator may be low due to a faulty overflow tank.
13. Addressing Coolant Odors
Coolant odors can indicate a leak or other issue in the cooling system. Identifying the source of the odor and addressing it promptly can prevent more severe problems.
13.1. Common Coolant Odors
- Sweet Smell: A sweet smell is the most common coolant odor and usually indicates a coolant leak.
- Burning Smell: A burning smell can indicate that coolant is leaking onto a hot engine component.
- Musty Smell: A musty smell can indicate mold or mildew growth in the cooling system.
13.2. Locating the Source of the Odor
- Inspect the Engine Compartment: Inspect the engine compartment for signs of coolant leaks, such as puddles or stains.
- Check the Hoses and Connections: Check the hoses and connections for leaks or corrosion.
- Sniff Around: Use your nose to sniff around the engine compartment and try to pinpoint the source of the odor.
13.3. Addressing the Issue
- Repair Leaks: Repair any coolant leaks promptly.
- Clean the Cooling System: Clean the cooling system to remove mold or mildew growth.
- Replace Components: Replace any damaged or corroded components.
14. Coolant and Environmental Concerns
Coolant is toxic and can be harmful to the environment if not disposed of properly. It’s crucial to handle and dispose of coolant responsibly.
14.1. Coolant Toxicity
Coolant contains ethylene glycol or propylene glycol, which are toxic to humans and animals. Ingesting even a small amount of coolant can be fatal.
14.2. Safe Handling Practices
- Wear Gloves and Safety Glasses: Wear gloves and safety glasses when handling coolant.
- Avoid Spills: Avoid spilling coolant.
- Wash Hands: Wash your hands thoroughly after handling coolant.
- Keep Away from Children and Pets: Keep coolant away from children and pets.
14.3. Proper Disposal Methods
- Recycle Coolant: Recycle used coolant at a local recycling center or auto parts store.
- Do Not Dump Coolant: Do not dump coolant down the drain or into the environment.
- Store Coolant Safely: Store coolant in a sealed container in a safe location.
15. Understanding Coolant Flushes: Why and When
A coolant flush involves removing the old coolant from the cooling system and replacing it with fresh coolant. This process helps remove contaminants, scale buildup, and corrosion, ensuring optimal cooling system performance.
15.1. Why Flush the Coolant?
- Remove Contaminants: Over time, coolant can become contaminated with rust, scale, and other debris.
- Prevent Corrosion: Contaminants can accelerate corrosion in the cooling system.
- Restore Cooling Efficiency: Fresh coolant provides better heat transfer and cooling efficiency.
- Extend Component Life: Regular coolant flushes can extend the life of cooling system components.
15.2. When to Flush the Coolant?
- Recommended Intervals: Consult your vehicle’s owner’s manual for the manufacturer’s recommended coolant flush intervals.
- Visual Inspection: If the coolant looks dirty or contaminated, it’s time for a flush.
- Performance Issues: If you’re experiencing overheating or other cooling system problems, a flush may be necessary.
15.3. How to Flush the Coolant
- Drain the Old Coolant: Drain the old coolant from the radiator and engine block.
- Flush the System: Use a coolant flush kit to flush the cooling system with water or a cleaning solution.
- Add New Coolant: Add fresh coolant to the system, using the correct type and mixture ratio.
- Bleed the System: Bleed the air out of the cooling system.
16. Upgrading Your Cooling System for Performance
For high-performance vehicles or those that undergo heavy use, upgrading the cooling system can provide significant benefits. Upgrades can improve cooling efficiency, prevent overheating, and extend engine life.
16.1. Radiator Upgrades
- Aluminum Radiators: Aluminum radiators provide better heat transfer than traditional copper radiators.
- Larger Radiators: Larger radiators have a greater surface area for heat dissipation.
- Performance Radiators: Performance radiators are designed for high-performance applications.
16.2. Fan Upgrades
- Electric Fans: Electric fans provide more consistent airflow than mechanical fans.
- High-Performance Fans: High-performance fans can move more air and improve cooling efficiency.
16.3. Thermostat Upgrades
- Lower Temperature Thermostats: Lower temperature thermostats can help keep the engine cooler.
16.4. Other Upgrades
- High-Performance Water Pumps: High-performance water pumps can circulate coolant more efficiently.
- Coolant Hoses: Upgrading to silicone or braided coolant hoses can improve durability and prevent leaks.
17. Coolant Additives: Do They Really Work?
Coolant additives are designed to enhance the performance of coolant and provide additional protection against corrosion, scale buildup, and overheating. However, their effectiveness is a subject of debate.
17.1. Types of Coolant Additives
- Corrosion Inhibitors: These additives help prevent corrosion in the cooling system.
- Water Wetter: These additives claim to improve heat transfer.
- Stop Leak: These additives are designed to seal small leaks in the cooling system.
17.2. Effectiveness of Additives
- Corrosion Inhibitors: Some corrosion inhibitors can be effective in preventing corrosion.
- Water Wetter: The effectiveness of water wetter is debated, with some studies showing minimal improvement in heat transfer.
- Stop Leak: Stop leak additives can be effective in sealing small leaks, but they can also clog the cooling system if used excessively.
17.3. Should You Use Additives?
- Use with Caution: Use coolant additives with caution and follow the manufacturer’s instructions.
- Quality Coolant: Using a high-quality coolant may eliminate the need for additives.
- Consult a Mechanic: Consult a qualified mechanic before using coolant additives.
18. Common Myths About Coolant
There are several common myths about coolant that can lead to confusion and improper maintenance practices. It’s essential to debunk these myths and understand the facts about coolant.
18.1. Myth 1: Coolant Color Matters
- Fact: Coolant color is not always an accurate indicator of compatibility or type.
18.2. Myth 2: You Can Use Any Coolant
- Fact: Using the wrong type of coolant can damage the cooling system.
18.3. Myth 3: You Never Need to Flush Coolant
- Fact: Coolant needs to be flushed periodically to remove contaminants.
18.4. Myth 4: You Can Use Tap Water Instead of Distilled Water
- Fact: Tap water contains minerals and impurities that can damage the cooling system.
18.5. Myth 5: Coolant Lasts Forever
- Fact: Coolant degrades over time and needs to be replaced.
19. The Future of Coolant Technology
Coolant technology is constantly evolving, with new formulations and additives being developed to improve cooling efficiency, extend component life, and reduce environmental impact.
19.1. New Coolant Formulations
- Longer Life Coolants: New coolants are being developed to last longer and provide better protection against corrosion.
- Environmentally Friendly Coolants: Coolants are being developed with less toxic and more biodegradable ingredients.
19.2. Smart Cooling Systems
- Adaptive Cooling: Smart cooling systems are being developed to adjust cooling based on engine load and driving conditions.
- Real-Time Monitoring: Real-time monitoring systems can track coolant levels, temperature, and other parameters.
19.3. Electric Vehicle Cooling
- Battery Cooling: New cooling technologies are being developed to cool batteries in electric vehicles.
- Integrated Cooling Systems: Integrated cooling systems combine engine and battery cooling into a single system.
20. Seeking Professional Help for Coolant Issues
While many coolant-related tasks can be performed by vehicle owners, some issues require the expertise of a qualified mechanic. Knowing when to seek professional help can prevent more severe engine damage and ensure your vehicle’s cooling system is functioning properly.
20.1. When to Seek Professional Help
- Persistent Overheating: If your engine is consistently overheating, it’s time to seek professional help.
- Coolant Leaks: If you can’t locate or repair a coolant leak, consult a mechanic.
- Coolant Contamination: If the coolant is contaminated with oil or rust, a professional flush may be necessary.
- Complex Repairs: Complex repairs, such as replacing a water pump or head gasket, should be performed by a qualified mechanic.
20.2. Finding a Reliable Mechanic
- Certifications: Look for mechanics with ASE certifications.
- Reputation: Check online reviews and ask for recommendations.
- Experience: Choose a mechanic with experience working on your vehicle’s make and model.
- Warranty: Ask about warranty coverage for repairs.
20.3. Contact CAR-TOOL.EDU.VN for Assistance
At CAR-TOOL.EDU.VN, we can help you find a reliable mechanic in your area and provide expert advice on cooling system maintenance and repairs. Contact us at +1 (641) 206-8880 or visit our website at CAR-TOOL.EDU.VN to learn more.
Maintaining your vehicle’s cooling system is crucial for ensuring engine health and preventing costly repairs. By understanding the role of coolant, identifying warning signs, and following proper maintenance practices, you can keep your vehicle running smoothly for years to come. Remember to consult your vehicle’s owner’s manual and seek professional help when needed.
Are you experiencing coolant issues and need expert advice or high-quality auto parts? Contact CAR-TOOL.EDU.VN at 456 Elm Street, Dallas, TX 75201, United States, or call us on Whatsapp: +1 (641) 206-8880. Our knowledgeable staff can assist you with all your cooling system needs, from diagnostics to parts replacement. Visit our website at CAR-TOOL.EDU.VN to explore our extensive selection of auto parts and tools. Let us help you keep your vehicle running at its best. Contact us today for a consultation and immediate assistance. Explore our range of automotive tools and parts at CAR-TOOL.EDU.VN, including essential engine coolants, to ensure your vehicle’s longevity and peak performance.