Replacing the engine coolant temperature sensor is crucial for maintaining optimal engine performance, and at CAR-TOOL.EDU.VN, we provide detailed guides and resources to help you diagnose and address this issue effectively. A faulty sensor can lead to various engine problems, but understanding the symptoms and replacement process can prevent further damage. Trust CAR-TOOL.EDU.VN for expert advice on engine temperature management, automotive sensor diagnostics, and coolant system maintenance.
Contents
- 1. What Does an Engine Coolant Temperature Sensor Do?
- 2. Where Is the Coolant Temperature Sensor Located in My Car?
- 3. What Are the Key Symptoms of a Faulty Coolant Temperature Sensor?
- 4. How to Diagnose a Bad Coolant Temperature Sensor?
- Understanding Diagnostic Tools
- 5. What is the Cost to Replace the Coolant Temperature Sensor?
- Factors Affecting Replacement Cost
- 6. Step-by-Step Guide on How to Replace the Coolant Temperature Sensor
- Essential Tools for the Job
- 7. What Are Common Mistakes to Avoid During Coolant Temperature Sensor Replacement?
- Tips for Ensuring a Successful Replacement
- 8. Frequently Asked Questions (FAQs) About Coolant Temperature Sensors
- 9. Contact CAR-TOOL.EDU.VN for Expert Assistance
- Why Choose CAR-TOOL.EDU.VN?
Table of Contents
- What Does an Engine Coolant Temperature Sensor Do?
- Where Is the Coolant Temperature Sensor Located in My Car?
- What Are the Key Symptoms of a Faulty Coolant Temperature Sensor?
- How to Diagnose a Bad Coolant Temperature Sensor?
- What is the Cost to Replace the Coolant Temperature Sensor?
- Step-by-Step Guide on How to Replace the Coolant Temperature Sensor
- What Are Common Mistakes to Avoid During Coolant Temperature Sensor Replacement?
- Frequently Asked Questions (FAQs) About Coolant Temperature Sensors
- Contact CAR-TOOL.EDU.VN for Expert Assistance
1. What Does an Engine Coolant Temperature Sensor Do?
The engine coolant temperature (ECT) sensor plays a vital role in your vehicle’s engine management system. This sensor measures the temperature of the engine coolant and relays this information to the engine control module (ECM) or powertrain control module (PCM). According to a study by the University of Michigan Transportation Research Institute, accurate temperature readings are essential for the ECM to optimize various engine functions. With precise temperature data, the ECM can adjust the air-to-fuel ratio, ignition timing, and cooling fan operation, ensuring efficient engine performance and preventing overheating. The ECT sensor helps maintain the engine’s operating temperature within the ideal range, which is essential for reducing emissions and maximizing fuel efficiency.
Here’s a breakdown of its primary functions:
- Monitoring Coolant Temperature: The primary function of the ECT sensor is to continuously monitor the temperature of the coolant circulating through the engine.
- Data Transmission: The ECT sensor sends real-time temperature data to the engine control module (ECM) or powertrain control module (PCM).
- Air-to-Fuel Ratio Adjustment: The ECM uses the temperature data to adjust the air-to-fuel ratio, ensuring the engine runs efficiently.
- Ignition Timing: The ECM adjusts the ignition timing based on coolant temperature to optimize combustion and performance.
- Cooling Fan Operation: The ECM controls the cooling fan based on the coolant temperature, preventing the engine from overheating.
2. Where Is the Coolant Temperature Sensor Located in My Car?
Locating the coolant temperature sensor can vary depending on your vehicle’s make and model, but generally, it is found near the thermostat housing. This housing is often located on the top of the engine, close to the intake manifold and cylinder heads. According to automotive expert Paul Knoll from American Muscle, the ECT sensor can sometimes be integrated into the thermostat housing or mounted near the water pump housing. A study by the National Institute for Automotive Service Excellence (ASE) indicates that familiarity with common sensor locations can significantly reduce diagnostic time. Knowing where to find the ECT sensor is the first step in diagnosing and replacing it.
Here are some common locations:
- Thermostat Housing: Often found on top of the engine, near the intake manifold and cylinder heads.
- Cylinder Head: Sometimes integrated directly into the cylinder head.
- Water Pump Housing: Occasionally mounted on or near the water pump housing.
Knowing the exact location for your specific vehicle can save time and effort during diagnosis and replacement. Consult your vehicle’s service manual or a trusted mechanic if you are unsure.
3. What Are the Key Symptoms of a Faulty Coolant Temperature Sensor?
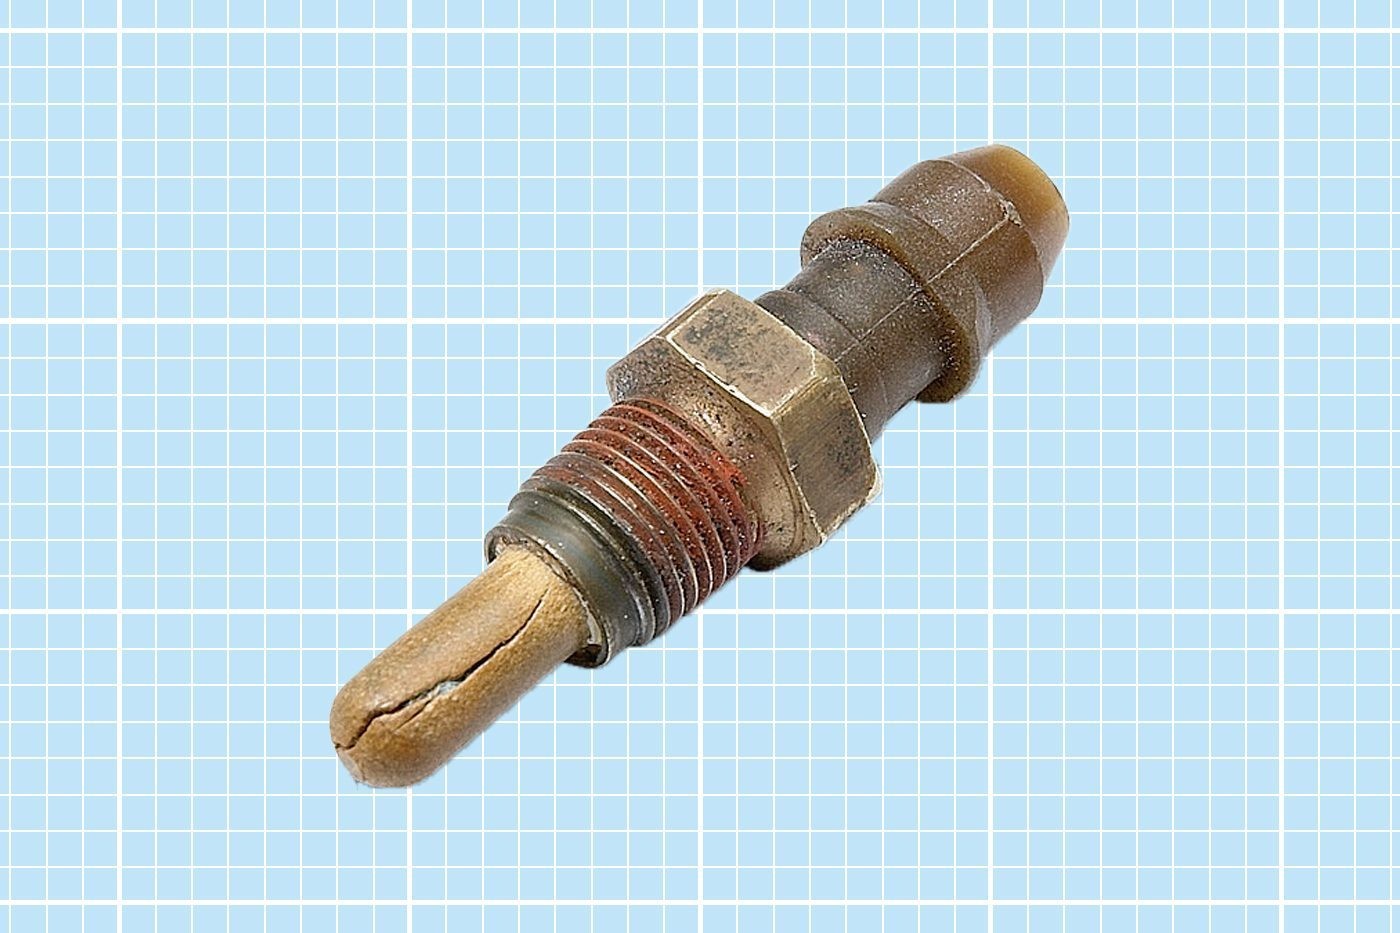 Rust and corrosion on a metallic component against a light blue graph paper background. The component is heavily worn and used in diesel engines to start under low temperatures.
Recognizing the symptoms of a failing coolant temperature sensor is crucial for preventing engine damage. Common signs include the engine overheating or running too cool, erratic temperature gauge readings, and an illuminated check engine light. According to Duane “Doc” Watson, a technical trainer at Bosch Mobility Aftermarket, a faulty sensor can cause the engine to run rich, leading to excessive fuel consumption and black smoke from the tailpipe. A study by the EPA found that malfunctioning sensors contribute to increased emissions and reduced fuel economy. By identifying these symptoms early, you can take timely action to replace the sensor and maintain your vehicle’s performance.
Here are the key symptoms to watch for:
- Engine Overheating: A faulty sensor can cause the engine to overheat due to incorrect cooling fan operation.
- Engine Running Too Cool: The engine might run cooler than normal, affecting performance and fuel efficiency.
- Erratic Temperature Gauge Readings: The temperature gauge on the dashboard may fluctuate erratically.
- Check Engine Light: The check engine light may illuminate, indicating a problem with the sensor.
- Cooling Fan Issues: The electric cooling fan may run constantly or not run at all.
- Poor Fuel Efficiency: The engine may consume more fuel than usual due to an incorrect air-to-fuel ratio.
- Rough Engine Running: The engine may run roughly, especially when idling.
- Black Smoke from Tailpipe: Excessive fuel can cause black smoke to come out of the tailpipe.
- Difficulty Starting: The engine may crank excessively or have trouble starting.
4. How to Diagnose a Bad Coolant Temperature Sensor?
Diagnosing a bad coolant temperature sensor involves several methods, including using a voltmeter or a diagnostic scan tool. Chris “Moose” Pyle, a master certified technician with JustAnswer, recommends comparing the temperature signal from the sensor to a laser temperature reading. According to a report by the Society of Automotive Engineers (SAE), accurate diagnosis is crucial for effective repair. Bosch’s VET 100 Circuit Analysis Tool can also be used to validate wiring connections and sensor accuracy. These diagnostic steps can help you confirm whether a coolant temperature sensor replacement is necessary.
Here are the steps to diagnose a bad coolant temperature sensor:
- Visual Inspection: Check for any visible damage to the sensor or its wiring.
- Voltmeter Test: Use a voltmeter to measure the sensor’s resistance at different temperatures.
- Scan Tool Analysis: Use a diagnostic scan tool to read the temperature signal from the sensor and check for error codes.
- Temperature Comparison: Compare the sensor’s reading to a laser temperature reading of the engine coolant.
- Wiring Check: Inspect the wiring and connections for any signs of corrosion or damage.
- Bosch VET 100 Tool: Use the Bosch VET 100 Circuit Analysis Tool to validate the wiring connections and sensor accuracy.
Understanding Diagnostic Tools
Diagnostic tools play a critical role in identifying issues with the coolant temperature sensor. Here’s a closer look at some of the tools mentioned:
- Voltmeter: A voltmeter is used to measure the electrical resistance of the sensor at different temperatures. By comparing these readings to the manufacturer’s specifications, you can determine if the sensor is functioning correctly.
- Diagnostic Scan Tool: A diagnostic scan tool can read the temperature signal from the sensor and display any error codes related to the sensor’s performance. This tool provides valuable insights into the sensor’s operation and helps pinpoint potential issues.
- Laser Temperature Gun: A laser temperature gun allows you to measure the actual temperature of the engine coolant. Comparing this reading to the sensor’s output can help verify the sensor’s accuracy.
- Bosch VET 100 Circuit Analysis Tool: This specialized tool is designed to validate the wiring connections and accuracy of the sensor. It plugs into the sensor’s socket and pairs with a diagnostic scan tool for comprehensive analysis.
5. What is the Cost to Replace the Coolant Temperature Sensor?
The cost to replace the coolant temperature sensor varies based on the vehicle’s make and model, but typically, the sensor itself costs between $15 and $50. Labor costs can range from $150 to $400, depending on the mechanic’s hourly rate and the complexity of the job. According to Pyle, you may also need to factor in the cost of coolant, which can be around $15 per gallon. A survey by AAA indicates that understanding these costs can help car owners budget for necessary repairs.
Here’s a breakdown of the costs involved:
- Sensor Cost: $15 – $50
- Labor Cost: $150 – $400 (1 to 2.5 hours of labor)
- Coolant Cost: Approximately $15 per gallon
Factors Affecting Replacement Cost
Several factors can influence the overall cost of replacing a coolant temperature sensor:
- Vehicle Make and Model: The cost of parts and labor can vary significantly depending on the vehicle make and model.
- Sensor Quality: Opting for an OEM (Original Equipment Manufacturer) sensor may be more expensive but can ensure better reliability and performance.
- Labor Rates: Mechanic labor rates can vary depending on location and the shop’s expertise.
- Additional Repairs: If other components, such as the thermostat, need replacement at the same time, this will add to the overall cost.
6. Step-by-Step Guide on How to Replace the Coolant Temperature Sensor
Replacing the coolant temperature sensor yourself can save money, but it’s essential to follow the correct procedure. First, allow the engine to cool completely to avoid injury. Then, locate the sensor and use compressed air to remove any debris. According to a guide by the Car Care Council, disconnecting the battery before starting any electrical work is crucial for safety. Carefully unplug the electrical connection and remove the sensor using the appropriate tools. Install the new sensor, applying sealant to the threads if necessary, and tighten it to the torque specifications in your owner’s manual. Finally, reconnect the electrical connector, add coolant, and check for leaks.
Here’s a step-by-step guide to replacing the coolant temperature sensor:
- Allow Engine to Cool: Ensure the engine is completely cool to prevent burns.
- Locate the Sensor: Find the coolant temperature sensor, usually near the thermostat housing.
- Remove Debris: Use compressed air to clean the area around the sensor.
- Drain Coolant: Drain coolant from the radiator as necessary, saving it in a clean container if it’s in good condition.
- Unplug Electrical Connection: Carefully disconnect the electrical connector from the sensor.
- Remove the Sensor: Use a socket wrench, open-end wrench, pliers, or screwdriver to remove the sensor.
- Install New Sensor: Apply a thin coat of RTV sealant if the new sensor doesn’t have sealant on the threads.
- Tighten Sensor: Tighten the sensor to the torque specifications recommended in the owner’s manual (typically around 15 to 18-inch pounds).
- Reconnect Electrical Connector: Reconnect the electrical connector, using dielectric grease to protect the terminals.
- Add Coolant: Refill the cooling system with the correct coolant.
- Check for Leaks: Start the engine and check for coolant leaks around the sensor.
- Burp the System: Run the engine with the coolant cap off to remove air pockets in the cooling system.
Essential Tools for the Job
Having the right tools on hand can make the replacement process smoother and more efficient. Here’s a list of essential tools you’ll need:
- Socket Wrench Set: A socket wrench set with various sizes is essential for removing and installing the sensor.
- Open-End Wrench Set: An open-end wrench set can be useful for accessing the sensor in tight spaces.
- Pliers: Pliers can help disconnect the electrical connector and manipulate hoses.
- Screwdriver Set: A screwdriver set with various types of screwdrivers is useful for removing any obstructing components.
- Torque Wrench: A torque wrench is crucial for tightening the new sensor to the correct specifications.
- Compressed Air: Compressed air can be used to clean the area around the sensor and remove debris.
- RTV Sealant: RTV sealant is used to seal the threads of the new sensor and prevent leaks.
- Dielectric Grease: Dielectric grease is applied to the electrical connector terminals to protect them from corrosion.
- Coolant Drain Pan: A coolant drain pan is used to catch the coolant when draining the system.
- Funnel: A funnel is useful for adding coolant back into the system.
7. What Are Common Mistakes to Avoid During Coolant Temperature Sensor Replacement?
Avoiding common mistakes during coolant temperature sensor replacement can prevent damage and ensure a successful repair. Over-tightening the new sensor can damage the threads and the intake manifold, especially on plastic intakes. According to Watson, cross-threading the sensor and forgetting to apply sealant to the threads can also cause coolant leaks. Pyle recommends using an OEM part instead of a cheap aftermarket one to avoid premature failure. Additionally, using the wrong coolant can lead to chemical incompatibilities and engine damage. Another pitfall is installing a dissimilar metal, such as a brass sensor into an aluminum intake manifold, which can cause corrosion.
Here are the common mistakes to avoid:
- Over-Torquing: Avoid over-tightening the new sensor, which can damage the threads and intake manifold.
- Cross-Threading: Ensure the sensor is properly aligned to prevent cross-threading and coolant leaks.
- Forgetting Sealant: Always apply sealant to the threads if the new sensor doesn’t come with it.
- Using Incorrect Sensor: Use the correct sensor for your vehicle, preferably an OEM part.
- Using Wrong Coolant: Use the correct type of coolant specified in your owner’s manual.
- Dissimilar Metals: Avoid installing a sensor made of a dissimilar metal into the intake manifold, as this can cause corrosion.
Tips for Ensuring a Successful Replacement
To ensure a successful coolant temperature sensor replacement, consider the following tips:
- Consult the Service Manual: Always consult your vehicle’s service manual for specific instructions and torque specifications.
- Use Quality Parts: Opt for high-quality OEM or reputable aftermarket sensors to ensure reliability.
- Apply Sealant Properly: Apply a thin, even coat of sealant to the threads of the new sensor.
- Tighten to Specifications: Use a torque wrench to tighten the sensor to the specified torque to prevent damage.
- Check for Leaks: After installation, start the engine and carefully check for any coolant leaks around the sensor.
- Monitor Engine Temperature: Keep an eye on the engine temperature gauge to ensure the cooling system is functioning correctly.
8. Frequently Asked Questions (FAQs) About Coolant Temperature Sensors
Q1: Is it okay to drive with a bad coolant temperature sensor?
Not usually, as it can lead to overheating. If you see a red warning light or your car is overheating, do not continue to drive. This can turn a $50 part into a possible $5,000 repair. If the engine is not overheating, it is probably safe to keep driving for a day or two, but try to get it into a shop as soon as possible. Driving with a faulty sensor can cause the engine to run inefficiently, potentially leading to more significant and costly damage.
Q2: Is it hard to replace the coolant temperature sensor?
It depends on the sensor’s location. If it’s easily accessible, replacing a coolant temperature sensor is generally considered a relatively straightforward job for someone with basic mechanical skills and the right tools. However, if the sensor is in a difficult-to-reach location, it may require more time and effort.
Q3: Can a bad coolant temperature sensor cause poor fuel economy?
Yes, a faulty coolant temperature sensor can cause poor fuel economy. The sensor provides data to the engine control module (ECM), which adjusts the air-to-fuel ratio. If the sensor is not working correctly, the ECM may miscalculate the fuel mixture, leading to excessive fuel consumption.
Q4: Will a bad coolant temperature sensor always trigger the check engine light?
No, a bad coolant temperature sensor will not always trigger the check engine light. In some cases, the sensor may fail in a way that does not immediately set off the warning light. However, other symptoms, such as overheating or poor engine performance, may indicate a problem.
Q5: How often should I replace the coolant temperature sensor?
There is no set interval for replacing the coolant temperature sensor. It should be replaced when it fails or shows signs of malfunction. Regular inspections and maintenance can help identify potential issues before they lead to more significant problems.
Q6: Can I test the coolant temperature sensor myself?
Yes, you can test the coolant temperature sensor yourself using a multimeter. By measuring the resistance of the sensor at different temperatures, you can determine if it is functioning correctly. Consult your vehicle’s service manual for the correct testing procedure and specifications.
Q7: What is the difference between a coolant temperature sensor and a coolant temperature sending unit?
The coolant temperature sensor and coolant temperature sending unit are often used interchangeably, but they serve slightly different functions. The sensor provides data to the engine control module (ECM), while the sending unit provides data to the temperature gauge on the dashboard.
Q8: Can a bad coolant temperature sensor cause the cooling fan to run constantly?
Yes, a faulty coolant temperature sensor can cause the cooling fan to run constantly. If the sensor is sending an incorrect signal to the ECM, it may cause the ECM to activate the cooling fan even when it is not needed.
Q9: What type of coolant should I use when replacing the sensor?
You should use the type of coolant specified in your vehicle’s owner’s manual. Using the wrong type of coolant can lead to corrosion and other cooling system problems.
Q10: Where can I buy a replacement coolant temperature sensor?
You can buy a replacement coolant temperature sensor at most auto parts stores or online retailers. Be sure to purchase a sensor that is compatible with your vehicle’s make and model.
9. Contact CAR-TOOL.EDU.VN for Expert Assistance
At CAR-TOOL.EDU.VN, we understand the complexities of automotive repairs and maintenance. If you’re facing challenges with your coolant temperature sensor or any other automotive issues, our team of experts is here to help. We offer detailed guides, expert advice, and a wide range of high-quality tools and parts to ensure your vehicle runs smoothly.
For personalized assistance and to explore our extensive product range, contact us today:
- Address: 456 Elm Street, Dallas, TX 75201, United States
- WhatsApp: +1 (641) 206-8880
- Website: CAR-TOOL.EDU.VN
Let CAR-TOOL.EDU.VN be your trusted partner in automotive care, providing the knowledge and resources you need to keep your vehicle in top condition. Whether you’re a seasoned mechanic or a DIY enthusiast, we’re here to support you every step of the way.
Why Choose CAR-TOOL.EDU.VN?
- Expert Guidance: Our team of experienced automotive professionals provides expert guidance and support to help you tackle any repair or maintenance task.
- Quality Products: We offer a wide range of high-quality tools and parts from trusted brands, ensuring reliability and performance.
- Comprehensive Resources: Our website features detailed guides, articles, and videos to help you understand and address various automotive issues.
- Customer Satisfaction: We are committed to providing exceptional customer service and ensuring your satisfaction with our products and services.
Don’t hesitate to reach out to us for all your automotive needs. At CAR-TOOL.EDU.VN, we’re dedicated to helping you keep your vehicle running its best.