OBD2 software Windows provides a comprehensive solution for diagnosing and troubleshooting vehicle issues, making it easier for both professionals and DIY enthusiasts to maintain their cars. CAR-TOOL.EDU.VN offers insights into selecting the right software for your needs, ensuring you can effectively monitor and manage your vehicle’s health. Explore advanced diagnostic tools and user-friendly interfaces to optimize your car’s performance and longevity with our detailed guides and recommendations for automotive diagnostic tools, car scanning hardware, and vehicle maintenance software.
Contents
- 1.1. Understanding OBD2 Systems
- 1.2. The Role of OBD2 Software on Windows
- 1.3. Benefits of Using OBD2 Software Windows
- 1.4. Key Features to Look for in OBD2 Software
- 1.5. Target Audience
- 2.1. Assessing Your Diagnostic Needs
- 2.2. Compatibility Considerations
- 2.3. Evaluating Software Features
- 2.4. User Interface and Ease of Use
- 2.5. Budget Considerations
- 2.6. Reading User Reviews and Testimonials
- 2.7. Recommended OBD2 Software for Windows
- 2.8. Where to Purchase OBD2 Software
- 2.9. Final Decision
- 3.1. TOAD Pro
- 3.2. AutoEnginuity ScanTool
- 3.3. PCMScan
- 3.4. ProScan
- 3.5. OBD Auto Doctor
- 3.6. Feature Comparison Table
- 4.1. System Requirements
- 4.2. Downloading the Software
- 4.3. Installing the Software
- 4.4. Installing the Necessary Drivers
- 4.5. Configuring the Software
- 4.6. Troubleshooting Common Issues
- 4.7. Resources for Support
- 5.1. Connecting to Your Vehicle
- 5.2. Reading Diagnostic Trouble Codes (DTCs)
- 5.3. Viewing Live Data
- 5.4. Performing Diagnostic Tests
- 5.5. Clearing Diagnostic Trouble Codes
- 5.6. Generating Reports
- 5.7. Advanced Features
- 5.8. Tips for Effective Car Diagnostics
- 5.9. Safety Precautions
- 6.1. Bidirectional Control
- 6.2. ECU Programming and Flashing
- 6.3. Key Programming
- 6.4. ABS and Airbag Diagnostics
- 6.5. Transmission Diagnostics
- 6.6. Data Logging and Analysis
- 6.7. Customizable Dashboards
- 6.8. Network Scanning
- 6.9. Vehicle Identification Number (VIN) Reading
- 6.10. Accessing Manufacturer-Specific Data
- 7.1. Importance of Regular Updates
- 7.2. How to Check for Updates
- 7.3. Automatic Updates
- 7.4. Manual Updates
- 7.5. Keeping Drivers Up to Date
- 7.6. Regular Maintenance Tasks
- 7.7. Troubleshooting Update Issues
- 7.8. Resources for Support
- 8.1. Software Won’t Connect to the Vehicle
- 8.2. Inaccurate or Missing Data
- 8.3. Software Freezes or Crashes
- 8.4. Diagnostic Trouble Codes (DTCs) Not Displaying
- 8.5. Software Not Reading VIN
- 8.6. Cannot Clear Diagnostic Trouble Codes
- 8.7. Adapter Not Recognized by Windows
- 8.8. Resources for Troubleshooting
- 9.1. Enhanced Integration with Cloud Services
- 9.2. Artificial Intelligence (AI) and Machine Learning (ML)
1. What is OBD2 Software Windows and Why Do You Need It?
OBD2 software for Windows allows you to access and interpret data from your vehicle’s onboard computer, enabling you to diagnose issues, monitor performance, and maintain your car effectively. This software is essential for both professional mechanics and car enthusiasts who want to understand their vehicle’s health.
1.1. Understanding OBD2 Systems
OBD2 (On-Board Diagnostics II) is a standardized system that provides access to data from a vehicle’s engine control unit (ECU). According to the Environmental Protection Agency (EPA), OBD2 systems were mandated in the United States for all cars and light trucks manufactured after 1996 to monitor emissions-related components. This standardization ensures that any OBD2 scanner or software can communicate with any compatible vehicle, making diagnostics more accessible.
1.2. The Role of OBD2 Software on Windows
Windows-based OBD2 software acts as an interface between your computer and your vehicle’s ECU, allowing you to read diagnostic trouble codes (DTCs), view live sensor data, and perform various diagnostic tests. This software transforms raw data into understandable information, empowering you to identify and address issues quickly.
1.3. Benefits of Using OBD2 Software Windows
Using OBD2 software on a Windows PC offers several advantages:
- Cost Savings: By diagnosing and potentially fixing issues yourself, you can save money on expensive mechanic fees.
- Early Problem Detection: Regular scanning can help identify minor issues before they become major problems.
- Performance Monitoring: Monitor your vehicle’s performance in real-time, allowing you to optimize fuel efficiency and overall performance.
- Informed Decision-Making: Understand the issues your car is facing before taking it to a mechanic, ensuring you are not overcharged or misled.
1.4. Key Features to Look for in OBD2 Software
When selecting OBD2 software for Windows, consider the following features:
- Compatibility: Ensure the software is compatible with your vehicle’s make and model.
- User Interface: A user-friendly interface makes it easier to navigate and understand the data.
- Data Logging: The ability to log and review data over time can help identify intermittent issues.
- Trouble Code Definitions: A comprehensive database of DTC definitions helps you understand the meaning of each code.
- Live Data Monitoring: Real-time data monitoring allows you to see how your vehicle is performing under various conditions.
- Reporting: The ability to generate reports can help you track maintenance and repairs.
 obd-port-software
1.5. Target Audience
This guide is tailored for:
- DIY Car Enthusiasts: Individuals who enjoy working on their cars and want to understand their vehicle’s performance.
- Professional Mechanics: Technicians who need reliable and comprehensive diagnostic tools.
- Garage Owners: Business owners looking to equip their shops with effective and efficient diagnostic solutions.
2. How to Choose the Right OBD2 Software for Windows?
Choosing the right OBD2 software for Windows involves evaluating your specific needs, considering compatibility, and understanding the features that provide the most value for your diagnostic tasks.
2.1. Assessing Your Diagnostic Needs
Before choosing OBD2 software, identify your primary diagnostic needs. Are you a DIY enthusiast looking for basic troubleshooting capabilities, or a professional mechanic requiring advanced functions? Understanding your needs will guide you in selecting the right software.
2.2. Compatibility Considerations
Ensure the OBD2 software you choose is compatible with your vehicle’s make, model, and year. Some software is designed for specific car brands, while others offer broader compatibility across various manufacturers.
2.3. Evaluating Software Features
Consider the following features when evaluating OBD2 software:
- Code Reading and Clearing: The ability to read and clear diagnostic trouble codes (DTCs) is fundamental.
- Live Data Streaming: Real-time data monitoring allows you to observe engine parameters and sensor readings.
- Advanced Diagnostics: Look for features such as bidirectional control, component testing, and advanced system scans.
- Data Logging and Playback: The ability to log and review data over time helps identify intermittent issues.
- Reporting Capabilities: Comprehensive reporting features enable you to document diagnostic results and share them with customers.
2.4. User Interface and Ease of Use
Choose OBD2 software with a user-friendly interface that is easy to navigate and understand. A well-designed interface can significantly improve your diagnostic efficiency.
2.5. Budget Considerations
OBD2 software ranges from free options to high-end professional suites. Determine your budget and find software that offers the best value for your investment. Remember, investing in reliable software can save you money in the long run by preventing costly repairs.
2.6. Reading User Reviews and Testimonials
Research user reviews and testimonials to gain insights into the performance and reliability of different OBD2 software options. User feedback can provide valuable information about real-world experiences with the software.
2.7. Recommended OBD2 Software for Windows
Based on features, compatibility, and user reviews, consider the following OBD2 software options for Windows:
- TOAD Pro: Offers advanced diagnostics and ECU remapping capabilities.
- AutoEnginuity ScanTool: Provides brand-specific options and deep coverage.
- PCMScan: A fully featured generic OBD-II diagnostic software.
- ProScan: User-friendly with excellent timing performance features.
- OBD Auto Doctor: Sophisticated tool for Mac OS X platforms.
2.8. Where to Purchase OBD2 Software
Purchase OBD2 software from reputable sources, such as the software developer’s website, authorized resellers, or trusted online retailers. Avoid downloading software from unofficial sources, as it may contain malware or be unreliable.
2.9. Final Decision
After evaluating your needs, considering compatibility, and researching available features, make an informed decision based on your budget and requirements. Choosing the right OBD2 software for Windows can enhance your diagnostic capabilities and help you maintain your vehicle effectively.
3. Top OBD2 Software Windows Options
Selecting the best OBD2 software for Windows can significantly enhance your vehicle diagnostics and maintenance capabilities. Here’s an in-depth look at some of the top options available, each offering unique features and benefits.
3.1. TOAD Pro
TOAD (Total OBD & ECU Auto Diagnostics) Pro stands out as a comprehensive OBD2 software solution for Windows. According to Total Car Diagnostics, TOAD Pro contains advanced, car-manufacturer-approved OBD software applications that perform thorough health checks and diagnose over 15,000 common problems.
-
Key Features:
- Comprehensive Diagnostics: Performs thorough health checks on your car.
- ECU Remapping: Includes ECU remapping software for optimizing fuel consumption.
- Live Data Monitoring: Monitors live data with customizable visual graphs.
- Wide Compatibility: Suitable for various car models and used globally.
-
Pros:
- Advanced features suitable for both home users and professional mechanics.
- Extracts extra OBD fault codes often missed by other scanners.
- Optimizes car performance and saves fuel costs.
-
Cons:
- May be overwhelming for beginners due to its advanced features.
- Higher price point compared to basic OBD2 software.
3.2. AutoEnginuity ScanTool
AutoEnginuity’s ScanTool is a powerful OBD2 software option for Windows, offering brand-specific options and deep coverage. According to AutoEnginuity, the ScanTool provides access to ABS, airbag, instrument cluster transmission, and many other controllers.
-
Key Features:
- Brand-Specific Options: Available for BMW, Ford, GM, Chrysler, Nissan, Hyundai, and more.
- Comprehensive Coverage: Accesses ABS, airbag, and transmission controllers.
- Data Logging: Logs data in XML and CSV formats.
- Customizable Sensor Data: Allows users to change how data is displayed.
-
Pros:
- Depth of coverage with online data, bidirectional controls, and system tests.
- Customizable sensor data display.
- Ease of use with concise data presentation.
-
Cons:
- Higher price point, making it more suitable for professional workshops.
- Focused towards car mechanic workshops needing OEM manufacturer bidirectional functions.
3.3. PCMScan
PCMScan is a fully featured generic OBD-II automotive diagnostic software that supports a wide variety of OBD hardware interfaces. According to Palmer Performance Engineering, PCMScan includes visual charting, logging, viewing, and playback of recorded data in real-time.
-
Key Features:
- Generic OBD-II Support: Supports a wide variety of OBD hardware interfaces.
- Visual Charting: Includes visual charting, logging, and playback of recorded data.
- DTC Support: Views vehicle Diagnostic Trouble Codes (DTCs) and Freeze Frame data.
- Customizable Dashboard: Allows users to customize the dashboard.
-
Pros:
- Dyno and Drag features.
- Customizable dashboard.
- Full support for printing and print preview.
-
Cons:
- Hasn’t been updated for over 7 years, lacking newer PID support.
- May be lacking at least 500+ new PID’s (sensor data) added in other applications.
3.4. ProScan
ProScan is a user-friendly OBD2 software option for Windows, known for its consistent stability and development based on thorough know-how of automotive protocols and sensors. According to Total Car Diagnostics, ProScan is compatible with any standard ELM327 hardware.
-
Key Features:
- User-Friendly Interface: Easy to use, making it suitable for beginners.
- Timing Performance: Accurate timing performance for 0-60mph measurements.
- Fuel Economy Adjustment: Allows adjustment of fuel economy based on driving habits.
- Diagnostic Report Generator: Generates reports on the automobile easily.
-
Pros:
- Stable and consistent performance.
- Accurate measurements of speed/torque gains.
- Can adjust fuel economy.
-
Cons:
- May not have as many advanced features as TOAD Pro or AutoEnginuity ScanTool.
- Part of the TOAD LITE package, so may require additional purchases for full functionality.
3.5. OBD Auto Doctor
OBD Auto Doctor is a sophisticated OBD2 car diagnostic tool, considered one of the best OBD software options for the Mac OS X platform. According to OBD Auto Doctor, the software allows users to check and reset codes and communicate directly with the car’s OBD2 system.
-
Key Features:
- Compatibility: Designed for Mac OS X platform.
- DTC Support: DTCs, Freeze frame, and MIL.
- Real-Time Indicators: OBD2 real-time indicators.
- Data Export: Data can be sent via email.
-
Pros:
- Sophisticated and clean interface.
- Can be utilized to read VIN and calibration ID of ECU.
- Built-in DTC database of over 14,000+ alarm codes.
-
Cons:
- May be too advanced for regular car owners.
- Specifically designed for Mac OS X, not Windows.
3.6. Feature Comparison Table
| Software | Key Features | Pros | Cons |
|---|---|---|---|
| TOAD Pro | Comprehensive diagnostics, ECU remapping, Live data monitoring | Advanced features, extracts extra fault codes, optimizes performance | Overwhelming for beginners, higher price point |
| AutoEnginuity | Brand-specific options, Comprehensive coverage, Data logging | Deep coverage, customizable sensor data, easy to use | Higher price point, focused on professional workshops |
| PCMScan | Generic OBD-II support, Visual charting, DTC support, Customizable dashboard | Dyno and Drag features, customizable dashboard, full support for printing | Not updated recently, lacking newer PID support |
| ProScan | User-friendly interface, Timing performance, Fuel economy adjustment | Stable performance, accurate measurements, can adjust fuel economy | Fewer advanced features, part of TOAD LITE package |
| OBD Auto Doctor | Mac OS X compatibility, DTC support, Real-time indicators, Data export | Sophisticated interface, reads VIN and calibration ID, built-in DTC database | May be too advanced for regular users, designed for Mac OS X |
Choosing the right OBD2 software for Windows depends on your specific needs, budget, and technical expertise. Evaluate the features, pros, and cons of each option to make an informed decision.
4. Installing and Setting Up OBD2 Software Windows
Installing and setting up OBD2 software on your Windows computer involves several key steps to ensure smooth operation and accurate diagnostics. Here’s a detailed guide to help you through the process.
4.1. System Requirements
Before you begin, ensure your computer meets the minimum system requirements for the OBD2 software. Typically, this includes:
- Operating System: Windows 7, 8, 10, or 11
- Processor: Intel or AMD processor
- RAM: At least 2GB of RAM
- Hard Disk Space: At least 100MB of free space
- Connectivity: USB port or Bluetooth adapter
4.2. Downloading the Software
- Visit the Official Website: Go to the official website of the OBD2 software you’ve chosen (e.g., TOAD Pro, AutoEnginuity, PCMScan).
- Download the Installer: Locate the download section and download the installer file. Ensure you download the correct version for your Windows operating system.
- Verify the Download: Check the downloaded file for any signs of corruption. Some websites provide checksums (MD5, SHA-256) to verify the integrity of the file.
4.3. Installing the Software
- Run the Installer: Locate the downloaded installer file and double-click to run it.
- Follow the On-Screen Instructions: The installation wizard will guide you through the process. Read each step carefully and follow the instructions.
- Accept the License Agreement: Review and accept the license agreement to proceed with the installation.
- Choose the Installation Location: Select the directory where you want to install the software. The default location is usually recommended.
- Create a Desktop Icon: Check the option to create a desktop icon for easy access to the software.
- Complete the Installation: Click “Install” to begin the installation process. Once the installation is complete, click “Finish” to exit the wizard.
4.4. Installing the Necessary Drivers
OBD2 software requires drivers to communicate with the OBD2 adapter.
- Locate the Driver Files: The driver files are usually included with the software or the OBD2 adapter. If not, you may need to download them from the manufacturer’s website.
- Connect the OBD2 Adapter: Plug the OBD2 adapter into your computer via USB or connect via Bluetooth.
- Install the Drivers:
- USB Connection: Windows should automatically detect the adapter and prompt you to install the drivers. If not, you may need to manually install them through the Device Manager.
- Bluetooth Connection: Pair the Bluetooth adapter with your computer. You may need to enter a pairing code (usually “1234” or “0000”). Once paired, Windows will install the necessary drivers.
4.5. Configuring the Software
- Launch the Software: Double-click the desktop icon or find the software in the Start menu and launch it.
- Select the OBD2 Adapter: In the software settings, select the OBD2 adapter you are using. This may involve choosing the correct COM port for USB connections or selecting the Bluetooth adapter.
- Configure Vehicle Profile: Enter your vehicle’s make, model, year, and engine type. This information helps the software accurately interpret the data from your vehicle.
- Test the Connection: Most OBD2 software offers a test connection feature. Use this to ensure the software can successfully communicate with your vehicle’s ECU.
4.6. Troubleshooting Common Issues
- Software Not Recognizing the Adapter:
- Ensure the adapter is properly connected and powered on.
- Verify the correct COM port or Bluetooth adapter is selected in the software settings.
- Reinstall the drivers for the OBD2 adapter.
- Communication Errors:
- Check the OBD2 port on your vehicle for any damage or obstructions.
- Ensure the vehicle’s ignition is turned on.
- Try a different OBD2 adapter to rule out a faulty adapter.
- Software Crashing or Freezing:
- Ensure your computer meets the minimum system requirements.
- Update the software to the latest version.
- Close any unnecessary programs running in the background.
4.7. Resources for Support
If you encounter any issues during the installation or setup process, consult the following resources:
- Software Documentation: The software’s user manual or online help documentation.
- Manufacturer’s Website: The manufacturer’s website may have troubleshooting guides or FAQs.
- Online Forums: Automotive forums or OBD2 software-specific forums can provide valuable insights and solutions.
- Technical Support: Contact the software manufacturer’s technical support team for assistance.
By following these steps, you can successfully install and set up OBD2 software on your Windows computer, enabling you to perform accurate vehicle diagnostics and maintenance.
5. Using OBD2 Software Windows for Car Diagnostics
Using OBD2 software on Windows can empower you to diagnose and maintain your vehicle effectively. Here’s a comprehensive guide on how to use OBD2 software for car diagnostics.
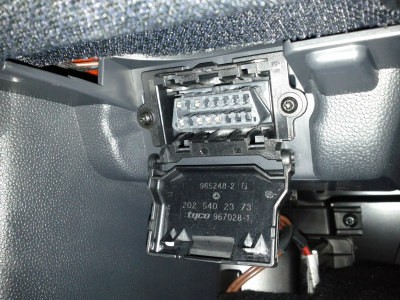
5.1. Connecting to Your Vehicle
- Locate the OBD2 Port: The OBD2 port is usually located under the dashboard on the driver’s side. Refer to your vehicle’s manual if you have trouble finding it.
- Plug in the OBD2 Adapter: Connect the OBD2 adapter to the port. Ensure it is securely plugged in.
- Turn On the Ignition: Turn the ignition key to the “ON” position, but do not start the engine.
- Connect to the Software: Launch the OBD2 software on your Windows computer. Select the appropriate COM port or Bluetooth device in the software settings to connect to the adapter.
5.2. Reading Diagnostic Trouble Codes (DTCs)
- Initiate a Scan: In the OBD2 software, select the option to scan for diagnostic trouble codes (DTCs). The software will communicate with the vehicle’s ECU and retrieve any stored codes.
- Interpret the Codes: The software will display the DTCs along with descriptions. Use the software’s built-in database or online resources to understand the meaning of each code.
- Prioritize the Codes: Some codes are more critical than others. Prioritize diagnosing and addressing the most severe codes first.
5.3. Viewing Live Data
- Access Live Data: Select the option to view live data or real-time data in the OBD2 software.
- Choose Parameters: Select the specific parameters you want to monitor, such as engine RPM, coolant temperature, fuel trim, and oxygen sensor readings.
- Monitor the Data: Observe the live data as you drive or run the engine. Look for any abnormal readings or fluctuations.
- Record the Data: Use the software’s data logging feature to record the live data for later analysis.
5.4. Performing Diagnostic Tests
- Access Test Functions: Some OBD2 software offers advanced diagnostic tests, such as oxygen sensor tests, misfire detection, and EVAP system tests.
- Run the Tests: Follow the software’s instructions to run the diagnostic tests.
- Interpret the Results: The software will display the results of the tests. Use the information to identify any issues with the vehicle’s components or systems.
5.5. Clearing Diagnostic Trouble Codes
- Address the Issues: Before clearing any DTCs, make sure you have diagnosed and addressed the underlying issues. Clearing codes without fixing the problems will only result in the codes reappearing.
- Clear the Codes: In the OBD2 software, select the option to clear the DTCs.
- Verify the Clear: After clearing the codes, start the engine and drive the vehicle to see if any codes reappear.
5.6. Generating Reports
- Access Reporting Functions: Most OBD2 software allows you to generate diagnostic reports.
- Create a Report: Select the option to create a report and choose the information you want to include, such as DTCs, live data, and test results.
- Review the Report: Review the generated report to ensure it is accurate and complete.
- Save or Print the Report: Save the report for future reference or print it out for your records.
5.7. Advanced Features
Some OBD2 software offers advanced features, such as:
- Bidirectional Control: Allows you to control certain vehicle components to test their functionality.
- ECU Programming: Allows you to reprogram the vehicle’s ECU for performance tuning or other modifications.
- Customizable Dashboards: Allows you to create custom dashboards to monitor specific parameters.
5.8. Tips for Effective Car Diagnostics
- Consult Your Vehicle’s Manual: Refer to your vehicle’s manual for specific diagnostic procedures and information.
- Use Multiple Data Sources: Use the OBD2 software in conjunction with other data sources, such as online forums and technical service bulletins (TSBs).
- Be Methodical: Follow a systematic approach to car diagnostics, starting with the most likely causes and working your way through the less likely ones.
- Document Everything: Keep detailed records of your diagnostic procedures, findings, and repairs.
5.9. Safety Precautions
- Do Not Distract Yourself: Avoid using the OBD2 software while driving, as it can be distracting and dangerous.
- Follow Safety Procedures: Always follow proper safety procedures when working on your vehicle.
- Wear Protective Gear: Wear safety glasses and gloves to protect yourself from hazards.
By following these steps, you can effectively use OBD2 software on Windows to diagnose and maintain your vehicle, saving time and money on costly repairs.
6. Advanced OBD2 Software Windows Functions
Advanced OBD2 software for Windows offers functions that go beyond basic code reading and live data monitoring, providing comprehensive diagnostic and troubleshooting capabilities for automotive professionals and enthusiasts.
6.1. Bidirectional Control
Bidirectional control allows users to send commands to the vehicle’s computer and activate specific components for testing. This function is invaluable for diagnosing issues with actuators, solenoids, and other electronically controlled devices.
- Activating Components: Test the functionality of fuel injectors, cooling fans, and other components by directly activating them through the software.
- Performing System Tests: Run automated system tests, such as EVAP system leak tests, to identify potential issues.
6.2. ECU Programming and Flashing
ECU programming, also known as flashing, involves reprogramming the vehicle’s engine control unit (ECU) with updated software or custom calibrations. This function can improve performance, fuel efficiency, and drivability.
- Software Updates: Update the ECU with the latest software from the manufacturer to fix known issues and improve performance.
- Performance Tuning: Install custom calibrations to optimize the engine for specific driving conditions or performance enhancements.
6.3. Key Programming
Key programming allows users to program new or replacement keys to the vehicle’s immobilizer system. This function is essential for locksmiths and automotive technicians who need to replace lost or damaged keys.
- Adding New Keys: Program new keys to the vehicle’s immobilizer system.
- Deleting Old Keys: Erase old or lost keys from the system to prevent unauthorized access.
6.4. ABS and Airbag Diagnostics
Advanced OBD2 software can access and diagnose the anti-lock braking system (ABS) and airbag systems, providing valuable information for troubleshooting safety-related issues.
- Reading ABS Codes: Retrieve diagnostic trouble codes (DTCs) from the ABS module to identify brake system issues.
- Testing ABS Components: Test the functionality of ABS sensors, valves, and pumps.
- Airbag System Diagnostics: Access and diagnose the airbag system to identify issues with airbags, sensors, and control modules.
6.5. Transmission Diagnostics
Transmission diagnostics allows users to access and diagnose the vehicle’s automatic or manual transmission system.
- Reading Transmission Codes: Retrieve DTCs from the transmission control module (TCM) to identify transmission issues.
- Monitoring Transmission Data: Monitor live data parameters, such as transmission temperature, gear position, and shift solenoid status.
- Performing Transmission Tests: Run automated tests to evaluate the performance of the transmission system.
6.6. Data Logging and Analysis
Data logging allows users to record live data parameters over time for later analysis. This function is invaluable for diagnosing intermittent issues and evaluating vehicle performance under various driving conditions.
- Recording Data: Record live data parameters, such as engine RPM, vehicle speed, and sensor readings.
- Analyzing Data: Analyze the recorded data to identify patterns, anomalies, and potential issues.
6.7. Customizable Dashboards
Customizable dashboards allow users to create custom displays to monitor specific data parameters in real-time. This function is useful for performance tuning, track days, and other applications where real-time monitoring is essential.
- Creating Custom Displays: Create custom dashboards with gauges, graphs, and other visual elements to monitor the data parameters you care about most.
- Configuring Alerts: Set up alerts to notify you when specific data parameters exceed certain thresholds.
6.8. Network Scanning
Network scanning allows users to scan the vehicle’s entire network of control modules to identify all available systems and functions. This function is useful for comprehensive diagnostics and troubleshooting.
6.9. Vehicle Identification Number (VIN) Reading
The software can automatically read the vehicle identification number (VIN) from the vehicle’s computer, streamlining the diagnostic process.
6.10. Accessing Manufacturer-Specific Data
Many advanced OBD2 software options can access manufacturer-specific data, providing deeper insights into the vehicle’s systems and functions.
These advanced functions can significantly enhance your diagnostic capabilities and help you troubleshoot even the most complex automotive issues.
7. Maintenance and Updates for OBD2 Software Windows
Maintaining and updating your OBD2 software on Windows is essential for ensuring accurate diagnostics and optimal performance. Regular maintenance and updates can address bugs, improve compatibility, and add new features.
7.1. Importance of Regular Updates
- Bug Fixes: Updates often include fixes for known bugs and issues, improving the stability and reliability of the software.
- Compatibility: Updates ensure compatibility with the latest vehicle models and OBD2 protocols, allowing you to diagnose a wider range of vehicles.
- New Features: Updates may introduce new features and enhancements, expanding the capabilities of the software.
- Security: Updates can address security vulnerabilities, protecting your computer and vehicle from potential threats.
7.2. How to Check for Updates
- Launch the Software: Open the OBD2 software on your Windows computer.
- Check for Updates: Look for an option in the software menu to check for updates. This may be labeled as “Check for Updates,” “Software Updates,” or similar.
- Follow the Instructions: If an update is available, follow the on-screen instructions to download and install it.
7.3. Automatic Updates
Some OBD2 software offers automatic updates, which can streamline the maintenance process. If your software has this feature, enable it to ensure you always have the latest version.
7.4. Manual Updates
If automatic updates are not available, you may need to manually check for updates and download them from the software manufacturer’s website.
7.5. Keeping Drivers Up to Date
In addition to updating the OBD2 software, it’s also important to keep the drivers for your OBD2 adapter up to date.
- Visit the Manufacturer’s Website: Go to the website of the OBD2 adapter manufacturer.
- Download the Latest Drivers: Look for the driver download section and download the latest drivers for your adapter.
- Install the Drivers: Follow the instructions provided by the manufacturer to install the drivers.
7.6. Regular Maintenance Tasks
- Clean Your OBD2 Adapter: Keep your OBD2 adapter clean and free from dirt and debris.
- Store Your Adapter Properly: Store your adapter in a safe place when not in use to prevent damage.
- Back Up Your Data: Regularly back up your diagnostic data and software settings to prevent data loss.
- Scan Your Computer for Malware: Run regular scans with a reputable antivirus program to protect your computer from malware.
7.7. Troubleshooting Update Issues
- Download Errors: If you experience errors while downloading updates, check your internet connection and try again.
- Installation Errors: If you encounter errors during installation, try running the installer as an administrator or temporarily disabling your antivirus software.
- Compatibility Issues: If an update causes compatibility issues with your vehicle or adapter, contact the software manufacturer for assistance.
7.8. Resources for Support
If you encounter any issues while maintaining or updating your OBD2 software, consult the following resources:
- Software Documentation: The software’s user manual or online help documentation.
- Manufacturer’s Website: The manufacturer’s website may have troubleshooting guides or FAQs.
- Online Forums: Automotive forums or OBD2 software-specific forums can provide valuable insights and solutions.
- Technical Support: Contact the software manufacturer’s technical support team for assistance.
By following these maintenance and update guidelines, you can ensure your OBD2 software on Windows remains reliable and effective for years to come.
8. Troubleshooting Common OBD2 Software Windows Problems
Even with the best OBD2 software, you may encounter issues that prevent you from accurately diagnosing your vehicle. Here are common problems and how to troubleshoot them:
8.1. Software Won’t Connect to the Vehicle
- Check the OBD2 Adapter: Ensure the adapter is securely plugged into the vehicle’s OBD2 port and the USB or Bluetooth connection to your computer is stable.
- Verify Adapter Compatibility: Confirm that your OBD2 adapter is compatible with the software you’re using and supports the vehicle’s communication protocol.
- Check the Vehicle’s Ignition: The vehicle’s ignition must be in the “ON” position (engine off) for the software to communicate with the ECU.
- Select the Correct COM Port: In the software settings, ensure the correct COM port is selected for USB connections or that the Bluetooth adapter is properly paired.
- Update Drivers: Outdated or corrupted drivers can prevent communication. Update the drivers for your OBD2 adapter.
8.2. Inaccurate or Missing Data
- Check Vehicle Information: Verify that the vehicle’s make, model, and year are correctly entered in the software.
- Supported Parameters: Not all vehicles support every data parameter. Check the software’s documentation or the vehicle’s service manual to see which parameters are available.
- Sensor Issues: If specific sensor readings are consistently inaccurate, there may be a problem with the sensor itself.
- Software Updates: Ensure you are using the latest version of the software, as updates often include improved data accuracy.
8.3. Software Freezes or Crashes
- System Requirements: Ensure your computer meets the minimum system requirements for the software.
- Close Unnecessary Programs: Close other applications to free up system resources.
- Software Updates: Install the latest updates to fix potential bugs and improve stability.
- Reinstall the Software: If the problem persists, try uninstalling and reinstalling the software.
- Check for Malware: Run a full system scan with a reputable antivirus program.
8.4. Diagnostic Trouble Codes (DTCs) Not Displaying
- Clear Existing Codes: Sometimes, a large number of stored DTCs can prevent new codes from displaying. Try clearing the existing codes and rescanning.
- Check Connection: Ensure a stable connection between the software, adapter, and vehicle.
- Vehicle Compatibility: Some software may not support all DTCs for every vehicle. Check the software’s compatibility list.
- Ignition Cycle: In some cases, a DTC may not display until the vehicle has completed a specific number of ignition cycles.
8.5. Software Not Reading VIN
- Check Connection: Ensure a stable connection between the software, adapter, and vehicle.
- Vehicle Compatibility: Some older vehicles may not support VIN reading via OBD2.
- Software Settings: Check the software settings to ensure VIN reading is enabled.
- Manual Entry: If the software cannot read the VIN automatically, try entering it manually.
8.6. Cannot Clear Diagnostic Trouble Codes
- Address Underlying Issues: Ensure that the underlying issues causing the DTCs have been resolved before attempting to clear the codes.
- Ignition Position: The ignition must be in the “ON” position (engine off) to clear DTCs.
- Software Permissions: Ensure the software has the necessary permissions to clear DTCs. Some software may require a higher level of access.
- Vehicle Requirements: Some vehicles may require a specific procedure to clear DTCs. Consult the vehicle’s service manual.
8.7. Adapter Not Recognized by Windows
- Check USB Port: Try connecting the adapter to a different USB port.
- Reinstall Drivers: Uninstall and reinstall the drivers for the adapter.
- Driver Compatibility: Ensure the drivers are compatible with your version of Windows.
- Device Manager: Check the Device Manager to see if the adapter is recognized and if there are any driver errors.
8.8. Resources for Troubleshooting
- Software Documentation: Refer to the software’s user manual or online help documentation.
- Manufacturer’s Website: Check the manufacturer’s website for FAQs and troubleshooting guides.
- Online Forums: Consult automotive forums and OBD2 software-specific forums for solutions.
- Technical Support: Contact the software manufacturer’s technical support team for assistance.
By following these troubleshooting steps, you can resolve many common OBD2 software problems and ensure accurate vehicle diagnostics.
9. Future Trends in OBD2 Software Windows
The field of OBD2 software for Windows is continuously evolving, driven by advancements in automotive technology and the increasing demand for more sophisticated diagnostic tools. Here are some key future trends to watch:
9.1. Enhanced Integration with Cloud Services
Future OBD2 software will likely feature tighter integration with cloud services, enabling users to store diagnostic data, access real-time updates, and collaborate with other technicians more effectively.
- Data Storage: Cloud storage will allow users to store large amounts of diagnostic data securely and access it from any device.
- Real-Time Updates: Cloud-based updates will ensure that software is always up-to-date with the latest vehicle models and diagnostic protocols.
- Collaboration: Cloud services will facilitate collaboration among technicians, allowing them to share diagnostic data and insights.
9.2. Artificial Intelligence (AI) and Machine Learning (ML)
AI and ML technologies will play an increasingly important role in OBD2 software, enabling more accurate and efficient diagnostics.
- Predictive Diagnostics: AI algorithms will analyze diagnostic data to predict potential issues before they occur, allowing for proactive maintenance.
- Automated Troubleshooting: ML models will automate the