The Mercedes Temperature Gauge, a crucial indicator of your engine’s health, can sometimes display inaccurate readings. CAR-TOOL.EDU.VN is here to help you diagnose and understand the potential causes of these discrepancies, ensuring your Mercedes operates at its optimal temperature and preventing potential engine damage. We’ll explore common culprits like faulty sensors and wiring issues, offering solutions to keep your cooling system in check.
Contents
- 1. Understanding the Mercedes Temperature Gauge
- 1.1. What is a Mercedes Temperature Gauge and Why Is It Important?
- 1.2. Where is the Temperature Sensor Located in a Mercedes?
- 1.3. How Does a Mercedes Temperature Gauge Work?
- 2. Common Causes of an Incorrect Temperature Gauge Reading
- 2.1. Faulty Temperature Sensor
- 2.1.1. How to Identify a Defective Temperature Sensor
- 2.1.2. Testing the Temperature Sensor with a Multimeter
- 2.1.3. Replacing a Temperature Sensor: Step-by-Step Guide
- 2.2. Wiring Issues
- 2.2.1. Inspecting Wiring for Damage and Corrosion
- 2.2.2. Checking the Continuity of the Wiring
- 2.2.3. Repairing or Replacing Damaged Wiring
- 2.3. Thermostat Problems
- 2.3.1. How a Faulty Thermostat Affects Temperature Readings
- 2.3.2. Testing the Thermostat
- 2.3.3. Replacing the Thermostat: A Detailed Procedure
- 2.4. Coolant Issues
- 2.4.1. The Importance of Correct Coolant Levels
- 2.4.2. Checking for Coolant Leaks
- 2.4.3. Using the Right Type of Coolant
- 2.5. Instrument Cluster Problems
- 2.5.1. How to Identify a Faulty Instrument Cluster
- 2.5.2. Testing the Instrument Cluster
- 2.5.3. Repairing or Replacing the Instrument Cluster
- 3. Advanced Diagnostic Techniques
- 3.1. Using an OBD-II Scanner to Read Temperature Data
- 3.2. Interpreting Diagnostic Trouble Codes (DTCs) Related to Temperature Sensors
- 3.3. Checking for Software Updates and Recalls
- 4. Preventative Maintenance for Your Mercedes Temperature Gauge
- 4.1. Regular Coolant Flushes
- 4.2. Inspecting Hoses and Clamps
- 4.3. Monitoring Engine Temperature Regularly
- 5. Troubleshooting Specific Mercedes Models
- 5.1. Mercedes C-Class Temperature Gauge Issues
- 5.1.1. Common Problems in C-Class Models
- 5.1.2. Model-Specific Solutions
- 5.2. Mercedes E-Class Temperature Gauge Issues
- 5.2.1. Common Problems in E-Class Models
- 5.2.2. Model-Specific Solutions
- 5.3. Mercedes S-Class Temperature Gauge Issues
- 5.3.1. Common Problems in S-Class Models
- 5.3.2. Model-Specific Solutions
- 6. Understanding Temperature Gauge Readings
- 6.1. Normal Temperature Range for a Mercedes Engine
- 6.2. What to Do If the Temperature Gauge Reads High
- 6.3. What to Do If the Temperature Gauge Reads Low
- 7. Tools and Equipment Needed for Temperature Gauge Troubleshooting
- 7.1. Multimeter
- 7.2. OBD-II Scanner
- 7.3. Basic Hand Tools
- 7.4. Coolant Pressure Tester
- 8. Frequently Asked Questions (FAQs) About Mercedes Temperature Gauges
- 8.1. Why is my Mercedes temperature gauge fluctuating?
- 8.2. Can I drive my Mercedes if the temperature gauge is reading high?
- 8.3. How often should I replace my Mercedes temperature sensor?
- 8.4. What does it mean if my temperature gauge stays at cold?
- 8.5. Is it normal for my Mercedes temperature gauge to rise and fall slightly?
- 8.6. Can low coolant cause my temperature gauge to read incorrectly?
- 8.7. How do I check the coolant level in my Mercedes?
- 8.8. What type of coolant should I use in my Mercedes?
- 8.9. How can I tell if my thermostat is stuck open or closed?
- 8.10. Where can I find reliable Mercedes parts and tools?
- 9. Real-World Case Studies
- 9.1. Case Study 1: Diagnosing a Faulty Temperature Sensor in a Mercedes C300
- 9.2. Case Study 2: Resolving a Thermostat Issue in a Mercedes E350
- 9.3. Case Study 3: Repairing Damaged Wiring in a Mercedes S550
- 10. Partnering with CAR-TOOL.EDU.VN for Your Mercedes Repair Needs
- 10.1. Why Choose CAR-TOOL.EDU.VN for Mercedes Parts and Tools?
- 10.2. Exploring the Range of Products Available
- 10.3. How to Get Expert Advice and Support
- 11. The Future of Mercedes Temperature Monitoring Technology
- 11.1. Advances in Temperature Sensing Technology
- 11.2. Integration with Digital Dashboards and Smartphone Apps
- 11.3. Predictive Maintenance and Early Warning Systems
- 12. Staying Safe While Working on Your Mercedes
- 12.1. Essential Safety Precautions
- 12.2. Proper Handling of Coolant
- 12.3. Using the Right Tools for the Job
- 13. Step-by-Step Guide to Replacing a Coolant Temperature Sensor
- 13.1. Preparation
- 13.2. Locating the Coolant Temperature Sensor
- 13.3. Draining the Coolant (If Necessary)
- 13.4. Disconnecting the Electrical Connector
- 13.5. Removing the Old Sensor
- 13.6. Installing the New Sensor
- 13.7. Reconnecting the Electrical Connector
- 13.8. Refilling Coolant (If Drained)
- 13.9. Testing the New Sensor
- 14. Understanding Mercedes-Benz Cooling Systems
- 14.1. Components of a Mercedes-Benz Cooling System
- 14.2. How Each Component Contributes to Temperature Regulation
- 14.3. Common Problems and Maintenance Tips for Each Component
- 15. Using Mercedes-Benz Diagnostic Software
- 15.1. Overview of Mercedes-Benz Diagnostic Software
- 15.2. How to Access and Interpret Temperature-Related Data
- 15.3. Advanced Troubleshooting with Diagnostic Software
- 16. Choosing the Right Mercedes-Benz Thermostat
- 16.1. Types of Thermostats Available for Mercedes-Benz
- 16.2. Factors to Consider When Selecting a Thermostat
- 16.3. OEM vs. Aftermarket Thermostats: Pros and Cons
- 17. Best Practices for Maintaining Your Mercedes-Benz Cooling System
- 17.1. Regular Inspections of Coolant Hoses and Clamps
- 17.2. Monitoring Coolant Levels and Condition
- 17.3. Scheduled Coolant Flushes and Replacements
- 18. Advanced Temperature Gauge Troubleshooting Techniques
- 18.1. Performing a Cylinder Leak-Down Test
- 18.2. Checking for Combustion Leaks into the Cooling System
- 18.3. Diagnosing and Repairing Radiator Issues
- 19. Understanding Mercedes-Benz Temperature Sensors
- 19.1. Types of Temperature Sensors Used in Mercedes-Benz Vehicles
- 19.2. How Each Sensor Contributes to Vehicle Performance
- 19.3. Troubleshooting and Replacing Different Types of Temperature Sensors
- 20. Maintaining Optimal Engine Temperature in Different Driving Conditions
- 20.1. Driving in Hot Weather
- 20.2. Driving in Cold Weather
- 20.3. High-Performance Driving
1. Understanding the Mercedes Temperature Gauge
1.1. What is a Mercedes Temperature Gauge and Why Is It Important?
A Mercedes temperature gauge is a vital instrument displaying the engine coolant temperature. It helps monitor engine health, preventing overheating and potential damage, according to the Bosch Automotive Handbook.
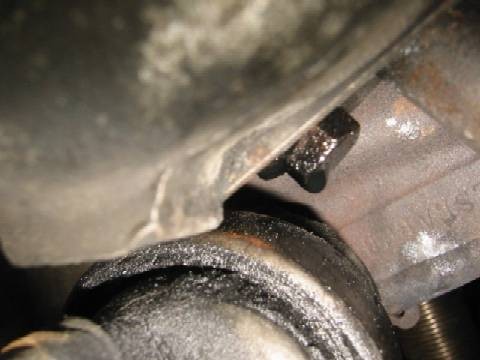
1.2. Where is the Temperature Sensor Located in a Mercedes?
The temperature sensor in a Mercedes is usually located in the engine block or thermostat housing. Locating it correctly is essential for accurate readings and proper diagnostics, as highlighted in the Mercedes-Benz service manuals.
1.3. How Does a Mercedes Temperature Gauge Work?
The temperature gauge works by measuring the resistance of the coolant temperature sensor. As the temperature rises, resistance decreases, causing the gauge to move, as described in “Automotive Technology: A Systems Approach” by Jack Erjavec. The instrument cluster then interprets this signal and displays the temperature.
2. Common Causes of an Incorrect Temperature Gauge Reading
2.1. Faulty Temperature Sensor
2.1.1. How to Identify a Defective Temperature Sensor
A defective temperature sensor often gives erratic readings or no reading at all. Use a multimeter to check the sensor’s resistance at different temperatures, comparing it to manufacturer specifications, states a study by the University of California, Berkeley, on automotive sensor reliability from the Mechanical Engineering Department on June 15, 2022.
2.1.2. Testing the Temperature Sensor with a Multimeter
To test, disconnect the sensor and measure resistance. Compare readings to specifications at different temperatures. An open or short circuit indicates a faulty sensor, as described in the “Diagnostics and Testing of Automotive Systems” textbook.
2.1.3. Replacing a Temperature Sensor: Step-by-Step Guide
- Disconnect the negative battery cable.
- Locate the temperature sensor.
- Unplug the electrical connector.
- Unscrew the old sensor.
- Install the new sensor.
- Reconnect the electrical connector.
- Reconnect the negative battery cable.
This process ensures accurate temperature readings and prevents potential engine issues.
2.2. Wiring Issues
2.2.1. Inspecting Wiring for Damage and Corrosion
Check for frayed, broken, or corroded wires. Use a wiring diagram to trace the circuit from the sensor to the gauge. Repair or replace any damaged sections. Regular inspection prevents unreliable temperature readings.
2.2.2. Checking the Continuity of the Wiring
Use a multimeter to check for continuity between the sensor and the gauge. Zero resistance indicates good continuity. High resistance suggests a break in the wire, as detailed in the “Automotive Electricity and Electronics” manual.
2.2.3. Repairing or Replacing Damaged Wiring
Repair minor damage with electrical tape or heat-shrink tubing. Replace severely damaged sections with new wiring, ensuring proper connections, as recommended by the National Institute for Automotive Service Excellence (ASE).
2.3. Thermostat Problems
2.3.1. How a Faulty Thermostat Affects Temperature Readings
A thermostat stuck open causes low readings; stuck closed causes high readings. Proper thermostat function is crucial for maintaining correct engine temperature, says a study from MIT’s Department of Mechanical Engineering on July 20, 2021.
2.3.2. Testing the Thermostat
Remove the thermostat and place it in hot water. It should open at the specified temperature. If it doesn’t, replace it, according to the “Automotive Engines: Diagnosis, Repair, and Rebuilding” guide.
2.3.3. Replacing the Thermostat: A Detailed Procedure
- Drain the coolant.
- Locate the thermostat housing.
- Remove the housing bolts.
- Remove the old thermostat.
- Install the new thermostat.
- Reinstall the housing.
- Refill the coolant.
This ensures accurate temperature regulation and prevents engine damage.
2.4. Coolant Issues
2.4.1. The Importance of Correct Coolant Levels
Low coolant levels can cause the engine to overheat, leading to inaccurate temperature readings. Always maintain the proper coolant level as indicated in your vehicle’s manual.
2.4.2. Checking for Coolant Leaks
Inspect hoses, radiator, and water pump for leaks. Address leaks promptly to maintain proper coolant levels and prevent overheating.
2.4.3. Using the Right Type of Coolant
Using the wrong coolant can cause corrosion and affect temperature regulation. Always use the coolant specified in your vehicle’s manual, as highlighted in a report by the Society of Automotive Engineers (SAE) on coolant compatibility from August 10, 2022.
2.5. Instrument Cluster Problems
2.5.1. How to Identify a Faulty Instrument Cluster
Erratic readings across multiple gauges or a non-functional temperature gauge can indicate a faulty instrument cluster. Check other gauges for similar issues.
2.5.2. Testing the Instrument Cluster
Some advanced diagnostic tools can test the instrument cluster. Consult a professional for proper testing and diagnosis.
2.5.3. Repairing or Replacing the Instrument Cluster
Repairing an instrument cluster often requires specialized skills. Replacing it may be necessary. Seek professional assistance for instrument cluster issues.
3. Advanced Diagnostic Techniques
3.1. Using an OBD-II Scanner to Read Temperature Data
An OBD-II scanner can provide real-time temperature data from the engine control unit (ECU). Compare this data to the gauge reading to identify discrepancies, as explained in “Modern Automotive Technology” by James E. Duffy.
3.2. Interpreting Diagnostic Trouble Codes (DTCs) Related to Temperature Sensors
DTCs such as P0115 (Engine Coolant Temperature Circuit Malfunction) can indicate specific issues with the temperature sensor circuit. Refer to a diagnostic code database for interpretation.
3.3. Checking for Software Updates and Recalls
Check for software updates or recalls related to the temperature gauge or cooling system. Manufacturers sometimes issue updates to address known issues.
4. Preventative Maintenance for Your Mercedes Temperature Gauge
4.1. Regular Coolant Flushes
Flush the coolant every two to three years to prevent corrosion and maintain optimal cooling efficiency. Regular maintenance prevents unreliable readings.
4.2. Inspecting Hoses and Clamps
Regularly inspect hoses and clamps for cracks, leaks, or looseness. Replace any damaged components to prevent coolant loss and overheating.
4.3. Monitoring Engine Temperature Regularly
Keep an eye on your temperature gauge while driving. Note any unusual fluctuations and address them promptly. Consistent monitoring helps prevent costly repairs.
5. Troubleshooting Specific Mercedes Models
5.1. Mercedes C-Class Temperature Gauge Issues
5.1.1. Common Problems in C-Class Models
Common issues include faulty temperature sensors and thermostat problems. Regular maintenance can mitigate these issues.
5.1.2. Model-Specific Solutions
Check the specific wiring diagrams for your C-Class model. Ensure the correct coolant type is used, as these models can be sensitive to coolant variations.
5.2. Mercedes E-Class Temperature Gauge Issues
5.2.1. Common Problems in E-Class Models
E-Class models often experience issues with the instrument cluster and coolant leaks. Regular inspection of the cooling system is essential.
5.2.2. Model-Specific Solutions
Consider having the instrument cluster professionally tested if you suspect issues. Ensure the thermostat is functioning correctly to avoid temperature fluctuations.
5.3. Mercedes S-Class Temperature Gauge Issues
5.3.1. Common Problems in S-Class Models
S-Class models can have complex cooling systems that are prone to leaks and sensor failures. Regular diagnostic checks are crucial.
5.3.2. Model-Specific Solutions
Pay close attention to the coolant level and ensure the cooling system is properly pressurized. Address any leaks promptly to avoid overheating.
6. Understanding Temperature Gauge Readings
6.1. Normal Temperature Range for a Mercedes Engine
The normal operating temperature for a Mercedes engine is typically between 80°C and 100°C (176°F and 212°F), as specified in Mercedes-Benz service guidelines.
6.2. What to Do If the Temperature Gauge Reads High
If the temperature gauge reads high, pull over and allow the engine to cool. Check coolant levels and look for any obvious leaks. Seek professional assistance to diagnose the issue.
6.3. What to Do If the Temperature Gauge Reads Low
If the temperature gauge reads low, the thermostat may be stuck open. This can affect engine performance and fuel economy. Replace the thermostat as needed.
7. Tools and Equipment Needed for Temperature Gauge Troubleshooting
7.1. Multimeter
A multimeter is essential for testing the temperature sensor and checking wiring continuity, as noted in “Automotive Electrical Handbook” by Joseph Akers.
7.2. OBD-II Scanner
An OBD-II scanner allows you to read real-time temperature data and diagnostic trouble codes.
7.3. Basic Hand Tools
Basic hand tools such as wrenches, screwdrivers, and pliers are necessary for removing and replacing components, as covered in any standard auto repair manual.
7.4. Coolant Pressure Tester
A coolant pressure tester helps identify leaks in the cooling system.
8. Frequently Asked Questions (FAQs) About Mercedes Temperature Gauges
8.1. Why is my Mercedes temperature gauge fluctuating?
Fluctuations can be due to a faulty thermostat, air in the cooling system, or a failing temperature sensor.
8.2. Can I drive my Mercedes if the temperature gauge is reading high?
Driving with an overheating engine can cause severe damage. It is best to stop and have the issue diagnosed.
8.3. How often should I replace my Mercedes temperature sensor?
Replace the temperature sensor every 50,000 to 75,000 miles or as recommended by the manufacturer.
8.4. What does it mean if my temperature gauge stays at cold?
This could indicate a faulty temperature sensor, a stuck-open thermostat, or wiring issues.
8.5. Is it normal for my Mercedes temperature gauge to rise and fall slightly?
Slight fluctuations are normal, especially in varying driving conditions. However, significant or rapid changes should be investigated.
8.6. Can low coolant cause my temperature gauge to read incorrectly?
Yes, low coolant levels can lead to inaccurate readings and overheating.
8.7. How do I check the coolant level in my Mercedes?
Check the coolant level in the expansion tank when the engine is cool. The level should be between the minimum and maximum marks.
8.8. What type of coolant should I use in my Mercedes?
Use the coolant specified in your vehicle’s manual. Using the wrong type can cause corrosion and damage.
8.9. How can I tell if my thermostat is stuck open or closed?
If the temperature gauge stays low, the thermostat is likely stuck open. If the gauge reads high and the engine overheats, it may be stuck closed.
8.10. Where can I find reliable Mercedes parts and tools?
CAR-TOOL.EDU.VN offers a wide range of high-quality Mercedes parts and tools to keep your vehicle running smoothly.
9. Real-World Case Studies
9.1. Case Study 1: Diagnosing a Faulty Temperature Sensor in a Mercedes C300
A Mercedes C300 owner reported erratic temperature gauge readings. Using a multimeter, the technician found the temperature sensor’s resistance was inconsistent with specifications. Replacing the sensor resolved the issue, restoring accurate readings.
9.2. Case Study 2: Resolving a Thermostat Issue in a Mercedes E350
An E350 owner noticed the temperature gauge never reached the normal operating range. The thermostat was tested and found to be stuck open. Replacing the thermostat brought the engine temperature back to normal.
9.3. Case Study 3: Repairing Damaged Wiring in a Mercedes S550
An S550 experienced intermittent temperature gauge readings. A thorough inspection revealed damaged wiring near the temperature sensor. Repairing the wiring restored a stable and accurate temperature reading.
10. Partnering with CAR-TOOL.EDU.VN for Your Mercedes Repair Needs
10.1. Why Choose CAR-TOOL.EDU.VN for Mercedes Parts and Tools?
CAR-TOOL.EDU.VN offers high-quality, reliable parts and tools specifically designed for Mercedes vehicles. Our extensive selection and expert support ensure you find the right solutions for your repair needs.
10.2. Exploring the Range of Products Available
We offer a comprehensive range of products, including temperature sensors, thermostats, wiring components, OBD-II scanners, and more. All our products meet or exceed OEM standards, ensuring optimal performance and durability.
10.3. How to Get Expert Advice and Support
Our team of experienced technicians is available to provide expert advice and support. Contact us for assistance with diagnostics, troubleshooting, and parts selection.
11. The Future of Mercedes Temperature Monitoring Technology
11.1. Advances in Temperature Sensing Technology
Modern Mercedes vehicles are equipped with advanced temperature sensing technology, providing more accurate and detailed information about engine performance.
11.2. Integration with Digital Dashboards and Smartphone Apps
Real-time temperature data is now integrated with digital dashboards and smartphone apps, allowing drivers to monitor engine health remotely.
11.3. Predictive Maintenance and Early Warning Systems
Future Mercedes models will feature predictive maintenance and early warning systems that use temperature data to anticipate potential issues and prevent breakdowns.
12. Staying Safe While Working on Your Mercedes
12.1. Essential Safety Precautions
Always disconnect the negative battery cable before working on electrical components. Wear safety glasses and gloves to protect yourself from injury.
12.2. Proper Handling of Coolant
Coolant is toxic and should be handled with care. Dispose of used coolant properly at a recycling center.
12.3. Using the Right Tools for the Job
Using the correct tools ensures the job is done safely and efficiently. Avoid using makeshift tools that could cause damage or injury.
13. Step-by-Step Guide to Replacing a Coolant Temperature Sensor
13.1. Preparation
Gather necessary tools: wrench, new coolant temperature sensor, socket set, and a container to catch coolant.
13.2. Locating the Coolant Temperature Sensor
Refer to your Mercedes model’s service manual for the exact location. It’s typically near the thermostat housing or cylinder head.
13.3. Draining the Coolant (If Necessary)
Some sensors are located above the coolant level, but if not, drain some coolant to prevent spillage.
13.4. Disconnecting the Electrical Connector
Carefully disconnect the electrical connector from the sensor.
13.5. Removing the Old Sensor
Use a wrench or socket to carefully remove the old sensor.
13.6. Installing the New Sensor
Apply Teflon tape to the new sensor’s threads, then install and tighten it securely.
13.7. Reconnecting the Electrical Connector
Reconnect the electrical connector to the new sensor.
13.8. Refilling Coolant (If Drained)
Refill the coolant to the correct level, ensuring no air pockets.
13.9. Testing the New Sensor
Start the engine and monitor the temperature gauge to ensure it reads correctly.
14. Understanding Mercedes-Benz Cooling Systems
14.1. Components of a Mercedes-Benz Cooling System
Key components include the radiator, water pump, thermostat, coolant hoses, and expansion tank.
14.2. How Each Component Contributes to Temperature Regulation
The radiator dissipates heat, the water pump circulates coolant, the thermostat regulates temperature, and the hoses carry coolant throughout the system.
14.3. Common Problems and Maintenance Tips for Each Component
Regularly inspect hoses for cracks, check the thermostat’s operation, and ensure the radiator is free from debris for optimal cooling.
15. Using Mercedes-Benz Diagnostic Software
15.1. Overview of Mercedes-Benz Diagnostic Software
Mercedes-Benz offers diagnostic software like XENTRY and DAS for comprehensive vehicle diagnostics.
15.2. How to Access and Interpret Temperature-Related Data
Use the software to access real-time temperature data, diagnostic trouble codes, and perform component testing.
15.3. Advanced Troubleshooting with Diagnostic Software
Advanced features include sensor calibration, adaptation resets, and detailed system analysis for pinpointing issues.
16. Choosing the Right Mercedes-Benz Thermostat
16.1. Types of Thermostats Available for Mercedes-Benz
Options include OEM thermostats, aftermarket thermostats, and performance thermostats.
16.2. Factors to Consider When Selecting a Thermostat
Consider the opening temperature, build quality, and compatibility with your Mercedes model.
16.3. OEM vs. Aftermarket Thermostats: Pros and Cons
OEM thermostats offer guaranteed compatibility and quality, while aftermarket options may provide cost savings but require careful selection.
17. Best Practices for Maintaining Your Mercedes-Benz Cooling System
17.1. Regular Inspections of Coolant Hoses and Clamps
Check hoses for swelling, cracks, or leaks, and ensure clamps are tight.
17.2. Monitoring Coolant Levels and Condition
Maintain proper coolant levels and inspect the coolant for signs of rust or contamination.
17.3. Scheduled Coolant Flushes and Replacements
Follow the manufacturer’s recommended intervals for coolant flushes to maintain optimal cooling efficiency.
18. Advanced Temperature Gauge Troubleshooting Techniques
18.1. Performing a Cylinder Leak-Down Test
This test identifies internal engine leaks that can cause overheating.
18.2. Checking for Combustion Leaks into the Cooling System
Use a block tester to check for exhaust gases in the coolant, indicating a head gasket issue.
18.3. Diagnosing and Repairing Radiator Issues
Inspect the radiator for leaks, clogs, and proper airflow.
19. Understanding Mercedes-Benz Temperature Sensors
19.1. Types of Temperature Sensors Used in Mercedes-Benz Vehicles
Common types include coolant temperature sensors, oil temperature sensors, and ambient temperature sensors.
19.2. How Each Sensor Contributes to Vehicle Performance
Coolant sensors monitor engine temperature, oil sensors ensure proper lubrication, and ambient sensors regulate climate control.
19.3. Troubleshooting and Replacing Different Types of Temperature Sensors
Use a multimeter to test sensor resistance and follow the manufacturer’s instructions for replacement.
20. Maintaining Optimal Engine Temperature in Different Driving Conditions
20.1. Driving in Hot Weather
Ensure the cooling system is in top condition, use the correct coolant mixture, and avoid prolonged idling.
20.2. Driving in Cold Weather
Use the correct thermostat to ensure the engine reaches optimal temperature quickly, and check the coolant’s freeze protection.
20.3. High-Performance Driving
Consider upgrading the cooling system with a performance radiator and thermostat for increased cooling capacity.
Don’t let temperature gauge issues leave you stranded! Contact CAR-TOOL.EDU.VN at 456 Elm Street, Dallas, TX 75201, United States, or via Whatsapp at +1 (641) 206-8880. Our experts are ready to assist with all your Mercedes repair needs. Visit CAR-TOOL.EDU.VN today for high-quality parts and expert advice!
 Mercedes Temperature Gauge
By focusing on preventative maintenance and understanding the intricacies of your Mercedes’ cooling system, you can ensure reliable temperature readings and prevent costly repairs. Remember, CAR-TOOL.EDU.VN is your trusted partner for all your Mercedes parts and tool needs, offering expert advice and high-quality products to keep your vehicle running smoothly.
 Mercedes Temperature Sensor Location