Mac Diagnostic is a built-in tool that helps you identify potential hardware issues on your Mac and CAR-TOOL.EDU.VN offers expertise in understanding and utilizing these diagnostics effectively. By running these tests, you can pinpoint problems and explore solutions, ensuring your Mac runs smoothly. CAR-TOOL.EDU.VN is the best place for you to discover more about Apple hardware test, Mac startup options, and reference codes.
Contents
- 1. What Is Mac Diagnostic?
- 1.1 Why is Mac Diagnostic Important?
- 1.2 Who Should Use Mac Diagnostic?
- 2. Preparing Your Mac for Diagnostic Testing
- 2.1 Update macOS
- 2.2 Shut Down Your Mac
- 2.3 Disconnect External Devices
- 2.4 Ensure Proper Ventilation
- 3. Starting Apple Diagnostics on Different Mac Models
- 3.1 Apple Silicon Macs
- 3.2 Intel Processor Macs
- 3.3 Network Connection
- 4. Interpreting and Understanding Test Results
- 4.1 Progress Bar
- 4.2 No Issues Found
- 4.3 Reference Codes
- 4.4 Repeating the Test
- 4.5 Restarting or Shutting Down
- 4.6 Service and Support Options
- 5. Understanding Apple Diagnostics Reference Codes
- 5.1 What Are Apple Diagnostics Reference Codes?
- 5.2 Common Reference Codes and Their Meanings
- 5.3 How to Use Reference Codes for Troubleshooting
- 6. Advanced Troubleshooting Steps After Mac Diagnostic
- 6.1 Resetting the System Management Controller (SMC)
- 6.2 Running Disk Utility
- 6.3 Checking and Reinstalling RAM Modules
- 6.4 Updating or Reinstalling Drivers
- 6.5 Safe Mode
- 7. When to Seek Professional Help
- 7.1 Recurring Issues
- 7.2 Physical Damage
- 7.3 Complex Hardware Issues
- 7.4 Data Loss Concerns
- 7.5 Warranty Considerations
- 8. Optimizing Mac Performance After Diagnostic Testing
- 8.1 Clean Up Your Hard Drive
- 8.2 Manage Startup Items
- 8.3 Update Software
- 8.4 Use Activity Monitor
- 8.5 Regularly Restart Your Mac
- 9. Contact CAR-TOOL.EDU.VN for Assistance
- 9.1 Why Choose CAR-TOOL.EDU.VN?
- 9.2 How to Reach Us
- 9.3 Get Immediate Assistance
- 10. FAQ About Mac Diagnostic
- 10.1 What Is Mac Diagnostic?
- 10.2 How Do I Start Mac Diagnostic?
- 10.3 What Should I Do Before Running Mac Diagnostic?
- 10.4 What Do the Reference Codes Mean?
- 10.5 Can I Run Mac Diagnostic Over the Internet?
- 10.6 What if Mac Diagnostic Finds No Issues?
- 10.7 How Often Should I Run Mac Diagnostic?
- 10.8 What Is the System Management Controller (SMC), and Why Should I Reset It?
- 10.9 How Can CAR-TOOL.EDU.VN Help Me With Mac Diagnostic?
- 10.10 Where Can I Find More Information About Auto Repair Tools and Diagnostics?
1. What Is Mac Diagnostic?
Mac Diagnostic, previously known as Apple Hardware Test, is a built-in diagnostic tool designed to identify potential hardware issues on your Mac. According to Apple Support, it can help determine which hardware component might be at fault, suggest solutions, and assist in contacting Apple Support for further assistance. This tool is essential for maintaining the health and longevity of your Mac.
1.1 Why is Mac Diagnostic Important?
Using Mac Diagnostic offers several key benefits:
- Early Detection of Hardware Issues: It helps in identifying problems before they escalate into major issues.
- Saves Time and Money: By pinpointing the exact hardware component at fault, you can avoid unnecessary repairs or replacements.
- Provides Solutions: The tool not only identifies issues but also suggests possible solutions.
- Facilitates Support: It helps you gather necessary information for contacting Apple Support, making the support process more efficient.
1.2 Who Should Use Mac Diagnostic?
Mac Diagnostic is beneficial for a range of users:
- Technicians/Auto Repair Professionals: Those seeking to diagnose Mac-related hardware issues in vehicles or other applications.
- Auto Service Technicians: Professionals who want to quickly assess Mac systems integrated into vehicles.
- Auto Repair Shop Owners: Those aiming to offer comprehensive diagnostic services, including Mac-related issues.
- Auto Repair Shop Managers: Individuals responsible for ensuring the efficiency and accuracy of diagnostic processes.
2. Preparing Your Mac for Diagnostic Testing
Before running Mac Diagnostics, it’s crucial to prepare your Mac properly to ensure accurate and reliable results. Proper preparation can prevent errors and provide a clear picture of your Mac’s hardware health.
2.1 Update macOS
According to Apple’s support documentation, installing the latest macOS updates is recommended before running diagnostics.
- Why Update: Updates often include fixes and improvements that can resolve underlying issues, ensuring the diagnostic test runs smoothly.
- How to Update: Go to System Preferences > Software Update and install any available updates.
2.2 Shut Down Your Mac
A complete shutdown is necessary to reset the hardware and ensure the diagnostic test starts from a clean state.
- How to Shut Down: Click the Apple menu in the upper-left corner of your screen and select “Shut Down.”
2.3 Disconnect External Devices
External devices can sometimes interfere with the diagnostic process. Disconnecting them helps isolate potential hardware issues within the Mac itself.
- Which Devices to Disconnect: Remove all external devices except for the keyboard, mouse, display, Ethernet connection (if applicable), and the connection to AC power.
- Why Disconnect: This ensures that the diagnostic test focuses solely on the internal components of your Mac.
2.4 Ensure Proper Ventilation
Proper ventilation is essential to prevent overheating during the diagnostic test, which could lead to inaccurate results or potential damage.
- Placement: Make sure your Mac is on a hard, flat, stable surface with good ventilation.
- Why Ventilation Matters: Overheating can affect the performance of hardware components and skew the test results.
3. Starting Apple Diagnostics on Different Mac Models
The process for starting Apple Diagnostics varies depending on whether your Mac has Apple silicon or an Intel processor. Follow the appropriate steps for your Mac model to ensure the diagnostic test runs correctly.
3.1 Apple Silicon Macs
Macs with Apple silicon have a specific method for starting diagnostics due to their unique architecture.
- Press and Hold the Power Button: Press and hold the power button on your Mac. On laptops with Touch ID, press and hold Touch ID.
- Startup Options: Continue holding the power button until your Mac turns on and loads startup options. When you see “Options,” release the power button.
- Command-D: Press and hold Command (⌘)-D on your keyboard. This will initiate the diagnostic test.
3.2 Intel Processor Macs
Intel-based Macs have a different procedure for starting Apple Diagnostics, involving specific key combinations during startup.
- Turn on Your Mac: Turn on your Mac, then immediately press and hold the D key on your keyboard as your Mac starts up.
- Release the D Key: Release the D key when you see a progress bar or are asked to choose a language.
- Alternative Method: If using the D key doesn’t work, press and hold Option (⌥)-D at startup instead.
If neither method works, consult Apple’s guidelines for using key combinations at startup.
3.3 Network Connection
An active network connection might be required to run certain parts of the diagnostic test, especially for accessing support information or running online diagnostics.
- Wi-Fi Menu: Use the Wi-Fi menu in the upper-right corner of your screen to choose a Wi-Fi network if prompted.
- Ethernet Connection: If available, an Ethernet connection can provide a more stable and reliable network connection for the test.
4. Interpreting and Understanding Test Results
Once the Mac Diagnostic test is complete, understanding the results is crucial for identifying the necessary steps to resolve any hardware issues.
4.1 Progress Bar
During the test, Apple Diagnostics displays a progress bar to indicate the status of the hardware check.
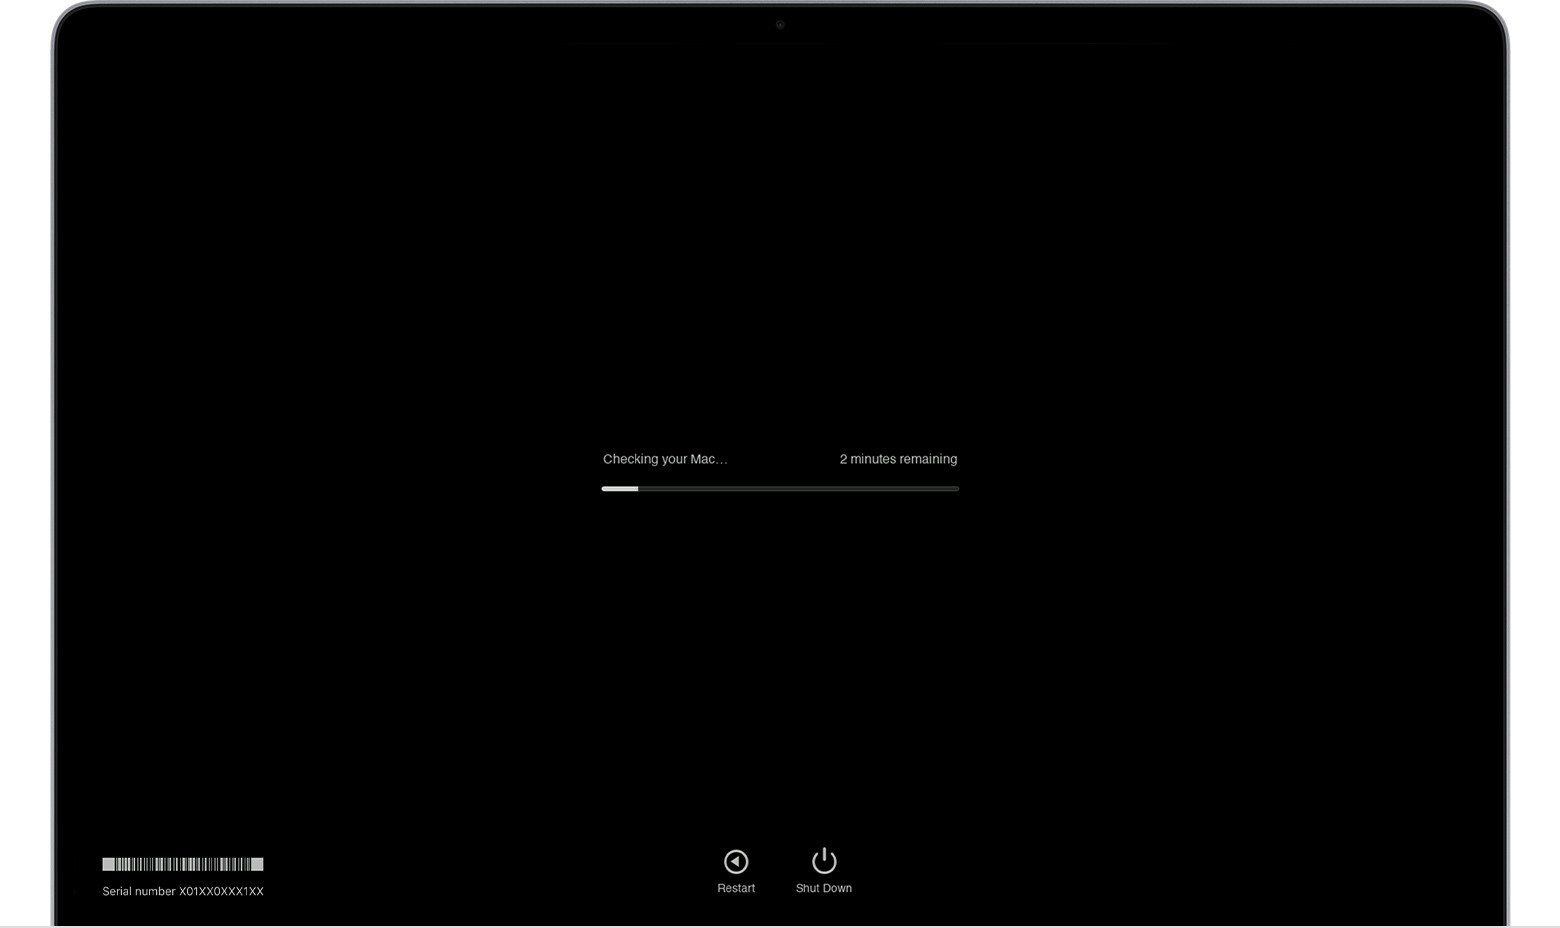 macOS Diagnostics running progress bar
- What It Indicates: This bar shows the ongoing process of the diagnostic test, ensuring you that the system is actively checking for issues.
4.2 No Issues Found
If the diagnostic test finds no issues, the results will indicate that no problems were detected.
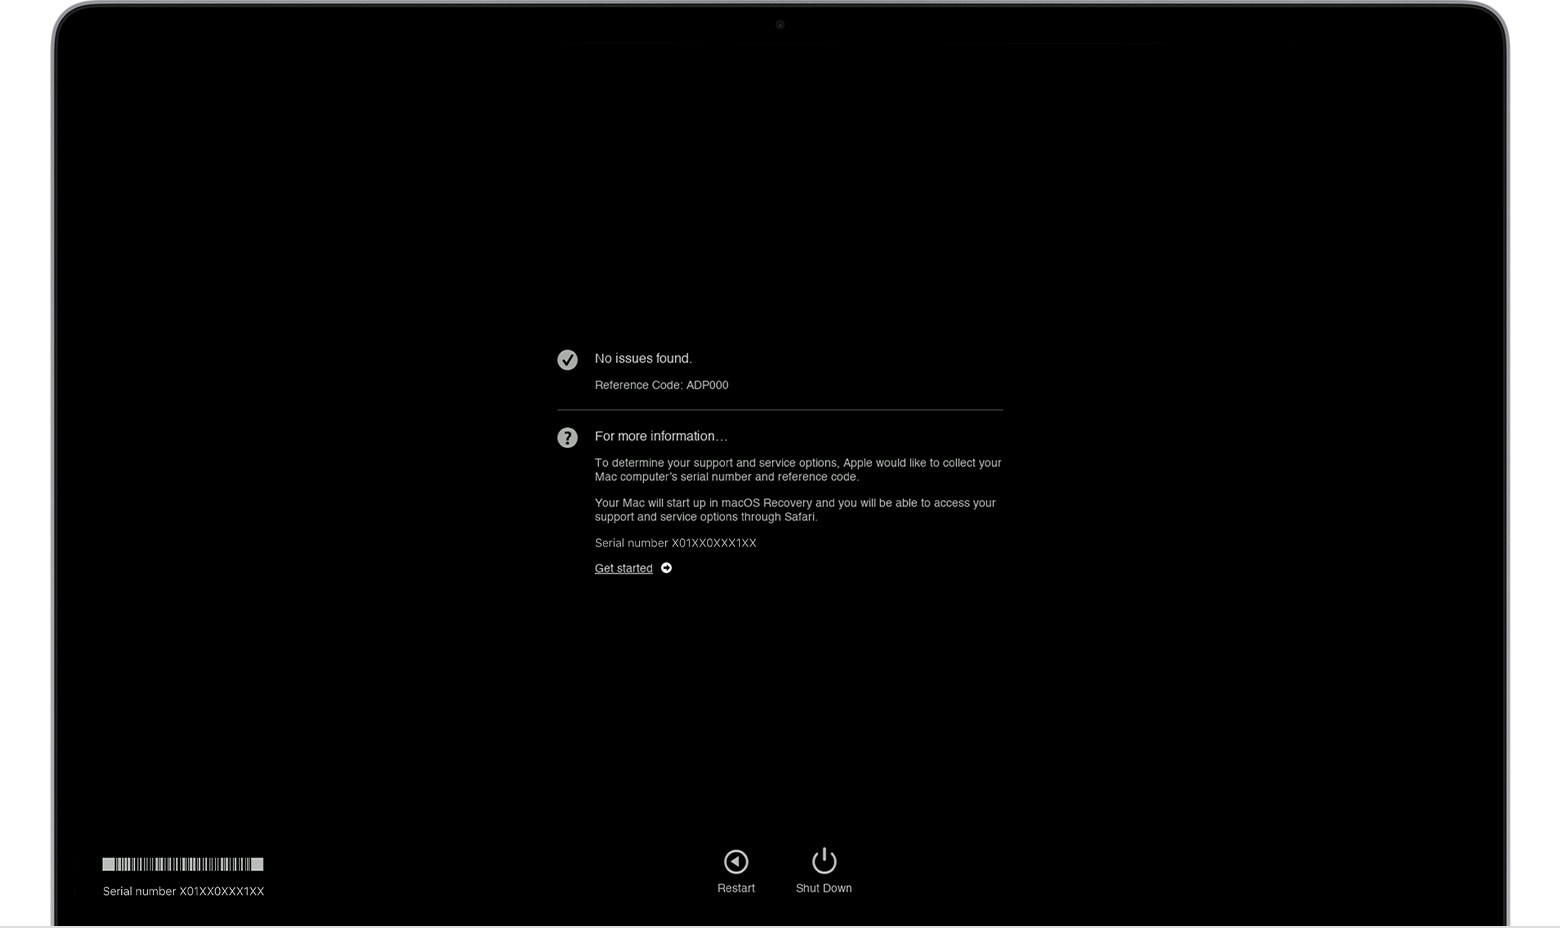 macOS Diagnostics results. No issues found.
- What It Means: This means that the hardware components tested are functioning correctly.
4.3 Reference Codes
If any issues are detected, Apple Diagnostics will display one or more reference codes. These codes are crucial for understanding the specific problem.
- What Are Reference Codes: These are unique codes that correspond to specific hardware issues.
- Where to Find More Information: A list of Apple Diagnostics reference codes can be found on the Apple Support website, providing detailed information about each code and its implications.
4.4 Repeating the Test
To ensure the accuracy of the results, you can repeat the diagnostic test.
- How to Repeat: Click “Run the test again” or press Command-R to restart the test.
- Why Repeat: Repeating the test can help confirm whether the initial results were accurate or if there might have been an intermittent issue.
4.5 Restarting or Shutting Down
After the test, you have the option to restart or shut down your Mac.
- How to Restart: Click “Restart” or press R.
- How to Shut Down: Click “Shut Down” or press S.
4.6 Service and Support Options
If the diagnostic test reveals issues, you can access service and support options to get further assistance.
- How to Access: Make sure your Mac is connected to the internet, then click ”Get started” or press Command-G. Your Mac will restart to a webpage with more information.
- What to Expect: This will provide you with relevant service and support options based on the diagnostic results.
5. Understanding Apple Diagnostics Reference Codes
Apple Diagnostics reference codes are essential for diagnosing hardware issues on your Mac. Each code corresponds to a specific problem, allowing technicians to pinpoint the source of the issue and implement the necessary repairs.
5.1 What Are Apple Diagnostics Reference Codes?
Apple Diagnostics reference codes are alphanumeric codes that appear after running the Apple Diagnostics test on your Mac. These codes provide specific information about any hardware issues detected during the test.
According to Apple Support, these codes are crucial for identifying the exact component that is malfunctioning, helping to streamline the repair process.
5.2 Common Reference Codes and Their Meanings
Understanding common reference codes can help you quickly identify and address hardware issues. Here are some frequently encountered codes and their meanings:
| Reference Code | Description | Possible Solutions |
|---|---|---|
| ADP000 | No issues found. | No action needed. |
| NDX001 | Issue with the flash storage. | Try running Disk Utility to repair the disk. If the issue persists, consider replacing the flash storage. |
| PFM006 | Issue with the system management controller (SMC). | Reset the SMC. If the issue persists, the SMC may need to be repaired or replaced. |
| VDH002 | Issue with the graphics card. | Update graphics drivers. If the issue persists, the graphics card may need to be replaced. |
| HDD004 | Issue with the hard drive. | Run Disk Utility to check and repair the hard drive. If the issue persists, consider replacing the hard drive. |
| MEM001 | Issue with the memory modules (RAM). | Ensure the RAM modules are properly installed. Try removing and re-installing them. If the issue persists, test each module individually or replace the faulty module. |
| PPT001 | Issue with the battery. | Check the battery health in System Information. If the battery is old or showing signs of failure, consider replacing it. |
| PPP003 | Issue with the power adapter. | Ensure the power adapter is properly connected and functioning. Try using a different power adapter. If the issue persists, the power adapter may need to be replaced. |
| TH000 | Issue with the thermal sensors. | Check the cooling system for obstructions. Ensure the fans are functioning properly. If the issue persists, the thermal sensors may need to be replaced. |
| WIFI001 | Issue with the Wi-Fi card. | Restart your Mac and try connecting to Wi-Fi again. Check the Wi-Fi card drivers. If the issue persists, the Wi-Fi card may need to be replaced. |
| Bluetooth000 | Issue with the Bluetooth module. | Restart your Mac and try connecting to Bluetooth devices again. Check the Bluetooth module drivers. If the issue persists, the Bluetooth module may need to be replaced. |
| CPU001 | Issue with the CPU. | Ensure the cooling system is functioning correctly. Reseat the CPU. If the issue persists, the CPU may need to be replaced. This is a complex task and may require professional assistance. |
| Fan001 | Issue with the fan. | Ensure the fan is free from obstructions and is spinning properly. Clean the fan. If the issue persists, the fan may need to be replaced. |
| Camera001 | Issue with the camera. | Check the camera settings and ensure it is enabled. Restart your Mac. If the issue persists, the camera may need to be replaced. |
| Keyboard001 | Issue with the keyboard. | Check for any stuck keys. Restart your Mac. If the issue persists, the keyboard may need to be replaced. |
| Trackpad001 | Issue with the trackpad. | Check the trackpad settings and ensure it is enabled. Restart your Mac. If the issue persists, the trackpad may need to be replaced. |
| Display001 | Issue with the display. | Check the display connections. Restart your Mac. If the issue persists, the display may need to be replaced. |
| Audio001 | Issue with the audio. | Check the audio settings and ensure the volume is not muted. Restart your Mac. If the issue persists, the audio module may need to be replaced. |
| Thunderbolt001 | Issue with the Thunderbolt port. | Check the Thunderbolt port for any damage. Restart your Mac. If the issue persists, the Thunderbolt port may need to be repaired or replaced. |
| USB001 | Issue with the USB port. | Check the USB port for any damage. Restart your Mac. If the issue persists, the USB port may need to be repaired or replaced. |
| SDCard001 | Issue with the SD card reader. | Check the SD card reader for any damage. Restart your Mac. If the issue persists, the SD card reader may need to be repaired or replaced. |
| Ethernet001 | Issue with the Ethernet port. | Check the Ethernet port for any damage. Restart your Mac. If the issue persists, the Ethernet port may need to be repaired or replaced. |
| AirPort001 | Issue with the AirPort card. | Restart your Mac and try connecting to Wi-Fi again. Check the AirPort card drivers. If the issue persists, the AirPort card may need to be replaced. |
5.3 How to Use Reference Codes for Troubleshooting
When you encounter a reference code, follow these steps for effective troubleshooting:
- Record the Reference Code: Write down the exact reference code displayed by Apple Diagnostics.
- Consult Apple Support: Visit the Apple Support website and search for the reference code to get detailed information about the issue.
- Follow Recommended Solutions: Apple Support will provide specific troubleshooting steps for each reference code. Follow these steps carefully.
- Seek Professional Help: If the issue persists or if you are not comfortable performing the troubleshooting steps yourself, seek help from a certified Apple technician.
6. Advanced Troubleshooting Steps After Mac Diagnostic
After running Mac Diagnostic and identifying potential hardware issues, advanced troubleshooting steps can help resolve complex problems and restore your Mac to optimal performance.
6.1 Resetting the System Management Controller (SMC)
The SMC controls various hardware functions, including power management, battery charging, and thermal management. Resetting the SMC can resolve issues related to these functions.
- Why Reset SMC: According to Apple Support, resetting the SMC can resolve a wide range of hardware-related issues.
- How to Reset: The process varies depending on the Mac model. For MacBooks with non-removable batteries, shut down the Mac, press and hold Shift-Control-Option and the power button for 10 seconds, then release all keys and start the Mac. For desktops, shut down the Mac, unplug the power cord for 15 seconds, then plug it back in and start the Mac.
6.2 Running Disk Utility
Disk Utility is a built-in macOS tool for managing and repairing disk-related issues. Running Disk Utility can help identify and fix errors on your hard drive or SSD.
- Why Use Disk Utility: Disk Utility can detect and repair file system errors, helping to prevent data loss and improve performance.
- How to Use: Open Disk Utility from the Utilities folder in Applications. Select the disk you want to check, then click “First Aid” and run the repair process.
6.3 Checking and Reinstalling RAM Modules
Memory (RAM) issues can cause various problems, including crashes, freezes, and performance slowdowns. Checking and reinstalling RAM modules can help resolve these issues.
- Why Check RAM: Ensuring RAM modules are properly installed and functioning correctly is crucial for system stability.
- How to Check: Shut down the Mac, open the RAM compartment, and ensure the modules are securely seated. If you have multiple modules, try removing and re-installing them one at a time to identify any faulty modules.
6.4 Updating or Reinstalling Drivers
Outdated or corrupted drivers can cause hardware components to malfunction. Updating or reinstalling drivers can resolve these issues.
- Why Update Drivers: Drivers are essential for communication between the operating system and hardware components.
- How to Update: Go to System Preferences > Software Update to check for driver updates. Alternatively, visit the manufacturer’s website to download the latest drivers for your hardware components.
6.5 Safe Mode
Starting your Mac in Safe Mode can help identify whether software is causing hardware issues. In Safe Mode, macOS loads only essential components, disabling third-party software and drivers.
- Why Use Safe Mode: If the issue disappears in Safe Mode, it indicates that a software conflict or third-party application is causing the problem.
- How to Enter Safe Mode: Restart your Mac and immediately press and hold the Shift key until the login window appears. Log in to your account, and you will be in Safe Mode.
7. When to Seek Professional Help
While many hardware issues can be resolved with troubleshooting steps, some problems require professional assistance. Knowing when to seek help from a certified technician can prevent further damage and ensure your Mac is properly repaired.
7.1 Recurring Issues
If you repeatedly encounter the same hardware issues after attempting troubleshooting steps, it may indicate a more serious underlying problem that requires professional attention.
- Why Seek Help: Recurring issues can be caused by faulty hardware components or complex software conflicts that are difficult to resolve without specialized knowledge and tools.
7.2 Physical Damage
Physical damage, such as a cracked screen, liquid damage, or broken ports, often requires professional repair. Attempting to fix these issues yourself can lead to further damage and void your warranty.
- Why Professional Repair: Certified technicians have the expertise and equipment to safely repair physical damage and restore your Mac to its original condition.
7.3 Complex Hardware Issues
Some hardware issues, such as problems with the logic board, CPU, or GPU, require advanced diagnostic and repair techniques that are beyond the capabilities of the average user.
- Why Expert Assistance: These components are intricate and sensitive, requiring specialized tools and expertise to diagnose and repair properly.
7.4 Data Loss Concerns
If you are concerned about data loss during the repair process, it is best to seek professional help. Certified technicians can take steps to protect your data and ensure it is not lost during the repair.
- Why Professional Data Protection: They have the tools and expertise to back up your data before performing any repairs, minimizing the risk of data loss.
7.5 Warranty Considerations
Attempting to repair your Mac yourself can void your warranty. If your Mac is still under warranty, it is best to seek professional repair from an authorized service provider to maintain your warranty coverage.
- Why Authorized Service: Authorized service providers are trained to repair your Mac according to Apple’s standards, ensuring your warranty remains valid.
8. Optimizing Mac Performance After Diagnostic Testing
After resolving hardware issues identified through Mac Diagnostic, optimizing your Mac’s performance is essential for ensuring smooth and efficient operation.
8.1 Clean Up Your Hard Drive
A cluttered hard drive can slow down your Mac’s performance. Regularly cleaning up your hard drive can improve speed and responsiveness.
- How to Clean Up: Delete unnecessary files, uninstall unused applications, and empty the Trash. Use Disk Utility to repair any disk errors.
- Why Clean Up: A clean hard drive reduces the amount of data the system needs to search, improving overall performance.
8.2 Manage Startup Items
Startup items are applications that automatically launch when you start your Mac. Managing these items can reduce startup time and improve system performance.
- How to Manage: Go to System Preferences > Users & Groups > Login Items to view and manage startup items. Remove any unnecessary applications from the list.
- Why Manage: Reducing the number of startup items frees up system resources, resulting in faster startup times.
8.3 Update Software
Keeping your software up to date ensures you have the latest performance improvements and security patches.
- How to Update: Go to System Preferences > Software Update to check for and install updates.
- Why Update: Software updates often include optimizations that can improve performance and stability.
8.4 Use Activity Monitor
Activity Monitor is a built-in macOS tool that allows you to monitor system resources and identify processes that are consuming excessive resources.
- How to Use: Open Activity Monitor from the Utilities folder in Applications. Monitor CPU, memory, and disk usage to identify resource-intensive processes.
- Why Monitor: Identifying and closing unnecessary processes can free up system resources and improve performance.
8.5 Regularly Restart Your Mac
Restarting your Mac can help clear temporary files, free up memory, and refresh system processes.
- How Often: Restart your Mac at least once a week to maintain optimal performance.
- Why Restart: Regular restarts can prevent performance slowdowns and ensure smooth operation.
9. Contact CAR-TOOL.EDU.VN for Assistance
At CAR-TOOL.EDU.VN, we understand the intricacies of Mac diagnostics and troubleshooting. If you’re facing challenges with your Mac or need expert advice on auto repair tools, our team is here to assist.
9.1 Why Choose CAR-TOOL.EDU.VN?
- Expert Guidance: Our experienced technicians provide reliable and accurate guidance on Mac diagnostics and auto repair solutions.
- Comprehensive Support: We offer comprehensive support for a wide range of auto repair tools and diagnostic equipment.
- Personalized Assistance: We provide personalized assistance to help you find the right tools and solutions for your specific needs.
9.2 How to Reach Us
- Address: 456 Elm Street, Dallas, TX 75201, United States
- WhatsApp: +1 (641) 206-8880
- Website: CAR-TOOL.EDU.VN
9.3 Get Immediate Assistance
Don’t let Mac diagnostic challenges slow you down. Contact us today for expert consultation and immediate assistance with your auto repair needs.
10. FAQ About Mac Diagnostic
10.1 What Is Mac Diagnostic?
Mac Diagnostic, formerly known as Apple Hardware Test, is a built-in diagnostic tool that helps identify potential hardware issues on your Mac. It assists in determining which hardware component might be at fault, suggests solutions, and aids in contacting Apple Support for assistance.
10.2 How Do I Start Mac Diagnostic?
The method to start Mac Diagnostic varies based on your Mac model. For Apple silicon Macs, press and hold the power button until startup options load, then press Command-D. For Intel processor Macs, turn on the Mac and immediately press and hold the D key during startup.
10.3 What Should I Do Before Running Mac Diagnostic?
Before running Mac Diagnostic, ensure you have updated macOS, shut down your Mac, disconnected all external devices (except keyboard, mouse, display, and Ethernet if applicable), and placed your Mac on a stable, well-ventilated surface.
10.4 What Do the Reference Codes Mean?
Reference codes are alphanumeric codes that appear after running Mac Diagnostic, providing specific information about detected hardware issues. These codes are crucial for identifying the exact component that is malfunctioning and for seeking appropriate solutions.
10.5 Can I Run Mac Diagnostic Over the Internet?
Yes, you can run Mac Diagnostic over the internet by pressing and holding Option (⌥)-D at startup if the standard D key method doesn’t work. This will start the diagnostic test using Apple’s servers.
10.6 What if Mac Diagnostic Finds No Issues?
If Mac Diagnostic finds no issues, it means the hardware components tested are functioning correctly. However, if you continue to experience problems, further troubleshooting may be needed, or the issue may be software-related.
10.7 How Often Should I Run Mac Diagnostic?
You should run Mac Diagnostic whenever you suspect there may be a hardware issue with your Mac. Regular checks are not necessary unless you experience specific problems or notice unusual behavior.
10.8 What Is the System Management Controller (SMC), and Why Should I Reset It?
The System Management Controller (SMC) manages hardware functions such as power, battery charging, and thermal management. Resetting the SMC can resolve various hardware-related issues and restore proper functionality.
10.9 How Can CAR-TOOL.EDU.VN Help Me With Mac Diagnostic?
CAR-TOOL.EDU.VN provides expert guidance and comprehensive support for Mac diagnostics and auto repair solutions. Our experienced technicians can assist you in understanding diagnostic results, troubleshooting issues, and finding the right tools for your needs.
10.10 Where Can I Find More Information About Auto Repair Tools and Diagnostics?
You can find more information about auto repair tools and diagnostics on the CAR-TOOL.EDU.VN website. We offer a wide range of resources, including product information, troubleshooting guides, and expert advice.
Navigating Mac diagnostics can be complex, but with the right tools and information, you can effectively troubleshoot and maintain your system. For expert guidance and comprehensive support, contact CAR-TOOL.EDU.VN today!