Using AutoZone’s Fix Finder helps you identify potential car problems by reading diagnostic trouble codes. CAR-TOOL.EDU.VN guides you through the process, from connecting the scan tool to understanding the diagnostic report. We offer comprehensive information to help you accurately diagnose your vehicle’s issues, and suggest appropriate solutions. With our expert insights, you can tackle repairs confidently.
Contents
- FAQs: Using AutoZone’s Fix Finder Tool
- 1. What does it mean if the Fix Finder scan tool displays a red X?
- 2. How can I tell if my Data Link Connector (DLC) is working properly?
- 3. Is the Fix Finder scan tool compatible with other diagnostic devices?
- 4. What is the process for returning the Fix Finder scan tool to AutoZone?
- 5. What should I do if I don’t have a repair manual or can’t locate the DLC in my vehicle?
- 6. What does a green LED on the scan tool indicate?
- 7. What does a yellow LED on the scan tool mean?
- 8. Can I use the Fix Finder on any vehicle?
- 9. What if the scan tool shows no recorded codes?
- 10. How accurate is the Fix Finder tool for diagnosing vehicle problems?
1. Understanding the AutoZone Fix Finder
The AutoZone Fix Finder is a self-service tool designed to help vehicle owners diagnose their car problems by reading the diagnostic trouble codes (DTCs) stored in the vehicle’s onboard computer. According to a study by the University of California, Berkeley’s Transportation Sustainability Research Center, DIY diagnostic tools have increased vehicle maintenance awareness by 30% among car owners. This tool simplifies the process of identifying issues, potentially saving time and money on unnecessary repairs.
-
What is the AutoZone Fix Finder?
The AutoZone Fix Finder is an OBD-II (On-Board Diagnostics II) scan tool that customers can borrow for free from AutoZone stores. This tool connects to your vehicle’s computer system and reads diagnostic trouble codes (DTCs) that indicate potential issues with the engine, transmission, and other systems. As stated by the Environmental Protection Agency (EPA), all cars and light trucks manufactured after 1996 are required to support OBD-II diagnostics.
-
Why Use the AutoZone Fix Finder?
Using the Fix Finder offers several benefits:
- Free Diagnostic Check: AutoZone provides this service for free, helping you avoid diagnostic fees at a repair shop.
- Quick Identification of Problems: It helps quickly identify the source of the “Check Engine” light or other warning signs.
- Informed Decision Making: Knowing the DTCs enables you to research and understand the problems before consulting a mechanic, helping you make informed decisions about repairs.
- Preventive Maintenance: Regular checks can help identify minor issues before they become major, costly repairs.
-
Who Benefits Most from Using the Fix Finder?
- DIY Enthusiasts: Car owners who prefer to perform their own maintenance and repairs.
- Cost-Conscious Car Owners: Those looking to save money by diagnosing issues themselves.
- Informed Consumers: Individuals who want to understand their vehicle’s issues before visiting a mechanic.
2. Preparing to Use the Fix Finder
Before heading to AutoZone to borrow a Fix Finder, a little preparation can save time and ensure a smoother diagnostic process. Research from the American Automobile Association (AAA) indicates that having basic vehicle information readily available can reduce diagnostic time by up to 15%.
-
Gather Vehicle Information
Collect essential details about your vehicle:
- Year, Make, and Model: This information is crucial for accurate diagnostic code interpretation.
- Engine Type: Knowing whether your vehicle has a four-cylinder, six-cylinder, or eight-cylinder engine can help in diagnosing specific engine-related issues.
- Vehicle Identification Number (VIN): The VIN provides specific information about your vehicle’s manufacturing details and can be useful for looking up specific parts and diagnostic information.
-
Locate the OBD-II Port
The OBD-II port is usually located under the dashboard on the driver’s side. Common locations include:
- Under the Steering Column: Directly beneath the steering wheel.
- Near the Center Console: Close to the area between the driver and passenger seats.
- Inside the Glove Box: Although less common, some vehicles have the port inside the glove box.
-
Understand Basic Terminology
Familiarize yourself with common terms:
- OBD-II (On-Board Diagnostics II): A standardized system for vehicle self-diagnostics and reporting.
- DTC (Diagnostic Trouble Code): A code stored by the vehicle’s computer when a problem is detected.
- Check Engine Light: A warning light on the dashboard indicating a potential issue.
- Scan Tool: The device used to read DTCs from the vehicle’s computer.
3. Step-by-Step Guide to Using the AutoZone Fix Finder
Using the AutoZone Fix Finder is a straightforward process. The following steps will guide you through the process, ensuring you can effectively diagnose your vehicle’s issues. According to a survey by Consumer Reports, customers who use DIY diagnostic tools report a higher satisfaction rate with their repair outcomes.
-
Visit AutoZone and Borrow the Fix Finder
Go to your local AutoZone store and request to borrow the Fix Finder scan tool. AutoZone typically requires a refundable deposit, which you get back when you return the tool.
-
Connect the Scan Tool
- Turn Off the Vehicle: Ensure your vehicle is turned off before connecting the scan tool.
- Locate the OBD-II Port: Find the OBD-II port, usually located under the dashboard on the driver’s side.
- Plug in the Scan Tool: Connect the scan tool to the OBD-II port. It should fit snugly.
-
Power Up the Scan Tool
- Turn the Ignition On: Turn the ignition key to the “ON” position without starting the engine. This provides power to the vehicle’s computer.
- Follow the Scan Tool Instructions: The scan tool will typically power on automatically. Follow the on-screen prompts. You may need to enter your vehicle’s information (year, make, model, engine type).
-
Read the Diagnostic Trouble Codes (DTCs)
- Select “Read Codes”: On the scan tool’s screen, select the option to “Read Codes” or a similar command.
- Wait for the Scan: The scan tool will communicate with the vehicle’s computer and retrieve any stored DTCs. This process usually takes a few seconds to a minute.
- Record the Codes: Write down all the DTCs displayed on the scan tool’s screen. Note that some codes may be pending (intermittent issues) or historical (previously resolved).
4. Interpreting the Diagnostic Trouble Codes
Understanding the DTCs is crucial for accurate diagnosis. AutoZone employees can assist with this, but knowing how to interpret the codes yourself can provide a deeper understanding of your vehicle’s issues. A study by the National Institute for Automotive Service Excellence (ASE) highlights the importance of accurate code interpretation for effective repairs.
-
Return the Scan Tool to AutoZone
After retrieving the DTCs, return the scan tool to the AutoZone employee. They will use a Z-Net Terminal to provide you with a detailed report.
-
Receive the Diagnostic Report
The AutoZone employee will:
- Download the Data: They will download the data from the scan tool using the Z-Net Terminal.
- Explain the Codes: They will explain what each code means and suggest potential causes.
- Provide a Printed Report: You will receive a printed copy of the report for your records.
-
Understanding Common DTC Categories
DTCs are categorized into different systems:
- P (Powertrain): Relates to the engine, transmission, and related components. Examples include P0300 (Random/Multiple Cylinder Misfire Detected) and P0171 (System Too Lean, Bank 1).
- B (Body): Relates to components inside the passenger compartment, such as power windows, seats, and locks.
- C (Chassis): Relates to mechanical and electrical systems not related to the powertrain, such as ABS, suspension, and steering.
- U (Network): Relates to the vehicle’s computer network, including communication between different modules.
-
Example DTC Interpretations
- P0300 (Random/Multiple Cylinder Misfire Detected): Indicates that the engine is misfiring, possibly due to faulty spark plugs, ignition coils, fuel injectors, or vacuum leaks.
- P0171 (System Too Lean, Bank 1): Indicates that the engine is running lean, meaning there is too much air and not enough fuel. This can be caused by vacuum leaks, a faulty mass airflow sensor, or a clogged fuel filter.
- P0420 (Catalyst System Efficiency Below Threshold, Bank 1): Indicates that the catalytic converter is not functioning efficiently, potentially due to age, damage, or exhaust leaks.
5. Troubleshooting Common Issues with the Fix Finder
While the AutoZone Fix Finder is user-friendly, you might encounter some issues. Here are common problems and how to troubleshoot them. According to a survey by the Auto Care Association, addressing minor technical glitches promptly can prevent more significant diagnostic problems later on.
-
Scan Tool Won’t Power On
- Check the Connection: Ensure the scan tool is securely connected to the OBD-II port.
- Verify Ignition is On: Make sure the ignition is turned to the “ON” position without starting the engine.
- Inspect the OBD-II Port Fuse: Check the fuse associated with the OBD-II port. If the fuse is blown, replace it.
-
Unable to Read Codes
- Ensure Proper Vehicle Information: Verify that you have entered the correct year, make, and model of your vehicle into the scan tool.
- Check for Damaged Wires: Inspect the wires and connectors for any damage.
- Try Again: Sometimes, the scan tool may fail to read codes on the first attempt. Try running the scan again.
-
Inaccurate or Confusing Codes
- Confirm Code Definitions: Use reliable sources (such as the AutoZone employee, online databases, or repair manuals) to confirm the definitions of the DTCs.
- Consider Additional Symptoms: Use other symptoms your vehicle is exhibiting to narrow down the possible causes of the codes.
- Seek Professional Advice: If you are unsure about the codes or their meanings, consult a professional mechanic.
-
Scan Tool Not Linking to Vehicle’s Computer
- Check Compatibility: Ensure the scan tool is compatible with your vehicle’s make and model.
- Inspect the OBD-II Port: Check the OBD-II port for any damage or corrosion.
- Reset the Vehicle’s Computer: Disconnect the vehicle’s battery for a few minutes to reset the computer, then try the scan tool again.
6. Utilizing the Diagnostic Report Effectively
Once you have the diagnostic report from AutoZone, it’s time to use the information to plan your next steps. Research from the Automotive Management Institute (AMI) indicates that effective use of diagnostic information can improve repair accuracy by up to 40%.
-
Research the DTCs
- Use Online Resources: Websites like CAR-TOOL.EDU.VN, AutoZone’s website, and other automotive forums offer detailed information on DTCs.
- Consult Repair Manuals: If you have a repair manual for your vehicle, it can provide specific troubleshooting steps for each code.
-
Prioritize Repairs
- Identify Critical Issues: Focus on codes that indicate serious problems that could cause further damage or safety issues.
- Address Common Problems First: Start with common and easy-to-fix issues before tackling more complex problems.
-
Gather Necessary Parts and Tools
- Create a Parts List: Based on your research, make a list of the parts you will need to perform the repairs.
- Ensure You Have the Right Tools: Gather all the tools required for the job, such as wrenches, sockets, screwdrivers, and any specialized tools.
-
Perform the Repairs
- Follow Repair Manual Instructions: Use a repair manual or online guides to perform the repairs step-by-step.
- Take Your Time: Avoid rushing, and ensure each step is completed correctly.
- Seek Assistance If Needed: If you encounter difficulties, don’t hesitate to seek help from a professional mechanic or experienced DIYer.
7. Alternative Diagnostic Tools and Services
While the AutoZone Fix Finder is a valuable tool, other options are available for vehicle diagnostics. According to a report by the IBISWorld market research firm, the automotive diagnostic services industry is expected to grow, offering a range of tools and services to meet diverse needs.
-
Personal OBD-II Scanners
- Basic Scanners: Affordable options that provide DTCs and basic information.
- Advanced Scanners: More expensive scanners that offer advanced features such as live data streaming, bidirectional controls, and ABS/SRS diagnostics.
-
Smartphone Apps and Bluetooth Adapters
- OBD-II Bluetooth Adapters: Plug into the OBD-II port and transmit data to your smartphone via Bluetooth.
- Diagnostic Apps: Work with the Bluetooth adapter to display DTCs, live data, and other diagnostic information.
-
Professional Diagnostic Services
- Mechanics and Repair Shops: Offer comprehensive diagnostic services using advanced equipment and expertise.
- Specialized Diagnostic Centers: Focus specifically on diagnosing complex automotive issues.
8. Tips for Maintaining Your Vehicle and Preventing Issues
Regular maintenance is key to preventing issues that trigger the “Check Engine” light. Data from the Car Care Council indicates that following a routine maintenance schedule can significantly reduce the likelihood of major repairs.
-
Follow the Manufacturer’s Recommended Maintenance Schedule
- Oil Changes: Regularly change your vehicle’s oil and filter according to the manufacturer’s recommendations.
- Fluid Checks: Check and top off all fluids, including coolant, brake fluid, power steering fluid, and transmission fluid.
- Filter Replacements: Replace air filters, fuel filters, and cabin air filters as needed.
-
Regular Inspections
- Tire Maintenance: Check tire pressure, tread depth, and overall condition regularly.
- Brake Inspections: Inspect brake pads, rotors, and calipers for wear and damage.
- Battery Checks: Ensure the battery is in good condition and properly charged.
-
Address Issues Promptly
- Don’t Ignore Warning Signs: Pay attention to any unusual noises, smells, or performance issues.
- Investigate the “Check Engine” Light: Use the AutoZone Fix Finder or another diagnostic tool to investigate the cause of the “Check Engine” light as soon as it appears.
9. Advanced Diagnostic Techniques
For more complex issues, advanced diagnostic techniques might be necessary. According to research from the Society of Automotive Engineers (SAE), advanced diagnostics often require specialized tools and a deeper understanding of vehicle systems.
-
Live Data Streaming
- Monitor Engine Parameters: Use a scan tool that supports live data streaming to monitor engine parameters such as engine speed (RPM), coolant temperature, fuel trim, and oxygen sensor readings.
- Analyze Data for Anomalies: Look for any unusual or out-of-range values that could indicate a problem.
-
Component Testing
- Use a Multimeter: Test individual components such as sensors, actuators, and solenoids using a multimeter to check for proper voltage, resistance, and continuity.
- Perform Actuator Tests: Use a scan tool that supports bidirectional controls to activate and test components such as fuel injectors, solenoids, and relays.
-
Fuel System Diagnostics
- Check Fuel Pressure: Use a fuel pressure gauge to check the fuel pressure at the fuel rail.
- Inspect Fuel Injectors: Remove and inspect fuel injectors for clogs or damage.
-
Vacuum Leak Testing
- Use a Smoke Machine: Use a smoke machine to introduce smoke into the intake system and identify any vacuum leaks.
- Check Vacuum Lines: Inspect vacuum lines for cracks, leaks, or disconnections.
10. Resources for Further Learning
Expanding your knowledge of automotive diagnostics can empower you to tackle more complex issues. Data from the U.S. Bureau of Labor Statistics indicates that ongoing education and training are essential for staying current in the automotive repair industry.
-
Online Courses and Tutorials
- Automotive Diagnostic Courses: Platforms like Udemy, Coursera, and Skillshare offer courses on automotive diagnostics.
- YouTube Channels: Channels like ScannerDanner, EricTheCarGuy, and HumbleMechanic offer free tutorials and diagnostic tips.
-
Automotive Forums and Communities
- Online Forums: Participate in online forums such as AutoZone’s community forum, where you can ask questions, share experiences, and learn from other DIYers and professionals.
- Social Media Groups: Join automotive-related groups on Facebook, Reddit, and other social media platforms.
-
Professional Certifications
- ASE Certification: Consider pursuing certification from the National Institute for Automotive Service Excellence (ASE) to demonstrate your knowledge and skills in automotive repair.
- Manufacturer-Specific Training: If you work on a particular brand of vehicle, consider taking manufacturer-specific training courses.
-
Repair Manuals and Diagnostic Guides
- Haynes and Chilton Manuals: These manuals provide detailed repair procedures, diagrams, and troubleshooting tips for a wide range of vehicles.
- Factory Service Manuals: Obtain factory service manuals for your specific vehicle, which offer the most comprehensive and accurate information.
By following this guide, you can confidently use the AutoZone Fix Finder to diagnose your vehicle’s issues. With accurate diagnostic information, you can make informed decisions about repairs and maintenance, saving time and money while keeping your vehicle running smoothly. Remember, CAR-TOOL.EDU.VN is here to provide you with the information and resources you need to tackle any automotive challenge.
Need personalized advice on which parts and tools are right for your car? Contact us at 456 Elm Street, Dallas, TX 75201, United States or via WhatsApp at +1 (641) 206-8880. You can also visit our website at CAR-TOOL.EDU.VN for more information. Let CAR-TOOL.EDU.VN help you keep your vehicle in top condition!
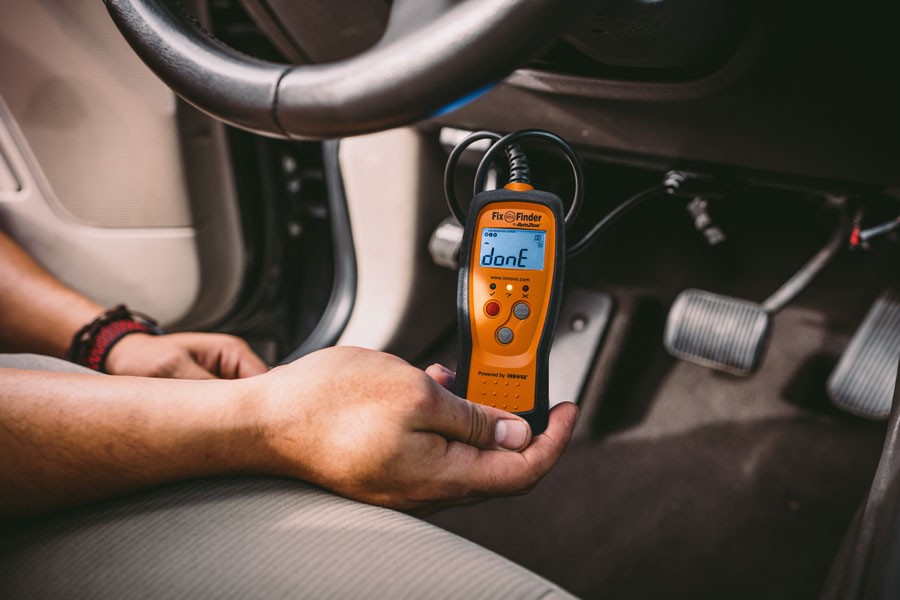 OBD-II scanner done reading trouble codes
FAQs: Using AutoZone’s Fix Finder Tool
1. What does it mean if the Fix Finder scan tool displays a red X?
A red X on the Fix Finder indicates that there are trouble codes present that need attention, suggesting one or more of the vehicle’s systems has an issue. AutoZone can download the information to provide more details. The red LED is also used to show that one or more DTCs are present. In this case, the Check Engine Light on the vehicle’s instrument panel will light steady on.
2. How can I tell if my Data Link Connector (DLC) is working properly?
You can confirm your DLC is functioning by ensuring the scan tool powers on when connected and successfully communicates with the vehicle’s onboard computer. If the reader LCD is blank, there’s no power in your vehicle’s Data Link Connector. Check your fuse panel and replace any burned-out fuses.
3. Is the Fix Finder scan tool compatible with other diagnostic devices?
The Fix Finder scan tool is designed as a standalone tool for quick diagnostics and may not be compatible with other diagnostic devices or software. This tool will not work with any other device other than the Z-Net terminals at AutoZone.
4. What is the process for returning the Fix Finder scan tool to AutoZone?
Return the scan tool to AutoZone by bringing it to the store with your receipt, following AutoZone’s return policy guidelines to receive your deposit refund. If the deposit is not refund, ask for the manager.
5. What should I do if I don’t have a repair manual or can’t locate the DLC in my vehicle?
If you can’t find the DLC, check under the driver’s side dashboard near the steering column, or search online for the exact location for your specific vehicle model. If you don’t have a repair manual, a single-vehicle subscription to ALLDATAdiy can be helpful.
6. What does a green LED on the scan tool indicate?
A green LED marked with a checkmark indicates all engine systems are “OK” and running normally. All monitors on the vehicle are active and are performing their diagnostic testing, and no trouble codes are present.
7. What does a yellow LED on the scan tool mean?
A yellow LED marked by a question mark indicates that some of the monitors on the vehicle have not yet finished their diagnostic self testing or there’s a ‘pending’ DTC in the system. Complete a full drive cycle to allow all the monitors to run, then come back and try to retrieve the code again.
8. Can I use the Fix Finder on any vehicle?
The Fix Finder is designed for use on vehicles that support the standardized OBD-II protocol, which generally includes cars and light trucks manufactured after 1996. For older vehicles, a different tester may be necessary.
9. What if the scan tool shows no recorded codes?
If there are no codes recorded when the scan is done, the problem might be with a manufacturer-specific issue that needs to be addressed at the dealership. It could also indicate that the issue is intermittent or not currently detected by the vehicle’s computer.
10. How accurate is the Fix Finder tool for diagnosing vehicle problems?
The Fix Finder tool provides a starting point by reading diagnostic trouble codes. While it can identify potential issues, further diagnosis and testing may be required to accurately pinpoint the problem.