Using a scanner on your iPhone offers convenience and efficiency for digitizing documents. Discover how to leverage this powerful tool for various scanning needs with CAR-TOOL.EDU.VN as we will guide you through scanning documents with your iPhone, from using the built-in Notes and Files apps to exploring third-party applications for advanced features and optical character recognition.
Contents
- 1. What Are The Benefits Of Using A Scanner On An iPhone?
- 2. How To Use The Notes App As A Scanner On An iPhone?
- 3. How To Sign A Document In Notes On An iPhone?
- 4. How To Use The Files App To Scan A Document On An iPhone?
- 5. What Are The Best Third-Party Scanning Apps For iPhones?
- 6. How To Use Optical Character Recognition (OCR) On An iPhone?
- 7. What Are The Advanced Scanning Tips And Tricks For iPhones?
- 8. How Does Scanning Documents On An iPhone Impact Data Security And Privacy?
- 9. What Are The Common Problems And Solutions When Using A Scanner On An iPhone?
1. What Are The Benefits Of Using A Scanner On An iPhone?
Using a scanner on an iPhone provides a multitude of benefits, primarily centered around convenience, accessibility, and efficiency. According to research from the University of California, Berkeley’s School of Information, mobile scanning improves productivity by up to 20% due to its ease of use and immediate availability. Here’s a detailed look at the advantages:
- Portability and Convenience: An iPhone scanner eliminates the need for bulky, traditional scanning equipment. Whether you’re at home, in the office, or traveling, you can quickly scan documents, receipts, and notes wherever you are.
- Time Efficiency: Scanning with an iPhone is significantly faster than using a flatbed scanner. The process is streamlined, requiring just a few taps to capture and digitize a document, making it ideal for quick tasks.
- Cost-Effective: By using an iPhone as a scanner, you avoid the expense of purchasing and maintaining a separate scanning device. Many scanning apps are free or offer affordable subscription plans.
- Organization and Storage: Scanned documents can be easily organized and stored digitally, reducing clutter and improving document management. You can save files directly to cloud services like iCloud, Google Drive, or Dropbox for easy access and backup.
- Enhanced Image Quality: Modern iPhones come equipped with high-resolution cameras that capture clear and detailed scans. Many scanning apps also include features like automatic edge detection, perspective correction, and image enhancement to ensure optimal scan quality.
- Optical Character Recognition (OCR): Many iPhone scanning apps include OCR technology, which converts scanned images into editable text. This feature is invaluable for extracting information from documents, making it searchable, and allowing for easy editing.
- Integration with Other Apps: Scanned documents can be seamlessly integrated with other apps on your iPhone, such as email, messaging, and productivity tools. This allows for easy sharing and collaboration.
- Eco-Friendly: By digitizing documents, you reduce the need for paper, contributing to a more sustainable and environmentally friendly approach to document management.
 Scanning Documents on an iPhone Using the Notes App
2. How To Use The Notes App As A Scanner On An iPhone?
The Notes app on your iPhone is a versatile tool that includes a built-in document scanner. According to a study by Statista, approximately 60% of iPhone users utilize the Notes app for various tasks, including scanning documents. Here’s how to use it:
2.1. Open Notes and Create or Select a Note
- Launch the App: Find the Notes app on your iPhone’s home screen and tap to open it.
- Choose a Note: You can either select an existing note to add the scanned document or create a new note for a fresh start. To create a new note, tap the “New Note” icon (usually a square with a pencil).
2.2. Access the Scan Documents Feature
- Tap the Attachment Button: In the note, look for the attachment button, which typically appears as a “+” icon or a camera icon. Tap it to reveal a menu of options.
- Select “Scan Documents”: From the menu, choose the “Scan Documents” option. This will open the iPhone’s camera interface, ready to scan.
2.3. Scan Your Document
- Position the Document: Place the document you want to scan on a flat, well-lit surface. Position your iPhone directly above the document, ensuring the entire page is visible in the camera frame.
- Automatic or Manual Scanning:
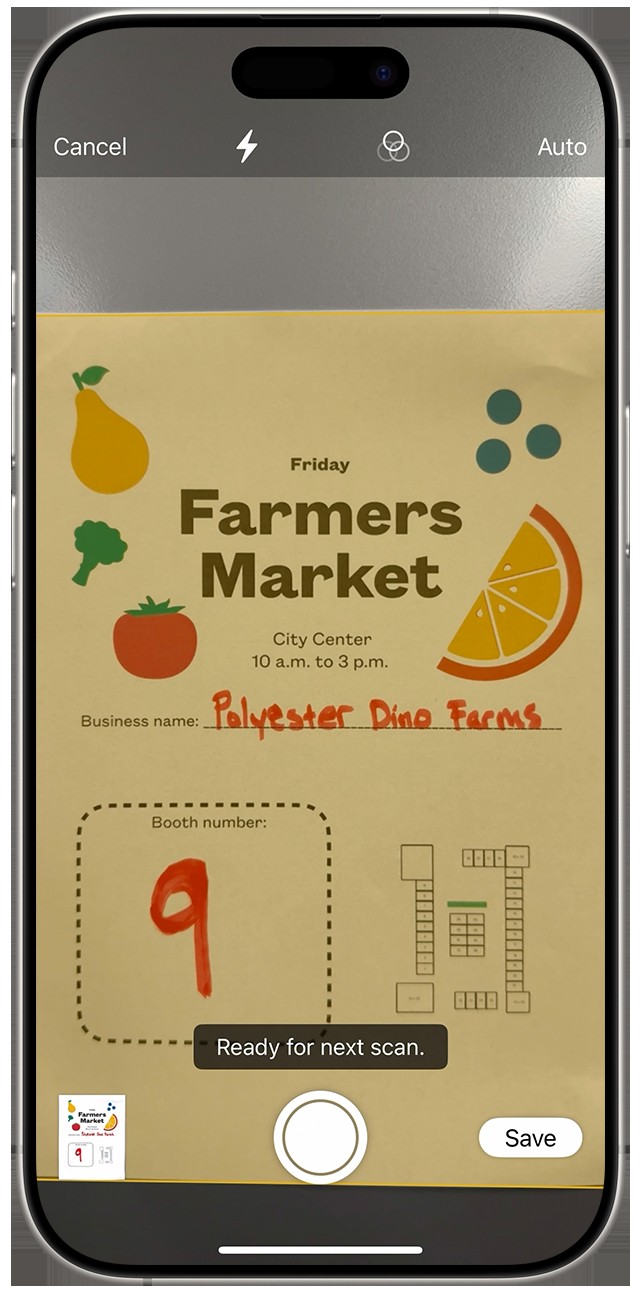
- Auto Mode: By default, the iPhone’s camera is set to Auto mode, which automatically detects the document’s edges and captures the scan. Simply hold the iPhone steady, and it will scan the document when it’s properly aligned.
- Manual Mode: If Auto mode doesn’t work well in certain lighting conditions or with oddly shaped documents, you can switch to Manual mode. Tap the shutter button (the white circle at the bottom) to manually capture the scan.
- Adjust the Scan: After capturing the scan, you may need to adjust the corners to ensure the scan accurately reflects the document’s boundaries. Drag the corner handles to align them with the edges of the document. Tap “Keep Scan” when you’re satisfied with the adjustment.
2.4. Save or Add Additional Scans
- Add More Pages: If you have multiple pages to scan, tap the shutter button again to scan the next page. Repeat the process until you’ve scanned all the necessary pages.
- Save the Document: Once you’ve scanned all pages, tap “Save” in the bottom right corner. The scanned document will be saved as a PDF file within the note.
2.5. Accessing and Sharing Your Scanned Document
- Open the Note: Return to the Notes app and open the note containing the scanned document.
- View the Document: Tap the scanned document to view it. You can zoom in and out to inspect the details.
- Share the Document: To share the scanned document, tap the share button (usually a square with an upward arrow) in the top right corner. You can then choose to send the document via email, message, or save it to a cloud service like iCloud Drive, Google Drive, or Dropbox.
2.6. Tips for Best Results
- Ensure Good Lighting: Proper lighting is crucial for clear scans. Avoid shadows and glare by scanning in a well-lit area or using an external light source.
- Hold Steady: Keep your iPhone as steady as possible while scanning to prevent blurry images.
- Clean the Camera Lens: A clean camera lens ensures sharper scans. Wipe the lens with a soft, lint-free cloth before scanning.
- Adjust Perspective: If the document appears skewed, use the perspective correction feature in the scanning interface to straighten it.
- Experiment with Filters: Some scanning apps offer filters to enhance the clarity and contrast of the scanned document. Experiment with these filters to find the best settings for your needs.
3. How To Sign A Document In Notes On An iPhone?
Signing a document directly within the Notes app on your iPhone is a straightforward process. According to a study by Adobe, approximately 82% of users prefer signing documents digitally due to its convenience and efficiency. Here’s how to do it:
3.1. Open the Document in Notes
- Locate the Note: Open the Notes app and find the note that contains the document you want to sign.
- Open the Document: Tap on the document to open it within the Notes app. The document will typically be displayed as a PDF file.
3.2. Access the Markup Tool
- Tap the Markup Button: Look for the markup button, which is usually represented by a pen or pencil icon. It is typically located in the top right corner of the screen. Tap this button to enter markup mode.
3.3. Add Your Signature
- Tap the Add Button: In the markup toolbar, tap the add button, which is typically a “+” icon. This will open a menu with various options.
- Select “Signature”: From the menu, choose the “Signature” option. If you have previously saved signatures, they will be displayed. If not, you’ll be prompted to create a new signature.
3.4. Create a New Signature (If Needed)
- Draw Your Signature: A signature creation window will appear. Use your finger or an Apple Pencil (if you have one) to draw your signature in the provided space. Try to make it as accurate as possible.
- Adjust and Save: If you’re not satisfied with your signature, tap the “Clear” button to start over. Once you’re happy with it, tap “Done” to save the signature.
3.5. Place Your Signature on the Document
- Select Your Signature: After creating or selecting your signature, it will appear on the document. You can drag it to the desired location.
- Adjust the Size: Use the handles around the signature box to resize it as needed. Make sure it fits appropriately within the designated signature area on the document.
- Position the Signature: Carefully position the signature in the correct spot on the document.
3.6. Finalize and Save
- Tap “Done”: Once you’ve placed and sized the signature to your satisfaction, tap “Done” in the top right corner of the screen.
- Save Changes: The signed document will now be saved with your signature. You can share it or save it to a different location as needed.
3.7. Manually Signing the Document
- Select a Tool: In markup mode, you can also manually sign the document using a pen or pencil tool. Select your preferred tool from the toolbar.
- Sign with Your Finger or Apple Pencil: Use your finger or an Apple Pencil to write your signature directly on the document.
- Save the Changes: Tap “Done” to save the signed document.
3.8. Tips for a Clear Signature
- Use a Stylus: For greater precision, use an Apple Pencil or a similar stylus.
- Ensure Adequate Lighting: Good lighting can help improve the clarity of your signature.
- Practice: Practice your signature a few times before applying it to the document to ensure it looks neat and accurate.
4. How To Use The Files App To Scan A Document On An iPhone?
The Files app on your iPhone provides another convenient way to scan documents. According to a survey by FinancesOnline, approximately 45% of iPhone users utilize the Files app for document management. Here’s how to use it:
4.1. Open the Files App
- Locate the App: Find the Files app on your iPhone’s home screen. It usually looks like a blue folder icon. Tap to open it.
4.2. Access the Scan Documents Feature
- Tap the More Button: In the Files app, look for the more button, which is typically represented by three dots in a circle or a “+” icon. Tap this button to reveal a menu of options.
- Select “Scan Documents”: From the menu, choose the “Scan Documents” option. This will open the iPhone’s camera interface, ready to scan.
4.3. Scan Your Document
- Position the Document: Place the document you want to scan on a flat, well-lit surface. Position your iPhone directly above the document, ensuring the entire page is visible in the camera frame.
- Automatic or Manual Scanning:
- Auto Mode: By default, the iPhone’s camera is set to Auto mode, which automatically detects the document’s edges and captures the scan. Simply hold the iPhone steady, and it will scan the document when it’s properly aligned.
- Manual Mode: If Auto mode doesn’t work well in certain lighting conditions or with oddly shaped documents, you can switch to Manual mode. Tap the shutter button (the white circle at the bottom) to manually capture the scan.
- Adjust the Scan: After capturing the scan, you may need to adjust the corners to ensure the scan accurately reflects the document’s boundaries. Drag the corner handles to align them with the edges of the document. Tap “Keep Scan” when you’re satisfied with the adjustment.
4.4. Save or Add Additional Scans
- Add More Pages: If you have multiple pages to scan, tap the shutter button again to scan the next page. Repeat the process until you’ve scanned all the necessary pages.
- Save the Document: Once you’ve scanned all pages, tap “Save” in the bottom right corner. You’ll be prompted to choose a location to save the document.
4.5. Choose a Save Location
- Select a Folder: Navigate to the folder where you want to save the scanned document. You can save it to iCloud Drive, on your iPhone, or in another cloud storage service connected to the Files app.
- Name the Document: Before saving, you can rename the document to something descriptive. Tap the file name field and enter the desired name.
- Save: Tap “Save” to save the scanned document to the selected location.
4.6. Accessing and Sharing Your Scanned Document
- Open the Files App: Return to the Files app and navigate to the folder where you saved the scanned document.
- View the Document: Tap the scanned document to view it. You can zoom in and out to inspect the details.
- Share the Document: To share the scanned document, tap the share button (usually a square with an upward arrow) in the bottom left corner. You can then choose to send the document via email, message, or save it to a cloud service like iCloud Drive, Google Drive, or Dropbox.
4.7. Tips for Best Results
- Ensure Good Lighting: Proper lighting is crucial for clear scans. Avoid shadows and glare by scanning in a well-lit area or using an external light source.
- Hold Steady: Keep your iPhone as steady as possible while scanning to prevent blurry images.
- Clean the Camera Lens: A clean camera lens ensures sharper scans. Wipe the lens with a soft, lint-free cloth before scanning.
- Adjust Perspective: If the document appears skewed, use the perspective correction feature in the scanning interface to straighten it.
- Experiment with Filters: Some scanning apps offer filters to enhance the clarity and contrast of the scanned document. Experiment with these filters to find the best settings for your needs.
5. What Are The Best Third-Party Scanning Apps For iPhones?
While the built-in Notes and Files apps offer basic scanning capabilities, several third-party apps provide more advanced features and enhanced functionality. According to a report by ResearchAndMarkets.com, the mobile scanning app market is expected to reach $3.8 billion by 2027, driven by the increasing demand for digital document management. Here are some of the best third-party scanning apps for iPhones:
5.1. Adobe Scan
- Overview: Adobe Scan is a free scanning app developed by Adobe, the creators of PDF. It offers excellent scanning quality, automatic text recognition (OCR), and seamless integration with other Adobe products.
- Key Features:
- Automatic Edge Detection: Automatically detects and crops the document edges.
- OCR Technology: Converts scanned images into editable text.
- Integration with Adobe Cloud: Saves scans directly to Adobe Document Cloud for easy access and sharing.
- Business Card Scanning: Scans and saves business card information.
- Multiple Scan Modes: Offers various scan modes, including whiteboard, form, and document.
- Pros:
- High-quality scans.
- Accurate OCR.
- Seamless integration with Adobe ecosystem.
- Free to use with no ads.
- Cons:
- Requires an Adobe account.
- Advanced features require a subscription to Adobe Acrobat.
5.2. Microsoft Lens (formerly Office Lens)
- Overview: Microsoft Lens is a free scanning app developed by Microsoft. It offers excellent scanning quality, automatic edge detection, and seamless integration with Microsoft Office apps.
- Key Features:
- Automatic Edge Detection: Automatically detects and crops the document edges.
- OCR Technology: Converts scanned images into editable text.
- Integration with Microsoft Office: Saves scans directly to OneDrive and integrates with Word, Excel, and PowerPoint.
- Whiteboard Mode: Optimizes scans of whiteboards and blackboards.
- Business Card Scanning: Scans and saves business card information.
- Pros:
- High-quality scans.
- Accurate OCR.
- Seamless integration with Microsoft Office ecosystem.
- Free to use with no ads.
- Cons:
- Requires a Microsoft account.
- Advanced features require a subscription to Microsoft 365.
5.3. CamScanner
- Overview: CamScanner is one of the most popular scanning apps, offering a wide range of features and excellent scanning quality.
- Key Features:
- Automatic Edge Detection: Automatically detects and crops the document edges.
- OCR Technology: Converts scanned images into editable text.
- Cloud Storage: Saves scans to CamScanner’s cloud storage for easy access and sharing.
- Annotation Tools: Allows you to annotate and mark up scanned documents.
- Password Protection: Protects your scanned documents with a password.
- Pros:
- High-quality scans.
- Accurate OCR.
- Wide range of features.
- Available on multiple platforms.
- Cons:
- Contains ads in the free version.
- Advanced features require a subscription.
- Concerns about data privacy in the past.
5.4. Scanbot
- Overview: Scanbot is a powerful scanning app that offers high-quality scans, automatic text recognition (OCR), and seamless integration with cloud services.
- Key Features:
- Automatic Edge Detection: Automatically detects and crops the document edges.
- OCR Technology: Converts scanned images into editable text.
- Cloud Storage: Saves scans to iCloud Drive, Google Drive, Dropbox, and other cloud services.
- Barcode Scanning: Scans barcodes and QR codes.
- Annotation Tools: Allows you to annotate and mark up scanned documents.
- Pros:
- High-quality scans.
- Accurate OCR.
- Seamless integration with cloud services.
- Fast and efficient scanning process.
- Cons:
- Some features require a subscription.
- Interface can be overwhelming for new users.
5.5. Genius Scan
- Overview: Genius Scan is a simple and efficient scanning app that offers high-quality scans and basic editing features.
- Key Features:
- Automatic Edge Detection: Automatically detects and crops the document edges.
- Perspective Correction: Corrects the perspective of skewed documents.
- Batch Scanning: Scans multiple pages in a single batch.
- PDF Creation: Creates PDF files from scanned documents.
- Email and Cloud Sharing: Shares scans via email and cloud services.
- Pros:
- Simple and easy to use.
- High-quality scans.
- Affordable price.
- Cons:
- Limited features compared to other scanning apps.
- OCR is available as a separate in-app purchase.
5.6. Comparison Table
| App | Price | OCR | Cloud Storage | Integration | Pros | Cons |
|---|---|---|---|---|---|---|
| Adobe Scan | Free/Premium | Yes | Adobe Document Cloud | Adobe Products | High-quality scans, accurate OCR, seamless Adobe integration | Requires Adobe account, advanced features require subscription |
| Microsoft Lens | Free | Yes | OneDrive | Microsoft Office | High-quality scans, accurate OCR, seamless Microsoft Office integration | Requires Microsoft account, advanced features require Microsoft 365 subscription |
| CamScanner | Free/Premium | Yes | CamScanner Cloud | Limited | High-quality scans, wide range of features, available on multiple platforms | Contains ads in free version, advanced features require subscription, privacy concerns |
| Scanbot | Free/Premium | Yes | iCloud, Google Drive, etc. | Cloud Services | High-quality scans, accurate OCR, seamless cloud integration, fast scanning | Some features require subscription, interface can be overwhelming |
| Genius Scan | Free/Paid | Yes (Add-on) | Email, Cloud Services | Basic | Simple and easy to use, high-quality scans, affordable | Limited features, OCR is a separate purchase |
5.7. Choosing the Right App
The best scanning app for you depends on your specific needs and preferences. If you need seamless integration with Adobe products, Adobe Scan is an excellent choice. If you’re a Microsoft Office user, Microsoft Lens is a great option. CamScanner offers a wide range of features, while Scanbot provides fast and efficient scanning. Genius Scan is a simple and affordable option for basic scanning needs.
6. How To Use Optical Character Recognition (OCR) On An iPhone?
Optical Character Recognition (OCR) is a technology that converts scanned images or documents into editable and searchable text. According to a report by Grand View Research, the global OCR market is expected to reach $13.54 billion by 2028, driven by the increasing need for digital document management and automation. Here’s how to use OCR on an iPhone:
6.1. Understanding OCR Technology
OCR technology works by analyzing the shapes and patterns of characters in an image and converting them into digital text. This allows you to extract information from scanned documents, making it easier to edit, search, and share.
6.2. Using OCR with Scanning Apps
Many iPhone scanning apps include built-in OCR functionality. Here’s how to use it with some of the popular apps:
- Adobe Scan:
- Scan the Document: Use Adobe Scan to scan the document you want to convert to text.
- Automatic OCR: Adobe Scan automatically performs OCR on the scanned document.
- Edit the Text: Open the scanned document in Adobe Acrobat or Adobe Scan and edit the text as needed.
- Microsoft Lens:
- Scan the Document: Use Microsoft Lens to scan the document.
- Choose Save Location: Save the document to Word.
- Automatic OCR: Microsoft Lens automatically performs OCR and opens the document in Word, where you can edit the text.
- CamScanner:
- Scan the Document: Use CamScanner to scan the document.
- Select OCR: Tap the “OCR” button.
- Choose Language: Select the language of the text in the document.
- Convert to Text: CamScanner converts the scanned image to editable text.
- Edit the Text: Edit the text as needed.
- Scanbot:
- Scan the Document: Use Scanbot to scan the document.
- Select OCR: Tap the “OCR” button.
- Convert to Text: Scanbot converts the scanned image to editable text.
- Edit the Text: Edit the text as needed.
- Genius Scan:
- Scan the Document: Use Genius Scan to scan the document.
- Purchase OCR: Purchase the OCR add-on.
- Select OCR: Tap the “OCR” button.
- Convert to Text: Genius Scan converts the scanned image to editable text.
- Edit the Text: Edit the text as needed.
6.3. Tips for Accurate OCR
- Ensure High-Quality Scans: Clear and well-lit scans are essential for accurate OCR.
- Use Proper Alignment: Make sure the document is properly aligned when scanning.
- Choose the Correct Language: Select the correct language for the OCR process.
- Edit and Correct Errors: OCR is not always perfect, so review and correct any errors in the converted text.
6.4. Third-Party OCR Apps
In addition to scanning apps with built-in OCR, you can also use dedicated OCR apps for more advanced features. Some popular OCR apps for iPhone include:
- TextGrabber: An app specifically designed for OCR, offering fast and accurate text recognition.
- ABBYY FineScanner: A powerful scanning and OCR app with advanced features and excellent accuracy.
6.5. Use Cases for OCR
- Digitizing Documents: Convert paper documents into editable digital files.
- Extracting Information: Extract text from images, receipts, and business cards.
- Creating Searchable PDFs: Make scanned documents searchable by converting them to text.
- Automating Data Entry: Automate data entry by extracting information from scanned forms.
7. What Are The Advanced Scanning Tips And Tricks For iPhones?
To maximize the scanning capabilities of your iPhone, consider these advanced tips and tricks. According to a survey by AIIM, organizations that implement advanced scanning techniques experience a 30% improvement in document processing efficiency.
7.1. Adjusting Camera Settings
- Focus and Exposure: Tap on the screen to focus on the document and adjust the exposure for optimal clarity.
- Gridlines: Enable gridlines in the camera settings to help align the document properly.
- HDR Mode: Use HDR (High Dynamic Range) mode to capture more detail in high-contrast environments.
7.2. Using External Lighting
- Natural Light: Scan documents in natural light whenever possible.
- External Light Source: Use an external light source, such as a desk lamp or flashlight, to eliminate shadows and improve clarity.
7.3. Batch Scanning
- Scan Multiple Pages: Many scanning apps allow you to scan multiple pages in a single batch.
- Automatic Sequencing: Some apps automatically sequence the scanned pages for easy organization.
7.4. Perspective Correction
- Adjust Skewed Documents: Use the perspective correction feature to fix skewed documents and ensure they appear straight.
7.5. Color and Contrast Adjustments
- Black and White Mode: Use black and white mode for text-heavy documents to improve readability.
- Contrast Enhancement: Adjust the contrast to make the text stand out more clearly.
7.6. Cloud Integration
- Automatic Upload: Set up automatic uploads to cloud services like iCloud Drive, Google Drive, or Dropbox for easy access and backup.
7.7. Annotation and Markup
- Add Notes and Highlights: Use annotation tools to add notes, highlights, and signatures to scanned documents.
7.8. File Management
- Descriptive File Names: Use descriptive file names to easily identify and organize your scanned documents.
- Folder Organization: Create folders to categorize your scanned documents by project, date, or type.
7.9. Password Protection
- Secure Sensitive Documents: Protect sensitive documents with a password to prevent unauthorized access.
7.10. Automation with Shortcuts
- Create Custom Shortcuts: Use the Shortcuts app on your iPhone to automate scanning tasks. For example, you can create a shortcut to automatically scan a document and save it to a specific folder in iCloud Drive.
8. How Does Scanning Documents On An iPhone Impact Data Security And Privacy?
Scanning documents on an iPhone raises important considerations regarding data security and privacy. According to a report by IBM, the average cost of a data breach in 2020 was $3.86 million, highlighting the importance of data security measures. Here’s how scanning documents on an iPhone can impact data security and privacy:
8.1. Storage Location
- On-Device Storage: Documents stored directly on your iPhone are generally secure, provided your device is protected with a strong passcode or biometric authentication.
- Cloud Storage: Storing scanned documents in cloud services like iCloud Drive, Google Drive, or Dropbox can provide convenient access but also introduces potential security risks. Ensure you use strong passwords and enable two-factor authentication for your cloud accounts.
8.2. App Permissions
- Camera Access: Scanning apps require access to your iPhone’s camera. Review the app’s privacy policy to understand how they use your camera data.
- Storage Access: Scanning apps also require access to your iPhone’s storage to save scanned documents. Be cautious about granting excessive permissions to apps.
8.3. Data Encryption
- On-Device Encryption: iPhones use hardware encryption to protect data stored on the device.
- Cloud Encryption: Cloud storage providers typically use encryption to protect data in transit and at rest. However, it’s essential to understand the encryption methods used and whether the provider has access to your encryption keys.
8.4. OCR and Data Processing
- Data Sent to Servers: Some OCR services send scanned images to remote servers for processing. Review the app’s privacy policy to understand how they handle your data and whether they retain copies of your documents.
- Data Retention: Be aware of how long scanning apps and OCR services retain your data. Choose apps that offer transparent data retention policies.
8.5. Third-Party Services
- Review Privacy Policies: Before using a scanning app or OCR service, carefully review their privacy policies to understand how they collect, use, and share your data.
- Choose Reputable Apps: Opt for reputable scanning apps from trusted developers with a proven track record of protecting user privacy.
8.6. Security Best Practices
- Use Strong Passwords: Use strong, unique passwords for your iPhone and cloud accounts.
- Enable Two-Factor Authentication: Enable two-factor authentication for your cloud accounts to add an extra layer of security.
- Keep Your iPhone Updated: Keep your iPhone’s operating system and apps updated to patch security vulnerabilities.
- Use a VPN: Consider using a Virtual Private Network (VPN) when scanning documents on public Wi-Fi networks to encrypt your data and protect your privacy.
8.7. Compliance with Regulations
- GDPR and CCPA: Be aware of data privacy regulations like the General Data Protection Regulation (GDPR) and the California Consumer Privacy Act (CCPA) and choose scanning apps that comply with these regulations.
8.8. Alternatives for Sensitive Documents
- Manual Transcription: For highly sensitive documents, consider manual transcription instead of OCR to minimize the risk of data exposure.
- Physical Storage: If data security is a paramount concern, consider storing sensitive documents in physical form in a secure location.
:max_bytes(150000):strip_icc()/scan-document-iphone-5c171428c9fa8e0001a6062f.png)
9. What Are The Common Problems And Solutions When Using A Scanner On An iPhone?
While scanning documents on an iPhone is generally straightforward, users may encounter some common problems. Here are some issues and their solutions. According to a study by TechRadar, approximately 30% of users experience issues with mobile scanning apps.
9.1. Poor Scan Quality
- Problem: Scans are blurry, distorted, or difficult to read.
- Solutions:
- Ensure Good Lighting: Scan documents in a well-lit area or use an external light source.
- Hold Steady: Keep your iPhone as steady as possible while scanning.
- Clean the Camera Lens: Wipe the camera lens with a soft, lint-free cloth.
- Adjust Focus and Exposure: Tap on the screen to focus and adjust the exposure.
- Use High-Resolution Mode: If available, use the high-resolution scanning mode.
9.2. Edge Detection Issues
- Problem: The scanning app fails to detect the edges of the document correctly.
- Solutions:
- Manual Adjustment: Manually adjust the corners of the scanned document to align with the edges.
- Use a Contrasting Background: Place the document on a background that contrasts with the paper color.
- Disable Auto Edge Detection: Disable auto edge detection and manually crop the document.
9.3. OCR Inaccuracy
- Problem: Optical Character Recognition (OCR) is inaccurate, resulting in errors in the converted text.
- Solutions:
- Ensure High-Quality Scans: Clear and well-lit scans are essential for accurate OCR.
- Choose the Correct Language: Select the correct language for the OCR process.
- Edit and Correct Errors: Review and correct any errors in the converted text.
- Use a Different OCR Service: Try a different OCR service or app for better accuracy.
9.4. App Crashing or Freezing
- Problem: The scanning app crashes or freezes during the scanning process.
- Solutions:
- Restart the App: Close the app completely and restart it.
- Restart Your iPhone: Restart your iPhone to free up memory and resources.
- Update the App: Make sure you have the latest version of the app installed.
- Clear App Cache: Clear the app’s cache to remove temporary files that may be causing issues.
- Reinstall the App: If the problem persists, uninstall and reinstall the app.
9.5. Storage Issues
- Problem: Your iPhone runs out of storage space when scanning large documents.
- Solutions:
- Free Up Storage Space: Delete unnecessary files, photos, and apps to free up storage space.
- Use Cloud Storage: Save scanned documents directly to cloud storage services like iCloud Drive, Google Drive, or Dropbox.
- Compress Scanned Documents: Compress scanned documents to reduce their file size.
9.6. Connectivity Issues
- Problem: The scanning app cannot connect to cloud services or perform OCR due to connectivity issues.
- Solutions:
- Check Your Internet Connection: Make sure you have a stable internet connection.
- Disable VPN: Temporarily disable your VPN to see if it’s causing connectivity issues.
- Check App Permissions: Make sure the app has the necessary permissions to access the internet.
9.7. Battery Drain
- Problem: Scanning documents drains your iPhone’s battery quickly.
- Solutions:
- Close Unnecessary Apps: Close unnecessary apps running in the background.
- Reduce Screen Brightness: Reduce the screen brightness to conserve battery power.
- Use Low Power Mode: Enable Low Power Mode to extend battery life.
- Scan with Charger Connected: Scan documents while your iPhone is connected to a charger.
9.8. Compatibility Issues
- Problem: The scanning app is not compatible with your iPhone model or iOS version.
- Solutions:
- Update Your iPhone: Update your iPhone to the latest iOS version.
- Use a Compatible App: Choose a scanning app that is compatible with your iPhone model and iOS version.
9.9. App-Specific Issues
- Problem: Issues specific to a particular scanning app