Using a code reader for a car can help you diagnose and fix automotive issues effectively. CAR-TOOL.EDU.VN provides detailed information and solutions to assist you in understanding and utilizing these tools. This comprehensive guide covers everything from connecting the reader to interpreting the codes, ensuring you save time and money on car repairs. By understanding this process, you can make informed decisions about your vehicle’s maintenance and address problems efficiently.
Contents
- 1. What is a Car Code Reader and Why Do You Need One?
- 2. Identifying the 5 Key Search Intentions When Learning to Use a Car Code Reader
- 3. Where is the OBD2 Port Located in Your Car?
- 4. Step-by-Step Guide to Connecting a Car Code Reader
- 5. Understanding the Main Menu Options on Your Car Code Reader
- 6. Decoding Diagnostic Trouble Codes (DTCs): A Comprehensive Guide
- 7. Using Live Data to Diagnose Car Problems
- 8. Using Freeze Frame Data to Aid Diagnosis
- 9. Clearing Diagnostic Trouble Codes: When and How
- 10. Choosing the Right Car Code Reader for Your Needs
- 11. Advanced Features to Look for in a Car Code Reader
- 12. Safety Precautions When Using a Car Code Reader
- 13. Common Mistakes to Avoid When Using a Car Code Reader
- 14. How to Use a Code Reader to Prepare for a Smog Check
- 15. Saving Money on Auto Repairs with a Car Code Reader: Real-World Examples
- FAQ: Frequently Asked Questions About Using Car Code Readers
1. What is a Car Code Reader and Why Do You Need One?
A car code reader, also known as an OBD2 scanner, is a diagnostic tool that allows you to access the onboard computer system of your vehicle. It retrieves diagnostic trouble codes (DTCs), which indicate potential issues within the car’s systems. According to a study by the National Institute for Automotive Service Excellence (ASE), using a code reader can significantly reduce diagnostic time and improve repair accuracy.
What exactly does an OBD2 scanner do?
An OBD2 scanner connects to your car’s On-Board Diagnostics system, specifically the OBD2 port. This port is usually found under the dashboard on the driver’s side. The scanner reads data from the car’s computer, including trouble codes, live sensor data, and freeze frame data (a snapshot of sensor values when a trouble code was triggered).
Why should you have an OBD2 scanner?
- Early Problem Detection: By identifying potential problems early, you can prevent minor issues from escalating into costly repairs.
- Informed Decision Making: Knowing the exact issue allows you to discuss repairs intelligently with mechanics and avoid unnecessary services.
- DIY Repairs: For those comfortable with auto repairs, a code reader can pinpoint the problem, enabling you to perform the repair yourself.
- Cost Savings: Regular diagnostics can save money by addressing issues promptly and preventing major breakdowns.
2. Identifying the 5 Key Search Intentions When Learning to Use a Car Code Reader
Understanding user intent is vital for providing relevant content. Here are five key search intentions people have when researching “How To Use A Code Reader For A Car”:
- Step-by-Step Instructions: Users want clear, easy-to-follow instructions on connecting and operating a code reader.
- Code Interpretation: Users need help understanding what the diagnostic trouble codes (DTCs) mean.
- Troubleshooting: Users seek guidance on how to use the code reader to diagnose specific car problems.
- Scanner Recommendations: Users look for recommendations on the best code readers for their needs and budget.
- Clearing Codes: Users want to know how to clear codes after addressing the underlying issue.
3. Where is the OBD2 Port Located in Your Car?
For practically all passenger vehicles, the OBD2 port is a 16-pin, trapezoid-shaped female connector. This connector is usually mounted beneath the dashboard on the driver’s side. In some situations, the connector may be hidden beneath the passenger side of the dash or in the center console. According to research from the Society of Automotive Engineers (SAE), this standardization ensures compatibility across different car models and makes.
How to Find Your OBD2 Port
- Check Under the Dashboard: Start by looking under the driver’s side dashboard. Use a flashlight to help you see clearly.
- Consult Your Owner’s Manual: If you can’t find the port, consult your vehicle’s owner’s manual. It should indicate the exact location.
- Check the Center Console: In some vehicles, the OBD2 port may be located inside the center console.
- Look Under the Passenger Side: As a last resort, check under the dashboard on the passenger side.
4. Step-by-Step Guide to Connecting a Car Code Reader
Connecting a code reader is straightforward. The male end of the plug only fits one way, so it’s almost foolproof. Here’s a step-by-step guide:
- Turn Off the Ignition: Make sure the car’s ignition is turned off before you begin.
- Locate the OBD2 Port: Find the OBD2 port, typically located under the dashboard on the driver’s side.
- Connect the Scanner: Match the trapezoidal shape of the code reader’s plug to the OBD2 port and gently but firmly push them together. A slight wiggle may be necessary to ensure a secure connection.
- Turn On the Ignition (Without Starting the Engine): Cycle the ignition to the “on” position without starting the engine. This provides power to the scanner.
- Wait for the Scanner to Boot Up: The OBD2 port will power up your scan tool in most cases. Wait for the device to finish its boot sequence.
Troubleshooting Connection Issues
- No Power: If the scanner doesn’t power up, check the connection to ensure it’s fully seated. Also, check the car’s fuses to rule out a blown fuse.
- Incorrect Connection: Ensure you’re matching the trapezoidal shape correctly. Forcing the connection can damage the port or scanner.
- Scanner Compatibility: Verify that the scanner is compatible with your vehicle’s make and model. Some older vehicles may require an adapter.
5. Understanding the Main Menu Options on Your Car Code Reader
After booting up your OBD2 scanner, you will encounter a menu with several options. The exact options and their arrangement can vary depending on whether you have a basic code reader or an advanced device.
Common Menu Options
- Read Codes: This selection displays the Diagnostic Trouble Codes (DTCs). It may also provide a short description of the fault. If there are multiple codes, it will scroll through them all.
- Erase Codes: This option clears the stored DTCs. The scanner typically asks for confirmation before erasing to prevent accidental code clearing. When you erase codes, the failure data stored in the computer is removed.
- Live Data: For scanners with live data monitoring, this option allows you to view real-time sensor readings to see if values are within the correct thresholds. It can also help identify sensors that aren’t switching values at all.
- Freeze Frame: This provides a snapshot of common parameters at the time a DTC was set. This information can be valuable for diagnosing intermittent issues.
- Vehicle Info: Displays data related to your vehicle’s build, such as VIN (Vehicle Identification Number) and calibration information.
- I/M Readiness: Short for Inspection and Maintenance Readiness, this section shows areas related to emissions and smog testing. It indicates whether the vehicle is ready for testing.
Navigating the Menu
Your scanner will have several buttons for navigation, even if it’s a Bluetooth or Wi-Fi OBD2 scanner controlled via smartphone.
- Arrow Buttons: Used to scroll through menu options.
- Enter Button: Selects the highlighted menu option.
- Back Button: Returns to the previous menu.
Tips for Menu Navigation
- Read the Manual: Familiarize yourself with your scanner’s manual to understand the specific functions and menu structure.
- Use the Arrow Keys: Scroll through the menu options carefully to avoid selecting the wrong function.
- Confirm Before Erasing: Always confirm your selection before erasing codes to prevent accidental data loss.
6. Decoding Diagnostic Trouble Codes (DTCs): A Comprehensive Guide
Once you select “Read Codes,” the scanner displays a code that needs deciphering. The format is always one letter followed by four numbers, such as P0301.
Understanding the Code Structure
- First Letter: Indicates the system where the fault occurred:
- P: Powertrain (engine, transmission, emissions, fuel system).
- B: Body (airbag, interior-related problems).
- C: Chassis (suspension, power steering, exterior issues).
- U: Network (network-related issues).
- Second Character: Indicates whether the code is generic or manufacturer-specific:
- 0: Generic code (applies to all manufacturers).
- 1: Manufacturer-specific code.
- Third Digit: Identifies the specific system:
- 1: Fuel and air metering.
- 2: Fuel and air metering for injector circuits.
- 3: Ignition system fault or misfire.
- 4: Auxiliary emission controls.
- 5: Vehicle speed control or idle system control fault.
- 7, 8, 9: Transmission-related codes.
- A, B, C: Hybrid-specific codes.
- Fourth and Fifth Digits: Further identify the specific fault within the system.
Example: P0301
- P: Powertrain.
- 0: Generic code.
- 3: Ignition system fault or misfire.
- 01: Cylinder #1 misfire.
This code indicates a powertrain control module code that is generic and related to the ignition system or a misfire. Specifically, it means there’s a cylinder #1 misfire.
Resources for Looking Up Codes
- Online Databases: Websites like OBD-Codes.com offer comprehensive databases for looking up DTCs.
- Repair Manuals: Your vehicle’s repair manual provides detailed explanations of DTCs specific to your car model.
- Mobile Apps: Apps like Torque Pro and OBD Auto Doctor can decode DTCs directly from your smartphone.
Tips for Accurate Code Interpretation
- Consult Multiple Sources: Cross-reference the code with multiple sources to ensure an accurate interpretation.
- Consider Symptoms: Pay attention to your vehicle’s symptoms, as they can provide additional clues about the problem.
- Check for Related Codes: Look for other related codes that may help narrow down the issue.
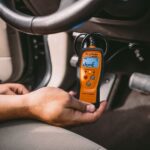
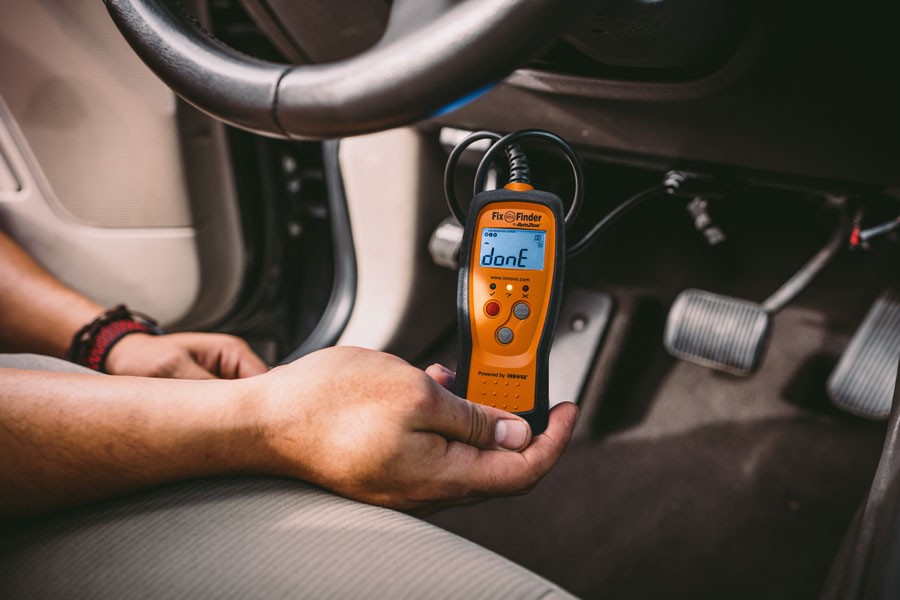 OBD-II scanner done reading trouble codes
7. Using Live Data to Diagnose Car Problems
Live data, also known as real-time data, allows you to monitor various sensor readings while the engine is running. This feature is invaluable for diagnosing intermittent issues and verifying the performance of different components.
How to Access Live Data
- Select “Live Data” from the Main Menu: Navigate to the “Live Data” option on your scanner’s main menu.
- Choose Parameters to Monitor: Select the specific parameters you want to monitor. Common parameters include:
- Engine RPM (Revolutions Per Minute).
- Engine Coolant Temperature.
- Intake Air Temperature.
- Mass Air Flow (MAF) Sensor Reading.
- Oxygen Sensor Readings.
- Fuel Trim Values.
- Throttle Position.
- View the Data: The scanner will display the real-time values for the selected parameters.
Interpreting Live Data
- Compare to Specifications: Compare the live data values to the manufacturer’s specifications. These specifications can be found in your vehicle’s repair manual or online databases.
- Look for Abnormal Readings: Identify any readings that are significantly outside the normal range.
- Monitor Sensor Behavior: Observe how the sensor values change over time. Look for erratic or unresponsive behavior.
Example: Oxygen Sensor Readings
Normal oxygen sensor readings should fluctuate between 0.1 and 0.9 volts. A sensor that is stuck at a fixed value may be faulty.
Tips for Using Live Data Effectively
- Drive the Vehicle: Monitor live data while driving to capture issues that only occur under certain conditions.
- Graph the Data: Use the scanner’s graphing function to visualize the data over time. This can help identify patterns and anomalies.
- Record the Data: Record the live data for future reference. This can be helpful when troubleshooting intermittent problems.
8. Using Freeze Frame Data to Aid Diagnosis
Freeze frame data captures a snapshot of the vehicle’s sensor values at the moment a DTC was set. This information can provide valuable clues about the conditions that led to the problem.
How to Access Freeze Frame Data
- Select “Freeze Frame” from the Main Menu: Navigate to the “Freeze Frame” option on your scanner’s main menu.
- Select the DTC: Choose the DTC for which you want to view the freeze frame data.
- View the Data: The scanner will display the sensor values recorded at the time the DTC was set.
Interpreting Freeze Frame Data
- Engine Load: Indicates how much power the engine is producing.
- Engine RPM: The engine speed at the time of the fault.
- Vehicle Speed: The speed of the vehicle.
- Coolant Temperature: The engine coolant temperature.
- Fuel Trim: Indicates how much the engine control unit (ECU) is adjusting the fuel mixture.
Example: Freeze Frame Data for P0301 (Cylinder #1 Misfire)
- Engine Load: 80%
- Engine RPM: 2500
- Vehicle Speed: 60 mph
- Coolant Temperature: 190°F
- Fuel Trim: +15%
This data suggests that the misfire occurred under high engine load at a moderate speed. The positive fuel trim indicates that the ECU was adding fuel to compensate for a lean condition, which could be related to the misfire.
Tips for Using Freeze Frame Data
- Compare to Normal Conditions: Compare the freeze frame data to the values you would expect under normal driving conditions.
- Look for Outliers: Identify any values that are significantly different from what you would expect.
- Consider the Context: Interpret the freeze frame data in the context of the DTC and the vehicle’s symptoms.
9. Clearing Diagnostic Trouble Codes: When and How
Clearing DTCs should only be done after you have properly diagnosed and repaired the underlying issue. Clearing codes without addressing the problem will only result in the codes returning.
When to Clear Codes
- After Repairing the Issue: Once you have fixed the problem that triggered the DTC, you can clear the code to reset the system.
- To Verify the Repair: Clearing the code allows you to monitor whether the issue recurs, confirming that the repair was successful.
How to Clear Codes
- Select “Erase Codes” from the Main Menu: Navigate to the “Erase Codes” option on your scanner’s main menu.
- Confirm the Action: The scanner will typically ask you to confirm that you want to erase the codes.
- Turn Off the Ignition: After clearing the codes, turn off the ignition for a few minutes to allow the ECU to reset.
Potential Issues After Clearing Codes
- Readiness Monitors: After clearing codes, the vehicle’s readiness monitors may not be set. These monitors need to complete their diagnostic cycles before the vehicle can pass an emissions test.
- Code Returns: If the underlying issue was not properly resolved, the DTC will return after a short period of driving.
Tips for Clearing Codes Safely
- Record the Codes: Before clearing any codes, record them for future reference.
- Verify the Repair: Ensure that the repair was successful before clearing the codes.
- Monitor Readiness Monitors: Check the readiness monitors to ensure they have completed their diagnostic cycles.
10. Choosing the Right Car Code Reader for Your Needs
Selecting the appropriate car code reader depends on your skill level, budget, and the types of vehicles you work on. There are basic code readers for simple diagnostics and advanced scanners with enhanced features.
Types of Code Readers
- Basic Code Readers: These entry-level devices read and clear DTCs. They are suitable for basic diagnostics and are typically inexpensive.
- Mid-Range Scanners: These scanners offer additional features such as live data, freeze frame data, and enhanced code definitions. They are a good choice for DIY mechanics and enthusiasts.
- Professional-Grade Scanners: These advanced scanners provide comprehensive diagnostic capabilities, including bidirectional control, module programming, and advanced troubleshooting features. They are designed for professional technicians and shops.
Factors to Consider
- Compatibility: Ensure that the scanner is compatible with your vehicle’s make and model.
- Features: Consider the features that are important to you, such as live data, freeze frame, and bidirectional control.
- Ease of Use: Choose a scanner that is easy to use and has a clear display.
- Price: Set a budget and choose a scanner that offers the best value for your money.
Recommended Code Readers
- Basic: Autel AutoLink AL319
- Mid-Range: BlueDriver Bluetooth Professional OBDII Scan Tool
- Professional: Snap-on Zeus
Where to Buy Code Readers
- Auto Parts Stores: AutoZone, Advance Auto Parts, and O’Reilly Auto Parts
- Online Retailers: Amazon, eBay, and specialized automotive tool websites
11. Advanced Features to Look for in a Car Code Reader
While basic code readers can read and clear DTCs, advanced scanners offer a range of features that can significantly enhance your diagnostic capabilities.
Enhanced Code Definitions
Advanced scanners provide more detailed descriptions of DTCs, which can help you pinpoint the exact cause of the problem.
Live Data Graphing
This feature allows you to visualize live data over time, making it easier to identify patterns and anomalies.
Bidirectional Control
Bidirectional control allows you to send commands to the vehicle’s modules to test components and systems. For example, you can use bidirectional control to activate the fuel pump or cycle the ABS system.
Module Programming
Some advanced scanners can program and reprogram vehicle modules, which is necessary when replacing a module or updating its software.
ABS and Airbag Diagnostics
These scanners can read and clear codes from the ABS and airbag systems, providing valuable information for diagnosing safety-related issues.
Tips for Using Advanced Features
- Read the Manual: Thoroughly read the scanner’s manual to understand how to use the advanced features.
- Practice: Experiment with the advanced features on a known good vehicle to familiarize yourself with their operation.
- Seek Training: Consider taking a training course to learn how to use advanced diagnostic techniques.
12. Safety Precautions When Using a Car Code Reader
Using a car code reader is generally safe, but it’s important to follow some safety precautions to prevent injury or damage to your vehicle.
General Safety Tips
- Read the Manual: Always read the scanner’s manual before using it.
- Work in a Well-Ventilated Area: When working on your vehicle, ensure that you are in a well-ventilated area to avoid inhaling harmful fumes.
- Wear Safety Glasses: Protect your eyes from debris and fluids by wearing safety glasses.
- Disconnect the Battery: If you are performing any repairs, disconnect the battery to prevent electrical shock.
- Use Caution When Working Around Moving Parts: Avoid working around moving parts, such as the engine fan and belts.
Specific Precautions for Code Readers
- Do Not Force Connections: Do not force the scanner’s plug into the OBD2 port. If it doesn’t fit easily, check the alignment.
- Do Not Use in Wet Conditions: Avoid using the scanner in wet conditions to prevent electrical shock.
- Do Not Clear Codes Without Addressing the Problem: Clearing codes without fixing the underlying issue can mask the problem and lead to further damage.
Emergency Procedures
- Electrical Shock: If you experience an electrical shock, disconnect the power source and seek medical attention immediately.
- Chemical Exposure: If you are exposed to harmful chemicals, flush the affected area with water and seek medical attention.
13. Common Mistakes to Avoid When Using a Car Code Reader
Using a car code reader effectively requires attention to detail and a thorough understanding of the diagnostic process. Here are some common mistakes to avoid:
Misinterpreting Codes
- Not Researching Codes Thoroughly: Always research the DTC thoroughly to understand its meaning and potential causes.
- Ignoring Vehicle Symptoms: Pay attention to your vehicle’s symptoms, as they can provide additional clues about the problem.
Clearing Codes Prematurely
- Clearing Codes Before Repairing the Issue: Clearing codes without fixing the underlying problem will only result in the codes returning.
- Not Recording Codes Before Clearing: Always record the DTCs before clearing them for future reference.
Misusing Live Data
- Not Comparing to Specifications: Compare the live data values to the manufacturer’s specifications to identify abnormal readings.
- Not Monitoring Under Different Conditions: Monitor live data while driving the vehicle under different conditions to capture intermittent issues.
Neglecting Scanner Maintenance
- Not Updating Software: Keep your scanner’s software up to date to ensure accurate code definitions and functionality.
- Not Protecting the Scanner: Store the scanner in a safe place to prevent damage.
14. How to Use a Code Reader to Prepare for a Smog Check
A car code reader can be a valuable tool for preparing your vehicle for a smog check. The I/M Readiness monitors indicate whether the vehicle’s emissions systems have completed their diagnostic cycles and are ready for testing.
Checking I/M Readiness Monitors
- Select “I/M Readiness” from the Main Menu: Navigate to the “I/M Readiness” option on your scanner’s main menu.
- View the Monitor Status: The scanner will display the status of each readiness monitor.
Interpreting the Monitor Status
- Ready: The monitor has completed its diagnostic cycle and is ready for testing.
- Not Ready: The monitor has not completed its diagnostic cycle and needs more drive time.
- Not Supported: The monitor is not supported by the vehicle.
Tips for Preparing for a Smog Check
- Complete All Repairs: Address any DTCs before attempting a smog check.
- Drive the Vehicle: Drive the vehicle for a sufficient amount of time to allow the readiness monitors to complete their diagnostic cycles.
- Check the Monitors Regularly: Check the readiness monitors regularly to ensure they are ready for testing.
15. Saving Money on Auto Repairs with a Car Code Reader: Real-World Examples
Using a car code reader can save you money in several ways. First, it can help you diagnose problems early, preventing minor issues from escalating into costly repairs. Second, it can empower you to perform DIY repairs, saving on labor costs.
Example 1: Replacing an Oxygen Sensor
A diagnostic scan shows P0138, indicating that the bank 1 sensor 2 oxygen sensor has high voltage. A new sensor is commonly required to fix it. You can keep this repair a DIY fix when you can scan the codes on your own and clear them after the new sensor is installed.
Example 2: Identifying a Loose Gas Cap
A diagnostic scan reveals a P0440 code, indicating a small evaporative leak. A common cause of this code is a loose or damaged gas cap. By tightening or replacing the gas cap, you can clear the code and avoid a costly trip to the mechanic.
Example 3: Diagnosing a Misfire
A diagnostic scan shows a P0301 code, indicating a cylinder #1 misfire. By checking the spark plug, ignition coil, and fuel injector for cylinder #1, you can identify the cause of the misfire and perform the necessary repairs.
Additional Ways to Save Money
- Avoid Unnecessary Repairs: By accurately diagnosing the problem, you can avoid unnecessary repairs and services.
- Negotiate with Mechanics: Knowing the exact issue allows you to discuss repairs intelligently with mechanics and negotiate a fair price.
FAQ: Frequently Asked Questions About Using Car Code Readers
1. Do I need a car code reader if my car seems fine?
Yes, even if your car seems fine, a code reader can help identify potential issues before they become major problems. Regular diagnostics can save you money in the long run.
2. Can a car code reader tell me exactly what part to replace?
A code reader provides diagnostic trouble codes (DTCs) that indicate potential issues. While it doesn’t always pinpoint the exact part, it narrows down the possible causes, helping you diagnose the problem more effectively.
3. Can I use a car code reader on any car?
Most car code readers are compatible with all cars manufactured after 1996, as they use the standardized OBD2 system. However, it’s always best to check the scanner’s compatibility with your specific vehicle make and model.
4. How often should I use a car code reader?
You should use a code reader whenever you notice unusual symptoms, such as a check engine light, rough idling, or decreased fuel efficiency. Regular checks, even without symptoms, can help catch minor issues early.
5. Is it safe to drive with a check engine light on?
It depends on the nature of the problem. If the check engine light is flashing, it indicates a serious issue that could cause engine damage. In this case, you should avoid driving the car and seek professional help immediately. If the light is steady, it’s generally safe to drive, but you should still diagnose the issue as soon as possible.
6. Can I use a car code reader to reset my maintenance light?
Some advanced code readers have the ability to reset maintenance lights. Check your scanner’s manual to see if this feature is supported.
7. What is the difference between a car code reader and a professional scan tool?
A car code reader is a basic tool that reads and clears DTCs. A professional scan tool offers advanced features such as live data, bidirectional control, and module programming, making it suitable for professional technicians.
8. Do I need to turn off my car before plugging in the code reader?
Yes, it’s generally recommended to turn off the ignition before plugging in the code reader to prevent any electrical issues.
9. Can I use a smartphone app instead of a dedicated code reader?
Yes, there are many smartphone apps that can be used with a Bluetooth or Wi-Fi OBD2 adapter. These apps can read and clear DTCs, display live data, and offer other features.
10. Where can I find more information about car code readers and diagnostics?
You can find more information about car code readers and diagnostics on websites like CAR-TOOL.EDU.VN, as well as in your vehicle’s repair manual and online automotive forums.
By understanding how to use a code reader for your car, you can save money, make informed decisions about repairs, and keep your vehicle running smoothly. Remember to consult reliable resources like CAR-TOOL.EDU.VN for detailed information and guidance. If you have further questions or need personalized advice, contact us at 456 Elm Street, Dallas, TX 75201, United States, Whatsapp: +1 (641) 206-8880, or visit our website at CAR-TOOL.EDU.VN. Our team is ready to assist you with all your automotive diagnostic needs.
This comprehensive guide is designed to help both beginners and experienced users understand and utilize car code readers effectively. By following these guidelines, you can ensure accurate diagnoses and cost-effective maintenance for your vehicle.