Resetting your oil pressure light typically involves a simple process of turning the ignition on without starting the engine and pressing the gas pedal a few times, but the specific procedure can vary depending on your vehicle’s make and model. At CAR-TOOL.EDU.VN, we understand the importance of maintaining optimal engine health and addressing warning lights promptly and the need of using the right auto repair tools. Understanding how to reset your oil pressure light, along with knowing when it’s necessary, can save you time and prevent potential engine damage. We’ll guide you through the reset process and highlight potential causes of low oil pressure. This article will cover oil pressure sensor reset, low oil pressure causes, and car maintenance tips.
Contents
- 1. Understanding the Oil Pressure Light
- 1.1 What Does the Oil Pressure Light Indicate?
- 1.2 Common Causes of Low Oil Pressure
- 1.3 The Importance of Addressing the Oil Pressure Light
- 2. Step-by-Step Guide on How to Reset the Oil Pressure Light
- 2.1 Resetting After an Oil Change
- 2.2 Resetting with the Trip Reset Button
- 2.3 Using a Scan Tool for Resetting
- 2.4 Specific Procedures for Different Car Brands
- 3. When to Reset vs. When to Seek Professional Help
- 3.1 Scenarios Where Resetting is Appropriate
- 3.2 When Professional Help is Necessary
- 3.3 Potential Problems if You Ignore the Warning Light
- 3.4 Finding a Trusted Mechanic
- 4. Understanding Oil Pressure Sensors
- 4.1 How Oil Pressure Sensors Work
- 4.2 Types of Oil Pressure Sensors
- 4.3 Common Problems with Oil Pressure Sensors
- 4.4 Testing an Oil Pressure Sensor
- 4.5 Replacing an Oil Pressure Sensor
- 5. The Role of Oil and Oil Filters
- 5.1 The Importance of Oil
- 5.2 Types of Oil
- 5.3 The Role of Oil Filters
- 5.4 Types of Oil Filters
- 5.5 How Often to Change Oil and Filter
- 5.6 Choosing the Right Oil and Filter
- 6. Maintaining Optimal Oil Pressure
- 6.1 Regular Oil Checks
- 6.2 Proper Oil Change Intervals
- 6.3 Using Quality Oil and Filters
- 6.4 Monitoring Engine Health
- 6.5 Addressing Leaks Promptly
- 6.6 Avoiding Extreme Driving Conditions
- 7. Advanced Diagnostic Tools for Oil Pressure Issues
- 7.1 Using an Oil Pressure Gauge
- 7.2 Interpreting Oil Pressure Readings
- 7.3 Using a Diagnostic Scan Tool
- 7.4 Analyzing Diagnostic Codes
- 7.5 Performing a Cylinder Leak-Down Test
- 8. Preventive Maintenance Tips for Engine Longevity
- 8.1 Following the Manufacturer’s Recommendations
- 8.2 Regular Fluid Checks
- 8.3 Inspecting Belts and Hoses
- 8.4 Maintaining a Clean Air Filter
- 8.5 Proper Tire Maintenance
- 8.6 Addressing Minor Issues Promptly
- 9. CAR-TOOL.EDU.VN: Your Partner in Auto Repair and Maintenance
- 9.1 Wide Range of Auto Repair Tools
- 9.2 High-Quality Products
- 9.3 Expert Advice and Support
- 9.4 Informative Articles and Guides
- 9.5 Convenient Online Shopping
- 9.6 Contact Us Today
- 10. FAQs About Resetting the Oil Pressure Light
- 10.1 What Does the Oil Pressure Light Indicate?
- 10.2 Can I Drive with the Oil Pressure Light On?
- 10.3 How Do I Check My Oil Level?
- 10.4 How Often Should I Change My Oil?
- 10.5 What Type of Oil Should I Use?
- 10.6 What Are the Symptoms of Low Oil Pressure?
- 10.7 How Do I Reset the Oil Pressure Light After an Oil Change?
- 10.8 What Are Common Causes of Low Oil Pressure?
- 10.9 Can a Faulty Oil Pressure Sensor Cause the Light to Come On?
- 10.10 When Should I Seek Professional Help for Oil Pressure Issues?
1. Understanding the Oil Pressure Light
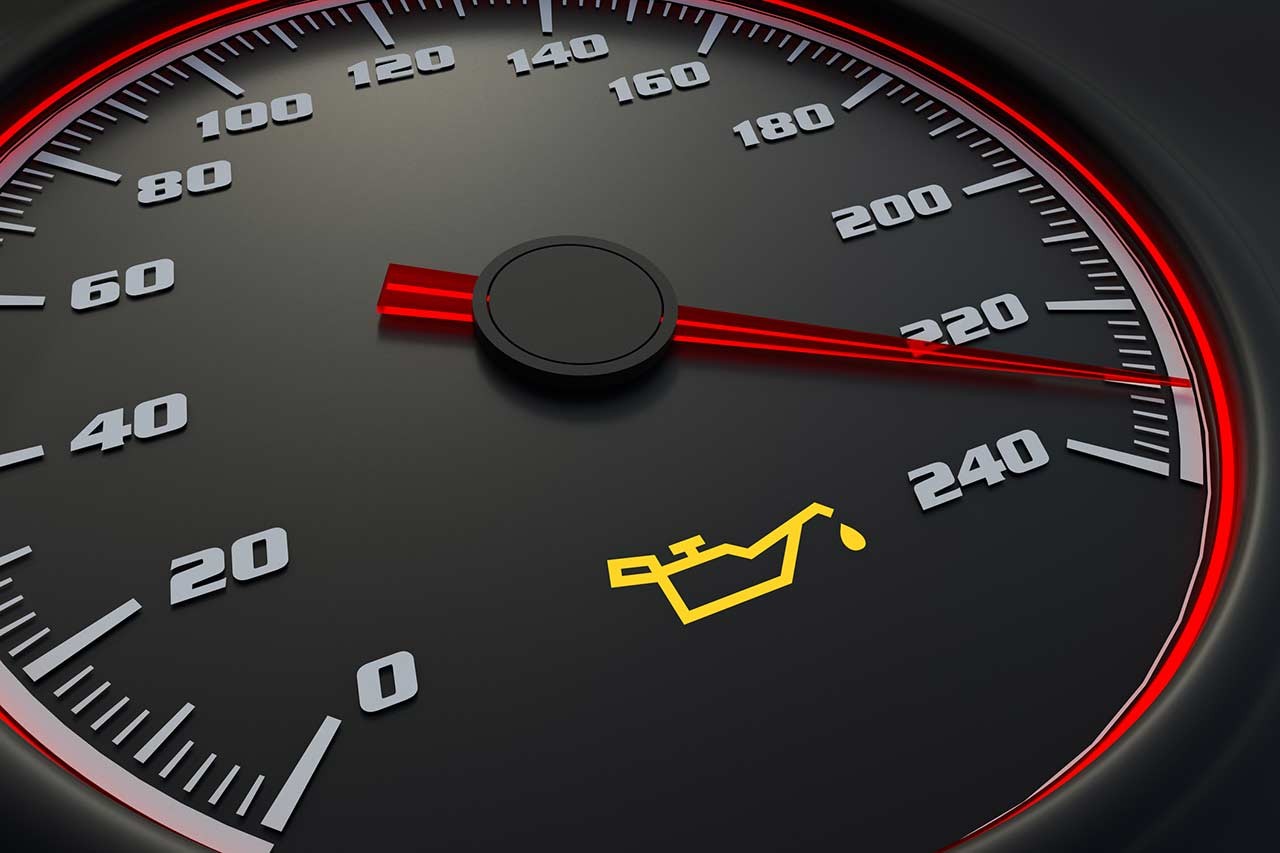
The oil pressure light in your vehicle serves as a critical indicator of your engine’s health, alerting you to potential issues with the lubrication system. Understanding its function and what triggers it is crucial for proper vehicle maintenance.
1.1 What Does the Oil Pressure Light Indicate?
The oil pressure light is designed to warn you when the oil pressure in your engine drops below a safe level. According to a study by the American Automobile Association (AAA), low oil pressure can lead to significant engine damage if not addressed promptly. The light indicates that oil isn’t circulating properly, which can result in increased friction and wear on engine components.
1.2 Common Causes of Low Oil Pressure
Several factors can cause low oil pressure, including:
- Low Oil Level: Insufficient oil in the engine is a primary cause. Regular checks and top-ups are essential.
- Old or Degraded Oil: Over time, oil loses its viscosity and ability to lubricate effectively.
- Clogged Oil Filter: A blocked filter restricts oil flow, reducing pressure.
- Faulty Oil Pump: If the oil pump fails, it cannot circulate oil properly.
- Oil Leaks: Leaks can lead to a rapid decrease in oil levels and pressure.
1.3 The Importance of Addressing the Oil Pressure Light
Ignoring the oil pressure light can lead to severe engine damage, potentially resulting in costly repairs or even engine failure. Research from the National Institute for Automotive Service Excellence (ASE) highlights that addressing oil pressure issues promptly can prevent long-term damage. Regular maintenance, including oil changes and inspections, is vital for maintaining optimal engine health.
 Engine oil pressure sensor
2. Step-by-Step Guide on How to Reset the Oil Pressure Light
Resetting the oil pressure light can be a straightforward process, but it’s essential to follow the correct steps to ensure accuracy and prevent further issues. This guide provides detailed instructions for resetting the light in various scenarios.
2.1 Resetting After an Oil Change
After an oil change, the oil pressure light may remain on until the system is reset. Here’s how to do it:
- Step 1: Turn the Ignition On: Insert the key into the ignition and turn it to the “on” position without starting the engine.
- Step 2: Depress the Gas Pedal: Slowly press the gas pedal three times in a row within 10 seconds. This action should reset the system.
- Step 3: Verify the Reset: Turn the ignition off and then on again to confirm the reset.
2.2 Resetting with the Trip Reset Button
Some vehicles allow you to reset the oil life system using the trip reset button. Here’s how:
- Step 1: Access the Oil Life Display: Use the trip reset button on your dashboard to navigate to the oil life display. This display typically shows the remaining oil life as a percentage.
- Step 2: Reset the System: Press and hold the trip reset button until the oil life display resets to 100%. This may take a few seconds.
- Step 3: Verify the Reset: Turn the ignition off and then on again to ensure the system has been properly reset.
2.3 Using a Scan Tool for Resetting
For more advanced vehicles, you may need to use a scan tool to reset the oil pressure light. Here’s the process:
- Step 1: Connect the Scan Tool: Plug the scan tool into the OBD-II port, usually located under the dashboard.
- Step 2: Navigate to the Reset Menu: Turn on the ignition and navigate through the scan tool menu to find the “Oil Life Reset” or “Service Reset” option.
- Step 3: Follow the On-Screen Prompts: Follow the on-screen prompts to reset the oil life system. This may involve confirming the reset and waiting for the system to complete the process.
- Step 4: Verify the Reset: Turn the ignition off and then on again to ensure the light has been successfully reset.
2.4 Specific Procedures for Different Car Brands
The reset procedure can vary by car brand. Here are some common methods for popular brands:
- Honda: Turn the ignition on, navigate to the “Maintenance” menu using the steering wheel controls, and select “Reset.”
- Toyota: Turn the ignition on, use the trip reset button to navigate to the oil life display, and hold the button until the system resets.
- Ford: Turn the ignition on, navigate to the “Settings” menu, select “Vehicle,” then “Oil Life Reset,” and follow the prompts.
- Chevrolet: Use the infotainment system to access the “Oil Life” menu and select “Reset.”
According to a study by J.D. Power, following the specific procedures for your car brand ensures the reset is performed correctly, preventing potential issues.
3. When to Reset vs. When to Seek Professional Help
Knowing when to reset the oil pressure light yourself and when to seek professional help is crucial for maintaining your vehicle’s health. Misdiagnosing the issue can lead to serious engine damage.
3.1 Scenarios Where Resetting is Appropriate
Resetting the oil pressure light is appropriate in the following situations:
- After an Oil Change: When you’ve just had your oil changed and the light remains on.
- After Topping Off Oil: If the oil level was low and you’ve added oil to the correct level.
- After Minor Maintenance: Following minor maintenance tasks that may have triggered the light.
3.2 When Professional Help is Necessary
Seek professional help if:
- The Light Stays On After Resetting: If the oil pressure light remains on even after resetting, there may be a more serious underlying issue.
- Unusual Engine Noises: Any unusual noises, such as knocking or ticking, accompanied by the oil pressure light.
- Visible Oil Leaks: If you notice visible oil leaks under your car or around the engine.
- Low Oil Pressure Symptoms: Experiencing symptoms like decreased engine performance or overheating.
3.3 Potential Problems if You Ignore the Warning Light
Ignoring the oil pressure light can lead to severe engine damage. According to research from the University of Michigan Transportation Research Institute, driving with low oil pressure can cause:
- Increased Friction: Insufficient lubrication leads to increased friction between engine components.
- Overheating: Increased friction generates excessive heat, potentially causing the engine to overheat.
- Engine Seizure: In extreme cases, the engine can seize due to lack of lubrication, resulting in complete engine failure.
3.4 Finding a Trusted Mechanic
Finding a trusted mechanic is essential for addressing oil pressure issues. Here are some tips:
- Ask for Recommendations: Seek recommendations from friends, family, or online reviews.
- Check for ASE Certification: Ensure the mechanic is certified by the National Institute for Automotive Service Excellence (ASE).
- Get a Written Estimate: Obtain a written estimate before any work is performed.
- Inquire About Warranty: Ask about the warranty on parts and labor.
Remember, addressing oil pressure issues promptly and properly can save you from costly repairs and ensure your vehicle’s longevity.
4. Understanding Oil Pressure Sensors
Oil pressure sensors are vital components of your vehicle’s engine, responsible for monitoring and reporting the oil pressure. Understanding how they work, their types, and common issues can help you maintain your vehicle’s health.
4.1 How Oil Pressure Sensors Work
Oil pressure sensors monitor the oil pressure in your engine and send a signal to the vehicle’s computer system. According to a study by the Society of Automotive Engineers (SAE), these sensors typically use a diaphragm or a pressure-sensitive element that changes resistance based on the oil pressure. This change in resistance is then converted into an electrical signal that the computer interprets.
4.2 Types of Oil Pressure Sensors
There are two main types of oil pressure sensors:
- Oil Pressure Switch: This type of sensor is a simple on/off switch that activates a warning light when the oil pressure drops below a certain level.
- Variable Resistance Sensor: This type of sensor provides a more precise measurement of oil pressure, sending a variable signal to the computer system.
4.3 Common Problems with Oil Pressure Sensors
Oil pressure sensors can develop several problems, including:
- Sensor Failure: The sensor may fail due to age, wear, or electrical issues.
- Oil Leaks: The sensor may leak oil, leading to inaccurate readings or a loss of oil pressure.
- Clogging: Debris or sludge can clog the sensor, preventing it from accurately measuring oil pressure.
- Wiring Issues: Damaged or corroded wiring can interfere with the sensor’s signal.
4.4 Testing an Oil Pressure Sensor
Testing an oil pressure sensor involves checking the sensor’s resistance and voltage. Here’s how:
- Step 1: Locate the Sensor: Find the oil pressure sensor, typically located near the oil filter or oil pump.
- Step 2: Disconnect the Wiring: Disconnect the wiring harness from the sensor.
- Step 3: Check Resistance: Use a multimeter to check the sensor’s resistance. The resistance should fall within the manufacturer’s specifications.
- Step 4: Check Voltage: With the engine running, use a multimeter to check the sensor’s voltage. The voltage should vary with the oil pressure.
According to research from the National Automotive Technicians Education Foundation (NATEF), proper testing of the oil pressure sensor ensures accurate diagnosis and prevents unnecessary repairs.
4.5 Replacing an Oil Pressure Sensor
Replacing an oil pressure sensor is a straightforward process:
- Step 1: Gather Tools and Parts: Collect the necessary tools and a new oil pressure sensor.
- Step 2: Disconnect the Wiring: Disconnect the wiring harness from the old sensor.
- Step 3: Remove the Old Sensor: Use a wrench to remove the old sensor.
- Step 4: Install the New Sensor: Install the new sensor and tighten it to the manufacturer’s specifications.
- Step 5: Reconnect the Wiring: Reconnect the wiring harness to the new sensor.
5. The Role of Oil and Oil Filters
Oil and oil filters are crucial for maintaining the health and performance of your engine. Understanding their functions, types, and maintenance requirements can help you keep your vehicle running smoothly.
5.1 The Importance of Oil
Oil serves several vital functions in your engine:
- Lubrication: Oil lubricates the engine’s moving parts, reducing friction and wear.
- Cooling: Oil helps to dissipate heat, preventing the engine from overheating.
- Cleaning: Oil carries away dirt, debris, and contaminants, keeping the engine clean.
- Sealing: Oil helps to seal the gaps between engine components, maintaining compression.
- Protection: Oil protects engine parts from corrosion and rust.
5.2 Types of Oil
There are several types of oil available, including:
- Conventional Oil: This is the most basic type of oil, suitable for older vehicles with simple engines.
- Synthetic Blend Oil: This oil is a mixture of conventional and synthetic oils, offering better performance and protection than conventional oil.
- Full Synthetic Oil: This oil is made from synthetic base stocks and additives, providing superior performance, protection, and longevity.
- High-Mileage Oil: This oil is formulated for vehicles with over 75,000 miles, helping to reduce oil consumption and prevent leaks.
According to a study by Consumer Reports, using the correct type of oil can significantly extend the life of your engine.
5.3 The Role of Oil Filters
Oil filters remove dirt, debris, and contaminants from the oil, keeping it clean and effective. A clogged oil filter can restrict oil flow, reducing oil pressure and potentially damaging the engine.
5.4 Types of Oil Filters
There are several types of oil filters available, including:
- Spin-On Filters: These filters are the most common type, easily installed and removed with a wrench.
- Cartridge Filters: These filters are used in some newer vehicles, requiring the replacement of only the filter element.
- Bypass Filters: These filters provide additional filtration, removing even smaller particles from the oil.
5.5 How Often to Change Oil and Filter
The frequency of oil and filter changes depends on the type of oil used and the vehicle’s operating conditions. Most manufacturers recommend changing the oil and filter every 3,000 to 5,000 miles for conventional oil and every 7,500 to 10,000 miles for synthetic oil.
5.6 Choosing the Right Oil and Filter
Choosing the right oil and filter for your vehicle is essential for maintaining its performance and longevity. Consult your vehicle’s owner’s manual for specific recommendations.
6. Maintaining Optimal Oil Pressure
Maintaining optimal oil pressure is essential for the health and longevity of your engine. Proper maintenance practices can help prevent low oil pressure and ensure your engine runs smoothly.
6.1 Regular Oil Checks
Checking your oil level regularly is a simple but crucial maintenance task. Here’s how:
- Step 1: Park on a Level Surface: Park your vehicle on a level surface and turn off the engine.
- Step 2: Locate the Dipstick: Find the oil dipstick, usually marked with a yellow or orange handle.
- Step 3: Remove and Wipe the Dipstick: Remove the dipstick and wipe it clean with a cloth.
- Step 4: Reinsert the Dipstick: Reinsert the dipstick fully into the tube.
- Step 5: Check the Oil Level: Remove the dipstick again and check the oil level. It should be between the “min” and “max” marks.
6.2 Proper Oil Change Intervals
Following the recommended oil change intervals is essential for maintaining optimal oil pressure. Consult your vehicle’s owner’s manual for specific recommendations.
6.3 Using Quality Oil and Filters
Using high-quality oil and filters can help prevent oil pressure issues and extend the life of your engine. Choose oil and filters that meet or exceed the manufacturer’s specifications.
6.4 Monitoring Engine Health
Monitoring your engine’s health can help you identify potential oil pressure issues early on. Pay attention to any unusual noises, such as knocking or ticking, and check for visible oil leaks.
6.5 Addressing Leaks Promptly
Addressing oil leaks promptly can prevent low oil pressure and potential engine damage. Common sources of oil leaks include:
- Valve Cover Gaskets: These gaskets seal the valve covers to the cylinder head.
- Oil Pan Gasket: This gasket seals the oil pan to the engine block.
- Rear Main Seal: This seal prevents oil from leaking out of the rear of the engine.
- Oil Filter Housing: The oil filter housing can develop leaks over time.
6.6 Avoiding Extreme Driving Conditions
Avoiding extreme driving conditions, such as frequent stop-and-go driving or high-speed driving, can help maintain optimal oil pressure. These conditions can put extra stress on the engine and oil system.
7. Advanced Diagnostic Tools for Oil Pressure Issues
Advanced diagnostic tools can help you accurately diagnose and address oil pressure issues. These tools provide valuable data and insights into your engine’s performance.
7.1 Using an Oil Pressure Gauge
An oil pressure gauge provides a real-time measurement of your engine’s oil pressure. This tool can help you identify low oil pressure or other issues with the oil system.
- Step 1: Locate the Oil Pressure Sensor: Find the oil pressure sensor, typically located near the oil filter or oil pump.
- Step 2: Remove the Sensor: Remove the oil pressure sensor.
- Step 3: Install the Gauge: Install the oil pressure gauge in place of the sensor.
- Step 4: Start the Engine: Start the engine and observe the oil pressure reading.
7.2 Interpreting Oil Pressure Readings
Interpreting oil pressure readings requires an understanding of the manufacturer’s specifications. Consult your vehicle’s owner’s manual for specific recommendations.
7.3 Using a Diagnostic Scan Tool
A diagnostic scan tool can provide valuable data about your engine’s performance, including oil pressure readings. This tool can help you identify potential issues with the oil system.
- Step 1: Connect the Scan Tool: Plug the scan tool into the OBD-II port, typically located under the dashboard.
- Step 2: Turn on the Ignition: Turn on the ignition without starting the engine.
- Step 3: Access the Data: Use the scan tool to access the engine’s data stream, including oil pressure readings.
7.4 Analyzing Diagnostic Codes
Analyzing diagnostic codes can help you identify the cause of oil pressure issues. Common codes related to oil pressure include:
- P0520: Oil Pressure Sensor/Switch Circuit Malfunction
- P0521: Oil Pressure Sensor/Switch Range/Performance
- P0522: Oil Pressure Sensor/Switch Low Voltage
- P0523: Oil Pressure Sensor/Switch High Voltage
7.5 Performing a Cylinder Leak-Down Test
A cylinder leak-down test can help you identify internal engine issues that may be causing low oil pressure. This test involves pressurizing each cylinder and measuring the amount of air that leaks out.
8. Preventive Maintenance Tips for Engine Longevity
Preventive maintenance is key to ensuring the longevity of your engine. Regular maintenance practices can help prevent oil pressure issues and other engine problems.
8.1 Following the Manufacturer’s Recommendations
Following the manufacturer’s recommendations for maintenance is essential for ensuring the longevity of your engine. Consult your vehicle’s owner’s manual for specific recommendations.
8.2 Regular Fluid Checks
Checking your vehicle’s fluids regularly can help you identify potential issues early on. In addition to oil, check the coolant, brake fluid, power steering fluid, and transmission fluid.
8.3 Inspecting Belts and Hoses
Inspecting your vehicle’s belts and hoses can help prevent breakdowns and other engine problems. Look for signs of wear, such as cracks, fraying, or leaks.
8.4 Maintaining a Clean Air Filter
Maintaining a clean air filter can help improve engine performance and fuel economy. A clogged air filter can restrict airflow, reducing engine power and efficiency.
8.5 Proper Tire Maintenance
Proper tire maintenance can help improve fuel economy and handling. Check your tire pressure regularly and rotate your tires as recommended.
8.6 Addressing Minor Issues Promptly
Addressing minor issues promptly can prevent them from turning into major problems. Pay attention to any unusual noises, vibrations, or warning lights, and have them checked by a qualified mechanic.
9. CAR-TOOL.EDU.VN: Your Partner in Auto Repair and Maintenance
At CAR-TOOL.EDU.VN, we are committed to providing you with the highest quality auto repair tools and information to keep your vehicle running smoothly. Whether you are a professional mechanic or a DIY enthusiast, we have the tools and resources you need to tackle any auto repair or maintenance project.
9.1 Wide Range of Auto Repair Tools
We offer a wide range of auto repair tools, including:
- Diagnostic Scan Tools: These tools can help you diagnose engine problems and access valuable data.
- Oil Pressure Gauges: These gauges provide real-time measurements of your engine’s oil pressure.
- Wrenches and Sockets: We offer a variety of wrenches and sockets for various auto repair tasks.
- Specialty Tools: We also carry a range of specialty tools for specific auto repair applications.
9.2 High-Quality Products
We are committed to providing our customers with the highest quality products from trusted brands. Our products are designed to meet or exceed industry standards, ensuring durability and reliability.
9.3 Expert Advice and Support
Our team of expert technicians is available to provide you with advice and support. Whether you need help choosing the right tool or troubleshooting a problem, we are here to assist you.
9.4 Informative Articles and Guides
We offer a range of informative articles and guides to help you learn about auto repair and maintenance. Our articles cover a variety of topics, including oil pressure issues, engine maintenance, and diagnostic procedures.
9.5 Convenient Online Shopping
Our convenient online store makes it easy to find and purchase the tools you need. We offer fast shipping and easy returns, ensuring a hassle-free shopping experience.
9.6 Contact Us Today
Contact us today to learn more about our products and services. Our team is ready to assist you with all your auto repair and maintenance needs.
Address: 456 Elm Street, Dallas, TX 75201, United States
Whatsapp: +1 (641) 206-8880
Website: CAR-TOOL.EDU.VN
10. FAQs About Resetting the Oil Pressure Light
10.1 What Does the Oil Pressure Light Indicate?
The oil pressure light indicates that the oil pressure in your engine is below a safe level. This could be due to low oil level, a faulty oil pump, a clogged oil filter, or other issues.
10.2 Can I Drive with the Oil Pressure Light On?
No, you should not drive with the oil pressure light on. Driving with low oil pressure can cause severe engine damage.
10.3 How Do I Check My Oil Level?
To check your oil level, park your vehicle on a level surface, locate the dipstick, remove it, wipe it clean, reinsert it, and then remove it again to check the oil level.
10.4 How Often Should I Change My Oil?
The frequency of oil changes depends on the type of oil used and the vehicle’s operating conditions. Consult your vehicle’s owner’s manual for specific recommendations.
10.5 What Type of Oil Should I Use?
Use the type of oil recommended in your vehicle’s owner’s manual. This may be conventional oil, synthetic blend oil, or full synthetic oil.
10.6 What Are the Symptoms of Low Oil Pressure?
Symptoms of low oil pressure include the oil pressure light coming on, unusual engine noises, decreased engine performance, and overheating.
10.7 How Do I Reset the Oil Pressure Light After an Oil Change?
To reset the oil pressure light after an oil change, turn the ignition on without starting the engine, press the gas pedal three times in a row within 10 seconds, and then turn the ignition off and on again to verify the reset.
10.8 What Are Common Causes of Low Oil Pressure?
Common causes of low oil pressure include low oil level, a faulty oil pump, a clogged oil filter, oil leaks, and worn engine components.
10.9 Can a Faulty Oil Pressure Sensor Cause the Light to Come On?
Yes, a faulty oil pressure sensor can cause the light to come on even if the oil pressure is normal.
10.10 When Should I Seek Professional Help for Oil Pressure Issues?
Seek professional help if the oil pressure light stays on after resetting, you hear unusual engine noises, you see visible oil leaks, or you experience other symptoms of low oil pressure.
Maintaining your vehicle’s oil pressure is crucial for its longevity and performance. If you’re experiencing issues with your oil pressure light, it’s essential to address them promptly. For reliable tools, expert advice, and quality products, visit CAR-TOOL.EDU.VN. Don’t hesitate to reach out to us via WhatsApp at +1 (641) 206-8880 or visit our location at 456 Elm Street, Dallas, TX 75201, United States. Let CAR-TOOL.EDU.VN be your trusted partner in auto repair and maintenance, ensuring your vehicle runs smoothly for years to come.