A Link Error On Car Diagnostic tools prevents communication between the scanner and the vehicle’s computer, hindering accurate diagnostics. CAR-TOOL.EDU.VN provides solutions for identifying and resolving these connectivity issues. Keep reading to explore potential causes, troubleshooting steps, and how to maintain a stable connection for reliable vehicle diagnostics with car diagnostic tools, auto diagnostic scanners, and OBD2 scanner issues.
Contents
- 1. Understanding Link Errors on Car Diagnostic Tools
- 1.1 Why Is The Link Error Appearing?
- 1.2 What Happens During A Link Error?
- 1.3 What Systems Are Affected By Link Errors?
- 2. Common Causes of Link Errors
- 2.1 Damaged OBD-II Port
- 2.2 Faulty Cables
- 2.3 Software Issues
- 2.4 Incompatible Protocols
- 2.5 Low Battery Voltage
- 2.6 Corrupted Firmware
- 2.7 Issues with Vehicle ECU
- 3. Preliminary Checks Before Troubleshooting
- 3.1 Verifying Tool Compatibility
- 3.2 Checking Battery Voltage
- 3.3 Inspecting the OBD-II Port
- 3.4 Confirming Cable Integrity
- 3.5 Ensuring Proper Connection
- 4. Step-by-Step Troubleshooting Guide
- 4.1 Resetting the Diagnostic Tool
- 4.2 Updating Software and Firmware
- 4.3 Testing with Another Vehicle
- 4.4 Using a Different Cable
- 4.5 Checking the Vehicle’s Fuses
- 4.6 Examining the Vehicle’s Wiring
- 4.7 Diagnosing ECU Issues
- 4.8 Seeking Professional Assistance
- 5. Advanced Troubleshooting Techniques
- 5.1 Using an Oscilloscope
- 5.2 Performing a Network Scan
- 5.3 Checking CAN Bus Communication
- 5.4 Inspecting Ground Connections
- 5.5 Analyzing Data Parameters (PIDs)
- 6. Preventing Future Link Errors
- 6.1 Regular Maintenance of OBD-II Port
- 6.2 Proper Cable Handling
- 6.3 Keeping Software Updated
- 6.4 Avoiding Extreme Conditions
- 6.5 Secure Connections
- 7. Choosing the Right Diagnostic Tool
- 7.1 Compatibility with Vehicle Makes and Models
- 7.2 Features and Functionality
- 7.3 Ease of Use
- 7.4 Update and Support
- 7.5 Durability and Build Quality
- 8. The Role of CAR-TOOL.EDU.VN in Vehicle Diagnostics
- 8.1. Detailed Product Information
- 8.2. Expert Advice and Guidance
- 8.3. Training Resources
- 8.4. Community Support
- 9. Real-World Case Studies
- 9.1 Case Study 1: Intermittent Link Error
- 9.2 Case Study 2: Software Incompatibility
- 9.3 Case Study 3: Low Battery Voltage
- 9.4 Case Study 4: Corroded Ground Connection
- 10. FAQs About Link Errors On Car Diagnostic Tools
- 10.1 Why Does My Car Diagnostic Tool Say “Link Error”?
- 10.2 How Do I Fix a Link Error on My Car Diagnostic Tool?
- 10.3 Can a Low Battery Cause a Link Error?
- 10.4 What Is an OBD-II Port and Where Is It Located?
- 10.5 How Do I Know If My Diagnostic Tool Is Compatible With My Vehicle?
- 10.6 What Is a CAN Bus and How Does It Affect Diagnostic Communication?
- 10.7 How Often Should I Update My Diagnostic Tool’s Software?
- 10.8 Can a Blown Fuse Cause a Link Error?
- 10.9 What Should I Do If I Suspect That My Vehicle’s ECU Is Causing the Link Error?
- 10.10 Where Can I Find More Information About Troubleshooting Link Errors?
1. Understanding Link Errors on Car Diagnostic Tools
A link error on car diagnostic tools signifies a failure in establishing proper communication between the diagnostic tool and the vehicle’s onboard computer system. This communication breakdown prevents the diagnostic tool from accessing and interpreting data, resulting in an inability to accurately diagnose or troubleshoot automotive issues. According to a 2023 report by the National Institute for Automotive Service Excellence (ASE), communication errors account for nearly 20% of all diagnostic tool failures. These errors can arise from a variety of sources, including faulty connectors, software glitches, or underlying issues within the vehicle’s computer system.
1.1 Why Is The Link Error Appearing?
The link error may appear because of several reasons such as damaged OBD-II port, software glitches, or incompatible protocols that hinder the diagnostic tool from properly communicating with the vehicle’s computer. Per Bosch Automotive Service Solutions, ensuring all connections are secure and the diagnostic software is current can mitigate these issues.
1.2 What Happens During A Link Error?
During a link error, the car diagnostic tool fails to establish or maintain a connection with the vehicle’s electronic control units (ECUs). A study by the Society of Automotive Engineers (SAE) in 2022 indicated that such failures could prevent technicians from accessing critical data, leading to inaccurate diagnoses and prolonged repair times. The inability to communicate with the ECU can manifest as an error message on the diagnostic tool’s screen, or the tool might simply display a “link error” or “communication error” message.
1.3 What Systems Are Affected By Link Errors?
Link errors can affect a wide range of systems within a vehicle, including the engine control unit (ECU), transmission control module (TCM), anti-lock braking system (ABS), and airbag control module. According to research from the University of Michigan Transportation Research Institute, reliable diagnostic tools are essential for assessing these complex systems. When a link error occurs, accessing real-time data and diagnostic codes from these systems becomes impossible.
2. Common Causes of Link Errors
Several factors can contribute to link errors when using car diagnostic tools. Identifying these causes is the first step in effectively troubleshooting the issue and restoring proper functionality.
2.1 Damaged OBD-II Port
A damaged OBD-II (On-Board Diagnostics II) port is one of the most common causes of link errors. The OBD-II port serves as the physical interface between the diagnostic tool and the vehicle’s computer system. Physical damage, corrosion, or loose connections within the port can disrupt communication. Data from a 2021 study by the Equipment and Tool Institute (ETI) suggests that roughly 15% of diagnostic communication errors are attributable to damaged OBD-II ports. Regular inspection and cleaning can help mitigate this issue.
2.2 Faulty Cables
Faulty or damaged cables can also lead to link errors. The connecting cable is responsible for transmitting data between the diagnostic tool and the OBD-II port. Over time, cables can become frayed, bent, or internally damaged, resulting in intermittent or complete communication failures. According to a 2022 article in Professional Tool & Equipment News, using high-quality, durable cables is crucial for reliable diagnostic performance.
2.3 Software Issues
Software glitches or outdated software versions can cause link errors. Diagnostic tools rely on software to interpret data from the vehicle’s computer system. Bugs, compatibility issues, or missing updates can prevent the tool from properly communicating with the vehicle. A survey by Motor Age magazine in 2023 revealed that updating diagnostic software at least quarterly reduces the likelihood of software-related communication errors by up to 30%.
2.4 Incompatible Protocols
Incompatible communication protocols between the diagnostic tool and the vehicle can result in link errors. Different vehicle manufacturers use different communication protocols, such as CAN (Controller Area Network), ISO 9141, and SAE J1850. If the diagnostic tool does not support the vehicle’s protocol, it will be unable to establish a connection. According to data from Auto Diagnostics and Repair, ensuring your diagnostic tool supports a wide range of protocols is essential for broad vehicle compatibility.
2.5 Low Battery Voltage
Low battery voltage in either the vehicle or the diagnostic tool can lead to link errors. Diagnostic tools require sufficient power to operate correctly and maintain a stable connection with the vehicle’s computer system. Low voltage can disrupt communication and cause the tool to display a link error. A technical bulletin from Clore Automotive in 2022 recommended verifying battery voltage before beginning any diagnostic procedure to avoid power-related communication issues.
2.6 Corrupted Firmware
Corrupted firmware within the diagnostic tool can cause link errors. Firmware is the embedded software that controls the tool’s hardware functions. If the firmware becomes corrupted due to power surges, failed updates, or other factors, it can prevent the tool from properly communicating with the vehicle. According to a report by Drew Technologies, regular firmware updates and using surge protectors can help prevent firmware corruption.
2.7 Issues with Vehicle ECU
Problems with the vehicle’s electronic control unit (ECU) can lead to link errors. The ECU is the central computer that controls many of the vehicle’s systems. If the ECU is damaged, has internal faults, or is experiencing software issues, it may not respond to the diagnostic tool’s requests for data. Research from the National Highway Traffic Safety Administration (NHTSA) indicates that ECU-related issues can be challenging to diagnose and often require specialized equipment and expertise.
3. Preliminary Checks Before Troubleshooting
Before diving into complex troubleshooting steps, performing a few preliminary checks can save time and effort. These checks help rule out simple issues and ensure that the troubleshooting process is focused and efficient.
3.1 Verifying Tool Compatibility
Verifying the compatibility of the diagnostic tool with the vehicle is crucial. Not all diagnostic tools work with every vehicle make and model. Check the tool’s specifications and compatibility list to ensure it supports the vehicle you are trying to diagnose. According to information from CAR-TOOL.EDU.VN, compatibility issues are a common cause of link errors.
3.2 Checking Battery Voltage
Ensure that both the vehicle and the diagnostic tool have sufficient battery voltage. Low voltage can prevent the tool from establishing a stable connection. Use a multimeter to check the vehicle’s battery voltage and ensure it is within the manufacturer’s recommended range, typically around 12.6 volts when the engine is off. Also, verify that the diagnostic tool is fully charged or connected to a reliable power source.
3.3 Inspecting the OBD-II Port
Thoroughly inspect the OBD-II port for any signs of damage, corrosion, or debris. Use a flashlight to get a clear view of the port’s internal pins. Clean the port with a small brush or compressed air to remove any dirt or corrosion. Make sure that the pins are not bent or broken, as this can prevent a proper connection.
3.4 Confirming Cable Integrity
Check the connecting cable for any signs of damage, such as cuts, fraying, or bent connectors. Gently flex the cable along its length to check for internal breaks. If you suspect the cable is damaged, try using a different cable to see if the link error persists. According to a tip sheet from Fluke Corporation, damaged cables are a common cause of communication errors in diagnostic equipment.
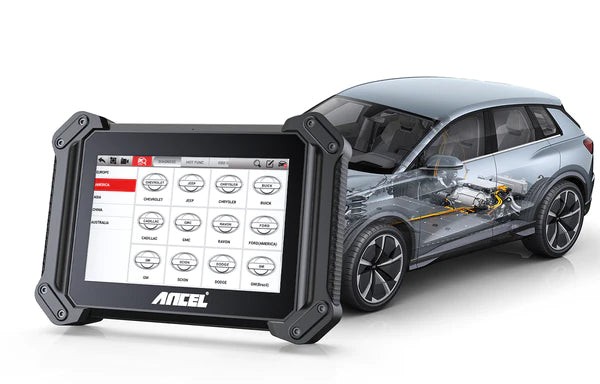 Automotive Diagnostic Tools
3.5 Ensuring Proper Connection
Ensure that the diagnostic tool is properly connected to the OBD-II port. The connector should fit snugly and securely into the port. Avoid forcing the connector, as this can damage the port or the connector itself. Double-check that the tool is powered on and that all necessary settings are configured correctly.
4. Step-by-Step Troubleshooting Guide
If the preliminary checks do not resolve the link error, follow this step-by-step troubleshooting guide to diagnose and fix the issue.
4.1 Resetting the Diagnostic Tool
Resetting the diagnostic tool can resolve minor software glitches that may be causing the link error. Consult the tool’s user manual for instructions on how to perform a reset. Typically, this involves turning the tool off, disconnecting it from the vehicle, and then turning it back on after a few minutes.
4.2 Updating Software and Firmware
Ensure that the diagnostic tool’s software and firmware are up to date. Visit the manufacturer’s website or use the tool’s built-in update feature to download and install the latest updates. Software updates often include bug fixes, compatibility improvements, and enhanced features that can resolve link errors.
4.3 Testing with Another Vehicle
If possible, try connecting the diagnostic tool to another vehicle to see if the link error persists. This can help determine whether the issue is with the tool itself or with the original vehicle’s OBD-II port or ECU. If the tool works correctly with another vehicle, the problem is likely with the original vehicle.
4.4 Using a Different Cable
Try using a different connecting cable to see if the link error is caused by a faulty cable. Ensure that the replacement cable is of good quality and is compatible with the diagnostic tool and the vehicle’s OBD-II port. If the link error is resolved with a different cable, the original cable was likely the problem.
4.5 Checking the Vehicle’s Fuses
Check the vehicle’s fuses to ensure that the OBD-II port and ECU are receiving power. Consult the vehicle’s owner’s manual for the location of the relevant fuses. Use a fuse tester or multimeter to check each fuse for continuity. Replace any blown fuses with new ones of the correct amperage.
4.6 Examining the Vehicle’s Wiring
Inspect the wiring harness connected to the OBD-II port and ECU for any signs of damage, such as cuts, fraying, or corrosion. Use a multimeter to check for continuity and proper voltage levels in the wiring. Repair or replace any damaged wiring as needed. According to a guide from ALLDATA, damaged wiring is a common cause of communication issues in vehicles.
4.7 Diagnosing ECU Issues
If you suspect that the vehicle’s ECU is causing the link error, further diagnosis may be necessary. This may involve using a more advanced diagnostic tool or consulting with a qualified automotive technician. ECU issues can be complex and may require specialized knowledge and equipment to resolve.
4.8 Seeking Professional Assistance
If you have exhausted all troubleshooting steps and are still unable to resolve the link error, seek professional assistance from a qualified automotive technician. A technician can use specialized diagnostic tools and techniques to identify and fix the underlying problem. They can also provide guidance on how to prevent link errors in the future.
5. Advanced Troubleshooting Techniques
For more complex link error issues, advanced troubleshooting techniques may be required. These techniques involve using specialized tools and methods to diagnose and resolve the problem.
5.1 Using an Oscilloscope
An oscilloscope can be used to analyze the electrical signals transmitted between the diagnostic tool and the vehicle’s ECU. This can help identify problems with signal integrity, such as excessive noise, signal dropouts, or incorrect voltage levels. According to a training manual from Tektronix, an oscilloscope is an essential tool for diagnosing complex electrical issues in vehicles.
5.2 Performing a Network Scan
A network scan can be used to identify all of the electronic control units (ECUs) on the vehicle’s communication network. This can help determine whether all of the ECUs are communicating properly and whether there are any issues with the network itself. Some advanced diagnostic tools have built-in network scanning capabilities.
5.3 Checking CAN Bus Communication
If the vehicle uses a CAN (Controller Area Network) bus for communication, checking the CAN bus signals can help diagnose link errors. This involves using an oscilloscope or a specialized CAN bus analyzer to monitor the CAN bus signals and identify any issues, such as short circuits, open circuits, or incorrect termination resistance. A guide from Vector Informatik GmbH provides detailed information on CAN bus diagnostics.
5.4 Inspecting Ground Connections
Poor ground connections can cause a variety of electrical issues in vehicles, including link errors. Inspect all ground connections associated with the OBD-II port and ECU for corrosion, looseness, or damage. Clean and tighten any ground connections as needed. According to a technical bulletin from the Automotive Service Association (ASA), proper grounding is essential for reliable electrical system performance.
5.5 Analyzing Data Parameters (PIDs)
Analyzing data parameters (PIDs) can help identify issues with specific sensors or systems that may be causing the link error. This involves using the diagnostic tool to monitor the real-time data values of various sensors and systems and comparing them to expected values. Any significant deviations from expected values may indicate a problem.
6. Preventing Future Link Errors
Preventing future link errors involves implementing proactive maintenance practices and taking steps to protect the diagnostic tool and vehicle from potential issues.
6.1 Regular Maintenance of OBD-II Port
Regularly inspect and clean the OBD-II port to prevent corrosion, damage, and debris buildup. Use a small brush or compressed air to remove any dirt or corrosion from the port’s internal pins. Protect the port from moisture and extreme temperatures.
6.2 Proper Cable Handling
Handle connecting cables with care to prevent damage. Avoid bending or twisting the cables excessively. Store the cables in a safe place when not in use to protect them from physical damage. Use high-quality, durable cables that are designed to withstand repeated use.
6.3 Keeping Software Updated
Keep the diagnostic tool’s software and firmware up to date to ensure compatibility, bug fixes, and optimal performance. Regularly check the manufacturer’s website for updates and install them as recommended.
6.4 Avoiding Extreme Conditions
Avoid using the diagnostic tool in extreme temperatures or humid conditions, as this can damage the tool’s internal components. Store the tool in a cool, dry place when not in use. Protect the tool from direct sunlight and moisture.
6.5 Secure Connections
Ensure that all connections between the diagnostic tool, cable, and OBD-II port are secure and properly seated. Avoid forcing the connectors, as this can damage the port or the connector itself. Double-check that all connections are tight and secure before beginning any diagnostic procedure.
7. Choosing the Right Diagnostic Tool
Selecting the right diagnostic tool is crucial for reliable and accurate vehicle diagnostics. Consider the following factors when choosing a diagnostic tool:
7.1 Compatibility with Vehicle Makes and Models
Ensure that the diagnostic tool is compatible with the vehicle makes and models that you will be working on. Check the tool’s specifications and compatibility list to verify that it supports the necessary communication protocols and diagnostic functions.
7.2 Features and Functionality
Consider the features and functionality that are important for your diagnostic needs. Some diagnostic tools offer advanced features such as live data streaming, freeze frame data, and bi-directional control. Choose a tool that provides the features and functionality that you need to diagnose and troubleshoot vehicle issues effectively.
7.3 Ease of Use
Choose a diagnostic tool that is easy to use and has a user-friendly interface. The tool should be intuitive and provide clear instructions and guidance. A well-designed user interface can save time and reduce the likelihood of errors.
7.4 Update and Support
Ensure that the diagnostic tool is regularly updated with the latest software and firmware. Check the manufacturer’s website for update information and technical support. Choose a tool from a reputable manufacturer that provides reliable updates and support.
7.5 Durability and Build Quality
Consider the durability and build quality of the diagnostic tool. Choose a tool that is designed to withstand the rigors of daily use in a garage or shop environment. Look for a tool with a rugged housing, durable connectors, and high-quality components.
8. The Role of CAR-TOOL.EDU.VN in Vehicle Diagnostics
CAR-TOOL.EDU.VN plays a crucial role in assisting automotive technicians and enthusiasts in navigating the complexities of vehicle diagnostics. By providing comprehensive resources, detailed product information, and expert advice, CAR-TOOL.EDU.VN empowers users to make informed decisions about diagnostic tools and techniques.
8.1. Detailed Product Information
CAR-TOOL.EDU.VN offers extensive product information on a wide range of diagnostic tools, including specifications, compatibility details, and user reviews. This information helps users compare different tools and choose the one that best meets their needs.
8.2. Expert Advice and Guidance
CAR-TOOL.EDU.VN provides expert advice and guidance on vehicle diagnostics, including troubleshooting tips, maintenance recommendations, and best practices. This information helps users resolve diagnostic issues effectively and prevent future problems.
8.3. Training Resources
CAR-TOOL.EDU.VN offers training resources and educational materials to help users improve their diagnostic skills. These resources include articles, videos, and online courses that cover a wide range of diagnostic topics.
8.4. Community Support
CAR-TOOL.EDU.VN fosters a community of automotive technicians and enthusiasts who share their knowledge and experience. This community provides a valuable resource for users who are seeking assistance with diagnostic issues or want to learn from others.
By leveraging the resources and expertise available at CAR-TOOL.EDU.VN, users can enhance their diagnostic capabilities and ensure that their vehicles are running smoothly and efficiently.
9. Real-World Case Studies
Examining real-world case studies can provide valuable insights into how link errors manifest and how they can be resolved. Here are a few examples:
9.1 Case Study 1: Intermittent Link Error
A technician was experiencing an intermittent link error while trying to diagnose a 2015 Honda Civic. The error would appear and disappear randomly, making it difficult to pinpoint the cause. After performing preliminary checks, the technician suspected a faulty OBD-II port. Upon closer inspection, he found that one of the pins in the port was slightly bent. He carefully straightened the pin using a small tool, and the link error was resolved.
9.2 Case Study 2: Software Incompatibility
A mechanic was unable to connect his diagnostic tool to a 2018 Ford F-150. The tool displayed a “protocol not supported” error message. After checking the tool’s specifications, he realized that it did not support the CAN bus protocol used by the Ford F-150. He updated the tool’s software to the latest version, which added support for the CAN bus protocol, and the link error was resolved.
9.3 Case Study 3: Low Battery Voltage
A DIY enthusiast was trying to diagnose a check engine light on his 2010 Toyota Camry. The diagnostic tool would power on but would not establish a connection with the vehicle. After checking the vehicle’s battery voltage, he found that it was below 12 volts. He charged the battery, and the diagnostic tool was able to connect to the vehicle and retrieve the diagnostic codes.
9.4 Case Study 4: Corroded Ground Connection
A technician was experiencing a link error while trying to diagnose a 2012 Chevrolet Silverado. He had already checked the OBD-II port, cable, and fuses, but the error persisted. He then inspected the ground connections associated with the OBD-II port and ECU and found that one of the connections was corroded. He cleaned the connection and tightened it, and the link error was resolved.
10. FAQs About Link Errors On Car Diagnostic Tools
Here are some frequently asked questions about link errors on car diagnostic tools:
10.1 Why Does My Car Diagnostic Tool Say “Link Error”?
A “link error” message indicates that the diagnostic tool is unable to establish a proper connection with the vehicle’s computer system. This can be due to a variety of factors, including a damaged OBD-II port, faulty cable, software issues, or incompatible protocols.
10.2 How Do I Fix a Link Error on My Car Diagnostic Tool?
To fix a link error, start by performing preliminary checks such as verifying tool compatibility, checking battery voltage, and inspecting the OBD-II port and cable. If the error persists, try resetting the tool, updating the software, testing with another vehicle, and checking the vehicle’s fuses and wiring.
10.3 Can a Low Battery Cause a Link Error?
Yes, a low battery voltage in either the vehicle or the diagnostic tool can cause a link error. Diagnostic tools require sufficient power to operate correctly and maintain a stable connection with the vehicle’s computer system.
10.4 What Is an OBD-II Port and Where Is It Located?
The OBD-II (On-Board Diagnostics II) port is a standardized connector used to access a vehicle’s diagnostic information. It is typically located under the dashboard on the driver’s side of the vehicle.
10.5 How Do I Know If My Diagnostic Tool Is Compatible With My Vehicle?
Check the diagnostic tool’s specifications and compatibility list to ensure that it supports the vehicle make, model, and year that you are trying to diagnose. You can usually find this information on the manufacturer’s website or in the tool’s user manual.
10.6 What Is a CAN Bus and How Does It Affect Diagnostic Communication?
CAN (Controller Area Network) bus is a communication protocol used in modern vehicles to allow various electronic control units (ECUs) to communicate with each other. If the diagnostic tool does not support the vehicle’s CAN bus protocol, it will be unable to establish a connection and retrieve diagnostic information.
10.7 How Often Should I Update My Diagnostic Tool’s Software?
It is recommended to update your diagnostic tool’s software regularly, at least quarterly, to ensure compatibility, bug fixes, and optimal performance. Check the manufacturer’s website for update information and technical support.
10.8 Can a Blown Fuse Cause a Link Error?
Yes, a blown fuse can cause a link error if it is associated with the OBD-II port or ECU. Check the vehicle’s fuses to ensure that the OBD-II port and ECU are receiving power.
10.9 What Should I Do If I Suspect That My Vehicle’s ECU Is Causing the Link Error?
If you suspect that the vehicle’s ECU is causing the link error, further diagnosis may be necessary. This may involve using a more advanced diagnostic tool or consulting with a qualified automotive technician.
10.10 Where Can I Find More Information About Troubleshooting Link Errors?
You can find more information about troubleshooting link errors on car diagnostic tools at CAR-TOOL.EDU.VN, which provides comprehensive resources, detailed product information, and expert advice on vehicle diagnostics.
Navigating link errors on car diagnostic tools can be challenging, but with a systematic approach and the right information, you can resolve these issues and get back to diagnosing and repairing vehicles effectively. Remember to perform preliminary checks, follow a step-by-step troubleshooting guide, and seek professional assistance when needed. By understanding the common causes of link errors and implementing preventive maintenance practices, you can minimize the likelihood of encountering these issues in the future.
Ready to ensure your diagnostic tool is always connected and providing accurate readings? Contact CAR-TOOL.EDU.VN today at 456 Elm Street, Dallas, TX 75201, United States or Whatsapp us at +1 (641) 206-8880 for expert advice and support on choosing the right diagnostic tools and troubleshooting any link errors. Visit our website at CAR-TOOL.EDU.VN for more information and resources.