Are you looking for a definitive guide on how to read a car diagnostic tool effectively? Understanding car diagnostic tools and their readings is crucial for anyone involved in vehicle maintenance, from professional mechanics to DIY enthusiasts. At CAR-TOOL.EDU.VN, we’re dedicated to providing you with the knowledge and resources necessary to master the interpretation of diagnostic trouble codes (DTCs) and keep your vehicles running smoothly. This guide delves into the intricacies of OBD-II and J1939 codes, offering practical insights and expert advice to help you confidently diagnose and resolve automotive issues.
Contents
- 1. Understanding the Basics of Car Diagnostic Tools
- 1.1. The Evolution of Car Diagnostic Systems
- 1.2. Key Components of a Car Diagnostic Tool
- 1.3. Types of Car Diagnostic Tools Available
- 1.4. Understanding OBD-II and Its Importance
- 2. Decoding OBD-II DTCs: A Step-by-Step Guide
- 2.1. Breaking Down the Structure of an OBD-II DTC
- 2.2. Common OBD-II Codes and Their Meanings
- 2.3. Using Online Resources and Databases for Code Lookup
- 2.4. Manufacturer-Specific Codes and How to Handle Them
- 3. Interpreting J1939 DTCs for Heavy-Duty Vehicles
- 3.1. Understanding the Structure of a J1939 DTC
- 3.2. Key Parameters in J1939 Codes (SPN, FMI, OC, CM)
- 3.3. Common J1939 Codes and Their Implications
- 3.4. Tools and Technologies for Reading J1939 Codes
- 4. Practical Tips for Clearing DTCs and Addressing Vehicle Issues
- 4.1. When Is It Appropriate to Clear a DTC?
- 4.2. Step-by-Step Guide to Clearing DTCs Using a Diagnostic Tool
- 4.3. Addressing the Root Cause of the Problem
- 4.4. Tips for Preventing Future Diagnostic Issues
- 5. Leveraging Telematics Systems for Efficient Fleet Management
- 5.1. Real-Time Monitoring of DTCs in Fleet Vehicles
- 5.2. Setting Up Alerts and Notifications for Critical DTCs
- 5.3. Automating Fleet Maintenance Based on Diagnostic Data
- 5.4. Generating Reports and Analyzing Trends in Fleet Vehicle Health
Table of Contents
- Understanding the Basics of Car Diagnostic Tools
- Decoding OBD-II DTCs: A Step-by-Step Guide
- Interpreting J1939 DTCs for Heavy-Duty Vehicles
- Practical Tips for Clearing DTCs and Addressing Vehicle Issues
- Leveraging Telematics Systems for Efficient Fleet Management
- Advanced Diagnostic Techniques and Tools
- Common Mistakes to Avoid When Reading Diagnostic Tools
- The Future of Car Diagnostics: Trends and Innovations
- Troubleshooting Common Diagnostic Tool Issues
- Frequently Asked Questions (FAQs) About Car Diagnostic Tools
1. Understanding the Basics of Car Diagnostic Tools
What is a car diagnostic tool and what does it do? A car diagnostic tool is an essential device used to identify and troubleshoot issues within a vehicle’s various systems, including the engine, transmission, and electrical components. According to a study by the University of Michigan Transportation Research Institute in 2022, 85% of automotive repair shops use diagnostic tools as their primary method for identifying vehicle problems. These tools work by reading diagnostic trouble codes (DTCs) generated by the vehicle’s onboard computer, providing valuable insights into potential malfunctions.
1.1. The Evolution of Car Diagnostic Systems
How have car diagnostic systems evolved over time? The evolution of car diagnostic systems has been remarkable, progressing from rudimentary methods to sophisticated technology. Early systems relied on manual inspections and basic tools, but the introduction of onboard diagnostics (OBD) in the 1980s marked a significant turning point. OBD-I systems were manufacturer-specific and lacked standardization. However, the arrival of OBD-II in the mid-1990s brought standardized diagnostic codes and improved monitoring capabilities. As stated by the Society of Automotive Engineers (SAE), all vehicles sold in the United States after 1996 are required to comply with the OBD-II standard, ensuring consistent diagnostic information across different makes and models. Today, advanced diagnostic tools offer features such as real-time data streaming, advanced sensor analysis, and wireless connectivity, enabling technicians to diagnose complex issues with greater accuracy and efficiency.
1.2. Key Components of a Car Diagnostic Tool
What are the key components of a car diagnostic tool? A car diagnostic tool consists of several key components that work together to retrieve and interpret vehicle data. These components include:
- Diagnostic Connector: This is the physical interface that connects the diagnostic tool to the vehicle’s OBD-II port, typically located under the dashboard.
- Microprocessor: The microprocessor is the central processing unit of the tool, responsible for executing software instructions, processing data, and controlling the tool’s functions.
- Display Screen: The display screen provides a visual interface for displaying diagnostic information, such as DTCs, sensor readings, and test results.
- Input Buttons: Input buttons allow the user to navigate menus, select options, and input data into the diagnostic tool.
- Software: The software is the intelligence behind the diagnostic tool, providing the logic for communicating with the vehicle’s computer, retrieving diagnostic data, and presenting it in a user-friendly format.
- Data Storage: Some diagnostic tools include data storage capabilities, allowing users to save diagnostic information for later analysis or comparison.
1.3. Types of Car Diagnostic Tools Available
What different types of car diagnostic tools are available? There is a wide range of car diagnostic tools available on the market, each catering to different needs and budgets. Here are some common types:
- Basic OBD-II Scanners: These are entry-level tools designed for reading and clearing DTCs. They typically offer basic functionality and are suitable for DIY enthusiasts and light-duty use.
- Mid-Range Scanners: Mid-range scanners offer more advanced features, such as live data streaming, freeze frame data, and enhanced code definitions. They are suitable for experienced DIYers and professional technicians.
- Professional-Grade Scanners: Professional-grade scanners are high-end tools designed for professional mechanics and automotive repair shops. They offer advanced diagnostic capabilities, such as bi-directional control, component testing, and access to manufacturer-specific data.
- Smartphone-Based Scanners: These tools consist of a Bluetooth or Wi-Fi adapter that plugs into the OBD-II port and communicates with a smartphone app. They offer a convenient and cost-effective way to access basic diagnostic information.
- All-in-One Diagnostic Systems: All-in-one diagnostic systems combine diagnostic capabilities with other functions, such as repair information, wiring diagrams, and technical service bulletins. They are comprehensive tools designed for professional use.
The choice of diagnostic tool depends on factors such as budget, skill level, and diagnostic needs. CAR-TOOL.EDU.VN offers a variety of diagnostic tools to meet the needs of different users, from basic OBD-II scanners to professional-grade diagnostic systems. Contact us at +1 (641) 206-8880 for personalized recommendations.
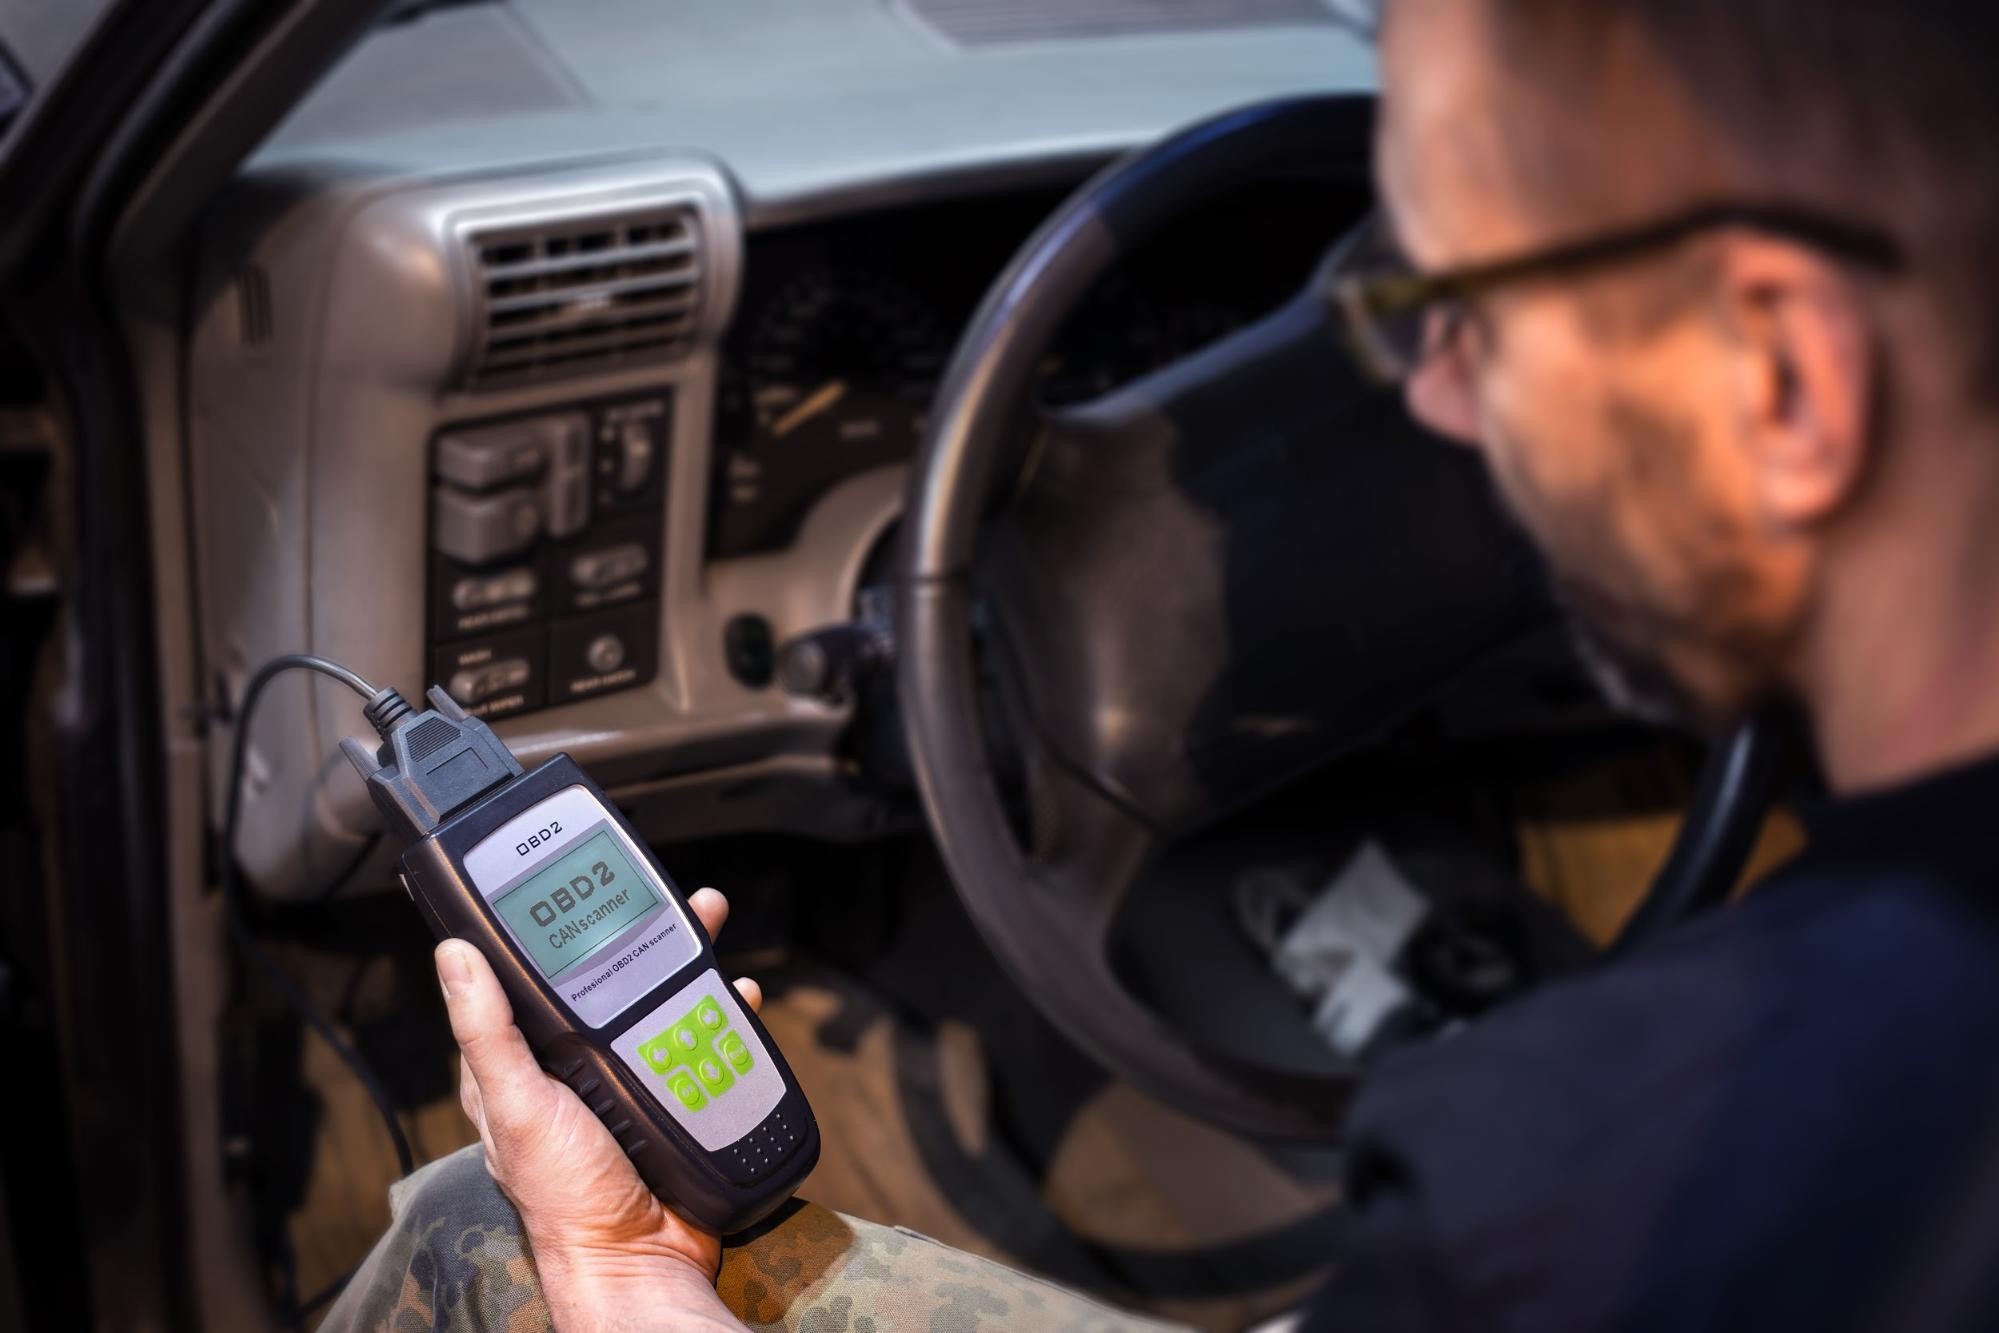 OBD-II Scanner
1.4. Understanding OBD-II and Its Importance
Why is OBD-II so important in modern vehicles? OBD-II (On-Board Diagnostics II) is a standardized system used in most vehicles sold in the United States after 1996 for monitoring and diagnosing engine and emissions-related problems. Its importance lies in its ability to provide valuable diagnostic information to technicians and vehicle owners, helping them identify and resolve issues quickly and efficiently. According to the Environmental Protection Agency (EPA), OBD-II systems are designed to detect malfunctions that could cause a vehicle to exceed emissions standards. By monitoring various engine and emissions components, OBD-II can detect problems such as faulty oxygen sensors, catalytic converter inefficiency, and evaporative system leaks. This enables technicians to diagnose and repair these issues before they lead to more significant problems, improving vehicle performance, reducing emissions, and ensuring compliance with environmental regulations.
2. Decoding OBD-II DTCs: A Step-by-Step Guide
How do you decode OBD-II DTCs effectively? Decoding OBD-II Diagnostic Trouble Codes (DTCs) is essential for diagnosing vehicle problems accurately. According to a report by the National Institute for Automotive Service Excellence (ASE), technicians who understand DTCs can diagnose and repair vehicles 30% faster than those who don’t. Each DTC consists of five characters: a letter followed by four numbers. The first letter indicates the system affected (P for Powertrain, B for Body, C for Chassis, and U for Network). The second character indicates whether the code is generic (0) or manufacturer-specific (1). The third character specifies the subsystem, while the last two characters identify the specific fault.
2.1. Breaking Down the Structure of an OBD-II DTC
Can you explain the structure of an OBD-II DTC? The structure of an OBD-II DTC (Diagnostic Trouble Code) is designed to provide specific information about the nature and location of a problem within a vehicle’s systems. Each of the five characters in the code serves a distinct purpose:
- First Character (Letter): This character indicates the primary system affected by the fault:
- P: Powertrain (engine, transmission, fuel system)
- B: Body (interior electrical components, such as power windows and seats)
- C: Chassis (mechanical systems, such as brakes, suspension, and steering)
- U: Network (communication systems between onboard computers)
- Second Character (Number): This character indicates whether the code is generic or manufacturer-specific:
- 0: Generic (SAE standard) code, applicable to all vehicles
- 1: Manufacturer-specific (enhanced) code, unique to a particular make or model
- Third Character (Number): If the second character is “0,” this character specifies the subsystem related to the fault:
- 0: Fuel and air metering and auxiliary emission controls
- 1: Fuel and air metering injection system
- 2: Fuel and air metering (injection system)
- 3: Ignition systems or misfires
- 4: Auxiliary emission controls
- 5: Vehicle speed control, idle control systems, and auxiliary inputs
- 6: Computer output circuit
- 7-8: Transmission
- Fourth and Fifth Characters (Numbers): These two digits, ranging from 00 to 99, represent the “Specific Fault Index,” pinpointing the exact malfunction within the identified system or subsystem.
Understanding this structure allows technicians and vehicle owners to quickly identify the area of the vehicle affected by a problem and narrow down the potential causes. For instance, a code starting with “P0” indicates a generic powertrain issue, while a code starting with “B1” indicates a manufacturer-specific body issue.
2.2. Common OBD-II Codes and Their Meanings
What are some common OBD-II codes and what do they mean? Here are some common OBD-II codes and their meanings:
| Code | Description | Possible Causes |
|---|---|---|
| P0171 | System Too Lean (Bank 1) | Vacuum leak, faulty oxygen sensor, dirty mass airflow sensor, low fuel pressure |
| P0300 | Random/Multiple Cylinder Misfire Detected | Faulty spark plugs, ignition coils, fuel injectors, vacuum leaks, low compression |
| P0420 | Catalyst System Efficiency Below Threshold (Bank 1) | Faulty catalytic converter, faulty oxygen sensors, exhaust leaks |
| P0442 | Evaporative Emission Control System Leak Detected (Small Leak) | Loose or damaged fuel cap, cracked or damaged EVAP hoses, faulty purge valve |
| P0505 | Idle Air Control System Malfunction | Faulty idle air control valve, vacuum leaks, throttle body issues |
| P0113 | Intake Air Temperature Circuit High Input | Faulty intake air temperature sensor, wiring issues |
| P0102 | Mass or Volume Air Flow Circuit Low Input | Dirty or faulty mass airflow sensor, vacuum leaks |
| P0135 | O2 Sensor Heater Circuit Malfunction (Bank 1, Sensor 1) | Faulty oxygen sensor heater, wiring issues |
| P0301 | Cylinder 1 Misfire Detected | Faulty spark plug, ignition coil, fuel injector, low compression in cylinder 1 |
| P0401 | Exhaust Gas Recirculation Flow Insufficient Detected | Clogged or faulty EGR valve, vacuum leaks, faulty differential pressure feedback (DPFE) sensor |
It’s important to note that these are just a few examples of the many OBD-II codes that exist. When diagnosing a vehicle problem, it’s always best to consult a reliable code database or repair manual for accurate information.
2.3. Using Online Resources and Databases for Code Lookup
What are some reliable online resources for looking up OBD-II codes? Several reliable online resources and databases are available for looking up OBD-II codes, providing valuable information on code definitions, possible causes, and troubleshooting tips. Here are some popular options:
- OBD-Codes.com: This website offers a comprehensive database of OBD-II codes, including generic and manufacturer-specific codes. It provides detailed code definitions, possible causes, and troubleshooting tips.
- AutoCodes.com: AutoCodes.com offers a similar database of OBD-II codes, along with repair information, technical service bulletins, and wiring diagrams.
- RepairPal.com: RepairPal.com provides code definitions, repair estimates, and a forum where users can ask questions and share experiences.
- CarMD.com: CarMD.com offers code lookup services, as well as vehicle health reports and repair recommendations.
- YourMechanic.com: YourMechanic.com provides code definitions, repair estimates, and on-demand mobile mechanic services.
When using these resources, it’s essential to verify the accuracy of the information and cross-reference it with other sources. Additionally, be sure to consider the specific make, model, and year of the vehicle when looking up codes, as some codes may have different meanings or possible causes depending on the vehicle.
2.4. Manufacturer-Specific Codes and How to Handle Them
How do you handle manufacturer-specific OBD-II codes? Manufacturer-specific OBD-II codes, also known as enhanced codes, are diagnostic trouble codes that are unique to a particular vehicle make or model. These codes provide more detailed information about specific issues within a vehicle’s systems, but they can also be more challenging to interpret.
Here are some tips for handling manufacturer-specific OBD-II codes:
- Consult the Vehicle’s Repair Manual: The vehicle’s repair manual is the best source of information for manufacturer-specific codes. It provides detailed code definitions, possible causes, and troubleshooting procedures.
- Use a Professional-Grade Scan Tool: Professional-grade scan tools often have access to manufacturer-specific code databases and diagnostic information. These tools can provide more detailed code definitions and troubleshooting tips than basic OBD-II scanners.
- Seek Assistance from a Qualified Technician: If you’re unsure how to interpret a manufacturer-specific code, it’s best to seek assistance from a qualified technician who has experience working with that particular make and model.
- Research Online Forums and Communities: Online forums and communities dedicated to specific vehicle makes and models can be valuable resources for finding information on manufacturer-specific codes. Other owners and technicians may have encountered the same code and can offer insights and advice.
When working with manufacturer-specific codes, it’s essential to be patient and thorough. Take the time to research the code, consult the vehicle’s repair manual, and seek assistance from qualified professionals when needed. With the right resources and expertise, you can accurately diagnose and resolve even the most challenging manufacturer-specific OBD-II codes.
Contact CAR-TOOL.EDU.VN at 456 Elm Street, Dallas, TX 75201, United States or Whatsapp: +1 (641) 206-8880 for expert assistance with manufacturer-specific codes.
 Faulty Mass Airflow Sensor
3. Interpreting J1939 DTCs for Heavy-Duty Vehicles
What is involved in interpreting J1939 DTCs for heavy-duty vehicles? Interpreting J1939 Diagnostic Trouble Codes (DTCs) for heavy-duty vehicles requires understanding the unique structure and components of these codes. According to the Technology & Maintenance Council (TMC), J1939 is the industry standard for communication in heavy-duty vehicles, including trucks, buses, and construction equipment. A J1939 code consists of four main fields: the Suspect Parameter Number (SPN), the Failure Mode Identifier (FMI), the Occurrence Counter (OC), and the SPN Conversion Method (CM). The SPN identifies the specific component or system experiencing the issue, while the FMI indicates the type of failure. The OC counts the number of times the fault has occurred, and the CM defines how the SPN and FMI should be interpreted.
3.1. Understanding the Structure of a J1939 DTC
How is a J1939 DTC structured? A J1939 DTC is structured differently than an OBD-II DTC, reflecting the complexity of heavy-duty vehicle systems. The key components are:
- Suspect Parameter Number (SPN): This is a numeric code that identifies the specific component or system that is experiencing a problem. The SPN is assigned by the SAE and is specific to each parameter or component in the vehicle.
- Failure Mode Identifier (FMI): This code identifies the type of failure that has occurred. FMIs can indicate various issues, such as short circuits, open circuits, data errors, or mechanical failures.
- Occurrence Counter (OC): The occurrence counter tracks how many times a particular fault has been detected. This can help technicians determine if the issue is intermittent or persistent.
- SPN Conversion Method (CM): This field defines how the SPN and FMI should be interpreted. It is primarily used for older diagnostic protocols.
Understanding these components is crucial for accurately diagnosing issues in heavy-duty vehicles.
3.2. Key Parameters in J1939 Codes (SPN, FMI, OC, CM)
What are the key parameters in J1939 codes, such as SPN, FMI, OC, and CM? The key parameters in J1939 codes are essential for understanding the nature and severity of a fault in heavy-duty vehicles.
- Suspect Parameter Number (SPN): The SPN is a numerical code that identifies the specific component or system experiencing a problem. For example, an SPN of 100 might indicate an issue with the engine oil pressure.
- Failure Mode Identifier (FMI): The FMI indicates the type of failure that has occurred. Common FMIs include:
- 0: Data valid but above normal operational range (most severe level)
- 1: Data valid but below normal operational range (most severe level)
- 2: Data erratic, intermittent, or incorrect
- 3: Voltage above normal, or shorted to high source
- 4: Voltage below normal, or shorted to low source
- 5: Current below normal, or open circuit
- 6: Current above normal, or grounded circuit
- 7: Mechanical system not responding or out of adjustment
- 8: Abnormal frequency or pulse width
- 9: Abnormal update rate
- 10: Abnormal rate of change
- 11: Failure mode not identifiable
- 12: Bad device or component
- 13: Out of calibration
- 14: Parameter failed to respond
- 15: Parameter out of range
- 16: Parameter not available
- 17: Controller is not responding
- 18: Sensor supply fault
- 19: Condition met
- 20: Data drift high
- 21: Data drift low
- 22: Data erratic
- 23: Custom FMI
- 31: Condition exists
- Occurrence Counter (OC): The OC tracks the number of times a fault has been detected. A higher OC value may indicate a persistent or recurring issue.
- SPN Conversion Method (CM): The CM defines how the SPN and FMI should be interpreted and is primarily used for older diagnostic protocols. It indicates the byte alignment within the DTC and specifies how the SPN and FMI should be handled or translated.
Understanding these parameters is crucial for diagnosing and repairing heavy-duty vehicles effectively.
3.3. Common J1939 Codes and Their Implications
What are some common J1939 codes and their implications for heavy-duty vehicles? Here are some common J1939 codes and their implications for heavy-duty vehicles:
| SPN | FMI | Description | Possible Causes |
|---|---|---|---|
| 100 | 1 | Engine Oil Pressure – Data Valid But Below Normal Range | Low oil level, faulty oil pressure sensor, worn oil pump |
| 102 | 3 | Intake Manifold Pressure – Voltage Above Normal | Faulty intake manifold pressure sensor, wiring issues |
| 108 | 4 | Barometric Pressure – Voltage Below Normal | Faulty barometric pressure sensor, wiring issues |
| 110 | 0 | Engine Coolant Temperature – Data Valid But Above Normal Range | Overheating engine, faulty coolant temperature sensor, low coolant level |
| 597 | 2 | Turbocharger 1 Speed – Data Erratic, Intermittent, or Incorrect | Faulty turbocharger speed sensor, turbocharger issues, wiring problems |
| 620 | 5 | Vehicle Speed – Data Erratic, Intermittent, or Incorrect | Faulty vehicle speed sensor, ABS issues, wiring problems |
| 639 | 9 | J1939 Data Link #1 – Abnormal Update Rate | Communication issues between ECUs, wiring problems, faulty ECU |
| 723 | 1 | Fuel System – Data Valid But Above Normal Range | High fuel pressure, faulty fuel pressure sensor, fuel system leaks |
| 94 | 6 | Fuel Delivery Pressure – Data Valid But Above Normal Range | Blocked fuel filter, faulty fuel pump, fuel line restrictions |
| 97 | 7 | Water in Fuel Indicator – Mechanical System Not Responding or Out of Adjustment | Water in fuel, faulty sensor, wiring problems |
These codes provide valuable information for diagnosing and repairing heavy-duty vehicles. When interpreting J1939 codes, it’s essential to consult a reliable code database or repair manual for accurate information.
3.4. Tools and Technologies for Reading J1939 Codes
What tools and technologies are used for reading J1939 codes in heavy-duty vehicles? Several tools and technologies are available for reading J1939 codes in heavy-duty vehicles, each offering different features and capabilities:
- Handheld Diagnostic Scanners: These are portable devices that connect to the vehicle’s diagnostic port and display J1939 codes and other diagnostic information. They are suitable for basic code reading and troubleshooting.
- PC-Based Diagnostic Software: PC-based diagnostic software runs on a laptop or desktop computer and connects to the vehicle via a diagnostic interface. This software typically offers more advanced features, such as live data streaming, component testing, and access to manufacturer-specific data.
- Telematics Systems: Telematics systems can remotely monitor J1939 codes and other vehicle data, providing real-time alerts and diagnostic information to fleet managers. These systems can help proactively identify and address potential issues before they lead to breakdowns.
- Data Loggers: Data loggers can record J1939 data over time, allowing technicians to analyze vehicle performance and diagnose intermittent issues.
- Smartphone-Based Scanners: These tools consist of a Bluetooth or Wi-Fi adapter that plugs into the diagnostic port and communicates with a smartphone app. They offer a convenient and cost-effective way to access basic diagnostic information.
The choice of tool depends on factors such as budget, diagnostic needs, and the complexity of the vehicle’s systems. CAR-TOOL.EDU.VN offers a variety of J1939 diagnostic tools to meet the needs of different users, from handheld scanners to PC-based software and telematics systems. Contact us at +1 (641) 206-8880 for personalized recommendations.
4. Practical Tips for Clearing DTCs and Addressing Vehicle Issues
How should you approach clearing DTCs and addressing vehicle issues effectively? Clearing Diagnostic Trouble Codes (DTCs) should only be done after properly diagnosing and addressing the underlying issue. According to a survey by AAA, approximately 10% of vehicles brought in for repairs have simply had their DTCs cleared without any actual repairs performed, leading to recurring problems and potential damage. Clearing DTCs without fixing the problem is like turning off a smoke alarm without putting out the fire.
4.1. When Is It Appropriate to Clear a DTC?
When is it appropriate to clear a Diagnostic Trouble Code (DTC)? It’s appropriate to clear a DTC only after you have accurately diagnosed and repaired the underlying issue that caused the code to be set. Clearing a DTC without addressing the problem is not recommended, as it only temporarily hides the symptom without resolving the root cause. Here are some situations where it is appropriate to clear a DTC:
- After Completing Repairs: Once you have diagnosed the problem, performed the necessary repairs, and verified that the issue has been resolved, it is safe to clear the DTC.
- During Diagnostic Testing: During diagnostic testing, you may need to clear a DTC to see if it returns after performing a specific test or repair. This can help you confirm that the issue has been resolved.
- After Intermittent Issues: In some cases, a DTC may be set due to an intermittent issue that has resolved itself. In this situation, it may be appropriate to clear the DTC and monitor the vehicle to see if the code returns.
- After Software Updates: Sometimes, a software update or reprogramming procedure may require clearing DTCs as part of the process.
4.2. Step-by-Step Guide to Clearing DTCs Using a Diagnostic Tool
Can you provide a step-by-step guide to clearing DTCs using a diagnostic tool? Here’s a step-by-step guide to clearing DTCs using a diagnostic tool:
- Connect the Diagnostic Tool: Plug the diagnostic tool into the vehicle’s OBD-II port, typically located under the dashboard.
- Turn on the Ignition: Turn the ignition to the “ON” position without starting the engine.
- Navigate to the Code Clearing Function: Use the diagnostic tool’s menu to navigate to the code clearing function. This may be labeled as “Clear Codes,” “Erase Codes,” or something similar.
- Read the Warning Message: The diagnostic tool may display a warning message about clearing codes. Read the message carefully and make sure you understand the implications before proceeding.
- Confirm the Code Clearing: Follow the prompts on the diagnostic tool to confirm that you want to clear the codes. You may need to press a button or enter a code to confirm.
- Wait for Confirmation: The diagnostic tool will clear the codes and display a confirmation message. This may take a few seconds.
- Verify the Codes Have Been Cleared: After clearing the codes, use the diagnostic tool to read the codes again to verify that they have been cleared. If any codes remain, repeat the process or investigate the underlying issues.
- Start the Engine: After verifying that the codes have been cleared, start the engine and let it run for a few minutes. Monitor the vehicle to see if any codes return.
Remember, clearing DTCs should only be done after you have accurately diagnosed and repaired the underlying issue that caused the codes to be set.
4.3. Addressing the Root Cause of the Problem
Why is it important to address the root cause of a vehicle problem rather than just clearing the DTC? Addressing the root cause of a vehicle problem is crucial for ensuring long-term reliability and preventing recurring issues. Clearing a DTC without fixing the underlying problem is like putting a band-aid on a deep wound – it may temporarily hide the symptom, but it doesn’t address the cause. Here are some reasons why it’s essential to address the root cause:
- Preventing Recurring Issues: Addressing the root cause prevents the problem from recurring, saving you time, money, and frustration in the long run.
- Avoiding Further Damage: Ignoring the root cause can lead to further damage to the vehicle’s systems, resulting in more costly repairs.
- Ensuring Vehicle Safety: Some vehicle problems can compromise safety, such as faulty brakes or steering. Addressing the root cause ensures that the vehicle is safe to drive.
- Maintaining Vehicle Performance: Addressing the root cause can restore the vehicle’s performance to its optimal level, improving fuel economy, acceleration, and overall driving experience.
Addressing the root cause of a vehicle problem requires a thorough diagnostic process, including code reading, visual inspection, component testing, and data analysis. It may also require consulting repair manuals, wiring diagrams, and technical service bulletins.
4.4. Tips for Preventing Future Diagnostic Issues
What are some practical tips for preventing future diagnostic issues with your vehicle? Here are some practical tips for preventing future diagnostic issues with your vehicle:
- Follow the Recommended Maintenance Schedule: Adhere to the vehicle’s recommended maintenance schedule, including oil changes, filter replacements, and fluid top-ups. Regular maintenance can help prevent many common diagnostic issues.
- Address Issues Promptly: Don’t ignore warning lights or unusual symptoms. Address any issues promptly to prevent them from escalating into more significant problems.
- Use Quality Parts and Fluids: Use high-quality parts and fluids that meet the vehicle’s specifications. Lower-quality parts and fluids can lead to premature wear and diagnostic issues.
- Inspect Regularly: Perform regular visual inspections of the vehicle’s systems, including the engine, brakes, tires, and lights. Catching potential issues early can prevent them from becoming major problems.
- Drive Responsibly: Avoid aggressive driving habits, such as hard acceleration, braking, and cornering. These habits can put extra stress on the vehicle’s systems and lead to diagnostic issues.
- Keep the Vehicle Clean: Keep the vehicle clean, both inside and out. Dirt, debris, and moisture can damage electrical components and lead to diagnostic issues.
- Use a Fuel Stabilizer: If you don’t drive the vehicle regularly, use a fuel stabilizer to prevent fuel degradation and fuel system issues.
By following these tips, you can help prevent future diagnostic issues with your vehicle and keep it running smoothly for years to come. For high-quality parts and fluids, visit CAR-TOOL.EDU.VN at 456 Elm Street, Dallas, TX 75201, United States or contact us at Whatsapp: +1 (641) 206-8880.
5. Leveraging Telematics Systems for Efficient Fleet Management
How can telematics systems enhance fleet management efficiency? Telematics systems offer a powerful way to enhance fleet management efficiency by providing real-time data and insights into vehicle performance, driver behavior, and overall fleet operations. According to a study by Berg Insight, the global telematics market is expected to reach $75 billion by 2025, driven by the increasing demand for fleet management solutions. Telematics systems can help fleet managers optimize routes, reduce fuel consumption, improve driver safety, and streamline maintenance operations.
5.1. Real-Time Monitoring of DTCs in Fleet Vehicles
What are the benefits of real-time monitoring of DTCs in fleet vehicles using telematics? Real-time monitoring of DTCs (Diagnostic Trouble Codes) in fleet vehicles using telematics offers numerous benefits for fleet managers:
- Proactive Maintenance: Telematics systems can alert fleet managers to potential issues before they lead to breakdowns, allowing them to schedule maintenance proactively and minimize downtime.
- Improved Vehicle Health: Real-time monitoring of DTCs can help fleet managers identify and address minor issues before they escalate into more significant problems, improving the overall health and longevity of fleet vehicles.
- Reduced Repair Costs: By addressing issues early, fleet managers can reduce repair costs and avoid costly emergency repairs.
- Enhanced Driver Safety: Telematics systems can alert fleet managers to safety-related DTCs, such as ABS or airbag issues, allowing them to take immediate action to protect drivers.
- Better Fuel Efficiency: Some DTCs can indicate issues that affect fuel efficiency, such as faulty oxygen sensors or misfires. Real-time monitoring of these codes can help fleet managers optimize fuel consumption and reduce costs.
- Streamlined Diagnostics: Telematics systems can provide detailed information about DTCs, including code definitions, possible causes, and troubleshooting tips. This can help technicians diagnose and repair vehicles more efficiently.
- Remote Diagnostics: Some telematics systems offer remote diagnostics capabilities, allowing technicians to access vehicle data and perform diagnostic tests remotely. This can save time and money by reducing the need for on-site visits.
5.2. Setting Up Alerts and Notifications for Critical DTCs
How can you set up alerts and notifications for critical DTCs in a telematics system? Setting up alerts and notifications for critical DTCs in a telematics system involves configuring the system to automatically notify fleet managers or maintenance personnel when specific DTCs are detected. The process typically involves the following steps:
- Identify Critical DTCs: Determine which DTCs are critical to fleet operations and safety. This may include codes related to engine performance, brakes, airbags, and other essential systems.
- Access the Telematics System: Log in to the telematics system using a web browser or mobile app.
- Navigate to the Alert Configuration: Locate the alert configuration section of the telematics system. This may be labeled as “Alerts,” “Notifications,” or something similar.
- Create a New Alert: Create a new alert for each critical DTC you want to monitor.
- Select the DTC: Choose the specific DTC from a list of available codes.
- Set Notification Preferences: Configure the notification preferences, such as email, SMS, or in-app notifications.
- Define Alert Triggers: Define the conditions that trigger the alert, such as the number of occurrences of the DTC or the severity level.
- Assign Notification Recipients: Assign the notification recipients, such as fleet managers, maintenance personnel, or drivers.
- Save the Alert: Save the alert configuration.
5.3. Automating Fleet Maintenance Based on Diagnostic Data
What are the benefits of automating fleet maintenance based on diagnostic data from telematics systems? Automating fleet maintenance based on diagnostic data from telematics systems offers numerous benefits:
- Preventive Maintenance: Telematics systems can schedule maintenance based on diagnostic data, such as mileage, engine hours, and DTCs. This helps prevent breakdowns and extends the lifespan of fleet vehicles.
- Reduced Downtime: By scheduling maintenance proactively, fleet managers can minimize downtime and keep vehicles on the road.
- Optimized Maintenance Intervals: Telematics systems can optimize maintenance intervals based on actual vehicle usage and operating conditions. This can save money by avoiding unnecessary maintenance and ensuring that maintenance is performed when it’s needed.
- Improved Maintenance Efficiency: Telematics systems can provide technicians with detailed diagnostic information, helping them diagnose and repair vehicles more efficiently.
- Better Budgeting: By tracking maintenance costs and scheduling maintenance proactively, fleet managers can better budget for maintenance expenses.
- Compliance: Telematics systems can help fleet managers comply with regulatory requirements for vehicle maintenance.
- Increased Resale Value: Well-maintained vehicles have a higher resale value, which can benefit fleet managers when it’s time to replace vehicles.
Automating fleet maintenance based on diagnostic data can significantly improve fleet efficiency, reduce costs, and enhance vehicle reliability.
5.4. Generating Reports and Analyzing Trends in Fleet Vehicle Health
How can you generate reports and analyze trends in fleet vehicle health using telematics data? Generating reports and analyzing trends in fleet vehicle health using telematics data involves using the telematics system to collect, organize, and analyze diagnostic information from fleet vehicles. The process typically involves the following steps:
- Access the Telematics System: Log in to the telematics system using a web browser or mobile app.
- Navigate to the Reporting Section: Locate the reporting section of the telematics system. This may be labeled as “Reports,” “Analytics,” or something similar.
- Select Report Type: Choose the type of report you want to generate, such as a DTC report, a maintenance report, or a