Electrical Diagnostic For Car On Laptop is a method of identifying and resolving electrical issues in vehicles by using diagnostic software and hardware connected to a laptop, offering precise and efficient troubleshooting. CAR-TOOL.EDU.VN provides comprehensive information and tools to help you perform these diagnostics effectively, ensuring accurate repairs and optimal vehicle performance through advanced auto repair solutions. Electrical system analysis, voltage drop testing, and circuit testing are vital for thorough car care.
Contents
- 1. What is Electrical Diagnostic for Cars Using a Laptop?
- 1.1 How Does a Laptop Interface with a Car’s Electrical System?
- 1.2 What Types of Electrical Issues Can Be Diagnosed?
- 1.3 What Are the Benefits of Using a Laptop for Car Diagnostics?
- 2. Key Components for Electrical Diagnostics on a Laptop
- 2.1 Essential Hardware: OBD-II Scanners and Cables
- 2.2 Diagnostic Software: Choosing the Right Programs
- 2.3 Laptop Requirements: Specifications and Compatibility
- 3. Step-by-Step Guide to Performing Electrical Diagnostics
- 3.1 Connecting the Laptop to the Vehicle’s OBD-II Port
- 3.2 Reading and Interpreting Diagnostic Trouble Codes (DTCs)
- 3.3 Using Live Data for Real-Time Analysis
- 3.4 Performing Actuator Tests and Bidirectional Controls
- 4. Advanced Diagnostic Techniques
- 4.1 Voltage Drop Testing: Identifying Circuit Issues
- 4.2 Signal Tracing: Following Electrical Signals
- 4.3 ECU Programming and Reprogramming
- 5. Common Electrical Problems and Their Solutions
- 5.1 Diagnosing and Fixing Sensor Issues
- 5.2 Resolving Wiring Harness Problems
- 5.3 Addressing Battery and Charging System Faults
- 6. Software and Tools Comparison
- 6.1 Top Diagnostic Software Options
- 6.2 Evaluating OBD-II Scanner Brands
- 6.3 Comparing Laptop Specifications for Diagnostic Work
- 7. Maintenance and Care Tips for Diagnostic Equipment
- 7.1 Proper Storage and Handling
- 7.2 Keeping Software Up to Date
- 7.3 Calibrating Equipment for Accuracy
- 8. Training and Certification Resources
- 8.1 Online Courses and Tutorials
- 8.2 Certification Programs (ASE, etc.)
- 8.3 Workshops and Seminars
- 9. Future Trends in Automotive Electrical Diagnostics
- 9.1 AI and Machine Learning in Diagnostics
- 9.2 Remote Diagnostics and Telematics
- 9.3 Integration with Cloud-Based Platforms
- 10. FAQ: Electrical Diagnostic For Car On Laptop
- 10.1 What is the best laptop for car diagnostics?
- 10.2 Can I use a Mac for car diagnostics?
- 10.3 How often should I perform electrical diagnostics on my car?
- 10.4 What are the most common electrical problems in cars?
- 10.5 Can I perform electrical diagnostics at home?
- 10.6 What is the difference between OBD-I and OBD-II?
- 10.7 How do I choose the right OBD-II scanner?
- 10.8 What does a P0300 code mean?
- 10.9 How do I test a car battery?
- 10.10 Where can I find reliable wiring diagrams for my car?
1. What is Electrical Diagnostic for Cars Using a Laptop?
Electrical diagnostic for cars using a laptop involves utilizing specialized software and hardware interfaces to read and interpret data from a vehicle’s electronic control units (ECUs). This process enables technicians to identify and troubleshoot electrical faults, such as sensor malfunctions, wiring issues, and ECU problems. According to a 2022 report by Grand View Research, the automotive diagnostics market is projected to reach $47.8 billion by 2028, driven by increasing vehicle complexity and the need for advanced diagnostic solutions.
1.1 How Does a Laptop Interface with a Car’s Electrical System?
A laptop interfaces with a car’s electrical system through a diagnostic tool that connects to the vehicle’s OBD-II port. This port allows the laptop to communicate with the car’s ECUs, retrieving diagnostic trouble codes (DTCs), sensor data, and other relevant information.
- OBD-II Port: The standardized port for accessing vehicle diagnostics.
- Diagnostic Software: Programs that interpret data from the car’s ECUs.
- Hardware Interface: Cables and adapters that connect the laptop to the OBD-II port.
1.2 What Types of Electrical Issues Can Be Diagnosed?
A wide range of electrical issues can be diagnosed using a laptop, including:
- Sensor Malfunctions: Issues with sensors like oxygen sensors, mass airflow sensors, and crankshaft position sensors.
- Wiring Problems: Shorts, open circuits, and damaged wiring harnesses.
- ECU Faults: Problems with the car’s electronic control units.
- Battery and Charging System Issues: Problems with the battery, alternator, and starter.
- Lighting Problems: Faults in headlights, taillights, and interior lighting systems.
1.3 What Are the Benefits of Using a Laptop for Car Diagnostics?
Using a laptop for car diagnostics offers several benefits:
- Accuracy: Provides precise data and error codes for accurate diagnosis.
- Efficiency: Speeds up the diagnostic process compared to manual methods.
- Comprehensive Analysis: Allows for real-time monitoring of various vehicle systems.
- Cost-Effectiveness: Helps identify issues early, preventing costly repairs.
- Data Logging: Enables recording of data for later analysis and troubleshooting.
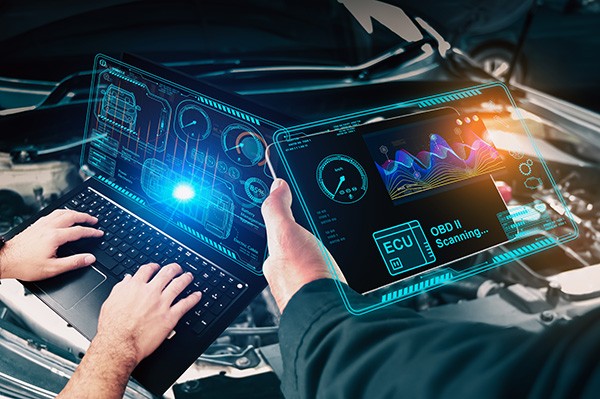 Mechanic using diagnostic software on a laptop to check a car's electrical system
2. Key Components for Electrical Diagnostics on a Laptop
To perform electrical diagnostics on a car using a laptop, you need specific hardware and software components that ensure effective communication with the vehicle’s systems. Having the right tools can make the diagnostic process more efficient and accurate.
2.1 Essential Hardware: OBD-II Scanners and Cables
The primary hardware component is an OBD-II scanner, which connects to the car’s diagnostic port and interfaces with the laptop.
- OBD-II Scanner Types:
- Basic Scanners: Read and clear diagnostic trouble codes (DTCs).
- Advanced Scanners: Offer bidirectional control, data logging, and advanced diagnostics.
- Cables:
- USB Cables: Connect the scanner to the laptop.
- Bluetooth Adapters: Allow wireless connection between the scanner and laptop.
2.2 Diagnostic Software: Choosing the Right Programs
Selecting the right diagnostic software is crucial for interpreting the data from the car’s ECUs.
- Types of Diagnostic Software:
- OEM Software: Provided by the car manufacturer for comprehensive diagnostics.
- Third-Party Software: Offers broad compatibility and advanced features.
- Features to Look For:
- DTC Reading and Clearing: Ability to read and clear diagnostic trouble codes.
- Live Data Streaming: Real-time monitoring of sensor data.
- Bidirectional Control: Ability to control vehicle components for testing.
- Software Updates: Regular updates to support new vehicle models and features.
2.3 Laptop Requirements: Specifications and Compatibility
The laptop used for diagnostics should meet certain specifications to ensure smooth operation with diagnostic software.
- Minimum Laptop Specs:
- Processor: Intel Core i5 or equivalent.
- RAM: 8GB or higher.
- Storage: 256GB SSD or higher.
- Operating System: Windows 10 or later.
- Compatibility Considerations:
- Software Compatibility: Ensure the diagnostic software is compatible with the laptop’s operating system.
- Hardware Compatibility: Check that the laptop has the necessary ports (USB, Bluetooth) for connecting to the OBD-II scanner.
3. Step-by-Step Guide to Performing Electrical Diagnostics
Performing electrical diagnostics on a car using a laptop involves a systematic approach to accurately identify and resolve issues. This section provides a detailed, step-by-step guide to help you through the process.
3.1 Connecting the Laptop to the Vehicle’s OBD-II Port
The first step is to establish a connection between your laptop and the vehicle’s onboard diagnostic system.
- Locate the OBD-II Port: Typically found under the dashboard on the driver’s side.
- Plug in the Scanner: Connect the OBD-II scanner to the port.
- Connect to Laptop: Use a USB cable or Bluetooth to connect the scanner to the laptop.
- Verify Connection: Ensure the scanner is powered on and the laptop recognizes the device.
3.2 Reading and Interpreting Diagnostic Trouble Codes (DTCs)
Once connected, use the diagnostic software to read and interpret the diagnostic trouble codes.
- Launch Diagnostic Software: Open the diagnostic software on your laptop.
- Select Vehicle Information: Enter the vehicle’s make, model, and year.
- Read DTCs: Initiate a scan to read the diagnostic trouble codes stored in the vehicle’s ECU.
- Interpret DTCs: Use the software’s database or online resources to understand the meaning of each code.
- Example: Code P0171 indicates a lean fuel mixture.
3.3 Using Live Data for Real-Time Analysis
Live data streaming allows you to monitor sensor values in real-time, providing valuable insights into the vehicle’s operation.
- Access Live Data: Select the live data or real-time data option in the diagnostic software.
- Monitor Key Parameters: Observe parameters such as:
- Engine Temperature: Monitor for overheating issues.
- Oxygen Sensor Readings: Check for proper air-fuel mixture.
- MAF Sensor Data: Verify the mass airflow sensor’s performance.
- Fuel Trims: Assess fuel delivery issues.
- Analyze Data: Look for anomalies or values outside the normal range.
- Example: A consistently high oxygen sensor reading might indicate a faulty sensor or a vacuum leak.
3.4 Performing Actuator Tests and Bidirectional Controls
Actuator tests and bidirectional controls allow you to command certain vehicle components to activate, helping you diagnose their functionality.
- Access Actuator Tests: Navigate to the actuator tests or bidirectional control section in the software.
- Select Component: Choose the component you want to test (e.g., fuel injectors, cooling fans, solenoids).
- Activate Component: Follow the software prompts to activate the component.
- Observe Response: Verify that the component responds correctly.
- Example: Activating a fuel injector should result in an audible click and a change in engine performance.
4. Advanced Diagnostic Techniques
For complex electrical issues, advanced diagnostic techniques may be necessary to pinpoint the root cause. This section covers some of these advanced methods.
4.1 Voltage Drop Testing: Identifying Circuit Issues
Voltage drop testing is a technique used to identify excessive resistance in a circuit, which can cause various electrical problems.
- Prepare the Circuit: Ensure the circuit is active and carrying current.
- Measure Voltage Drop: Use a multimeter to measure the voltage drop across each component and wire in the circuit.
- Analyze Results: A high voltage drop indicates excessive resistance.
- Example: A voltage drop of more than 0.5 volts across a wire connection indicates a poor connection.
- Common Causes:
- Corroded Connections: Clean or replace corroded terminals.
- Damaged Wires: Replace damaged or frayed wires.
- Loose Connections: Tighten loose connections.
4.2 Signal Tracing: Following Electrical Signals
Signal tracing involves following an electrical signal through a circuit to identify where it is being lost or disrupted.
- Identify Signal Path: Determine the path of the electrical signal you want to trace.
- Use a Multimeter or Oscilloscope: Use a multimeter to check for voltage or an oscilloscope to view the signal waveform.
- Follow the Signal: Start at the signal source and move along the circuit, checking for the signal at each connection point.
- Locate the Fault: The point where the signal disappears indicates the location of the fault.
- Example: If a signal is present at the input of a switch but not at the output, the switch is likely faulty.
4.3 ECU Programming and Reprogramming
In some cases, electrical issues may be caused by software glitches or corrupted data in the ECU. ECU programming and reprogramming can resolve these issues.
- Determine Need for Programming: Consult service bulletins or diagnostic information to determine if reprogramming is necessary.
- Use OEM Software: Use the vehicle manufacturer’s software for ECU programming.
- Follow Procedure: Carefully follow the manufacturer’s instructions for reprogramming the ECU.
- Verify Success: After programming, verify that the issue is resolved and no new problems have been introduced.
- Caution: Incorrect ECU programming can cause serious vehicle damage.
5. Common Electrical Problems and Their Solutions
Understanding common electrical problems and their solutions can help streamline the diagnostic and repair process.
5.1 Diagnosing and Fixing Sensor Issues
Sensor issues are common in modern vehicles due to the numerous sensors monitoring various systems.
- Identify Faulty Sensor: Use diagnostic software to read DTCs and identify the faulty sensor.
- Verify Sensor Output: Use live data to check the sensor’s output and compare it to specifications.
- Test Sensor Wiring: Check the sensor’s wiring for shorts, opens, or corrosion.
- Replace Sensor: If the sensor is faulty, replace it with a new one.
- Example: A faulty oxygen sensor can cause poor fuel economy and emissions issues.
5.2 Resolving Wiring Harness Problems
Wiring harness problems can be challenging to diagnose due to their complexity and hidden location.
- Inspect Wiring Harness: Visually inspect the wiring harness for damage, such as cuts, abrasions, or corrosion.
- Check Connections: Ensure all connectors are properly seated and free of corrosion.
- Test for Continuity: Use a multimeter to test for continuity in each wire of the harness.
- Repair or Replace: Repair damaged wires or replace the entire harness if necessary.
- Example: Rodent damage to a wiring harness can cause multiple electrical issues.
5.3 Addressing Battery and Charging System Faults
Battery and charging system faults can lead to a variety of electrical problems, including starting issues and component malfunctions.
- Test Battery Voltage: Use a multimeter to check the battery voltage. A healthy battery should read around 12.6 volts.
- Perform Load Test: Use a load tester to check the battery’s ability to deliver current under load.
- Check Alternator Output: Use a multimeter to check the alternator’s output voltage while the engine is running. It should be between 13.5 and 14.5 volts.
- Inspect Cables and Connections: Check battery cables and connections for corrosion and tightness.
- Replace Components: Replace the battery or alternator if they are faulty.
- Example: A failing alternator can cause the battery to drain, leading to starting problems.
6. Software and Tools Comparison
Choosing the right software and tools is essential for effective electrical diagnostics. Here’s a comparison of some popular options.
6.1 Top Diagnostic Software Options
| Software | Features | Pros | Cons |
|---|---|---|---|
| Autel MaxiSYS | Comprehensive diagnostics, ECU programming, bidirectional control | Wide vehicle coverage, user-friendly interface, advanced functions | Higher cost, requires regular updates |
| Snap-on Zeus | Advanced diagnostics, guided component tests, data logging | Extensive vehicle coverage, detailed diagnostic information, powerful features | High price, steep learning curve |
| Bosch ESI[tronic] | Vehicle diagnostics, repair information, wiring diagrams | Integrated repair information, comprehensive diagnostics, reliable data | Can be complex to navigate, requires subscription |
| FORScan | Ford and Mazda specific diagnostics, module programming, custom configurations | Affordable, powerful for Ford and Mazda vehicles, active community support | Limited to Ford and Mazda vehicles, requires technical knowledge |
| OBDLink MX+ with BimmerCode/JScan | BMW/VAG and Jeep/Chrysler/Dodge/Ram specific diagnostics, coding, and modifications | Affordable, can be used with Android or iOS devices, active community support | Limited to certain makes and models, requires third party apps, requires technical knowledge |
6.2 Evaluating OBD-II Scanner Brands
| Brand | Features | Pros | Cons |
|---|---|---|---|
| Autel | Wide range of scanners, from basic to advanced, comprehensive vehicle coverage | User-friendly, feature-rich, reliable | Higher price point |
| Snap-on | High-end professional scanners, advanced diagnostics, extensive vehicle coverage | Exceptional accuracy, detailed diagnostic information, durable | Very expensive, requires training |
| Bosch | Reliable scanners, integrated repair information, wide vehicle coverage | Trusted brand, comprehensive diagnostics, excellent support | Can be costly, some features require subscription |
| LAUNCH | Affordable scanners, basic to advanced features, decent vehicle coverage | Budget-friendly, easy to use, good value for the price | May lack some advanced features, vehicle coverage not as extensive as higher-end brands |
| Thinkcar | Affordable scanners, DIY focused, smartphone based, Bluetooth connectivity | Budget-friendly, easy to use, portable | May lack some advanced features, vehicle coverage not as extensive as higher-end brands |
6.3 Comparing Laptop Specifications for Diagnostic Work
| Specification | Minimum Requirement | Recommended Requirement |
|---|---|---|
| Processor | Intel Core i3 or equivalent | Intel Core i5 or equivalent |
| RAM | 4GB | 8GB or more |
| Storage | 128GB SSD | 256GB SSD or more |
| Operating System | Windows 7 or later | Windows 10 or later |
| Connectivity | USB, Bluetooth | USB, Bluetooth, Wi-Fi |
7. Maintenance and Care Tips for Diagnostic Equipment
Proper maintenance and care of your diagnostic equipment can prolong its lifespan and ensure accurate readings.
7.1 Proper Storage and Handling
- Storage: Store scanners and cables in a clean, dry environment.
- Handling: Avoid dropping or subjecting equipment to extreme temperatures.
- Cable Care: Avoid bending or twisting cables excessively.
7.2 Keeping Software Up to Date
- Regular Updates: Install software updates regularly to ensure compatibility and access to the latest features.
- Subscription Management: Keep software subscriptions active to receive ongoing support and updates.
7.3 Calibrating Equipment for Accuracy
- Calibration: Follow manufacturer’s instructions for calibrating diagnostic equipment.
- Regular Checks: Periodically check the accuracy of equipment and recalibrate if necessary.
8. Training and Certification Resources
Proper training and certification can enhance your skills and knowledge in electrical diagnostics.
8.1 Online Courses and Tutorials
- Automotive Training Centers: Offer online courses on automotive diagnostics and repair.
- Udemy and Coursera: Provide courses on vehicle electrical systems and diagnostics.
8.2 Certification Programs (ASE, etc.)
- ASE Certification: Automotive Service Excellence (ASE) certification demonstrates competence in automotive repair and diagnostics.
- Manufacturer Certifications: Some vehicle manufacturers offer certification programs for their specific vehicles.
8.3 Workshops and Seminars
- Industry Events: Attend industry workshops and seminars to learn about the latest diagnostic techniques and technologies.
- Local Training Centers: Check with local vocational schools and community colleges for automotive training programs.
9. Future Trends in Automotive Electrical Diagnostics
The field of automotive electrical diagnostics is constantly evolving with new technologies and techniques.
9.1 AI and Machine Learning in Diagnostics
- Predictive Diagnostics: AI and machine learning can analyze vehicle data to predict potential failures before they occur.
- Automated Troubleshooting: AI-powered diagnostic tools can guide technicians through the troubleshooting process.
9.2 Remote Diagnostics and Telematics
- Remote Access: Remote diagnostics allows technicians to access vehicle data and perform diagnostics from a remote location.
- Telematics: Telematics systems collect vehicle data and transmit it to a central server for analysis.
9.3 Integration with Cloud-Based Platforms
- Cloud Storage: Cloud-based platforms allow technicians to store and access diagnostic data from anywhere.
- Data Sharing: Cloud platforms facilitate sharing of diagnostic data with other technicians and experts.
10. FAQ: Electrical Diagnostic For Car On Laptop
10.1 What is the best laptop for car diagnostics?
The best laptop for car diagnostics should have a fast processor (Intel Core i5 or better), ample RAM (8GB or more), a solid-state drive (SSD) for fast boot times, and compatibility with diagnostic software. Brands like Panasonic Toughbook, Dell, and Lenovo are popular choices due to their durability and performance.
10.2 Can I use a Mac for car diagnostics?
While Windows is the most common operating system for diagnostic software, you can use a Mac by running Windows in a virtual machine (e.g., using Parallels or VMware) or using diagnostic software that is compatible with macOS.
10.3 How often should I perform electrical diagnostics on my car?
You should perform electrical diagnostics whenever you notice symptoms of electrical issues, such as warning lights, starting problems, or component malfunctions. Regular diagnostics can also be part of your routine maintenance schedule.
10.4 What are the most common electrical problems in cars?
Common electrical problems include faulty sensors, wiring issues, battery and charging system faults, and ECU problems.
10.5 Can I perform electrical diagnostics at home?
Yes, you can perform basic electrical diagnostics at home using an OBD-II scanner and diagnostic software. However, advanced diagnostics may require specialized tools and knowledge.
10.6 What is the difference between OBD-I and OBD-II?
OBD-I is an older, non-standardized diagnostic system, while OBD-II is a standardized system that provides more comprehensive diagnostic information and is mandatory for all cars sold in the US since 1996.
10.7 How do I choose the right OBD-II scanner?
Consider your budget, the features you need, and the vehicle coverage of the scanner. Basic scanners are suitable for reading and clearing codes, while advanced scanners offer more functionality.
10.8 What does a P0300 code mean?
A P0300 code indicates a random or multiple cylinder misfire. This could be caused by issues with the ignition system, fuel system, or engine mechanical problems.
10.9 How do I test a car battery?
You can test a car battery using a multimeter to check the voltage or a load tester to check its ability to deliver current under load.
10.10 Where can I find reliable wiring diagrams for my car?
You can find reliable wiring diagrams in the vehicle’s service manual, online databases, or through diagnostic software subscriptions.
Electrical diagnostic for car on laptop is a game-changer in automotive maintenance, offering accuracy, efficiency, and comprehensive analysis. Whether you’re a seasoned mechanic or a DIY enthusiast, mastering these techniques can save you time and money while ensuring your vehicle runs smoothly. For the latest tools, detailed product comparisons, and expert advice, be sure to visit CAR-TOOL.EDU.VN. Need personalized guidance? Contact us today via Whatsapp at +1 (641) 206-8880 or visit our location at 456 Elm Street, Dallas, TX 75201, United States. Our team at CAR-TOOL.EDU.VN is here to help you find the perfect solutions for your automotive needs, emphasizing system analysis, circuit testing, and voltage drop testing.