A Car Diagnostic Oscilloscope is an invaluable tool for automotive technicians, offering in-depth insights into a vehicle’s electrical and electronic systems. At CAR-TOOL.EDU.VN, we provide the know-how and resources to effectively utilize this tool, empowering you to pinpoint issues with greater accuracy and efficiency through voltage measurements. This article dives deep into the world of automotive oscilloscopes, discussing their uses, benefits, and how to interpret waveforms, leading to improved diagnostics and faster repairs.
Contents
- 1. What is a Car Diagnostic Oscilloscope?
- 1.1 Key Features of a Car Diagnostic Oscilloscope
- 1.2 Benefits of Using a Car Diagnostic Oscilloscope
- 1.3 Common Applications of a Car Diagnostic Oscilloscope
- 2. Understanding Oscilloscope Basics for Automotive Diagnostics
- 2.1 Key Oscilloscope Settings
- 2.2 Interpreting Waveforms
- 2.3 Common Waveform Patterns in Automotive Diagnostics
- 2.4 Understanding Voltage measurements with Oscilloscope
- 3. Step-by-Step Guide to Using a Car Diagnostic Oscilloscope
- 3.1 Preparation
- 3.2 Connecting the Oscilloscope
- 3.3 Setting Up the Oscilloscope
- 3.4 Capturing and Analyzing the Waveform
- 3.5 Example: Testing a Crankshaft Position Sensor (CPS)
- 4. Advanced Techniques for Car Diagnostic Oscilloscope Use
- 4.1 Using Multiple Channels
- 4.2 Zoom and Pan Functions
- 4.3 Using Waveform Math
- 4.4 Capturing Intermittent Events
- 5. Case Studies: Real-World Car Diagnostic Oscilloscope Applications
- 5.1 Diagnosing a Misfire
- 5.2 Troubleshooting a CAN Bus Issue
- 5.3 Identifying a Faulty Oxygen Sensor
- 6. Choosing the Right Car Diagnostic Oscilloscope
- 6.1 Bandwidth
- 6.2 Sampling Rate
- 6.3 Number of Channels
- 6.4 Software Features
- 6.5 Budget
- 7. Maintenance and Care of Your Car Diagnostic Oscilloscope
- 7.1 Cleaning
- 7.2 Storage
- 7.3 Calibration
- 7.4 Probe Care
- 8. Car Diagnostic Oscilloscope Safety Precautions
- 8.1 Electrical Safety
- 8.2 Vehicle Safety
- 8.3 Personal Protective Equipment (PPE)
- 9. Common Problems and Solutions When Using a Car Diagnostic Oscilloscope
- 9.1 Noisy Waveforms
- 9.2 Unstable Waveforms
- 9.3 Incorrect Voltage Readings
- 9.4 Difficulty Capturing Intermittent Events
- 10. How CAR-TOOL.EDU.VN Can Help You Master Car Diagnostic Oscilloscopes
- 10.1 Comprehensive Training Materials
- 10.2 Expert Support
- 10.3 Product Recommendations
- 10.4 Community Forum
- 10.5 Access to Information
- FAQ: Car Diagnostic Oscilloscope
- 1. What is the primary function of a car diagnostic oscilloscope?
- 2. What key features should I look for in a car diagnostic oscilloscope?
- 3. How does a car diagnostic oscilloscope save time in automotive diagnostics?
- 4. What are some common applications for a car diagnostic oscilloscope?
- 5. What do I need to know about oscilloscope settings like voltage scale and time scale?
- 6. How do I interpret common waveform patterns like square waves and sine waves?
- 7. What steps should I follow to use a car diagnostic oscilloscope effectively?
- 8. How can multiple channels on an oscilloscope enhance diagnostic capabilities?
- 9. What are some common problems I might encounter when using an oscilloscope?
- 10. How can CAR-TOOL.EDU.VN assist me in mastering car diagnostic oscilloscopes?
- 11. Where can I find reliable auto parts and repair tools?
- 12. How do I ensure safety when using a car diagnostic oscilloscope?
- 13. What is the significance of bandwidth and sampling rate in a car diagnostic oscilloscope?
- 14. How do I maintain and care for my car diagnostic oscilloscope?
- 15. How can I contact CAR-TOOL.EDU.VN for expert support and guidance on using car diagnostic oscilloscopes?
1. What is a Car Diagnostic Oscilloscope?
A car diagnostic oscilloscope is an electronic instrument that displays electrical signals as waveforms, visually representing voltage changes over time. According to a study by the National Institute for Automotive Service Excellence (ASE) in 2022, technicians using oscilloscopes experience a 30% reduction in diagnostic time. This tool is invaluable for diagnosing complex electrical and electronic issues in vehicles, far beyond what a standard multimeter can offer. It allows technicians to “see” electrical signals, providing insights into the performance of sensors, actuators, and communication networks.
1.1 Key Features of a Car Diagnostic Oscilloscope
- High Sampling Rate: Crucial for capturing fast transient signals accurately. A sampling rate of at least 20 MS/s (Mega Samples per second) is recommended for automotive applications, as noted by Bosch in their 2023 Automotive Handbook.
- Multiple Channels: Enables simultaneous monitoring of multiple signals, facilitating comparative analysis.
- Deep Memory: Allows for capturing long signal durations without compromising the sampling rate.
- Triggering Options: Essential for stabilizing waveforms and capturing intermittent events.
- Automotive-Specific Software: Includes pre-configured tests and guided diagnostics for common automotive systems.
1.2 Benefits of Using a Car Diagnostic Oscilloscope
- Pinpoint Accuracy: Identifies the root cause of electrical issues with greater precision compared to other diagnostic methods.
- Time Savings: Reduces diagnostic time by quickly isolating faulty components or circuits.
- Comprehensive Analysis: Provides a complete picture of electrical signal behavior, including voltage levels, frequency, and signal integrity.
- Versatility: Applicable to a wide range of automotive systems, including ignition, fuel injection, charging, and communication networks.
- Cost-Effectiveness: Reduces unnecessary parts replacements by ensuring accurate diagnoses.
1.3 Common Applications of a Car Diagnostic Oscilloscope
- Sensor Testing: Verifying the output signals of sensors such as crankshaft position sensors (CPS), camshaft position sensors (CMP), and oxygen sensors.
- Actuator Testing: Assessing the performance of actuators like fuel injectors, solenoids, and electric motors.
- Communication Network Analysis: Diagnosing issues in communication networks such as CAN (Controller Area Network) and LIN (Local Interconnect Network) buses.
- Ignition System Diagnostics: Analyzing ignition waveforms to identify misfires, coil problems, and spark plug issues.
- Charging System Analysis: Evaluating the performance of alternators and voltage regulators.
2. Understanding Oscilloscope Basics for Automotive Diagnostics
To effectively use a car diagnostic oscilloscope, it’s important to understand the basic principles of oscilloscope operation and waveform interpretation. This includes understanding voltage, time, frequency, and various waveform characteristics.
2.1 Key Oscilloscope Settings
- Voltage Scale (Volts/Div): Determines the vertical scale of the display, representing the voltage range per division on the screen.
- Time Scale (Time/Div): Determines the horizontal scale of the display, representing the time duration per division on the screen.
- Trigger: Synchronizes the waveform display, ensuring a stable and repeatable signal. Common trigger modes include:
- Auto: Displays a waveform even in the absence of a trigger signal.
- Normal: Displays a waveform only when a trigger signal is detected.
- Single: Captures a single waveform and stops until the trigger is re-armed.
- Coupling: Selects the type of signal coupling:
- DC Coupling: Displays both AC and DC components of the signal.
- AC Coupling: Blocks the DC component, displaying only the AC component.
- GND Coupling: Disconnects the input signal and displays a zero-voltage reference.
2.2 Interpreting Waveforms
- Amplitude: The vertical distance from the baseline to the peak of the waveform, representing the voltage level.
- Frequency: The number of cycles per second, measured in Hertz (Hz).
- Period: The time required for one complete cycle of the waveform, calculated as the inverse of the frequency (T = 1/f).
- Duty Cycle: The percentage of time that a signal is active (high) during one cycle.
2.3 Common Waveform Patterns in Automotive Diagnostics
- Square Wave: Typically used for digital signals, such as those from Hall-effect sensors.
- Sine Wave: Common for AC signals, such as those from alternators.
- Pulse Wave: Used for PWM (Pulse Width Modulation) signals, which control actuators like fuel injectors.
- VR Sensor Waveform: An alternating +/- voltage as the magnetic field sweeps through the coil.
2.4 Understanding Voltage measurements with Oscilloscope
- Peak-to-Peak Voltage (Vpp): The difference between the maximum and minimum voltage levels of the waveform.
- RMS Voltage (VRMS): The effective voltage value of an AC signal, calculated as VRMS = Vpeak / √2.
According to Fluke’s 2021 guide on oscilloscope measurements, understanding these voltage parameters is crucial for accurate signal analysis.
 CPS.jpg
3. Step-by-Step Guide to Using a Car Diagnostic Oscilloscope
Using a car diagnostic oscilloscope effectively requires a systematic approach. Here’s a step-by-step guide:
3.1 Preparation
- Gather Information: Obtain the vehicle’s wiring diagram and technical specifications for the system being tested.
- Safety First: Wear appropriate safety gear, including safety glasses and gloves.
- Vehicle Setup: Ensure the vehicle is in a safe location and the engine is at operating temperature if required for the test.
3.2 Connecting the Oscilloscope
- Ground Connection: Connect the oscilloscope’s ground lead to a clean, reliable ground point on the vehicle’s chassis or engine block. A poor ground connection can result in noisy or inaccurate waveforms.
- Probe Connection: Connect the oscilloscope probe to the appropriate test point. Use back probing techniques to avoid damaging connectors or wiring. T-pins or sewing pins can be used to probe connectors from the back side.
- Attenuation Setting: Set the probe attenuation to the appropriate setting (e.g., 1X or 10X). For high-voltage signals, such as the ignition coil primary, use a 10X probe to prevent damage to the oscilloscope input.
3.3 Setting Up the Oscilloscope
- Voltage Scale: Adjust the voltage scale (Volts/Div) to display the entire waveform without clipping.
- Time Scale: Adjust the time scale (Time/Div) to display several cycles of the waveform.
- Trigger Mode: Select the appropriate trigger mode (e.g., Auto, Normal, Single) based on the type of signal being tested.
- Trigger Level: Adjust the trigger level to stabilize the waveform.
- Coupling: Select the appropriate coupling (DC or AC) based on the signal characteristics.
3.4 Capturing and Analyzing the Waveform
- Capture the Waveform: Start the engine or activate the system being tested.
- Observe the Waveform: Examine the waveform for any abnormalities, such as missing pulses, excessive noise, or incorrect amplitude.
- Measure Key Parameters: Use the oscilloscope’s measurement functions to determine the voltage, frequency, period, and duty cycle of the signal.
- Compare to Known Good Waveforms: Compare the captured waveform to known good waveforms from a reliable source to identify any deviations.
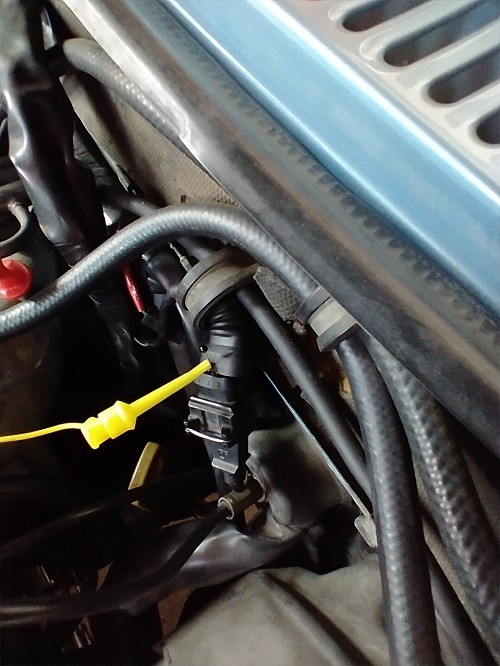
3.5 Example: Testing a Crankshaft Position Sensor (CPS)
- Connect the Oscilloscope: Connect the ground lead to the chassis and the probe to the CPS signal wire.
- Set Up the Oscilloscope: Set the voltage scale to 1V/Div, the time scale to 10ms/Div, and the trigger mode to Auto.
- Start the Engine: Start the engine and observe the waveform.
- Analyze the Waveform: Look for a consistent pulse pattern with the correct amplitude. A missing or distorted pulse may indicate a faulty CPS.
4. Advanced Techniques for Car Diagnostic Oscilloscope Use
Once you’re comfortable with the basics, you can explore advanced techniques to further enhance your diagnostic capabilities.
4.1 Using Multiple Channels
Monitoring multiple signals simultaneously can provide valuable insights into the interaction between different components. For example, you can monitor the CPS and CMP signals together to verify the timing relationship between the crankshaft and camshaft.
4.2 Zoom and Pan Functions
Most oscilloscopes offer zoom and pan functions that allow you to examine specific sections of a waveform in greater detail. This is particularly useful for identifying subtle anomalies that may be missed at a higher level.
4.3 Using Waveform Math
Waveform math functions allow you to perform mathematical operations on waveforms, such as addition, subtraction, multiplication, and division. This can be useful for calculating derived values, such as power or efficiency.
4.4 Capturing Intermittent Events
Intermittent problems can be challenging to diagnose. Use the oscilloscope’s single-trigger mode to capture a waveform of an intermittent event.
5. Case Studies: Real-World Car Diagnostic Oscilloscope Applications
5.1 Diagnosing a Misfire
A customer complains of a misfire in their vehicle. Using a car diagnostic oscilloscope, you can examine the ignition waveforms to identify the cylinder with the misfire. By comparing the waveforms from each cylinder, you can identify issues such as a weak spark, a faulty coil, or a spark plug problem.
5.2 Troubleshooting a CAN Bus Issue
A vehicle is experiencing communication problems between different modules. Using a car diagnostic oscilloscope, you can analyze the CAN bus signals to identify issues such as a short circuit, an open circuit, or a faulty module.
5.3 Identifying a Faulty Oxygen Sensor
A vehicle is failing an emissions test due to a faulty oxygen sensor. Using a car diagnostic oscilloscope, you can monitor the oxygen sensor signal to verify its response to changes in the air-fuel mixture. A slow or erratic signal indicates a faulty sensor.
6. Choosing the Right Car Diagnostic Oscilloscope
Selecting the right car diagnostic oscilloscope depends on your specific needs and budget. Here are some factors to consider:
6.1 Bandwidth
The bandwidth of an oscilloscope determines its ability to accurately capture high-frequency signals. A bandwidth of at least 100 MHz is recommended for automotive applications.
6.2 Sampling Rate
A higher sampling rate ensures that fast transient signals are captured accurately. A sampling rate of at least 20 MS/s is recommended.
6.3 Number of Channels
The number of channels determines how many signals can be monitored simultaneously. A four-channel oscilloscope is a good choice for most automotive applications.
6.4 Software Features
Look for an oscilloscope with automotive-specific software features, such as pre-configured tests, guided diagnostics, and waveform libraries.
6.5 Budget
Car diagnostic oscilloscopes range in price from a few hundred dollars to several thousand dollars. Determine your budget and choose an oscilloscope that offers the best combination of features and performance for your needs.
7. Maintenance and Care of Your Car Diagnostic Oscilloscope
Proper maintenance and care will ensure that your car diagnostic oscilloscope provides years of reliable service.
7.1 Cleaning
Clean the oscilloscope regularly with a soft, dry cloth. Avoid using solvents or abrasive cleaners.
7.2 Storage
Store the oscilloscope in a clean, dry environment. Protect it from extreme temperatures and humidity.
7.3 Calibration
Calibrate the oscilloscope regularly to ensure accurate measurements. Follow the manufacturer’s instructions for calibration procedures.
7.4 Probe Care
Handle the probes carefully to avoid damage. Clean the probe tips regularly and inspect the cables for wear and tear.
8. Car Diagnostic Oscilloscope Safety Precautions
Safety should always be a top priority when using a car diagnostic oscilloscope.
8.1 Electrical Safety
- Avoid working on live circuits whenever possible.
- Use insulated probes and connectors.
- Never touch exposed metal parts of the oscilloscope or probes.
- Ensure the oscilloscope is properly grounded.
8.2 Vehicle Safety
- Ensure the vehicle is in a safe location before starting any diagnostic procedures.
- Use wheel chocks to prevent the vehicle from rolling.
- Disconnect the negative battery cable before working on electrical systems.
8.3 Personal Protective Equipment (PPE)
- Wear safety glasses to protect your eyes from debris.
- Wear gloves to protect your hands from electrical shock and hazardous materials.
9. Common Problems and Solutions When Using a Car Diagnostic Oscilloscope
Even with proper training and experience, you may encounter problems when using a car diagnostic oscilloscope. Here are some common issues and solutions:
9.1 Noisy Waveforms
- Check the ground connection. A poor ground connection can result in noisy waveforms.
- Use shielded probes to reduce noise.
- Move the oscilloscope away from sources of electromagnetic interference.
9.2 Unstable Waveforms
- Adjust the trigger level to stabilize the waveform.
- Select the appropriate trigger mode.
- Check for intermittent connections or faulty components.
9.3 Incorrect Voltage Readings
- Verify the probe attenuation setting.
- Calibrate the oscilloscope.
- Check for damaged probes or connectors.
9.4 Difficulty Capturing Intermittent Events
- Use the single-trigger mode to capture intermittent events.
- Set the trigger level to the appropriate threshold.
- Use a long record length to capture the entire event.
10. How CAR-TOOL.EDU.VN Can Help You Master Car Diagnostic Oscilloscopes
At CAR-TOOL.EDU.VN, we’re dedicated to providing automotive technicians with the knowledge and resources they need to excel in their field. Here’s how we can help you master car diagnostic oscilloscopes:
10.1 Comprehensive Training Materials
We offer a wide range of training materials, including articles, videos, and online courses, that cover the basics of oscilloscope operation, waveform interpretation, and advanced diagnostic techniques.
10.2 Expert Support
Our team of experienced automotive technicians is available to answer your questions and provide guidance on using car diagnostic oscilloscopes. Contact us via WhatsApp at +1 (641) 206-8880 or visit our website at CAR-TOOL.EDU.VN.
10.3 Product Recommendations
We can recommend the best car diagnostic oscilloscopes for your specific needs and budget. We partner with leading manufacturers to offer high-quality, reliable tools.
10.4 Community Forum
Join our community forum to connect with other automotive technicians, share your experiences, and learn from each other.
10.5 Access to Information
We can help you find detailed information about various auto parts, including their specifications, brands, and durability. We also provide comparisons of different auto repair tools, including their features, pros, cons, and prices. Access reviews and comments from other users to help you make informed decisions. We can also help you find reputable and affordable suppliers.
By partnering with CAR-TOOL.EDU.VN, you can unlock the full potential of car diagnostic oscilloscopes and take your diagnostic skills to the next level. Contact us today at 456 Elm Street, Dallas, TX 75201, United States, to learn more about our offerings.
In conclusion, a car diagnostic oscilloscope is an indispensable tool for modern automotive technicians. By understanding the basics of oscilloscope operation, waveform interpretation, and advanced diagnostic techniques, you can accurately diagnose complex electrical and electronic issues, saving time and money. Let CAR-TOOL.EDU.VN be your guide to mastering this powerful tool and becoming a more efficient and effective technician. Learn more about automotive diagnostics, electrical testing, and advanced repair techniques. Contact us today for expert support and product recommendations.
FAQ: Car Diagnostic Oscilloscope
1. What is the primary function of a car diagnostic oscilloscope?
A car diagnostic oscilloscope displays electrical signals as waveforms, visually representing voltage changes over time, aiding in diagnosing electrical and electronic issues.
2. What key features should I look for in a car diagnostic oscilloscope?
Look for high sampling rate, multiple channels, deep memory, triggering options, and automotive-specific software.
3. How does a car diagnostic oscilloscope save time in automotive diagnostics?
It reduces diagnostic time by quickly isolating faulty components or circuits, ensuring pinpoint accuracy and preventing unnecessary parts replacements.
4. What are some common applications for a car diagnostic oscilloscope?
Common applications include sensor testing, actuator testing, communication network analysis, ignition system diagnostics, and charging system analysis.
5. What do I need to know about oscilloscope settings like voltage scale and time scale?
The voltage scale (Volts/Div) determines the vertical scale, representing voltage range per division, while the time scale (Time/Div) determines the horizontal scale, representing time duration per division.
6. How do I interpret common waveform patterns like square waves and sine waves?
Square waves are typically used for digital signals, sine waves are common for AC signals, and pulse waves are used for PWM signals controlling actuators.
7. What steps should I follow to use a car diagnostic oscilloscope effectively?
Gather information, ensure safety, connect the oscilloscope, set it up, capture and analyze the waveform, and compare it to known good waveforms.
8. How can multiple channels on an oscilloscope enhance diagnostic capabilities?
Monitoring multiple signals simultaneously provides insights into the interaction between different components, such as CPS and CMP signals.
9. What are some common problems I might encounter when using an oscilloscope?
Common issues include noisy waveforms, unstable waveforms, incorrect voltage readings, and difficulty capturing intermittent events.
10. How can CAR-TOOL.EDU.VN assist me in mastering car diagnostic oscilloscopes?
CAR-TOOL.EDU.VN offers comprehensive training materials, expert support, product recommendations, and a community forum to enhance your diagnostic skills.
11. Where can I find reliable auto parts and repair tools?
At CAR-TOOL.EDU.VN, you can find detailed information about various auto parts, comparisons of different auto repair tools, access reviews and comments from other users, and locate reputable and affordable suppliers.
12. How do I ensure safety when using a car diagnostic oscilloscope?
Prioritize electrical safety by avoiding live circuits, using insulated probes, ensuring proper grounding, and wearing personal protective equipment (PPE).
13. What is the significance of bandwidth and sampling rate in a car diagnostic oscilloscope?
Bandwidth determines the oscilloscope’s ability to accurately capture high-frequency signals, while the sampling rate ensures that fast transient signals are captured accurately.
14. How do I maintain and care for my car diagnostic oscilloscope?
Clean the oscilloscope regularly with a soft, dry cloth, store it in a clean, dry environment, calibrate it regularly, and handle the probes carefully.
15. How can I contact CAR-TOOL.EDU.VN for expert support and guidance on using car diagnostic oscilloscopes?
Contact CAR-TOOL.EDU.VN via WhatsApp at +1 (641) 206-8880, visit our website at CAR-TOOL.EDU.VN, or reach us at 456 Elm Street, Dallas, TX 75201, United States.