Are you familiar with using an oscilloscope for diagnostics for automotive repairs? At CAR-TOOL.EDU.VN, we believe mastering the oscilloscope can significantly enhance your diagnostic skills, leading to more efficient and accurate automotive repairs by using diagnostic equipment. We are committed to offering detailed information, comparing the options and helping you make the best decisions.
1. What is an Oscilloscope and Why Use It for Automotive Diagnostics?
An oscilloscope is an electronic test instrument that visually displays electrical signals as waveforms on a screen. It graphs voltage changes over time, providing a detailed look at signal behavior. According to a study by the University of California, Berkeley’s Electrical Engineering and Computer Sciences Department in 2022, oscilloscopes are invaluable tools for diagnosing complex electronic circuits in modern vehicles because they allow technicians to see exactly what is happening with electrical signals, rather than just measuring static voltage or resistance. This capability makes it easier to identify intermittent faults, signal distortions, and other issues that traditional diagnostic tools might miss.
1.1 Key Benefits of Using an Oscilloscope:
- Visual Representation: Oscilloscopes provide a visual representation of electrical signals, making it easier to identify anomalies and patterns.
- Real-Time Analysis: They allow real-time analysis of signals, which is essential for diagnosing dynamic systems like engine management and ignition.
- Precise Measurements: Oscilloscopes enable precise measurement of voltage, frequency, and timing, critical for accurate diagnostics.
1.2 Typical Applications in Automotive Diagnostics:
- Sensor Testing: Verifying the output signals of sensors such as crankshaft position sensors (CPS), mass airflow (MAF) sensors, and oxygen sensors.
- Actuator Testing: Checking the control signals for actuators like fuel injectors, ignition coils, and solenoids.
- Communication Bus Analysis: Decoding and analyzing signals on communication buses like CAN, LIN, and Ethernet.
- Noise and Interference Detection: Identifying sources of electrical noise and interference that can affect system performance.
2. Understanding Basic Oscilloscope Functions for Automotive Use
To effectively use an oscilloscope for automotive diagnostics, you need to understand its basic functions and settings. These include voltage scales, time scales, triggering, and coupling.
2.1 Key Oscilloscope Controls and Settings:
- Voltage Scale (Volts/Div): Adjusts the vertical scale to display the voltage range of the signal.
- Time Scale (Time/Div): Adjusts the horizontal scale to display the time duration of the signal.
- Triggering: Stabilizes the waveform by synchronizing the display to a specific point in the signal.
- Coupling (AC/DC): Determines how the oscilloscope processes the input signal. DC coupling shows both AC and DC components, while AC coupling blocks the DC component.
2.2 Setting Up an Oscilloscope for Automotive Diagnostics:
- Connect the Probe: Attach the oscilloscope probe to the test point in the vehicle’s electrical circuit.
- Ground the Oscilloscope: Connect the ground lead of the probe to a suitable ground point on the vehicle’s chassis or engine block.
- Adjust Voltage and Time Scales: Set the voltage and time scales to appropriate ranges for the signal you are measuring. Start with larger scales and then fine-tune as needed.
- Set the Trigger: Choose a trigger source and level to stabilize the waveform. Common trigger sources include edge triggering and pulse width triggering.
- Select Coupling: Select AC or DC coupling based on the type of signal being measured. Use DC coupling for most automotive signals unless you need to block a DC offset.
2.3 Common Mistakes to Avoid:
- Improper Grounding: Poor grounding can result in noisy or inaccurate waveforms. Ensure a solid ground connection.
- Incorrect Probe Settings: Using the wrong probe attenuation (e.g., 1X instead of 10X) can lead to incorrect voltage measurements and potential damage to the oscilloscope.
- Overloading the Circuit: Probing high-impedance circuits with low-impedance probes can load the circuit and affect its behavior. Use high-impedance probes when necessary.
3. Essential Automotive Waveforms and Their Interpretations
Understanding common automotive waveforms is crucial for effective diagnostics. Different sensors and actuators produce unique waveforms that can reveal valuable information about their operation.
3.1 Common Automotive Waveforms:
- Crankshaft Position Sensor (CPS): The CPS generates a signal that indicates the position and speed of the crankshaft. The waveform is typically a sine wave or square wave, depending on the sensor type.
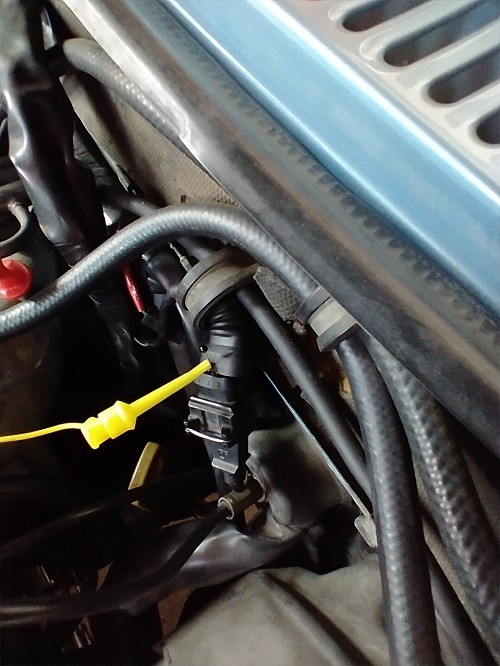 CPS.jpg
- Mass Airflow Sensor (MAF): The MAF sensor measures the amount of air entering the engine. The waveform is typically a DC voltage that varies with airflow.
- Oxygen Sensor: The oxygen sensor measures the amount of oxygen in the exhaust gas. The waveform is typically a voltage that switches between low (rich) and high (lean) levels.
- Fuel Injector: The fuel injector control signal is a pulse width modulated (PWM) signal that controls the duration of fuel injection.
3.2 Interpreting Waveform Deviations:
- Missing Pulses: Missing pulses in a waveform can indicate a faulty sensor or actuator.
- Distorted Waveforms: Distorted waveforms can indicate electrical noise, interference, or a failing component.
- Incorrect Voltage Levels: Voltage levels outside the normal range can indicate a problem with the sensor, actuator, or wiring.
- Timing Issues: Timing issues, such as incorrect pulse widths or frequencies, can indicate a problem with the engine control unit (ECU) or related components.
3.3 Case Studies: Diagnosing Faults with Waveform Analysis:
- Case Study 1: Intermittent Misfire: By analyzing the crankshaft position sensor waveform, a technician identifies intermittent signal dropouts caused by a loose connection, leading to misfires.
- Case Study 2: Poor Fuel Economy: By examining the oxygen sensor waveform, a technician notices a sluggish response, indicating a contaminated sensor causing the engine to run rich and reduce fuel economy.
- Case Study 3: Starting Problems: By checking the fuel injector control signal, a technician finds a weak pulse, indicating a failing injector driver in the ECU, preventing the engine from starting.
4. Step-by-Step Guide to Diagnosing Common Automotive Issues with an Oscilloscope
Using an oscilloscope for automotive diagnostics involves a systematic approach. Here’s a step-by-step guide to help you diagnose common issues:
4.1 Preparing for Diagnostic Testing:
- Gather Information: Collect information about the vehicle, including its make, model, year, and engine type. Consult service manuals and wiring diagrams.
- Identify the Problem: Understand the symptoms and the conditions under which they occur.
- Plan Your Approach: Decide which sensors and actuators to test based on the symptoms and diagnostic codes.
4.2 Performing the Tests:
- Connect the Oscilloscope: Connect the oscilloscope probe to the appropriate test point and ground the oscilloscope.
- Set Up the Oscilloscope: Adjust the voltage and time scales, set the trigger, and select the appropriate coupling mode.
- Capture the Waveform: Start the engine or activate the system and capture the waveform.
- Analyze the Waveform: Examine the waveform for anomalies, distortions, and deviations from the normal pattern.
4.3 Analyzing the Results and Troubleshooting:
- Compare to Known Good Waveforms: Compare the captured waveform to known good waveforms from service manuals or online resources.
- Identify the Root Cause: Based on the waveform analysis, identify the potential causes of the problem.
- Perform Additional Tests: Conduct additional tests, such as resistance measurements and voltage drop tests, to confirm the diagnosis.
- Repair the Problem: Repair or replace the faulty component and verify the repair with the oscilloscope.
5. Advanced Oscilloscope Techniques for Automotive Diagnostics
Once you’re comfortable with the basics, you can explore advanced techniques to tackle more complex diagnostic challenges.
5.1 Advanced Triggering Modes:
- Pulse Width Triggering: Triggers the oscilloscope when a pulse of a specific width occurs. Useful for analyzing PWM signals like fuel injector control signals.
- Window Triggering: Triggers the oscilloscope when the signal enters or exits a defined voltage window. Useful for detecting signal anomalies within a specific range.
5.2 Using Multiple Channels:
- Simultaneous Signal Analysis: Use multiple channels to simultaneously analyze related signals, such as the crankshaft position sensor and camshaft position sensor.
- Correlation Analysis: Compare the timing and amplitude of multiple signals to identify synchronization issues or phase differences.
5.3 Decoding Serial Data:
- CAN Bus Analysis: Use the oscilloscope to decode and analyze CAN bus signals, including message IDs, data, and error codes.
- LIN Bus Analysis: Analyze LIN bus signals, which are commonly used for low-speed communication between automotive components.
6. Selecting the Right Oscilloscope for Automotive Diagnostics
Choosing the right oscilloscope for automotive diagnostics depends on your budget, needs, and skill level. Here are some factors to consider:
6.1 Key Specifications to Consider:
- Bandwidth: The bandwidth of the oscilloscope determines its ability to accurately measure high-frequency signals. For automotive diagnostics, a bandwidth of 100 MHz or higher is recommended.
- Sample Rate: The sample rate determines how frequently the oscilloscope samples the input signal. A higher sample rate allows for more detailed waveform capture.
- Number of Channels: Oscilloscopes with two or four channels are common for automotive use. More channels allow for simultaneous analysis of multiple signals.
- Memory Depth: The memory depth determines how much data the oscilloscope can store. A larger memory depth allows for longer capture times and more detailed analysis.
6.2 Types of Oscilloscopes:
- Digital Storage Oscilloscopes (DSOs): DSOs are the most common type of oscilloscope for automotive use. They capture and store waveforms digitally, allowing for detailed analysis and manipulation.
- PC-Based Oscilloscopes: PC-based oscilloscopes connect to a computer via USB and use the computer’s display and processing power. They are often more affordable than standalone oscilloscopes and offer advanced software features.
- Handheld Oscilloscopes: Handheld oscilloscopes are portable and battery-powered, making them ideal for field service and on-vehicle testing.
6.3 Top Oscilloscope Brands for Automotive Diagnostics:
| Brand | Models | Features | Price Range |
|---|---|---|---|
| Fluke | 123 Series, 880 Series | Rugged, reliable, and designed for industrial and automotive use. High bandwidth, multiple channels, and advanced triggering options. | $1,500+ |
| Hantek | DSO2D15, DSO2C10 | Affordable and versatile oscilloscopes suitable for hobbyists and entry-level technicians. Decent bandwidth, multiple channels, and basic triggering options. | $300 – $800 |
| PicoScope | 2204A, 4425A | PC-based oscilloscopes with advanced software features and high resolution. Ideal for complex diagnostics and waveform analysis. | $800+ |
| Tektronix | TBS2000 Series, MSO2000 Series | High-performance oscilloscopes with excellent bandwidth, sample rate, and memory depth. Suitable for advanced diagnostics and research. | $2,000+ |
| Keysight | DSOX1102G, DSOX2000 Series | Versatile oscilloscopes with advanced features like waveform math, FFT analysis, and serial data decoding. Suitable for a wide range of automotive applications. | $1,800+ |
| Autel | MaxiScope MP408 | Designed specifically for automotive diagnostics. Includes pre-set parameters for common automotive sensors and actuators, making it easy to capture and analyze waveforms. | $1,200+ |
| Bosch | FSA 500, FSA 720/740 | Integrated diagnostic systems with oscilloscope, multimeter, and other diagnostic tools. Designed for professional automotive technicians. | $3,000+ |
| Launch | O2-162, X-431 Sensorbox | Designed for automotive diagnostics. Includes pre-set parameters for common automotive sensors and actuators, making it easy to capture and analyze waveforms. | $1,000+ |
6.4 Tips for Purchasing an Oscilloscope:
- Consider Your Needs: Determine which features and specifications are most important for your diagnostic needs.
- Read Reviews: Research and read reviews from other automotive technicians and experts.
- Check for Updates: Ensure that the oscilloscope manufacturer provides software and firmware updates.
7. Safety Precautions When Using Oscilloscopes in Automotive Environments
Working with electrical systems in vehicles can be dangerous. It’s crucial to follow safety precautions to prevent injury and damage to equipment.
7.1 Essential Safety Guidelines:
- Disconnect the Battery: Disconnect the vehicle’s battery before working on electrical systems to prevent short circuits and electrical shocks.
- Use Insulated Tools: Use insulated tools to prevent accidental contact with live circuits.
- Wear Safety Glasses: Wear safety glasses to protect your eyes from sparks and debris.
- Avoid Wet Conditions: Do not use oscilloscopes in wet or damp conditions to prevent electrical shock.
7.2 Protecting the Oscilloscope:
- Use Proper Probes: Use probes with the appropriate voltage rating and attenuation.
- Avoid Overvoltage: Do not exceed the oscilloscope’s maximum input voltage.
- Proper Grounding: Ensure the oscilloscope is properly grounded to prevent ground loops and electrical noise.
7.3 Emergency Procedures:
- Electrical Shock: If someone receives an electrical shock, immediately disconnect the power source and call for medical assistance.
- Fire: If a fire occurs, use a fire extinguisher to put out the fire and evacuate the area.
8. Maintaining and Calibrating Your Automotive Oscilloscope
Proper maintenance and calibration are essential for ensuring the accuracy and reliability of your oscilloscope.
8.1 Regular Maintenance Tasks:
- Cleaning: Clean the oscilloscope and probes regularly with a soft, dry cloth.
- Inspection: Inspect the probes and cables for damage and replace them if necessary.
- Storage: Store the oscilloscope in a clean, dry place to prevent dust and moisture buildup.
8.2 Calibration Procedures:
- Self-Calibration: Many oscilloscopes have a self-calibration function that can be used to compensate for internal drift.
- Professional Calibration: For critical measurements, have the oscilloscope calibrated by a professional calibration service.
8.3 Troubleshooting Common Issues:
- No Display: Check the power cord and power switch. Verify that the oscilloscope is properly grounded.
- No Signal: Check the probe connections and settings. Verify that the input signal is within the oscilloscope’s voltage range.
- Inaccurate Readings: Calibrate the oscilloscope and check the probe settings. Verify that the input signal is clean and free from noise.
9. Maximizing Your Oscilloscope Skills with CAR-TOOL.EDU.VN
Using an oscilloscope for automotive diagnostics can seem daunting, but with the right knowledge and practice, you can master this powerful tool and improve your diagnostic skills. CAR-TOOL.EDU.VN is here to support you with detailed information, product comparisons, and expert advice.
9.1 Finding Reliable Information and Resources:
- CAR-TOOL.EDU.VN: Explore our website for in-depth articles, product reviews, and how-to guides on automotive oscilloscopes and diagnostic techniques.
- Manufacturer Websites: Visit the websites of oscilloscope manufacturers for technical specifications, user manuals, and application notes.
- Online Forums and Communities: Join online forums and communities for automotive technicians to share knowledge, ask questions, and get support.
9.2 Recommended Training Courses and Certifications:
- Automotive Oscilloscope Training Courses: Enroll in training courses that cover oscilloscope fundamentals, waveform analysis, and automotive diagnostic techniques.
- ASE Certification: Pursue Automotive Service Excellence (ASE) certification to demonstrate your knowledge and skills in automotive diagnostics and repair.
9.3 Practical Exercises for Skill Development:
- Practice on Known Good Vehicles: Use the oscilloscope to analyze signals on vehicles with known good performance to establish a baseline.
- Diagnose Simulated Faults: Use diagnostic simulators to practice diagnosing faults and troubleshooting problems.
- Work on Real-World Cases: Apply your oscilloscope skills to diagnose and repair real-world automotive issues.
10. Future Trends in Automotive Oscilloscope Technology
The field of automotive diagnostics is constantly evolving, and oscilloscopes are becoming more powerful and versatile. Here are some future trends to watch for:
10.1 Emerging Technologies and Features:
- Wireless Connectivity: Oscilloscopes with wireless connectivity allow for remote monitoring and data sharing.
- Artificial Intelligence (AI): AI-powered oscilloscopes can automatically analyze waveforms and identify potential problems.
- Augmented Reality (AR): AR technology can overlay diagnostic information onto the vehicle, making it easier to identify test points and interpret results.
10.2 The Role of Oscilloscopes in Electric Vehicle (EV) Diagnostics:
- High-Voltage Systems: Oscilloscopes are essential for diagnosing high-voltage systems in electric vehicles, including batteries, inverters, and motors.
- Charging System Analysis: Oscilloscopes can be used to analyze the performance of EV charging systems and identify charging issues.
- Motor Control Diagnostics: Oscilloscopes are used to diagnose motor control issues, such as faulty motor drivers and communication problems.
10.3 Preparing for the Future of Automotive Diagnostics:
- Continuous Learning: Stay up-to-date with the latest oscilloscope technologies and diagnostic techniques.
- Invest in Advanced Tools: Invest in advanced oscilloscopes and diagnostic tools to meet the challenges of modern automotive systems.
- Network with Other Professionals: Network with other automotive technicians and experts to share knowledge and learn from their experiences.
Ready to elevate your automotive diagnostic skills? Contact CAR-TOOL.EDU.VN today for expert advice and support on selecting the right tools and techniques. Call us at +1 (641) 206-8880 or visit our website at CAR-TOOL.EDU.VN. Our address is 456 Elm Street, Dallas, TX 75201, United States. Let us help you become a master of automotive diagnostics!
FAQ Section
Q1: What is the primary function of an oscilloscope in automotive diagnostics?
An oscilloscope visually displays electrical signals as waveforms, allowing technicians to analyze signal behavior in real-time. This makes it easier to identify intermittent faults, signal distortions, and other issues that traditional diagnostic tools might miss.
Q2: Why is an oscilloscope better than a multimeter for certain automotive diagnostics?
While a multimeter measures static voltage or resistance, an oscilloscope shows how voltage changes over time. This is essential for diagnosing dynamic systems like engine management and ignition systems, where signal behavior is critical.
Q3: What are some common automotive waveforms that technicians should be familiar with?
Common waveforms include those from crankshaft position sensors (CPS), mass airflow sensors (MAF), oxygen sensors, and fuel injectors. Each has a unique pattern that indicates its proper operation.
Q4: How do you set up an oscilloscope for automotive diagnostics?
Connect the probe to the test point, ground the oscilloscope, adjust voltage and time scales, set the trigger, and select AC or DC coupling based on the signal type.
Q5: What are the essential safety precautions to take when using an oscilloscope in a vehicle?
Always disconnect the battery, use insulated tools, wear safety glasses, and avoid wet conditions to prevent electrical shock and damage to equipment.
Q6: What is the recommended bandwidth for an oscilloscope used in automotive diagnostics?
A bandwidth of 100 MHz or higher is recommended for automotive diagnostics to accurately measure high-frequency signals.
Q7: Can an oscilloscope be used to diagnose problems in electric vehicles (EVs)?
Yes, oscilloscopes are essential for diagnosing high-voltage systems in EVs, including batteries, inverters, motors, and charging systems.
Q8: What are some advanced triggering modes that can be used with an oscilloscope?
Advanced modes include pulse width triggering, useful for PWM signals like fuel injectors, and window triggering, useful for detecting signal anomalies within a specific range.
Q9: How can multiple channels on an oscilloscope be useful in automotive diagnostics?
Multiple channels allow simultaneous analysis of related signals, such as crankshaft and camshaft position sensors, to identify synchronization issues or phase differences.
Q10: Where can I find reliable information and training resources to improve my oscilloscope skills?
Explore CAR-TOOL.EDU.VN for articles and guides, visit manufacturer websites for manuals, and join online forums for automotive technicians to share knowledge and ask questions.