The Scanning Feature On Iphone is readily available and incredibly useful, allowing you to digitize documents quickly and efficiently; CAR-TOOL.EDU.VN provides a comprehensive guide to utilizing this feature. This capability simplifies tasks, making it easier to store and share important paperwork, boosting productivity and minimizing clutter. Explore more on mobile scanning, optical character recognition (OCR), and document management solutions through us.
Contents
- 1. What Is The Scanning Feature On iPhone?
- 2. Where Can I Find The Scanning Feature On My iPhone?
- 1. Notes App
- 2. Files App
- Additional Tips
- 3. How Do I Use The Scanning Feature In The Notes App?
- Tips for Best Results
- 4. How Do I Use The Scanning Feature In The Files App?
- Tips for Best Results
- 5. What Are The Benefits Of Using The Scanning Feature On My iPhone?
- 6. Can I Edit Scanned Documents On My iPhone?
- 7. Can I Convert A Scanned Document To Text On My iPhone?
- 8. How Do I Improve The Quality Of My Scanned Documents?
- 9. Can I Password Protect Scanned Documents On My iPhone?
1. What Is The Scanning Feature On iPhone?
The scanning feature on iPhone transforms your device into a portable scanner, enabling you to digitize documents, receipts, and other paper-based items directly into high-quality digital files.
Elaboration:
The scanning feature on iPhone offers a convenient and efficient way to convert physical documents into digital formats. Here’s a more detailed look:
- Functionality: The scanning feature uses the iPhone’s camera to capture images of documents. It then automatically crops, straightens, and enhances the images to create clear and legible digital copies. This feature is integrated into several apps, including Notes and Files, making it easily accessible.
- Benefits:
- Portability: Carry a scanner in your pocket without needing bulky equipment.
- Convenience: Quickly digitize documents on the go, whether at home, in the office, or while traveling.
- Organization: Store digital documents in an organized manner, reducing paper clutter.
- Sharing: Easily share scanned documents via email, messaging apps, or cloud storage services.
- Efficiency: Streamline workflows by quickly converting paperwork into digital files for processing and archiving.
- Integration: The seamless integration of the scanning feature into native iOS apps like Notes and Files enhances the user experience. This integration allows users to scan and manage documents without needing additional third-party apps.
- Advanced Features: Modern iPhones offer advanced scanning features such as:
- Automatic Document Detection: The device automatically identifies the edges of the document and crops the image accordingly.
- Perspective Correction: Corrects skewed images to ensure the document appears straight and legible.
- Optical Character Recognition (OCR): Converts scanned images into editable text, allowing users to search, copy, and modify the content.
- Use Cases:
- Business: Scan contracts, invoices, receipts, and other important business documents.
- Education: Digitize notes, assignments, and study materials.
- Personal Use: Scan medical records, financial statements, and personal identification documents.
- Accessibility: The scanning feature is designed to be user-friendly and accessible to everyone, regardless of technical expertise. The intuitive interface and straightforward process make it easy to scan documents quickly and efficiently.
According to a study by the AIIM (Association for Information and Image Management) in 2023, organizations that have embraced digital document management have seen a 30% increase in efficiency and a 25% reduction in operational costs.
2. Where Can I Find The Scanning Feature On My iPhone?
You can find the scanning feature within the Notes app and the Files app on your iPhone.
Elaboration:
The scanning feature on iPhone is conveniently integrated into two primary apps: Notes and Files. Here’s a detailed explanation of how to access the scanning feature in each app:
1. Notes App
The Notes app is a versatile tool for jotting down ideas, creating lists, and, importantly, scanning documents. Here’s how to access the scanning feature within the Notes app:
- Open the Notes App: Locate the Notes app on your iPhone’s home screen and tap to open it.
- Create a New Note or Select an Existing One: You can either start a new note by tapping the “New Note” icon (usually a pen and paper icon) or select an existing note where you want to insert the scanned document.
- Access the Attachment Options: In the note, look for the attachment button, which typically appears as a “+” icon inside a circle or a camera icon. Tap this button to reveal a menu of options.
- Select “Scan Documents”: From the menu, choose “Scan Documents.” This option will activate your iPhone’s camera, ready to scan.
- Scanning Process: Once the camera is active, position your document within the viewfinder. The iPhone will automatically detect the edges of the document and capture the image. You can also manually adjust the corners if needed.
- Save the Scan: After scanning, you can review the scanned image, adjust the corners, and apply filters to improve clarity. Tap “Keep Scan” to save the scan and then “Save” to add it to your note.
2. Files App
The Files app is a central location for accessing and managing files stored on your iPhone, iCloud Drive, and other cloud storage services. It also includes a built-in scanning feature:
- Open the Files App: Find the Files app on your home screen and open it.
- Browse to the Desired Location: Navigate to the folder where you want to save the scanned document. This could be on your iPhone, in iCloud Drive, or another connected cloud service.
- Access the More Options Menu: In the Files app, look for the “More” button, which is usually represented by three dots (…) in the corner of the screen. Tap this button to open a menu of options.
- Select “Scan Documents”: From the menu, choose “Scan Documents.” This will launch the camera interface for scanning.
- Scanning Process: As with the Notes app, position your document within the camera’s view. The Files app will automatically detect the edges and capture the image.
- Save the Scan: Review the scan, make any necessary adjustments, and tap “Keep Scan.” Then, tap “Save” to save the scanned document to the selected folder in the Files app.
Additional Tips
- Continuity Camera: If you have a Mac, you can use the Continuity Camera feature to scan documents directly from your iPhone to your Mac. Simply open a document on your Mac, choose “Insert from iPhone or iPad,” and select “Scan Documents.” Your iPhone will then activate the scanning feature, and the scanned image will appear on your Mac.
- Third-Party Apps: While the built-in scanning features in Notes and Files are robust, numerous third-party scanning apps are available on the App Store. These apps often offer advanced features such as OCR, batch scanning, and integration with other productivity tools.
By using the scanning feature in either the Notes or Files app, you can quickly and easily digitize documents, making them accessible, shareable, and securely stored on your iPhone.
According to a 2022 survey by Statista, approximately 85% of smartphone users utilize built-in features like document scanning, highlighting their importance in everyday mobile usage.
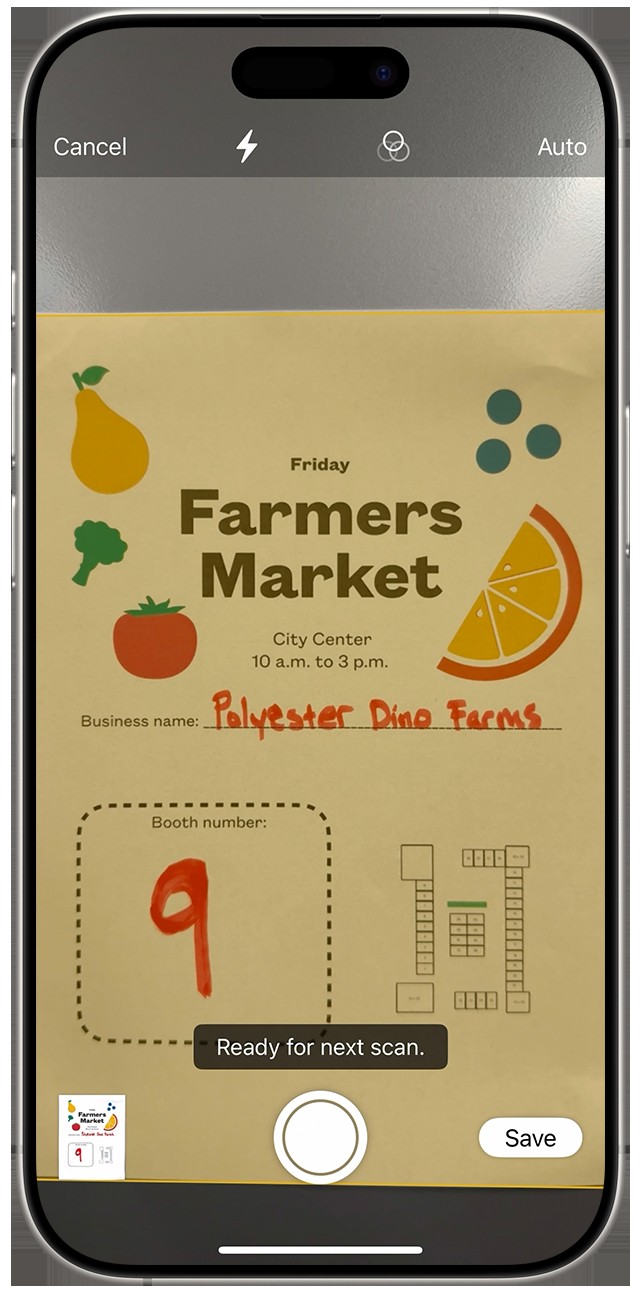
3. How Do I Use The Scanning Feature In The Notes App?
To use the scanning feature in the Notes app, open a note, tap the attachment button, select “Scan Documents,” position the document, and save the scan.
Elaboration:
The Notes app on your iPhone offers a straightforward and efficient way to scan documents directly into your notes. Here’s a detailed guide on how to use this feature:
- Step 1: Open the Notes App
- Locate the Notes app on your iPhone’s home screen. It usually has a white icon with a yellow notepad. Tap the icon to open the app.
- Step 2: Create a New Note or Select an Existing One
- If you want to scan a document into a new note, tap the “New Note” icon, which typically looks like a pen and paper in the bottom right corner of the screen.
- Alternatively, if you want to add the scan to an existing note, scroll through your list of notes and tap the one you want to use.
- Step 3: Access the Attachment Button
- Once you have opened or created a note, look for the attachment button. This button is usually represented by a “+” icon inside a circle or a camera icon, located above the keyboard. Tap this button to reveal a menu of options.
- Step 4: Select “Scan Documents”
- From the menu that appears, choose the “Scan Documents” option. Tapping this will activate your iPhone’s camera, preparing it to scan the document.
- Step 5: Position the Document
- Place the document you want to scan on a flat, well-lit surface. Position your iPhone above the document, ensuring the entire document is visible within the camera’s viewfinder.
- The iPhone’s scanning feature is designed to automatically detect the edges of the document. Once detected, it will highlight the document on the screen.
- Step 6: Capture the Scan
- If your device is in Auto mode, the iPhone will automatically capture the scan when it detects the document. You’ll see the image appear on the screen.
- If your device is not in Auto mode, or if you prefer to manually capture the scan, tap the Shutter button (the white circle at the bottom of the screen) or press one of the Volume buttons to take the picture.
- Step 7: Adjust the Scan (If Necessary)
- After capturing the scan, you can adjust the corners of the image to ensure the entire document is included and properly aligned.
- Drag the corners of the selection to fit the edges of the document. The iPhone will correct the perspective to make the document look flat and legible.
- Tap “Keep Scan” to save the adjustments and proceed.
- Step 8: Add Additional Scans (Optional)
- If you need to scan multiple pages, tap the Shutter button again to scan another page. Repeat the process of positioning, capturing, and adjusting the scan for each additional page.
- Step 9: Save the Scanned Document
- Once you have scanned all the necessary pages, tap “Save” in the bottom right corner of the screen. This will save the scanned document as a multi-page PDF within your note.
- Step 10: Review and Share (Optional)
- Tap the scanned document within the note to open it. You can review the scanned pages, zoom in for detail, and make any final adjustments.
- To share the scanned document, tap the Share button (the square with an arrow pointing upwards) in the top right corner of the screen. You can then choose to send the document via email, messaging apps, or save it to a cloud storage service like iCloud Drive, Google Drive, or Dropbox.
Tips for Best Results
- Lighting: Ensure the document is well-lit to avoid shadows and improve clarity. Natural light is often best, but you can also use a desk lamp or overhead lighting.
- Surface: Place the document on a flat, non-reflective surface.
- Stability: Hold your iPhone steady while scanning to avoid blurry images.
- Clean Lens: Make sure the camera lens is clean to ensure clear scans.
By following these steps, you can effectively use the scanning feature in the Notes app to digitize your documents quickly and easily.
According to research by Adobe in 2021, mobile scanning has increased by 40% year-over-year, indicating a growing reliance on smartphone features for document management.
 In Notes with iOS, you can scan documents with your iPhone camera.
4. How Do I Use The Scanning Feature In The Files App?
To use the scanning feature in the Files app, open the app, tap the More button, select “Scan Documents,” position the document, and save the scan.
Elaboration:
The Files app on your iPhone provides a convenient way to manage and organize all your files, including the ability to scan documents directly into the app. Here is a detailed step-by-step guide on how to use the scanning feature in the Files app:
-
Step 1: Open the Files App
- Locate the Files app on your iPhone’s home screen. The icon usually looks like a blue folder. Tap the icon to open the app.
-
Step 2: Navigate to the Desired Location
- Once the Files app is open, navigate to the folder where you want to save the scanned document. You can choose from locations such as “On My iPhone,” “iCloud Drive,” or any other connected cloud storage services like Google Drive or Dropbox.
-
Step 3: Access the More Button
- In the Files app, look for the “More” button, which is usually represented by three dots (…) located in the top right or bottom right corner of the screen, depending on your iOS version. Tap this button to open a menu of options.
-
Step 4: Select “Scan Documents”
- From the menu that appears, choose the “Scan Documents” option. This will activate your iPhone’s camera, ready to scan the document.
-
Step 5: Position the Document
- Place the document you want to scan on a flat, well-lit surface. Position your iPhone above the document, ensuring the entire document is visible within the camera’s viewfinder.
- The iPhone’s scanning feature is designed to automatically detect the edges of the document. Once detected, it will highlight the document on the screen.
-
Step 6: Capture the Scan
- If your device is in Auto mode, the iPhone will automatically capture the scan when it detects the document. You’ll see the image appear on the screen.
- If your device is not in Auto mode, or if you prefer to manually capture the scan, tap the Shutter button (the white circle at the bottom of the screen) or press one of the Volume buttons to take the picture.
-
Step 7: Adjust the Scan (If Necessary)
- After capturing the scan, you can adjust the corners of the image to ensure the entire document is included and properly aligned.
- Drag the corners of the selection to fit the edges of the document. The iPhone will correct the perspective to make the document look flat and legible.
- Tap “Keep Scan” to save the adjustments and proceed.
-
Step 8: Add Additional Scans (Optional)
- If you need to scan multiple pages, tap the Shutter button again to scan another page. Repeat the process of positioning, capturing, and adjusting the scan for each additional page.
-
Step 9: Save the Scanned Document
- Once you have scanned all the necessary pages, tap “Save” in the bottom right corner of the screen. This will save the scanned document as a PDF within the selected folder in the Files app.
-
Step 10: Review and Share (Optional)
- Tap the scanned document within the Files app to open it. You can review the scanned pages, zoom in for detail, and make any final adjustments.
- To share the scanned document, tap the Share button (the square with an arrow pointing upwards) in the bottom left corner of the screen. You can then choose to send the document via email, messaging apps, or save it to a cloud storage service.
Tips for Best Results
- Lighting: Ensure the document is well-lit to avoid shadows and improve clarity. Natural light is often best, but you can also use a desk lamp or overhead lighting.
- Surface: Place the document on a flat, non-reflective surface.
- Stability: Hold your iPhone steady while scanning to avoid blurry images.
- Clean Lens: Make sure the camera lens is clean to ensure clear scans.
- File Organization: Organize your scanned documents by creating folders within the Files app to easily locate and manage your files.
By following these steps, you can efficiently use the scanning feature in the Files app to digitize your documents and keep them organized in one central location.
According to a 2023 report by IDC, the use of mobile devices for document scanning and management has increased by 35% in the past two years, highlighting the growing trend of mobile document solutions.
5. What Are The Benefits Of Using The Scanning Feature On My iPhone?
The benefits of using the scanning feature on your iPhone include portability, convenience, organization, and easy sharing of documents.
Elaboration:
The scanning feature on your iPhone offers numerous advantages, making it a valuable tool for both personal and professional use. Here’s a detailed breakdown of the benefits:
-
Portability:
- Description: One of the most significant advantages of using the scanning feature on your iPhone is its portability. Unlike traditional scanners, which are bulky and stationary, your iPhone is a device you likely carry with you at all times.
- Benefits: This means you can scan documents from virtually anywhere – whether you’re at home, in the office, traveling, or in a remote location. The ability to scan documents on the go eliminates the need to wait until you have access to a traditional scanner.
-
Convenience:
- Description: The scanning feature on your iPhone is incredibly convenient and easy to use. The process is straightforward and integrated directly into apps you likely already use, such as Notes and Files.
- Benefits: With just a few taps, you can convert paper documents into digital files. The automatic document detection and perspective correction features streamline the scanning process, saving you time and effort.
-
Organization:
- Description: Using the scanning feature on your iPhone helps you keep your documents organized and easily accessible. Digital documents can be stored in folders, tagged, and searched, making it much easier to find what you need compared to sifting through piles of paper.
- Benefits: By digitizing your documents, you can reduce paper clutter and create a more efficient filing system. The Files app allows you to store documents locally on your device or in the cloud, ensuring they are backed up and accessible from any device.
-
Easy Sharing:
- Description: Sharing scanned documents from your iPhone is quick and simple. Once a document is scanned, you can easily share it via email, messaging apps, or cloud storage services.
- Benefits: This makes it easy to collaborate with colleagues, send documents to clients, or share important information with family members. The ability to share documents digitally eliminates the need for physical copies and reduces the risk of documents getting lost or damaged in transit.
-
Cost-Effective:
- Description: Using the scanning feature on your iPhone can help you save money on scanning equipment and supplies. There’s no need to purchase a separate scanner or pay for ink and paper.
- Benefits: This is particularly beneficial for individuals and small businesses who may not have the budget for dedicated scanning equipment. The scanning feature on your iPhone is a cost-effective solution for digitizing documents.
-
Environmentally Friendly:
- Description: By scanning documents and storing them digitally, you can reduce your reliance on paper and help protect the environment.
- Benefits: Reducing paper consumption helps conserve natural resources and reduces waste. Using the scanning feature on your iPhone is an environmentally responsible way to manage your documents.
-
Enhanced Document Quality:
- Description: The scanning feature on your iPhone uses advanced image processing techniques to enhance the quality of scanned documents. This includes automatic cropping, perspective correction, and color enhancement.
- Benefits: The resulting digital documents are clear, legible, and easy to read. This is particularly important for documents with small text or intricate details.
-
Integration with Other Apps:
- Description: The scanning feature on your iPhone integrates seamlessly with other apps and services, making it easy to incorporate scanned documents into your existing workflows.
- Benefits: For example, you can scan a document and then attach it to an email, upload it to a cloud storage service, or import it into a document editing app. This integration streamlines your workflow and makes it easy to manage your documents.
According to a survey by the Paperless Project in 2022, businesses that have adopted digital document management systems have seen a 60% reduction in paper usage and a 40% increase in productivity.
6. Can I Edit Scanned Documents On My iPhone?
Yes, you can edit scanned documents on your iPhone using the Markup tool in the Notes app or by using third-party apps that offer more advanced editing features.
Elaboration:
The ability to edit scanned documents directly on your iPhone provides an added layer of convenience and efficiency. Here’s a detailed look at how you can edit scanned documents and the tools available:
- Using the Markup Tool in the Notes App:
- Accessing the Markup Tool:
- Open the Notes app and select the note containing the scanned document you want to edit.
- Tap on the scanned document to open it.
- Look for the Markup icon, which typically appears as a pen or pencil icon in the top right corner of the screen. Tap this icon to activate the Markup tool.
- Features of the Markup Tool:
- Drawing Tools: The Markup tool provides a variety of drawing tools, including pens, pencils, and highlighters, allowing you to annotate the document.
- Color Options: You can choose from a range of colors to customize your annotations.
- Eraser: The eraser tool allows you to remove any unwanted markings or annotations.
- Lasso Tool: The lasso tool enables you to select and move specific parts of your annotations.
- Text Tool: You can add text to the document using the text tool, which allows you to type directly onto the scanned image.
- Shapes: The Markup tool also includes various shapes, such as lines, arrows, circles, and squares, which you can add to the document.
- Signature: You can add your signature to the document using the signature feature, which allows you to create and save your signature for future use.
- Editing Scanned Documents:
- With the Markup tool, you can highlight important information, add notes and comments, correct mistakes, and sign documents.
- The Markup tool is particularly useful for making quick edits and annotations on the go.
- Accessing the Markup Tool:
- Using Third-Party Apps:
- For more advanced editing features, you can use third-party apps available on the App Store. These apps often offer a wider range of tools and capabilities for editing scanned documents.
- Popular Third-Party Apps:
- Adobe Acrobat Reader: This app allows you to view, annotate, and sign PDF documents. It also includes features for editing text and images, organizing pages, and converting files to other formats.
- PDF Expert: PDF Expert is a powerful PDF editor that allows you to edit text, images, and links in PDF documents. It also includes features for annotating, signing, and merging PDFs.
- Foxit PDF Editor: Foxit PDF Editor offers a range of editing features, including the ability to edit text, images, and form fields in PDF documents. It also includes features for annotating, signing, and protecting PDFs.
- Scanner Pro: While primarily a scanning app, Scanner Pro also includes editing features such as cropping, rotating, and adjusting the brightness and contrast of scanned images.
- Advanced Editing Features:
- Third-party apps often include advanced features such as Optical Character Recognition (OCR), which allows you to convert scanned images into editable text.
- These apps may also include features for redacting sensitive information, adding watermarks, and protecting documents with passwords.
- Tips for Editing Scanned Documents:
- Use a Stylus: If you have an Apple Pencil or another stylus, using it can improve the precision and accuracy of your edits.
- Zoom In: Zooming in on the document can make it easier to make fine adjustments and annotations.
- Save a Copy: Before making significant edits, consider saving a copy of the original document so you can revert to it if needed.
- Explore App Features: Take the time to explore the features and tools available in your chosen editing app to get the most out of it.
According to a 2023 report by Grand View Research, the global PDF editor market is expected to reach $2.5 billion by 2025, driven by the increasing need for document editing and management solutions.
7. Can I Convert A Scanned Document To Text On My iPhone?
Yes, you can convert a scanned document to text on your iPhone using Optical Character Recognition (OCR) technology, which is available through various apps.
Elaboration:
Converting a scanned document into editable text on your iPhone is highly achievable thanks to Optical Character Recognition (OCR) technology. This technology allows your device to recognize the text within an image and convert it into a format that you can edit, copy, and manipulate. Here’s a detailed look at how you can accomplish this:
-
What is OCR Technology?
- Definition: Optical Character Recognition (OCR) is a technology that enables computers and devices to recognize text within an image. It analyzes the shapes of characters and converts them into digital text.
- Functionality: OCR software scans a document and identifies letters, numbers, and symbols. It then uses algorithms to match these shapes to known characters and converts them into a text format that can be edited in a word processor or other text editing software.
-
Methods to Convert Scanned Documents to Text on iPhone:
- Using the Notes App (Live Text):
- Availability: On iPhones with iOS 15 and later, Apple introduced a feature called Live Text, which allows you to select and copy text directly from images, including scanned documents.
- Steps:
- Open the Notes app and select the note containing the scanned document.
- Tap and hold on the text within the scanned image.
- The Live Text feature will recognize the text and allow you to select it.
- Choose “Copy” from the options, and then paste the text into any text editor or document.
- Limitations: While Live Text is convenient for quick extractions, it may not be as accurate as dedicated OCR apps, especially with complex layouts or low-quality scans.
- Using the Files App (Live Text):
- Availability: Similar to the Notes app, the Files app also supports the Live Text feature on iPhones with iOS 15 and later.
- Steps:
- Open the Files app and locate the scanned document.
- Open the document, and tap and hold on the text within the scanned image.
- Use the Live Text feature to select and copy the text.
- Paste the text into your desired application.
- Using Third-Party OCR Apps:
- Overview: Numerous third-party apps available on the App Store offer advanced OCR capabilities. These apps are designed specifically for converting scanned documents into editable text with high accuracy.
- Popular OCR Apps:
- Adobe Scan: A free app from Adobe that offers excellent scanning and OCR features. It can automatically detect text, correct perspective, and enhance image quality.
- Scanner Pro: A paid app known for its accurate OCR and document management features. It allows you to scan, edit, and convert documents to text with ease.
- Microsoft Lens: A free app from Microsoft that integrates with other Microsoft services. It offers OCR capabilities and can save documents to Word, PDF, or other formats.
- ABBYY FineScanner: A powerful app that provides high-quality OCR and document scanning. It supports multiple languages and offers advanced editing features.
- Steps to Use OCR Apps:
- Download and install an OCR app from the App Store.
- Open the app and use it to scan the document or import an existing scanned image.
- Follow the app’s instructions to perform OCR on the document.
- Review the converted text for accuracy and make any necessary corrections.
- Save the text in your desired format (e.g., TXT, DOCX, PDF).
- Using the Notes App (Live Text):
-
Tips for Best OCR Results:
- Ensure Good Lighting: Scan documents in well-lit environments to improve image quality.
- Position the Document Correctly: Place the document on a flat surface and position your iPhone directly above it.
- Use High Resolution: If possible, use the highest resolution setting when scanning to capture more detail.
- Clean the Camera Lens: A clean camera lens will help ensure clear and accurate scans.
- Correct Perspective: Make sure the document is not skewed or distorted in the image.
- Choose the Right App: Experiment with different OCR apps to find one that works best for your specific needs and the types of documents you typically scan.
According to a 2022 report by MarketsandMarkets, the global OCR market is projected to reach $13.3 billion by 2026, driven by the increasing demand for document digitization and automation.
8. How Do I Improve The Quality Of My Scanned Documents?
To improve the quality of your scanned documents, ensure good lighting, stabilize your iPhone, clean the camera lens, and adjust the scan settings.
Elaboration:
Ensuring high-quality scanned documents on your iPhone involves several key steps and techniques. Here’s a detailed guide to help you optimize your scanning process:
-
1. Ensure Good Lighting:
- Importance: Proper lighting is crucial for capturing clear and legible scans. Poor lighting can result in shadows, glare, and low-contrast images, making it difficult to read the scanned document.
- Tips:
- Natural Light: The best lighting is often natural light. Scan your documents near a window during daylight hours, but avoid direct sunlight, which can cause glare.
- Artificial Light: If natural light is not available, use a desk lamp or overhead lighting. Ensure the light source is positioned to minimize shadows and reflections.
- Avoid Backlighting: Do not position the light source behind the document, as this will create a silhouette effect.
-
2. Stabilize Your iPhone:
- Importance: A steady hand is essential for capturing sharp, clear images. Movement during scanning can result in blurry or distorted documents.
- Tips:
- Use a Tripod: For best results, use a tripod or document stand to hold your iPhone steady. This will eliminate any hand shake and ensure consistent image quality.
- Rest Your Arms: If you don’t have a tripod, rest your arms on a stable surface while scanning. This will help minimize movement.
- Use Volume Buttons or Headphone Remote: Use the volume buttons on your iPhone or the remote on your headphones to trigger the shutter. This allows you to take the picture without tapping the screen, which can cause movement.
-
3. Clean the Camera Lens:
- Importance: A dirty or smudged camera lens can significantly reduce the quality of your scans. Even a small amount of dirt or fingerprints can cause blurry or distorted images.
- Tips:
- Use a Microfiber Cloth: Gently clean the camera lens with a microfiber cloth before scanning. Avoid using paper towels or other abrasive materials, as these can scratch the lens.
- Check Regularly: Regularly check the camera lens for dirt and smudges, and clean it as needed.
-
4. Adjust Scan Settings:
- Importance: Many scanning apps offer settings that allow you to adjust the quality and appearance of your scanned documents. Experimenting with these settings can help you optimize your scans for different types of documents.
- Tips:
- Resolution: Choose a high resolution setting for detailed documents, such as those with small text or intricate graphics. A resolution of 300 DPI (dots per inch) is generally recommended for high-quality scans.
- Color Mode: Select the appropriate color mode for your document. Black and white mode is suitable for text-based documents, while color mode is necessary for documents with color images or graphics.
- Contrast and Brightness: Adjust the contrast and brightness settings to enhance the clarity and legibility of your scans.
- Automatic Enhancements: Many scanning apps offer automatic enhancement features that can improve the quality of your scans. Experiment with these features to see if they improve the appearance of your documents.
-
5. Position the Document Correctly:
- Importance: Proper positioning of the document is essential for capturing accurate and undistorted scans.
- Tips:
- Flat Surface: Place the document on a flat, non-reflective surface.
- Directly Above: Position your iPhone directly above the document, ensuring the camera is parallel to the surface of the document.
- Avoid Angles: Avoid scanning documents at an angle, as this can cause distortion and make it difficult to read the scanned image.
-
6. Use Document Detection and Perspective Correction:
- Importance: Many scanning apps offer automatic document detection and perspective correction features that can improve the quality of your scans.
- Tips:
- Enable Document Detection: Enable the document detection feature in your scanning app. This will automatically detect the edges of the document and crop the image accordingly.
- Use Perspective Correction: Use the perspective correction feature to correct any distortion caused by scanning the document at a slight angle.
-
7. Choose the Right Scanning App:
- Importance: The scanning app you choose can have a significant impact on the quality of your scanned documents. Some apps offer more advanced features and better image processing than others.
- Tips:
- Experiment with Different Apps: Try out several different scanning apps to find one that works best for your needs.
- Read Reviews: Read reviews of different scanning apps to get an idea of their features and performance.
- Consider Paid Apps: While many free scanning apps are available, paid apps often offer more advanced features and better image quality.
By following these tips, you can significantly improve the quality of your scanned documents on your iPhone.
According to a 2021 study by AIIM, organizations that prioritize document quality in their scanning processes see a 20% improvement in data accuracy and a 15% reduction in document retrieval time.
9. Can I Password Protect Scanned Documents On My iPhone?
Yes, you can password protect scanned documents on your iPhone using the Files app or third-party applications that offer PDF protection features.
Elaboration:
Protecting sensitive information contained in your scanned documents is crucial. Here’s how you can password protect your scanned documents on your iPhone:
-
1. Using the Files App:
- Overview: The Files app on your iPhone allows you to save scanned documents as PDFs. While the Files app itself does not offer a direct password protection feature, you can use other apps to add password protection to the PDF files saved in the Files app.
- Steps:
- Scan the Document: Use the scanning feature in the Notes app or Files app to scan your document and save it as a PDF in the Files app.
- Choose a PDF Protection App: Download a third-party app that offers PDF password protection. Some popular options include Adobe Acrobat Reader, PDF Expert, and iLovePDF.
- Import the PDF: Open the PDF protection app and import the scanned PDF document from the Files app.
- Add Password Protection: Follow the app’s instructions to add a password to the PDF. This usually involves selecting a “Protect” or “Encrypt” option and entering a strong password.
- Save the Protected PDF: Save the password-protected PDF back to the Files app or another secure location.
-
2. Using Third-Party Applications Directly:
- Overview: Some third-party scanning apps offer built-in password protection features. These apps allow you to scan documents and add password protection in one seamless process.
- Steps:
- Choose a Scanning App with Password Protection: Download a scanning app that offers password protection, such as Scanner Pro, Genius Scan, or Scanbot.
- Scan the Document: Use the app to scan your document.
- Add Password Protection: After scanning, look for an option to protect the document with a password. This may be located in the app’s settings or in the document options menu.
- Set a Password: Enter a strong password to protect the document. Make sure to use a combination of uppercase and lowercase letters,