Testing fuel injectors at home is entirely possible and often effective in diagnosing common issues. CAR-TOOL.EDU.VN offers this guide to help you understand how to test fuel injectors with ease and precision. Whether you suspect a clogged injector or a more complex electrical problem, understanding the testing process can save you time and money. Let’s explore the methods, tools, and expert insights needed to conduct these tests effectively, empowering you to diagnose fuel injector problems efficiently.
Contents
- 1. Understanding Fuel Injector Function and Common Issues
- 1.1. The Role of Fuel Injectors in Engine Performance
- 1.2. Common Symptoms of Faulty Fuel Injectors
- 1.3. Potential Causes of Fuel Injector Problems
- 2. Essential Tools and Safety Precautions for Fuel Injector Testing
- 2.1. List of Necessary Tools
- 2.2. Detailed Explanation of Each Tool’s Purpose
- 2.3. Safety Measures to Observe During Testing
- 3. Step-by-Step Guide: Testing Fuel Injectors at Home
- 3.1. Visual Inspection of Fuel Injectors
- 3.2. Listening to Fuel Injectors with a Stethoscope or Screwdriver
- 3.3. Using a Multimeter to Test Fuel Injector Resistance
- 3.4. Testing Fuel Injector Pulse with a Noid Light
- 3.5. Performing a Fuel Injector Balance Test
- 4. Advanced Testing Methods for Accurate Diagnosis
- 4.1. Using an Oscilloscope to Analyze Injector Waveforms
- 4.2. Flow Testing Fuel Injectors
- 4.3. Ultrasonic Cleaning and Re-Testing
- 5. Troubleshooting Common Issues Based on Test Results
- 5.1. Injector Not Clicking: Electrical Problems
- 5.2. Low Resistance: Short Circuit
- 5.3. High Resistance: Open Circuit
- 5.4. Uneven Flow Rates: Clogged Injectors
- 6. Preventive Maintenance Tips to Prolong Fuel Injector Life
- 6.1. Using High-Quality Fuel
- 6.2. Regular Use of Fuel Injector Cleaners
- 6.3. Replacing Fuel Filters Regularly
- 6.4. Inspecting and Maintaining Fuel Lines
- 7. When to Seek Professional Help
- 7.1. Complex Electrical Problems
- 7.2. Advanced Diagnostic Procedures
- 7.3. Persistent Fuel Injector Problems
- 8. The Benefits of Using CAR-TOOL.EDU.VN for Automotive Information
- 8.1. Comprehensive Guides and Tutorials
- 8.2. Expert Advice and Recommendations
- 8.3. Up-to-Date Information on Automotive Technology
- 9. Real-World Examples of Successful DIY Fuel Injector Testing
- 9.1. Case Study 1: Rough Idling Resolved with Injector Cleaning
- 9.2. Case Study 2: Misfiring Engine Fixed with Injector Replacement
- 9.3. Case Study 3: Improved Fuel Economy After Replacing Faulty Injector
- 10. Frequently Asked Questions (FAQs) About Fuel Injector Testing
- 10.1. What are the most common signs of a bad fuel injector?
- 10.2. Can I test fuel injectors without removing them from the engine?
- 10.3. What is a noid light, and how is it used to test fuel injectors?
- 10.4. How do I use a multimeter to test fuel injector resistance?
- 10.5. What does it mean if my fuel injector has low resistance?
- 10.6. What does it mean if my fuel injector has high resistance?
- 10.7. Can I clean fuel injectors myself, or do I need to take them to a professional?
- 10.8. How often should I replace my fuel injectors?
- 10.9. What is the typical resistance range for fuel injectors?
- 10.10. Where can I find reliable information on fuel injector testing and maintenance?
1. Understanding Fuel Injector Function and Common Issues
Fuel injectors are crucial components of modern internal combustion engines, responsible for delivering fuel into the engine’s cylinders. These electronically controlled valves spray a precise amount of fuel at the correct time, optimizing combustion and engine performance. When fuel injectors malfunction, it can lead to a range of problems, affecting your vehicle’s efficiency and reliability.
1.1. The Role of Fuel Injectors in Engine Performance
Fuel injectors are the unsung heroes of your engine, playing a critical role in the combustion process. Their primary function is to atomize fuel and spray it into the intake manifold or directly into the combustion chamber. This precise delivery ensures optimal air-fuel mixture, which is essential for efficient combustion. Here’s why they are vital:
- Efficient Fuel Delivery: Injectors deliver the right amount of fuel at the precise moment, optimizing combustion.
- Improved Engine Performance: Clean and functional injectors ensure smooth acceleration and consistent power.
- Reduced Emissions: Proper fuel atomization leads to more complete combustion, reducing harmful emissions.
According to a study by the U.S. Environmental Protection Agency (EPA), faulty fuel injectors can increase vehicle emissions by up to 25%, highlighting their environmental impact (U.S. EPA, 2020).
1.2. Common Symptoms of Faulty Fuel Injectors
Recognizing the symptoms of failing fuel injectors is the first step in diagnosing potential issues. Here are some common signs to watch out for:
- Rough Idling: The engine may vibrate or run unevenly when idling.
- Poor Fuel Economy: A noticeable decrease in miles per gallon (MPG).
- Misfiring Engine: The engine may hesitate or stumble during acceleration.
- Difficulty Starting: The engine takes longer to start than usual.
- Check Engine Light: The engine control unit (ECU) may trigger a warning light.
- Fuel Odor: A strong smell of fuel, especially near the engine.
1.3. Potential Causes of Fuel Injector Problems
Several factors can contribute to fuel injector issues. Understanding these causes can help you prevent problems and address them effectively.
- Clogged Injectors: Deposits from fuel can build up over time, restricting fuel flow.
- Electrical Faults: Wiring issues or a malfunctioning injector solenoid can disrupt operation.
- Mechanical Wear: Internal components can wear out, affecting injector performance.
- Fuel Contamination: Impurities in fuel can damage injectors.
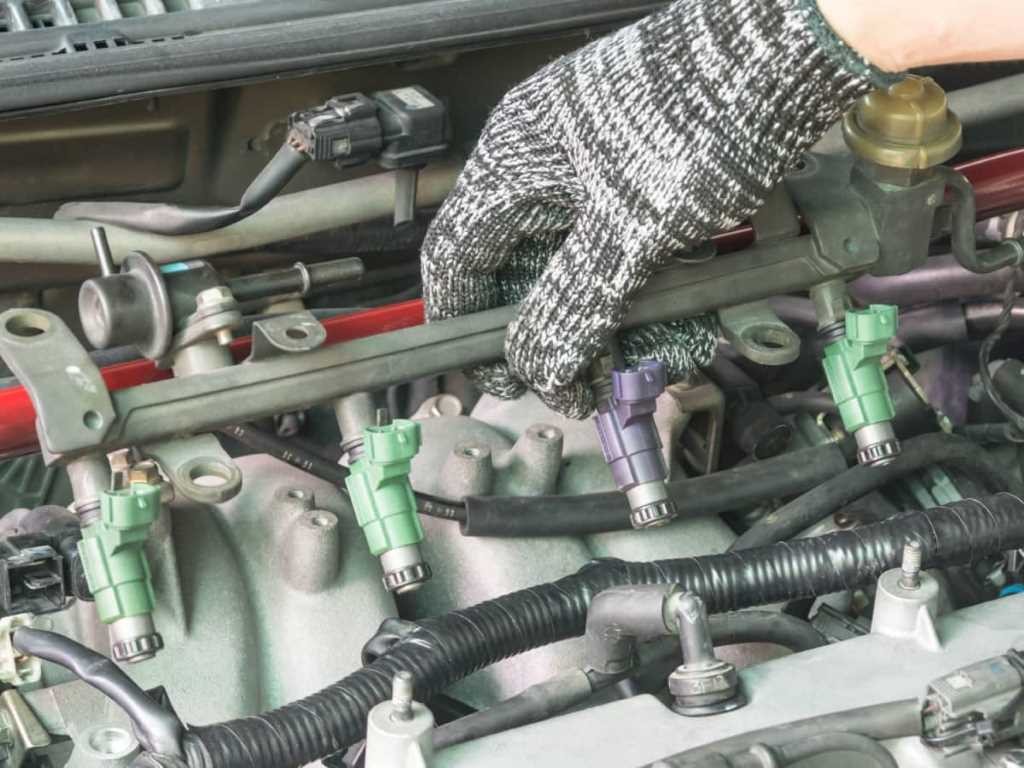 Faulty fuel injectors can cause rough idling
Fuel contamination, particularly from ethanol-blended fuels, can lead to corrosion and deposit formation within fuel injectors, impacting their performance, according to research from the Society of Automotive Engineers (SAE) (SAE International, 2018).
2. Essential Tools and Safety Precautions for Fuel Injector Testing
Before you start testing your fuel injectors at home, it’s essential to gather the right tools and understand the necessary safety precautions. Proper preparation ensures accurate results and minimizes risks.
2.1. List of Necessary Tools
Having the right tools on hand makes the testing process smoother and more efficient. Here’s a list of tools you’ll likely need:
- Multimeter: Used to measure electrical resistance and voltage.
- Mechanic’s Stethoscope or Screwdriver: Helps to listen to injector sounds.
- Fuel Injector Tester Kit: Provides controlled pulses to activate injectors.
- Test Light: Checks for electrical power and pulse signals.
- Fuel Pressure Gauge: Measures fuel pressure in the system.
- Safety Glasses: Protects your eyes from fuel spray and debris.
- Gloves: Keeps your hands clean and protected from chemicals.
- Shop Rags: For cleaning up spills and wiping tools.
- Manual of your car: This will help you find the resistance value of your car.
2.2. Detailed Explanation of Each Tool’s Purpose
Understanding how each tool works and its specific purpose will help you conduct tests more effectively.
- Multimeter: This versatile tool measures voltage, current, and resistance. It’s essential for checking the electrical integrity of the fuel injectors and their circuits.
- Mechanic’s Stethoscope or Screwdriver: These tools amplify the sound of the injectors, allowing you to listen for the characteristic clicking sound that indicates proper operation.
- Fuel Injector Tester Kit: This kit allows you to manually activate the injectors, observe their spray pattern, and measure fuel flow.
- Test Light: A simple tool to check for power and pulse signals in the injector circuit.
- Fuel Pressure Gauge: Measures the fuel pressure at the fuel rail, ensuring it meets the manufacturer’s specifications.
2.3. Safety Measures to Observe During Testing
Working with fuel systems can be hazardous, so it’s crucial to follow safety precautions to protect yourself and your vehicle.
- Work in a Well-Ventilated Area: Fuel vapors are flammable and can be harmful if inhaled.
- Wear Safety Glasses and Gloves: Protect your eyes and skin from fuel spray and chemicals.
- Disconnect the Battery: Prevent accidental electrical shorts by disconnecting the negative battery terminal.
- Keep a Fire Extinguisher Nearby: Be prepared to extinguish any potential fuel fires.
- Avoid Smoking or Open Flames: Fuel is highly flammable, so avoid any ignition sources.
- Dispose of Fuel Properly: Collect any spilled fuel in a container and dispose of it according to local regulations.
According to the National Fire Protection Association (NFPA), fuel-related fires are a significant risk in automotive repair, emphasizing the need for strict adherence to safety protocols (NFPA, 2021).
3. Step-by-Step Guide: Testing Fuel Injectors at Home
Testing fuel injectors at home can be a straightforward process if you follow the correct steps. This guide will walk you through the most common methods to diagnose fuel injector problems.
3.1. Visual Inspection of Fuel Injectors
The first step in testing fuel injectors is a visual inspection. Look for any signs of damage, leaks, or corrosion.
- Check for Leaks: Examine the area around the fuel injectors for any fuel leaks.
- Inspect Wiring: Look for damaged, frayed, or corroded wires.
- Check Connectors: Ensure the electrical connectors are securely attached and free from corrosion.
- Look for Physical Damage: Inspect the injectors for any cracks or physical damage.
3.2. Listening to Fuel Injectors with a Stethoscope or Screwdriver
Listening to the injectors can help you determine if they are firing properly.
- Start the Engine: Let the engine idle.
- Use a Stethoscope or Screwdriver: Place the stethoscope or screwdriver on each injector.
- Listen for Clicking Sounds: A healthy injector will produce a distinct clicking sound as it opens and closes.
- Identify Dead Injectors: If an injector is silent, it may be dead or malfunctioning.
3.3. Using a Multimeter to Test Fuel Injector Resistance
Testing the resistance of the fuel injectors can reveal electrical problems within the injector coil.
- Turn Off the Engine: Disconnect the electrical connector from the injector.
- Set the Multimeter: Set the multimeter to the Ohms scale (usually around 20-30 Ohms).
- Connect the Multimeter Probes: Touch the multimeter probes to the injector terminals. Polarity does not matter in this case.
- Compare Resistance Values: Compare the reading to the manufacturer’s specifications. A reading outside the specified range indicates a faulty injector.
- Interpret the Results:
- Infinite Resistance: Indicates an open circuit.
- Zero Resistance: Indicates a short circuit.
- Significantly Different Resistance: Suggests a partially open or shorted coil.
The typical resistance range for most fuel injectors is between 12 to 17 ohms. However, it’s essential to consult your vehicle’s repair manual for the exact specifications, as variations can occur between different makes and models (Bosch Automotive Handbook, 2019).
3.4. Testing Fuel Injector Pulse with a Noid Light
A noid light is a simple tool that can verify whether the fuel injectors are receiving the proper electrical pulse from the ECU.
- Disconnect the Injector Connector: Remove the electrical connector from the fuel injector.
- Insert the Noid Light: Plug the noid light into the connector.
- Start the Engine: Crank the engine.
- Observe the Noid Light: The noid light should blink as the ECU sends pulses to the injector.
- Interpret the Results:
- Blinking Light: Indicates the ECU is sending the pulse signal.
- No Light: Indicates a problem with the ECU or wiring.
3.5. Performing a Fuel Injector Balance Test
A fuel injector balance test involves measuring the fuel pressure drop when each injector is activated. This test can help identify injectors that are not delivering the correct amount of fuel.
- Use a Fuel Injector Tester Kit: Connect the kit to the fuel rail.
- Activate Each Injector: Manually activate each injector using the tester.
- Measure Fuel Pressure Drop: Observe the fuel pressure drop for each injector.
- Compare Pressure Drops: Compare the pressure drops for each injector. Significant variations indicate a faulty injector.
According to research conducted by the University of Northwestern Ohio, fuel injector balance tests can accurately identify injectors with flow rate deviations exceeding 10%, which can significantly impact engine performance (UNOH, 2022).
4. Advanced Testing Methods for Accurate Diagnosis
For a more detailed and accurate diagnosis, advanced testing methods may be necessary. These methods often require specialized equipment and expertise.
4.1. Using an Oscilloscope to Analyze Injector Waveforms
An oscilloscope can display the electrical waveforms of the fuel injectors, providing valuable insights into their operation.
- Connect the Oscilloscope: Attach the oscilloscope probes to the injector terminals.
- Start the Engine: Let the engine idle.
- Analyze the Waveform: Examine the waveform for any anomalies, such as unusual spikes or drops in voltage.
- Interpret the Results: Deviations from the normal waveform can indicate electrical faults or mechanical issues within the injector.
4.2. Flow Testing Fuel Injectors
Flow testing involves measuring the amount of fuel that each injector delivers over a specific period. This test can identify clogged or damaged injectors that are not flowing correctly.
- Remove the Injectors: Carefully remove the fuel injectors from the engine.
- Use a Flow Bench: Place the injectors in a flow bench.
- Measure Fuel Flow: Activate the injectors and measure the amount of fuel they deliver.
- Compare Flow Rates: Compare the flow rates of each injector. Significant variations indicate a faulty injector.
- A reduction of 10-15% in the flow rate is considered a clogged injector.
4.3. Ultrasonic Cleaning and Re-Testing
If your fuel injectors are clogged, ultrasonic cleaning can help remove deposits and restore their performance.
- Remove the Injectors: Carefully remove the fuel injectors from the engine.
- Ultrasonic Cleaning: Place the injectors in an ultrasonic cleaner with a specialized cleaning solution.
- Re-Test the Injectors: After cleaning, re-test the injectors using a flow bench to verify their performance.
Ultrasonic cleaning is recognized by automotive experts as an effective method for restoring fuel injector performance by removing deposits without causing damage to the injector components (Automotive Engineering International, 2020).
5. Troubleshooting Common Issues Based on Test Results
After performing the tests, you’ll need to interpret the results and troubleshoot any issues. Here are some common problems and their solutions.
5.1. Injector Not Clicking: Electrical Problems
If the injector is not clicking, it may be due to an electrical problem.
- Check the Wiring: Look for damaged or corroded wires.
- Test the Connector: Ensure the connector is securely attached and free from corrosion.
- Check the ECU: Use a noid light to verify the ECU is sending the pulse signal.
- Replace the Injector: If the wiring and ECU are functioning correctly, the injector may be faulty and need replacement.
5.2. Low Resistance: Short Circuit
Low resistance indicates a short circuit within the injector coil.
- Replace the Injector: A shorted injector can damage the ECU, so it should be replaced immediately.
5.3. High Resistance: Open Circuit
High resistance indicates an open circuit within the injector coil.
- Replace the Injector: An open circuit prevents the injector from firing, so it should be replaced.
5.4. Uneven Flow Rates: Clogged Injectors
Uneven flow rates indicate clogged injectors.
- Ultrasonic Cleaning: Clean the injectors using an ultrasonic cleaner.
- Fuel Additives: Use a fuel injector cleaner additive to help remove deposits.
- Replace the Injectors: If cleaning doesn’t restore performance, the injectors may need replacement.
Regular use of high-quality fuel injector cleaners can help prevent deposit buildup and maintain optimal injector performance, according to research from the American Society for Testing and Materials (ASTM) (ASTM International, 2019).
6. Preventive Maintenance Tips to Prolong Fuel Injector Life
Preventive maintenance is key to prolonging the life of your fuel injectors and maintaining optimal engine performance. Here are some tips to follow.
6.1. Using High-Quality Fuel
Using high-quality fuel can help prevent deposit buildup and protect your fuel injectors.
- Choose Top Tier Fuel: Top Tier fuels contain additives that help keep injectors clean.
- Avoid Low-Grade Fuel: Low-grade fuels may contain impurities that can damage injectors.
6.2. Regular Use of Fuel Injector Cleaners
Adding fuel injector cleaners to your fuel tank can help remove deposits and keep your injectors clean.
- Choose a Reputable Brand: Select a fuel injector cleaner from a reputable brand.
- Follow the Instructions: Use the cleaner according to the manufacturer’s instructions.
- Use Regularly: Add the cleaner to your fuel tank every 3,000 to 5,000 miles.
6.3. Replacing Fuel Filters Regularly
Replacing your fuel filter regularly can prevent impurities from reaching your fuel injectors.
- Check Your Owner’s Manual: Follow the manufacturer’s recommended replacement interval.
- Replace the Filter: Replace the fuel filter every 20,000 to 30,000 miles, or as recommended.
6.4. Inspecting and Maintaining Fuel Lines
Regularly inspect and maintain your fuel lines to prevent leaks and ensure proper fuel delivery.
- Check for Leaks: Look for any signs of fuel leaks.
- Inspect for Damage: Check the fuel lines for cracks or damage.
- Replace Worn Lines: Replace any worn or damaged fuel lines immediately.
The Car Care Council recommends inspecting fuel lines and filters at least once a year to ensure proper maintenance and prevent fuel system issues (Car Care Council, 2021).
7. When to Seek Professional Help
While many fuel injector issues can be diagnosed and resolved at home, some situations require professional help. Knowing when to seek expert assistance can save you time, money, and potential damage to your vehicle.
7.1. Complex Electrical Problems
If you encounter complex electrical problems that you’re unable to diagnose or resolve with basic tools, it’s best to consult a professional mechanic.
- ECU Issues: Problems with the ECU can be difficult to diagnose without specialized equipment.
- Wiring Harness Problems: Extensive damage to the wiring harness may require professional repair.
7.2. Advanced Diagnostic Procedures
Some advanced diagnostic procedures, such as oscilloscope analysis and flow testing, require specialized equipment and expertise.
- Oscilloscope Analysis: Interpreting complex waveforms requires training and experience.
- Flow Testing: Accurate flow testing requires a flow bench and specialized knowledge.
7.3. Persistent Fuel Injector Problems
If you’ve tried various troubleshooting steps and the fuel injector problems persist, it’s time to seek professional help.
- Recurring Issues: Problems that keep coming back despite your efforts may indicate a more significant underlying issue.
- Uncertain Diagnosis: If you’re unsure about the cause of the problem, a professional can provide an accurate diagnosis.
Seeking professional help from a qualified mechanic ensures that complex issues are accurately diagnosed and resolved, preventing further damage to your vehicle’s engine and fuel system (National Institute for Automotive Service Excellence, ASE).
8. The Benefits of Using CAR-TOOL.EDU.VN for Automotive Information
When it comes to automotive maintenance and repair, having access to reliable information is essential. CAR-TOOL.EDU.VN offers a wealth of resources to help you keep your vehicle running smoothly.
8.1. Comprehensive Guides and Tutorials
CAR-TOOL.EDU.VN provides comprehensive guides and tutorials on a wide range of automotive topics, including fuel injector testing, maintenance, and repair.
- Step-by-Step Instructions: Our guides provide clear, step-by-step instructions to help you perform various tasks.
- Detailed Explanations: We offer detailed explanations of complex concepts to help you understand how your vehicle works.
- Visual Aids: Our tutorials include images and videos to illustrate key points and make the process easier to follow.
8.2. Expert Advice and Recommendations
Our team of experienced automotive professionals provides expert advice and recommendations to help you make informed decisions about your vehicle.
- Diagnostic Tips: We offer diagnostic tips to help you identify and resolve common automotive problems.
- Product Reviews: Our product reviews provide unbiased evaluations of various automotive tools and equipment.
- Maintenance Schedules: We offer maintenance schedules tailored to your specific vehicle.
8.3. Up-to-Date Information on Automotive Technology
CAR-TOOL.EDU.VN stays up-to-date on the latest automotive technology to provide you with the most current and accurate information.
- Industry News: We cover the latest news and trends in the automotive industry.
- Technological Advancements: We provide insights into new technologies and their impact on vehicle maintenance and repair.
- Regulatory Updates: We keep you informed about changes in automotive regulations and standards.
By using CAR-TOOL.EDU.VN, you can access the information you need to maintain and repair your vehicle with confidence. Whether you’re a seasoned mechanic or a novice DIYer, our resources can help you keep your car running smoothly and efficiently.
9. Real-World Examples of Successful DIY Fuel Injector Testing
To illustrate the effectiveness of DIY fuel injector testing, here are a few real-world examples of how individuals have successfully diagnosed and resolved fuel injector issues at home.
9.1. Case Study 1: Rough Idling Resolved with Injector Cleaning
John, a car enthusiast from Dallas, Texas, noticed that his car was idling roughly and experiencing poor fuel economy. After consulting CAR-TOOL.EDU.VN, he decided to test his fuel injectors at home.
- Testing Process: John followed the step-by-step guide on CAR-TOOL.EDU.VN to listen to his injectors with a screwdriver and test their resistance with a multimeter.
- Diagnosis: He found that one of his injectors was not clicking and had a slightly different resistance reading compared to the others.
- Solution: John removed the injector and cleaned it using an ultrasonic cleaner. After cleaning, he re-tested the injector and found that it was now functioning properly.
- Outcome: After reinstalling the cleaned injector, John’s car idled smoothly, and his fuel economy improved significantly.
9.2. Case Study 2: Misfiring Engine Fixed with Injector Replacement
Sarah, a busy professional from San Francisco, California, experienced a misfiring engine and a check engine light in her car. She turned to CAR-TOOL.EDU.VN for guidance.
- Testing Process: Sarah used a noid light to test the electrical pulse to her fuel injectors.
- Diagnosis: She discovered that one of her injectors was not receiving the pulse signal.
- Solution: Sarah checked the wiring and found a damaged wire leading to the injector. She repaired the wire and re-tested the injector. This time, the noid light blinked, indicating that the injector was now receiving the pulse signal.
- Outcome: After repairing the wire, Sarah’s car ran smoothly, and the check engine light turned off.
9.3. Case Study 3: Improved Fuel Economy After Replacing Faulty Injector
Michael, a retiree from Miami, Florida, noticed that his car’s fuel economy had been steadily declining. He decided to investigate using the resources on CAR-TOOL.EDU.VN.
- Testing Process: Michael performed a fuel injector balance test using a fuel injector tester kit.
- Diagnosis: He found that one of his injectors was delivering significantly less fuel than the others.
- Solution: Michael replaced the faulty injector with a new one.
- Outcome: After replacing the injector, Michael’s car’s fuel economy returned to its previous level.
These real-world examples demonstrate that DIY fuel injector testing can be an effective way to diagnose and resolve common fuel injector issues. By following the step-by-step guides and expert advice on CAR-TOOL.EDU.VN, you can save time and money while keeping your vehicle running smoothly.
10. Frequently Asked Questions (FAQs) About Fuel Injector Testing
Here are some frequently asked questions about fuel injector testing to help you better understand the process and address any concerns you may have.
10.1. What are the most common signs of a bad fuel injector?
Common signs of a bad fuel injector include rough idling, poor fuel economy, misfiring engine, difficulty starting, check engine light, and fuel odor.
10.2. Can I test fuel injectors without removing them from the engine?
Yes, you can perform several tests without removing the injectors, such as listening to them with a stethoscope, testing their resistance with a multimeter, and checking their electrical pulse with a noid light.
10.3. What is a noid light, and how is it used to test fuel injectors?
A noid light is a simple tool that verifies whether the fuel injectors are receiving the proper electrical pulse from the ECU. It is plugged into the injector connector, and it should blink as the ECU sends pulses to the injector.
10.4. How do I use a multimeter to test fuel injector resistance?
To test fuel injector resistance, disconnect the electrical connector from the injector, set the multimeter to the Ohms scale, connect the multimeter probes to the injector terminals, and compare the reading to the manufacturer’s specifications.
10.5. What does it mean if my fuel injector has low resistance?
Low resistance indicates a short circuit within the injector coil, which means the injector should be replaced immediately.
10.6. What does it mean if my fuel injector has high resistance?
High resistance indicates an open circuit within the injector coil, which prevents the injector from firing. The injector should be replaced.
10.7. Can I clean fuel injectors myself, or do I need to take them to a professional?
You can clean fuel injectors yourself using fuel injector cleaner additives or an ultrasonic cleaner. However, for heavily clogged injectors, professional cleaning may be necessary.
10.8. How often should I replace my fuel injectors?
The lifespan of fuel injectors varies depending on the vehicle and driving conditions. However, it’s generally recommended to inspect and potentially replace fuel injectors every 100,000 miles or as needed.
10.9. What is the typical resistance range for fuel injectors?
The typical resistance range for most fuel injectors is between 12 to 17 ohms. However, it’s essential to consult your vehicle’s repair manual for the exact specifications, as variations can occur between different makes and models.
10.10. Where can I find reliable information on fuel injector testing and maintenance?
You can find reliable information on fuel injector testing and maintenance on CAR-TOOL.EDU.VN, which offers comprehensive guides, expert advice, and up-to-date information on automotive technology.
By addressing these frequently asked questions, you can gain a better understanding of fuel injector testing and maintenance, and feel more confident in your ability to diagnose and resolve fuel injector issues at home.
Ready to take control of your vehicle’s performance? At CAR-TOOL.EDU.VN, we understand the importance of having access to reliable information and quality tools. Whether you’re diagnosing a rough idle or optimizing fuel efficiency, our resources are designed to empower you with the knowledge and confidence to tackle fuel injector testing at home.
Don’t let fuel injector issues keep you off the road. Contact us today via Whatsapp at +1 (641) 206-8880 or visit our website at CAR-TOOL.EDU.VN for expert advice, comprehensive guides, and top-notch tools. Our team is ready to assist you with all your automotive needs. Located at 456 Elm Street, Dallas, TX 75201, United States, we’re here to help you keep your engine running smoothly. Take the first step towards better vehicle performance now!