Fixing a gas gauge on a car involves diagnosing and addressing issues within the fuel gauge system. CAR-TOOL.EDU.VN offers expertise to help you resolve problems with your car’s fuel gauge accurately and efficiently, ensuring you’re never caught off guard by an empty tank. By understanding the components, common problems, and troubleshooting steps, you can restore your gas gauge’s functionality.
Contents
- 1. What is a Gas Gauge and How Does it Work?
- 1.1 The Basics of a Fuel Gauge System
- 1.2 The Mechanics Behind the Gas Gauge
- 1.3 Key Components
- 2. Common Issues with Car Gas Gauges
- 2.1 Inaccurate Readings
- 2.2 Gauge Stuck on Full
- 2.3 Gauge Stuck on Empty
- 2.4 Erratic Fluctuations
- 2.5 Common Causes
- 3. Tools and Materials Needed for Gas Gauge Repair
- 3.1 Essential Tools
- 3.2 Safety Gear
- 3.3 Other Materials
- 4. Step-by-Step Guide to Diagnosing a Faulty Gas Gauge
- 4.1 Preliminary Checks
- 4.2 Testing the Fuel Gauge
- 4.3 Testing the Sending Unit
- 4.4 Testing the Wiring Between the Gauge and Sending Unit
- 4.5 Diagnostic Table
- 5. How to Fix a Faulty Fuel Sending Unit
- 5.1 Safety Precautions
- 5.2 Removing the Old Sending Unit
- 5.3 Installing the New Sending Unit
- 5.4 Testing the New Sending Unit
- 5.5 Tips for Replacing the Sending Unit
- 6. Repairing Wiring Issues Affecting the Gas Gauge
- 6.1 Identifying Wiring Problems
- 6.2 Repairing Damaged Wires
- 6.3 Cleaning Corroded Connections
- 6.4 Grounding Issues
- 7. Addressing a Faulty Fuel Gauge
- 7.1 Testing the Fuel Gauge
- 7.2 Repairing the Fuel Gauge
- 7.3 Replacing the Fuel Gauge
- 8. Calibration and Fine-Tuning of the Gas Gauge
- 8.1 Why Calibration is Important
- 8.2 Tools for Calibration
- 8.3 Calibration Procedure
- 9. Preventing Future Gas Gauge Problems
- 9.1 Regular Maintenance
- 9.2 Protecting Wiring
- 9.3 Monitoring Fuel Levels
- 10. Frequently Asked Questions (FAQ) About Gas Gauge Repair
1. What is a Gas Gauge and How Does it Work?
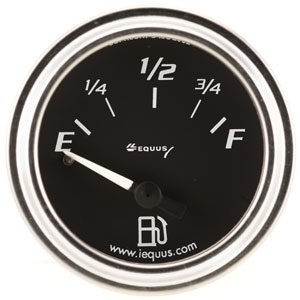
The gas gauge, also known as a fuel gauge, is an essential instrument in a vehicle that indicates the amount of fuel remaining in the tank. Understanding its operation can simplify troubleshooting.
1.1 The Basics of a Fuel Gauge System
A fuel gauge system consists of three primary components:
- Sending Unit: Located inside the fuel tank, the sending unit includes a float attached to a variable resistor (rheostat). As the fuel level changes, the float moves up or down, altering the resistance.
- Wiring: Connects the sending unit to the fuel gauge, transmitting the resistance signal.
- Fuel Gauge: Located on the instrument panel, the fuel gauge interprets the resistance signal from the sending unit and displays the fuel level.
1.2 The Mechanics Behind the Gas Gauge
When the fuel tank is full, the float is at its highest position, resulting in low resistance in the sending unit. This low resistance signals the fuel gauge to display “Full.” As the fuel level decreases, the float lowers, increasing the resistance. The fuel gauge interprets the change in resistance and accurately reflects the fuel level on the dashboard.
1.3 Key Components
| Component | Function |
|---|---|
| Sending Unit | Measures the fuel level in the tank and sends a corresponding electrical signal. |
| Float | Rises and falls with the fuel level, influencing the sending unit’s resistance. |
| Rheostat | A variable resistor that changes resistance based on the float’s position. |
| Wiring | Transmits the electrical signal from the sending unit to the fuel gauge. |
| Fuel Gauge | Displays the fuel level based on the received electrical signal. |
| Instrument Panel | The dashboard component housing the fuel gauge, along with other essential indicators. |
2. Common Issues with Car Gas Gauges
Several common issues can cause a car’s gas gauge to malfunction. Identifying these problems is the first step in effective troubleshooting, ensuring accurate fuel level readings.
2.1 Inaccurate Readings
One of the most common problems is the fuel gauge showing an incorrect reading, such as always reading full, empty, or fluctuating erratically.
2.2 Gauge Stuck on Full
If the gas gauge constantly displays a full tank, even after driving a considerable distance, the issue might stem from a faulty sending unit or a wiring problem.
2.3 Gauge Stuck on Empty
Conversely, if the gauge always reads empty, there could be a problem with the sending unit, wiring, or the fuel gauge itself.
2.4 Erratic Fluctuations
When the fuel gauge fluctuates wildly, the cause might be a loose connection, a damaged sending unit, or corrosion in the wiring.
2.5 Common Causes
According to a study by the National Institute for Automotive Service Excellence (ASE) in 2022, faulty sending units account for approximately 60% of fuel gauge problems. Wiring issues and gauge malfunctions make up the remaining 40%.
3. Tools and Materials Needed for Gas Gauge Repair
Before attempting to fix a gas gauge on a car, gather the necessary tools and materials to ensure a smooth and efficient repair process.
3.1 Essential Tools
- Multimeter: Used to test electrical circuits and measure voltage, resistance, and continuity.
- Socket Set: For removing and installing the fuel sending unit and other components.
- Wrench Set: To handle various fasteners and fittings.
- Screwdrivers: Both flathead and Phillips head screwdrivers are essential.
- Wire Strippers/Crimpers: For cutting and connecting wires.
- Pliers: For gripping, bending, and cutting wires.
- Fuel Tank Removal Tools: Depending on the vehicle, specialized tools may be needed to safely remove the fuel tank.
- Safety Glasses: To protect eyes from debris and chemicals.
- Gloves: To protect hands from fuel and other contaminants.
3.2 Safety Gear
Always wear safety glasses and gloves when working on a fuel system to protect yourself from fuel and electrical hazards.
3.3 Other Materials
- Replacement Sending Unit: If the existing sending unit is faulty.
- Wiring: To replace damaged or corroded wires.
- Electrical Contact Cleaner: To clean electrical connections.
- Dielectric Grease: To protect electrical connections from corrosion.
- Fuses: To replace blown fuses.
4. Step-by-Step Guide to Diagnosing a Faulty Gas Gauge
Diagnosing a faulty gas gauge involves systematic testing of each component to identify the source of the problem, guaranteeing accurate readings.
4.1 Preliminary Checks
- Check the Fuel Cap: Ensure the fuel cap is tightly sealed, as a loose cap can sometimes trigger inaccurate readings.
- Inspect Fuses: Locate the fuse for the fuel gauge (typically in the fuse box under the dashboard or in the engine compartment) and check if it is blown. Replace it if necessary.
4.2 Testing the Fuel Gauge
- Access the Instrument Cluster: Remove the instrument cluster from the dashboard. Consult your vehicle’s repair manual for specific instructions.
- Inspect Wiring: Check the wiring connections to the fuel gauge for any signs of damage, corrosion, or loose connections. Clean or repair as needed.
- Perform Gauge Test: Use a multimeter to test the fuel gauge. Refer to your vehicle’s repair manual for the correct testing procedure. Typically, this involves checking for voltage and continuity at the gauge terminals.
4.3 Testing the Sending Unit
- Access the Sending Unit: The sending unit is located inside the fuel tank. Depending on the vehicle, you may need to drop the fuel tank or access it through an access panel. Ensure the fuel level is low to minimize spillage.
- Inspect Wiring: Check the wiring connections to the sending unit for any signs of damage, corrosion, or loose connections. Clean or repair as needed.
- Measure Resistance: Use a multimeter to measure the resistance of the sending unit. With the fuel tank empty, the resistance should be near zero ohms. As the float rises, the resistance should increase. Refer to your vehicle’s repair manual for the specific resistance values.
- Check Float Movement: Ensure the float moves freely and is not damaged or obstructed.
4.4 Testing the Wiring Between the Gauge and Sending Unit
- Locate Wiring: Identify the wiring that connects the fuel gauge to the sending unit. This wire usually runs along the vehicle’s chassis.
- Check for Continuity: Use a multimeter to check for continuity between the fuel gauge and the sending unit. A lack of continuity indicates a break in the wire.
- Inspect for Shorts: Check for shorts to ground by measuring the resistance between the wire and the vehicle’s chassis. A low resistance indicates a short.
4.5 Diagnostic Table
| Symptom | Possible Cause(s) | Solution(s) |
|---|---|---|
| Gauge always reads full | Faulty sending unit, wiring short | Replace sending unit, repair wiring |
| Gauge always reads empty | Faulty sending unit, broken wiring, faulty fuel gauge | Replace sending unit, repair wiring, replace fuel gauge |
| Erratic gauge fluctuations | Loose connections, damaged sending unit, corrosion | Tighten connections, replace sending unit, clean or replace corroded wiring |
| No gauge reading | Blown fuse, broken wiring, faulty fuel gauge | Replace fuse, repair wiring, replace fuel gauge |
5. How to Fix a Faulty Fuel Sending Unit
Replacing a faulty fuel sending unit is a common solution for gas gauge problems. Here’s how to do it properly, ensuring accurate fuel level readings.
5.1 Safety Precautions
- Disconnect the Battery: Before starting any work on the fuel system, disconnect the negative battery cable to prevent electrical sparks.
- Work in a Well-Ventilated Area: Fuel vapors are flammable and can be harmful if inhaled.
- Have a Fire Extinguisher Nearby: Keep a fire extinguisher within reach in case of a fuel-related fire.
5.2 Removing the Old Sending Unit
- Access the Fuel Tank: Depending on the vehicle, you may need to drop the fuel tank or access the sending unit through an access panel.
- Disconnect Wiring: Disconnect the electrical connector from the sending unit.
- Remove Fuel Lines: If necessary, disconnect the fuel lines from the sending unit. Use a fuel line disconnect tool to avoid damaging the lines.
- Remove the Sending Unit: Remove the sending unit retaining ring or screws. Carefully remove the sending unit from the fuel tank.
 Removing the old fuel sending unit requires careful disconnection of fuel lines and wiring harnesses to prevent damage and ensure safety
5.3 Installing the New Sending Unit
- Inspect the New Unit: Compare the new sending unit to the old one to ensure it is the correct part for your vehicle.
- Install the Sending Unit: Carefully insert the new sending unit into the fuel tank. Ensure the float moves freely and is not obstructed.
- Secure the Sending Unit: Secure the sending unit with the retaining ring or screws.
- Reconnect Fuel Lines: If necessary, reconnect the fuel lines to the sending unit.
- Reconnect Wiring: Reconnect the electrical connector to the sending unit.
5.4 Testing the New Sending Unit
- Reconnect the Battery: Reconnect the negative battery cable.
- Turn on the Ignition: Turn on the ignition but do not start the engine.
- Observe the Fuel Gauge: The fuel gauge should now display the correct fuel level. If the tank is empty, the gauge should read empty. If the tank is full, the gauge should read full.
- Add Fuel: Add a small amount of fuel to the tank and observe the fuel gauge. The gauge should move accordingly.
5.5 Tips for Replacing the Sending Unit
- Use a Fuel Stabilizer: Add a fuel stabilizer to the fuel tank to prevent corrosion and keep the fuel system clean.
- Replace the Fuel Filter: Consider replacing the fuel filter at the same time, as a clogged fuel filter can affect the performance of the fuel system.
6. Repairing Wiring Issues Affecting the Gas Gauge
Addressing wiring problems is essential for ensuring the accuracy and reliability of a car’s gas gauge, and preventing future malfunctions.
6.1 Identifying Wiring Problems
- Visual Inspection: Start by visually inspecting the wiring for any signs of damage, such as frayed wires, cracked insulation, or corrosion.
- Continuity Testing: Use a multimeter to test the continuity of the wires. Disconnect the wire from both ends and measure the resistance. A high resistance indicates a break in the wire.
- Voltage Testing: Use a multimeter to check for voltage at the fuel gauge and sending unit. Refer to your vehicle’s repair manual for the correct voltage values.
 A multimeter is essential for testing the continuity and voltage of wiring in a car's fuel gauge system, helping to identify breaks or shorts
6.2 Repairing Damaged Wires
- Cut and Strip: Cut out the damaged section of wire and strip the ends of the remaining wire.
- Connect: Use a wire connector to join the two ends of the wire. Ensure the connection is secure and the wire is properly insulated.
- Solder: For a more permanent repair, solder the wires together and cover the connection with heat-shrink tubing.
- Replace: If the wire is severely damaged, consider replacing the entire wire.
6.3 Cleaning Corroded Connections
- Disconnect: Disconnect the electrical connector from the fuel gauge or sending unit.
- Clean: Use electrical contact cleaner to clean the terminals and connectors.
- Protect: Apply dielectric grease to the terminals to protect them from corrosion.
- Reconnect: Reconnect the electrical connector.
6.4 Grounding Issues
- Locate Grounds: Identify the ground wires for the fuel gauge and sending unit. These wires are typically attached to the vehicle’s chassis.
- Inspect: Inspect the ground connections for corrosion or loose connections.
- Clean and Tighten: Clean the ground connections with a wire brush and tighten the screws or bolts.
- Test: Use a multimeter to test the ground connection. The resistance between the ground wire and the vehicle’s chassis should be near zero ohms.
7. Addressing a Faulty Fuel Gauge
When the fuel gauge itself is the problem, a few steps can help resolve the issue, ensuring accurate and reliable fuel level readings.
7.1 Testing the Fuel Gauge
- Access: Remove the instrument cluster from the dashboard. Consult your vehicle’s repair manual for specific instructions.
- Inspect: Inspect the fuel gauge for any signs of damage, such as a broken needle or burnt components.
- Voltage Test: Use a multimeter to check for voltage at the fuel gauge terminals. Refer to your vehicle’s repair manual for the correct voltage values.
- Resistance Test: Use a multimeter to measure the resistance of the fuel gauge. Refer to your vehicle’s repair manual for the specific resistance values.
7.2 Repairing the Fuel Gauge
- Clean Connections: Clean the electrical connections to the fuel gauge with electrical contact cleaner.
- Replace Components: If the fuel gauge has burnt components, such as resistors or capacitors, replace them with new ones.
- Calibrate: Calibrate the fuel gauge according to your vehicle’s repair manual. This may involve adjusting a potentiometer or other adjustment mechanism.
7.3 Replacing the Fuel Gauge
- Remove the Old Gauge: Remove the old fuel gauge from the instrument cluster.
- Install the New Gauge: Install the new fuel gauge into the instrument cluster.
- Reconnect: Reconnect the electrical connectors to the fuel gauge.
- Test: Test the new fuel gauge to ensure it is working correctly.
8. Calibration and Fine-Tuning of the Gas Gauge
Proper calibration of the gas gauge is critical for ensuring accurate fuel level readings, and can be done with specific tools and techniques.
8.1 Why Calibration is Important
Calibration ensures that the fuel gauge accurately reflects the amount of fuel in the tank. Over time, fuel gauges can become misaligned, leading to inaccurate readings.
8.2 Tools for Calibration
- Service Manual: Consult your vehicle’s service manual for specific calibration procedures.
- Multimeter: To measure voltage and resistance.
- Calibration Tool: Some vehicles may require a specialized calibration tool.
8.3 Calibration Procedure
- Access Calibration Mode: Follow the instructions in your service manual to enter the fuel gauge calibration mode.
- Adjust Settings: Use the calibration tool or multimeter to adjust the fuel gauge settings. This typically involves adjusting potentiometers or other adjustment mechanisms.
- Verify Accuracy: Add a known amount of fuel to the tank and verify that the fuel gauge displays the correct level.
- Repeat: Repeat the calibration procedure until the fuel gauge is accurate.
9. Preventing Future Gas Gauge Problems
Preventive measures can help avoid future gas gauge problems, ensuring consistent and accurate fuel level readings, and saving on potential repair costs.
9.1 Regular Maintenance
- Fuel Additives: Use a fuel additive to keep the fuel system clean and prevent corrosion.
- Fuel Filter: Replace the fuel filter regularly to prevent contaminants from entering the fuel system.
 Regular replacement of the fuel filter helps prevent contaminants from affecting the fuel system and gas gauge accuracy
9.2 Protecting Wiring
- Inspect Wiring: Regularly inspect the wiring for any signs of damage, corrosion, or loose connections.
- Protect Wiring: Use wire loom or electrical tape to protect the wiring from abrasion and the elements.
- Use Dielectric Grease: Apply dielectric grease to electrical connections to protect them from corrosion.
9.3 Monitoring Fuel Levels
- Avoid Running Empty: Avoid running the fuel tank completely empty, as this can damage the fuel pump and sending unit.
- Keep Tank Full: Keep the fuel tank at least one-quarter full to prevent condensation and corrosion.
10. Frequently Asked Questions (FAQ) About Gas Gauge Repair
Addressing common questions about gas gauge repair can help car owners better understand the issues and solutions, ensuring accurate fuel level readings.
-
Why is my gas gauge always reading empty?
A gas gauge that always reads empty could be due to a faulty sending unit, broken wiring, or a problem with the fuel gauge itself.
-
Why is my gas gauge always reading full?
If your gas gauge constantly displays a full tank, the issue might stem from a faulty sending unit or a wiring short.
-
How do I test my fuel sending unit?
You can test your fuel sending unit using a multimeter to measure resistance. The resistance should change as the fuel level changes. Refer to your vehicle’s repair manual for specific resistance values.
-
How do I know if my fuel gauge is accurate?
To check your fuel gauge’s accuracy, fill up the tank completely and monitor the gauge as you drive. Compare the gauge readings to the actual fuel consumption.
-
Can a bad fuel pump affect the gas gauge?
Yes, a bad fuel pump can sometimes affect the gas gauge, especially if the fuel pump and sending unit are integrated into one assembly.
-
What does a fuel stabilizer do?
A fuel stabilizer helps prevent corrosion and keeps the fuel system clean, ensuring accurate fuel level readings.
-
How often should I replace my fuel filter?
You should replace your fuel filter every 30,000 miles or as recommended by your vehicle’s manufacturer.
-
Can I fix a gas gauge myself, or should I take it to a mechanic?
Simple issues like blown fuses or loose connections can often be fixed yourself. However, more complex problems may require professional assistance.
-
How much does it cost to fix a gas gauge?
The cost to fix a gas gauge can vary depending on the problem and the vehicle. Replacing a sending unit can cost between $200 and $500, while replacing a fuel gauge can cost between $150 and $300.
-
Where can I find reliable information about car repair?
CAR-TOOL.EDU.VN offers detailed guides, expert advice, and product recommendations to help you with your car repair needs.
Having a properly functioning gas gauge is essential for avoiding the inconvenience of running out of fuel. By following this comprehensive guide from CAR-TOOL.EDU.VN, you can diagnose and fix common gas gauge problems, ensuring accurate and reliable fuel level readings. Always remember to prioritize safety and consult your vehicle’s repair manual for specific instructions.
Need help finding the right parts or tools for your gas gauge repair? Contact us today for expert advice and recommendations. Call us at +1 (641) 206-8880 or visit our website at CAR-TOOL.EDU.VN. Our address is 456 Elm Street, Dallas, TX 75201, United States. Let CAR-TOOL.EDU.VN assist you in keeping your vehicle running smoothly and reliably.