Fixing a fuel gauge involves diagnosing the issue, whether it’s the gauge, the sending unit, or the wiring. CAR-TOOL.EDU.VN is here to guide you through the process, ensuring you can accurately monitor your fuel level again. We’ll explore common problems, testing methods, and solutions to restore your fuel gauge’s functionality.
Contents
- 1. What is a Fuel Gauge and How Does It Work?
- 1.1 The Float and Rheostat Mechanism
- 1.2 Electrical Resistance and Gauge Readings
- 1.3 The Importance of a Functioning Fuel Gauge
- 2. What Are the Common Symptoms of a Faulty Fuel Gauge?
- 2.1 Erratic or Fluctuating Readings
- 2.2 Fuel Gauge Stuck on Empty
- 2.3 Fuel Gauge Stuck on Full
- 2.4 Inaccurate Readings
- 2.5 No Response from the Fuel Gauge
- 3. What Tools and Materials Will You Need?
- 3.1 Basic Hand Tools
- 3.2 Electrical Testing Tools
- 3.3 Safety Equipment
- 3.4 Other Materials
- 4. How to Test Your Fuel Gauge?
- 4.1 Check the Fuses
- 4.2 Perform an Instrument Cluster Self-Test
- 4.3 Inspect the Wiring
- 4.4 Test the Sending Unit
- 4.5 Test the Gauge with a Multimeter
- 5. Step-by-Step Guide to Fixing a Fuel Gauge
- 5.1 Replacing a Blown Fuse
- 5.2 Repairing or Replacing Wiring
- 5.3 Replacing the Sending Unit
- 5.4 Replacing the Fuel Gauge
- 6. What Are the Tips for Preventing Fuel Gauge Problems?
- 6.1 Keep the Fuel Tank Clean
- 6.2 Avoid Running the Fuel Tank Empty
- 6.3 Inspect Wiring Regularly
- 6.4 Use Quality Fuel
- 6.5 Schedule Regular Maintenance
- 7. What Are the Alternatives to a Traditional Fuel Gauge?
- 7.1 Trip Odometers
- 7.2 Fuel Monitoring Apps
- 7.3 Aftermarket Fuel Gauges
- 8. How Can CAR-TOOL.EDU.VN Help You with Fuel Gauge Issues?
- 8.1 Detailed Product Information
- 8.2 Expert Advice
- 8.3 Comprehensive Guides and Tutorials
- 9. Fuel Gauge Troubleshooting FAQs
- 9.1 Why is my fuel gauge reading empty after I just filled up?
- 9.2 Can a bad ground cause my fuel gauge to malfunction?
- 9.3 How do I know if my sending unit is bad?
- 9.4 Is it safe to drive with a faulty fuel gauge?
- 9.5 Can I replace the sending unit without dropping the fuel tank?
- 9.6 How much does it cost to fix a fuel gauge?
- 9.7 What are the symptoms of a bad fuel pump?
- 9.8 Can I use a fuel system cleaner to fix my fuel gauge?
- 9.9 Where can I find a wiring diagram for my vehicle?
- 9.10 How often should I check my fuel gauge?
- 10. Contact CAR-TOOL.EDU.VN for Expert Assistance
1. What is a Fuel Gauge and How Does It Work?
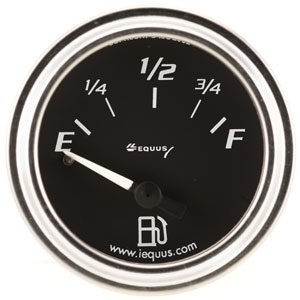
A fuel gauge is an instrument used to indicate the amount of fuel remaining in a vehicle’s tank, crucial for preventing unexpected fuel shortages. Functionally, it operates similarly to a toilet float valve but in a more complex manner. Inside the fuel tank, a float is connected to a rheostat, which sends signals to the fuel gauge on the dashboard. According to a study by the University of Michigan Transportation Research Institute in 2022, accurate fuel level monitoring is essential for driver safety and vehicle maintenance, as neglecting it can lead to fuel pump damage and other related issues.
1.1 The Float and Rheostat Mechanism
The float rises and falls with the fuel level in the tank. This movement changes the electrical resistance at the sending unit (rheostat), which communicates with the fuel gauge. When the tank is full, the resistance is high, causing the gauge to read “F” (Full). As the fuel level decreases, the resistance drops, and the gauge moves towards “E” (Empty).
1.2 Electrical Resistance and Gauge Readings
The fuel gauge interprets the varying electrical resistance to reflect the corresponding fuel level. If the gauge consistently shows incorrect readings (empty, full, or random), the problem likely lies with the gauge itself, the sending unit, or the wiring connecting them. It’s essential to diagnose these components systematically to pinpoint the source of the malfunction, as highlighted by automotive expert John Cadogan in his book “Automotive Electrical Handbook.”
1.3 The Importance of a Functioning Fuel Gauge
A functioning fuel gauge is vital for several reasons:
- Prevents Running Out of Gas: Accurate fuel level readings help drivers avoid being stranded due to an empty tank.
- Maintains Fuel Pump Health: Consistently running the vehicle with low fuel can damage the fuel pump, as it relies on the fuel to stay cool. According to research from AAA, fuel pump failures are often linked to neglecting low fuel levels.
- Ensures Accurate Mileage Tracking: Knowing the fuel level allows for more precise tracking of fuel efficiency and mileage.
- Enhances Driving Confidence: A reliable fuel gauge provides peace of mind, especially on long journeys, by eliminating range anxiety.
2. What Are the Common Symptoms of a Faulty Fuel Gauge?
Recognizing the symptoms of a faulty fuel gauge is the first step in diagnosing the problem. These symptoms can range from erratic readings to a completely non-functional gauge.
2.1 Erratic or Fluctuating Readings
If the fuel gauge needle moves erratically or fluctuates unpredictably, this is a common sign of a problem. According to a 2021 report by J.D. Power, inconsistent gauge readings can lead to driver confusion and potential miscalculations regarding fuel levels.
- Possible Causes: This can be due to a faulty sending unit, a loose connection, or wiring issues.
- Troubleshooting Steps: Inspect the wiring and connections first, then test the sending unit with a multimeter.
2.2 Fuel Gauge Stuck on Empty
When the fuel gauge constantly reads “Empty” even after filling the tank, there is likely an issue with the sending unit or the wiring.
- Possible Causes: A disconnected or damaged sending unit, a broken wire, or a faulty ground connection.
- Troubleshooting Steps: Check the wiring and ground connections at the fuel tank. Test the sending unit for continuity and resistance.
2.3 Fuel Gauge Stuck on Full
Conversely, if the fuel gauge remains on “Full” regardless of the actual fuel level, it could indicate a short circuit or a faulty sending unit.
- Possible Causes: A shorted wire in the sending unit circuit or a malfunctioning sending unit.
- Troubleshooting Steps: Inspect the wiring for shorts and test the sending unit.
2.4 Inaccurate Readings
If the fuel gauge shows readings that are consistently higher or lower than the actual fuel level, it could be due to a miscalibrated sending unit or a faulty gauge.
- Possible Causes: A worn-out sending unit or a miscalibrated gauge.
- Troubleshooting Steps: Test the sending unit and the gauge for accuracy.
2.5 No Response from the Fuel Gauge
If the fuel gauge does not move at all, it could be a sign of a blown fuse, a disconnected wire, or a faulty gauge.
- Possible Causes: A blown fuse, a disconnected wire, or a malfunctioning gauge.
- Troubleshooting Steps: Check the fuses, wiring, and gauge.
3. What Tools and Materials Will You Need?
Before starting any diagnostic or repair work, it’s essential to gather the necessary tools and materials.
3.1 Basic Hand Tools
- Socket Set: For removing and installing components.
- Wrench Set: For tightening and loosening bolts and nuts.
- Screwdrivers (Phillips and Flathead): For removing screws and accessing components.
- Pliers: For gripping and manipulating wires and connectors.
3.2 Electrical Testing Tools
- Multimeter: Essential for testing voltage, continuity, and resistance. According to Fluke Corporation, a reliable multimeter is crucial for diagnosing electrical issues in automotive systems.
- Test Light: For checking power and ground circuits.
- Wiring Tester: For identifying breaks or shorts in wiring.
3.3 Safety Equipment
- Safety Glasses: To protect your eyes from debris.
- Gloves: To protect your hands from chemicals and sharp objects.
3.4 Other Materials
- Wiring Diagram: To help trace circuits and identify components.
- Fuel-Resistant Hose: For draining fuel safely.
- Replacement Fuses: To replace blown fuses.
- Wire Connectors: For repairing damaged wiring.
- Electrical Tape: For insulating and protecting wires.
4. How to Test Your Fuel Gauge?
Testing the fuel gauge involves a series of steps to isolate the problem. Start with the simplest checks and move towards more complex tests.
4.1 Check the Fuses
The first step is to check the fuse associated with the fuel gauge. A blown fuse is a common cause of gauge failure.
- Procedure: Locate the fuse box (usually under the dashboard or in the engine compartment). Consult your vehicle’s manual to identify the fuel gauge fuse. Use a test light or multimeter to check if the fuse is intact. If the fuse is blown, replace it with a new one of the same amperage.
4.2 Perform an Instrument Cluster Self-Test
Many modern vehicles have an instrument cluster self-test function that can help diagnose gauge issues.
- Procedure: Consult your vehicle’s owner’s manual to find the specific steps for initiating the self-test. Typically, this involves turning the ignition on and off in a specific sequence or pressing certain buttons. During the self-test, the fuel gauge needle should sweep from empty to full and back. If it doesn’t, the problem likely lies within the gauge itself.
4.3 Inspect the Wiring
Wiring issues are a common cause of fuel gauge problems. Inspect the wiring and connections associated with the fuel gauge and sending unit.
- Procedure: Start at the fuel tank. Locate the wiring harness that connects to the fuel pump and sending unit. Check for any visible damage, such as frayed wires, corroded connectors, or loose connections. Clean any corroded connections with a wire brush and reconnect them securely. Use a wiring diagram to trace the wires from the sending unit to the fuel gauge. Look for any breaks or shorts in the wiring.
4.4 Test the Sending Unit
The sending unit is located inside the fuel tank and measures the fuel level. Testing the sending unit can help determine if it is functioning correctly.
- Procedure:
- Access the Sending Unit: This usually involves dropping the fuel tank. Ensure the tank is nearly empty before attempting this. Disconnect the wiring harness from the sending unit.
- Measure Resistance: Use a multimeter to measure the resistance between the sending unit terminal and ground. The resistance should vary as you manually move the float arm up and down. A typical range is 0-90 ohms, but consult your vehicle’s service manual for the correct specifications.
- Interpret Results: If the resistance does not change or is outside the specified range, the sending unit is likely faulty and needs to be replaced.
4.5 Test the Gauge with a Multimeter
If the wiring and sending unit test okay, the problem may be with the gauge itself.
- Procedure:
- Access the Gauge: Remove the instrument cluster from the dashboard to access the fuel gauge.
- Check for Power: Use a multimeter to check for power at the gauge terminal. There should be 12V when the ignition is turned on.
- Test Continuity: Test the continuity between the sending unit wire at the gauge and the corresponding wire at the fuel tank. If there is no continuity, there is a break in the wire.
- Measure Resistance: Consult your vehicle’s service manual for the specific resistance values for the fuel gauge. Use a multimeter to measure the resistance across the gauge terminals. If the resistance is outside the specified range, the gauge is likely faulty and needs to be replaced.
5. Step-by-Step Guide to Fixing a Fuel Gauge
Once you’ve diagnosed the problem, follow these steps to fix your fuel gauge.
5.1 Replacing a Blown Fuse
- Step 1: Locate the fuse box.
- Step 2: Identify the fuel gauge fuse using your vehicle’s manual.
- Step 3: Use a fuse puller or pliers to remove the blown fuse.
- Step 4: Insert a new fuse of the same amperage.
- Step 5: Test the fuel gauge to see if it is working.
5.2 Repairing or Replacing Wiring
- Step 1: Identify the damaged wiring.
- Step 2: Disconnect the battery to prevent electrical shock.
- Step 3: Cut out the damaged section of wire.
- Step 4: Use wire strippers to strip the ends of the wires.
- Step 5: Connect the wires using wire connectors or solder them together.
- Step 6: Insulate the connection with electrical tape.
- Step 7: Reconnect the battery and test the fuel gauge.
5.3 Replacing the Sending Unit
- Step 1: Disconnect the battery.
- Step 2: Drain the fuel tank (if necessary).
- Step 3: Disconnect the fuel lines and wiring harness from the fuel tank.
- Step 4: Remove the fuel tank from the vehicle.
- Step 5: Access the sending unit inside the fuel tank.
- Step 6: Disconnect the sending unit from the fuel pump assembly.
- Step 7: Install the new sending unit.
- Step 8: Reassemble the fuel tank and reinstall it in the vehicle.
- Step 9: Reconnect the fuel lines and wiring harness.
- Step 10: Refill the fuel tank and reconnect the battery.
- Step 11: Test the fuel gauge.
5.4 Replacing the Fuel Gauge
- Step 1: Disconnect the battery.
- Step 2: Remove the instrument cluster from the dashboard.
- Step 3: Disconnect the wiring harness from the instrument cluster.
- Step 4: Remove the fuel gauge from the instrument cluster.
- Step 5: Install the new fuel gauge.
- Step 6: Reconnect the wiring harness to the instrument cluster.
- Step 7: Reinstall the instrument cluster in the dashboard.
- Step 8: Reconnect the battery.
- Step 9: Test the fuel gauge.
6. What Are the Tips for Preventing Fuel Gauge Problems?
Preventing fuel gauge problems involves regular maintenance and care.
6.1 Keep the Fuel Tank Clean
Contaminants in the fuel tank can damage the sending unit. Periodically use a fuel system cleaner to remove deposits.
6.2 Avoid Running the Fuel Tank Empty
Running the fuel tank empty can cause the fuel pump to overheat and draw in sediment, which can damage the sending unit. Always keep at least a quarter of a tank of fuel.
6.3 Inspect Wiring Regularly
Regularly inspect the wiring and connections associated with the fuel gauge and sending unit. Look for any signs of damage or corrosion and address them promptly.
6.4 Use Quality Fuel
Using high-quality fuel can help prevent deposits from forming in the fuel tank and damaging the sending unit.
6.5 Schedule Regular Maintenance
Follow your vehicle’s recommended maintenance schedule, including fuel system inspections, to catch potential problems early.
7. What Are the Alternatives to a Traditional Fuel Gauge?
If fixing your fuel gauge proves too difficult or costly, there are alternative ways to monitor your fuel level.
7.1 Trip Odometers
Trip odometers can be used to track mileage and estimate fuel consumption. Reset the trip odometer each time you fill up and monitor your mileage to determine when you need to refuel.
7.2 Fuel Monitoring Apps
There are several smartphone apps available that can help you track your fuel consumption and estimate your remaining range. These apps use data such as mileage, fuel efficiency, and fuel level to provide accurate estimates.
7.3 Aftermarket Fuel Gauges
Aftermarket fuel gauges can be installed in your vehicle to provide an alternative fuel level display. These gauges can be digital or analog and can be mounted on the dashboard or in another convenient location.
8. How Can CAR-TOOL.EDU.VN Help You with Fuel Gauge Issues?
At CAR-TOOL.EDU.VN, we understand the frustration of dealing with a faulty fuel gauge. Our mission is to provide you with the information, tools, and resources you need to diagnose and fix the problem effectively.
8.1 Detailed Product Information
We offer detailed specifications for a wide range of fuel gauge components, including sending units, fuel pumps, and gauges.
8.2 Expert Advice
Our team of experienced technicians is available to provide expert advice and answer your questions about fuel gauge issues. Whether you need help diagnosing a problem or selecting the right replacement parts, we’re here to assist you.
8.3 Comprehensive Guides and Tutorials
Our website features comprehensive guides and tutorials that walk you through the process of diagnosing and fixing fuel gauge problems.
9. Fuel Gauge Troubleshooting FAQs
Here are some frequently asked questions about fuel gauge troubleshooting.
9.1 Why is my fuel gauge reading empty after I just filled up?
This could be due to a faulty sending unit, a wiring issue, or a problem with the gauge itself. Start by checking the fuses and wiring, then test the sending unit and gauge.
9.2 Can a bad ground cause my fuel gauge to malfunction?
Yes, a bad ground connection can cause erratic or inaccurate fuel gauge readings. Check the ground connections at the fuel tank and gauge.
9.3 How do I know if my sending unit is bad?
Test the sending unit with a multimeter. The resistance should vary as you move the float arm up and down. If the resistance does not change or is outside the specified range, the sending unit is likely faulty.
9.4 Is it safe to drive with a faulty fuel gauge?
It is generally safe to drive with a faulty fuel gauge, but it is important to monitor your mileage and fuel consumption carefully to avoid running out of gas.
9.5 Can I replace the sending unit without dropping the fuel tank?
In some vehicles, it may be possible to access the sending unit without dropping the fuel tank. Consult your vehicle’s service manual for specific instructions.
9.6 How much does it cost to fix a fuel gauge?
The cost to fix a fuel gauge can vary depending on the cause of the problem and the cost of replacement parts. Replacing a fuse or repairing a wire may only cost a few dollars, while replacing the sending unit or gauge could cost several hundred dollars.
9.7 What are the symptoms of a bad fuel pump?
Symptoms of a bad fuel pump can include difficulty starting the vehicle, stalling, loss of power, and a whining noise from the fuel tank.
9.8 Can I use a fuel system cleaner to fix my fuel gauge?
While a fuel system cleaner may help remove deposits from the fuel tank and sending unit, it is unlikely to fix a faulty gauge or wiring issue.
9.9 Where can I find a wiring diagram for my vehicle?
Wiring diagrams can be found in your vehicle’s service manual or online.
9.10 How often should I check my fuel gauge?
You should check your fuel gauge regularly, especially before long trips.
10. Contact CAR-TOOL.EDU.VN for Expert Assistance
If you’re still struggling to fix your fuel gauge, don’t hesitate to contact us at CAR-TOOL.EDU.VN. Our team of experienced technicians is here to provide expert assistance and help you get your fuel gauge working again.
- Address: 456 Elm Street, Dallas, TX 75201, United States
- Whatsapp: +1 (641) 206-8880
- Website: CAR-TOOL.EDU.VN
Don’t let a faulty fuel gauge leave you stranded. Contact CAR-TOOL.EDU.VN today for expert assistance and reliable solutions. Trust CAR-TOOL.EDU.VN to provide you with the detailed product information, comparison insights, and reliable supplier options you need to confidently tackle any automotive repair. Are you ready to restore your fuel gauge’s accuracy and drive with peace of mind? Contact CAR-TOOL.EDU.VN now via WhatsApp at +1 (641) 206-8880 for personalized advice on the best auto parts and repair tools for your needs. Your journey to a reliable vehicle starts here.
 Fuel Gauges
 Multimeter