Checking the fuel pressure sensor is crucial for diagnosing engine issues and ensuring optimal performance, and CAR-TOOL.EDU.VN provides the expertise and resources you need. By understanding the sensor’s function, identifying symptoms of failure, and utilizing a multimeter for testing, you can effectively troubleshoot fuel system problems. Learn how to test a fuel pressure sensor, understand its importance, and keep your vehicle running smoothly with accurate fuel management.
Contents
- 1. What is a Fuel Pressure Sensor and Why is it Important?
- 1.1. Function of the Fuel Pressure Sensor
- 1.2. Role in Engine Management
- 1.3. Benefits of a Properly Functioning Sensor
- 2. Understanding the Types of Fuel Pressure Sensors
- 2.1. Piezoelectric Sensors
- 2.2. Strain Gauge Sensors
- 2.3. Capacitive Sensors
- 2.4. Comparison Table
- 3. Common Symptoms of a Failing Fuel Pressure Sensor
- 3.1. Poor Fuel Economy
- 3.2. Engine Stalling or Hesitation
- 3.3. Rough Idling
- 3.4. Check Engine Light
- 3.5. Difficulty Starting the Engine
- 3.6. Unusual Engine Noises
- 3.7. Black Smoke from Exhaust
- 3.8. Comparison Table
- 4. How to Check Fuel Pressure Sensor with a Multimeter
- 4.1. Gather Necessary Tools and Materials
- 4.2. Locate the Fuel Pressure Sensor
- 4.3. Inspect the Sensor and Wiring
- 4.4. Disconnect the Electrical Connector
- 4.5. Perform a Resistance Test
- 4.6. Perform a Voltage Test
- 4.7. Compare Readings to Specifications
- 4.8. Interpret the Results
- 4.9. Testing with the Engine Running
- 4.10. Safety Precautions
- 4.11. Comparison Table
- 5. Step-by-Step Guide: Replacing a Fuel Pressure Sensor
- 5.1. Gather Necessary Tools and Materials
- 5.2. Safety Precautions
- 5.3. Locate the Fuel Pressure Sensor
- 5.4. Relieve Fuel Pressure
- 5.5. Disconnect the Electrical Connector
- 5.6. Remove the Old Sensor
- 5.7. Install the New Sensor
- 5.8. Reconnect the Electrical Connector
- 5.9. Reinstall the Fuel Pump Relay
- 5.10. Reconnect the Battery
- 5.11. Start the Engine and Check for Leaks
- 5.12. Clear Diagnostic Trouble Codes (DTCs)
- 5.13. Test Drive
- 5.14. Comparison Table
- 6. Tips for Maintaining Your Car’s Fuel System
- 6.1. Use High-Quality Fuel
- 6.2. Regularly Replace Fuel Filter
- 6.3. Inspect Fuel Lines and Connections
- 6.4. Keep Fuel Tank Full
- 6.5. Use Fuel Injector Cleaner
- 6.6. Monitor Fuel Pressure
- 6.7. Check Fuel Cap
- 6.8. Avoid Running on Empty
- 6.9. Follow Maintenance Schedule
- 6.10. Comparison Table
- 7. Frequently Asked Questions (FAQ)
- 7.1. How Many Volts Should Be in the Fuel Rail Pressure Sensor?
- 7.2. What Happens if the Fuel Rail Pressure Sensor Is Unplugged?
- 7.3. How Do I Know If My Fuel Sensor Is Bad?
- 7.4. Can a Bad Fuel Pressure Sensor Cause a No Start?
- 7.5. Is It Safe to Drive with a Bad Fuel Pressure Sensor?
- 7.6. How Often Should I Replace My Fuel Pressure Sensor?
- 7.7. Can a Bad Fuel Pressure Sensor Affect My Gas Mileage?
- 7.8. What Tools Do I Need to Replace a Fuel Pressure Sensor?
- 7.9. How Much Does It Cost to Replace a Fuel Pressure Sensor?
- 7.10. Where Can I Buy a Replacement Fuel Pressure Sensor?
- 8. Conclusion: Ensuring Optimal Fuel System Performance
1. What is a Fuel Pressure Sensor and Why is it Important?
A fuel pressure sensor, also known as a fuel rail pressure sensor, is an essential component in modern vehicles that monitors the pressure of fuel in the fuel rail. According to a study by the University of Michigan’s Automotive Research Center, fuel pressure sensors play a critical role in optimizing engine performance and reducing emissions. A properly functioning sensor ensures that the engine receives the correct amount of fuel, leading to efficient combustion and reduced fuel consumption.
1.1. Function of the Fuel Pressure Sensor
The primary function of a fuel pressure sensor is to measure the pressure of fuel within the fuel rail. This information is then relayed to the engine control unit (ECU), which uses it to adjust the fuel injection rate. This adjustment ensures that the air-fuel mixture is optimal for different driving conditions, as highlighted in research from the Oak Ridge National Laboratory’s Center for Transportation Analysis. By maintaining an ideal air-fuel ratio, the engine operates efficiently, producing the necessary power while minimizing harmful emissions.
1.2. Role in Engine Management
The fuel pressure sensor plays a pivotal role in the engine management system. The ECU uses the data from the sensor to make real-time adjustments to the fuel injection, ignition timing, and other engine parameters. According to a report by the EPA, precise fuel management is crucial for meeting emission standards and improving overall vehicle efficiency. A malfunctioning sensor can disrupt this balance, leading to a range of performance issues.
1.3. Benefits of a Properly Functioning Sensor
A properly functioning fuel pressure sensor offers numerous benefits:
- Improved Fuel Efficiency: By ensuring the correct air-fuel mixture, the engine uses fuel more efficiently, saving you money at the pump.
- Reduced Emissions: Optimal combustion reduces the amount of harmful pollutants released into the atmosphere, contributing to a cleaner environment.
- Enhanced Engine Performance: A consistent and accurate fuel supply results in smoother acceleration, better throttle response, and overall improved engine performance.
- Prevention of Engine Damage: Maintaining the correct fuel pressure prevents issues such as engine knocking, misfires, and potential damage to engine components.
2. Understanding the Types of Fuel Pressure Sensors
Fuel pressure sensors come in different types, each designed with specific features and advantages. According to a study by the Society of Automotive Engineers (SAE), understanding the different types of sensors is crucial for proper diagnosis and maintenance. Here’s an overview of the common types of fuel pressure sensors:
2.1. Piezoelectric Sensors
Piezoelectric sensors are among the most common types used in automotive applications. These sensors utilize a piezoelectric crystal that generates an electrical charge when subjected to pressure.
How They Work: The fuel pressure deforms the crystal, producing a voltage signal proportional to the pressure. The ECU reads this signal to determine the fuel pressure in the rail.
Advantages:
- High accuracy and sensitivity
- Fast response time
- Compact size
Disadvantages:
- Sensitive to temperature changes
- Can be more expensive than other types
2.2. Strain Gauge Sensors
Strain gauge sensors measure pressure by detecting the strain on a resistive element caused by the fuel pressure.
How They Work: As fuel pressure increases, it causes a diaphragm to flex, which in turn strains the resistive element. This changes the element’s resistance, which is then converted into a voltage signal that the ECU can interpret.
Advantages:
- Good linearity and stability
- Relatively low cost
Disadvantages:
- Lower sensitivity compared to piezoelectric sensors
- Can be affected by mechanical vibrations
2.3. Capacitive Sensors
Capacitive sensors measure pressure by detecting changes in capacitance caused by the movement of a diaphragm.
How They Work: Fuel pressure deflects the diaphragm, altering the distance between two capacitor plates. This change in capacitance is converted into a voltage signal that is sent to the ECU.
Advantages:
- High sensitivity
- Low temperature sensitivity
Disadvantages:
- More complex design
- Can be sensitive to electromagnetic interference
2.4. Comparison Table
| Feature | Piezoelectric Sensors | Strain Gauge Sensors | Capacitive Sensors |
|---|---|---|---|
| Accuracy | High | Good | High |
| Sensitivity | High | Lower | High |
| Response Time | Fast | Moderate | Fast |
| Temperature Sensitivity | High | Low | Low |
| Cost | Higher | Low | Moderate |
Understanding the characteristics of each sensor type will enable you to diagnose issues more effectively and choose the appropriate replacement sensor if needed. CAR-TOOL.EDU.VN provides detailed specifications and comparisons of various sensor types to help you make informed decisions.
 Piezoelectric Fuel Pressure Sensor
3. Common Symptoms of a Failing Fuel Pressure Sensor
Recognizing the symptoms of a failing fuel pressure sensor is essential for diagnosing fuel system issues and preventing potential engine damage. According to automotive diagnostic experts, a malfunctioning sensor can cause a variety of noticeable problems. Here are some common symptoms to watch for:
3.1. Poor Fuel Economy
One of the first signs of a failing fuel pressure sensor is a noticeable decrease in fuel economy.
Explanation: When the sensor provides inaccurate readings, the ECU may inject too much or too little fuel into the engine. An over-rich mixture wastes fuel, while a lean mixture reduces power and efficiency.
What to Do: Monitor your car’s fuel consumption over a few weeks. If you notice a significant drop in miles per gallon (MPG) without any changes in your driving habits, it could indicate a problem with the fuel pressure sensor.
3.2. Engine Stalling or Hesitation
Engine stalling or hesitation during acceleration can also point to a failing fuel pressure sensor.
Explanation: Incorrect fuel pressure readings can disrupt the air-fuel mixture, causing the engine to stall or hesitate, particularly when accelerating. The engine may struggle to maintain a consistent speed, leading to jerky movements.
What to Do: Pay attention to how your car responds when you accelerate. If you experience frequent stalling or hesitation, it’s time to inspect the fuel pressure sensor.
3.3. Rough Idling
A rough or unstable idle is another common symptom of a malfunctioning fuel pressure sensor.
Explanation: At idle, the engine relies on precise fuel delivery to maintain a smooth operation. A faulty sensor can cause the engine to receive inconsistent fuel, leading to a rough or erratic idle.
What to Do: Observe your car’s idle when stopped. If the engine vibrates excessively or the RPM fluctuates noticeably, it could indicate a fuel pressure sensor issue.
3.4. Check Engine Light
The check engine light is a telltale sign that something is amiss with your car’s engine.
Explanation: A failing fuel pressure sensor can trigger the check engine light. The ECU detects the abnormal readings from the sensor and logs a diagnostic trouble code (DTC), which activates the light.
What to Do: Use an OBD-II scanner to read the diagnostic trouble codes. Common codes related to the fuel pressure sensor include P0190, P0191, P0192, P0193, and P0194. Consult CAR-TOOL.EDU.VN for detailed information on these codes and their potential causes.
3.5. Difficulty Starting the Engine
A failing fuel pressure sensor can make it difficult to start the engine.
Explanation: The sensor provides critical data to the ECU during the startup process. Inaccurate readings can result in an improper fuel mixture, making it hard to ignite the engine.
What to Do: Notice if your car takes longer than usual to start. If it requires multiple attempts or cranks without starting, the fuel pressure sensor could be the culprit.
3.6. Unusual Engine Noises
Unusual engine noises, such as knocking or pinging, can also indicate a problem with the fuel pressure sensor.
Explanation: When the air-fuel mixture is off, the engine may experience abnormal combustion, leading to knocking or pinging sounds. These noises are signs of potential engine damage and should not be ignored.
What to Do: Listen for unusual noises coming from the engine. If you hear knocking or pinging, especially during acceleration, it’s crucial to have your fuel system checked.
3.7. Black Smoke from Exhaust
Black smoke emitting from the exhaust pipe is a sign of an overly rich fuel mixture.
Explanation: A faulty fuel pressure sensor can cause the ECU to inject too much fuel into the engine, resulting in incomplete combustion and black smoke.
What to Do: Observe the color of your car’s exhaust. If you see black smoke, it’s a clear indication of an issue with the fuel system, potentially related to the fuel pressure sensor.
3.8. Comparison Table
| Symptom | Explanation | What to Do |
|---|---|---|
| Poor Fuel Economy | Incorrect air-fuel mixture leads to wasted fuel. | Monitor MPG, look for significant drops. |
| Engine Stalling/Hesitation | Disrupted air-fuel mixture causes stalling or hesitation. | Pay attention to acceleration, check for frequent stalling. |
| Rough Idling | Inconsistent fuel delivery results in an unstable idle. | Observe idle, check for excessive vibrations or RPM fluctuations. |
| Check Engine Light | Abnormal sensor readings trigger the check engine light. | Use an OBD-II scanner to read diagnostic trouble codes. |
| Difficulty Starting | Improper fuel mixture makes it hard to ignite the engine. | Notice if the car takes longer than usual to start. |
| Unusual Engine Noises | Abnormal combustion leads to knocking or pinging sounds. | Listen for unusual noises, especially during acceleration. |
| Black Smoke from Exhaust | Overly rich fuel mixture results in incomplete combustion. | Observe the color of the exhaust; black smoke indicates a rich mixture. |
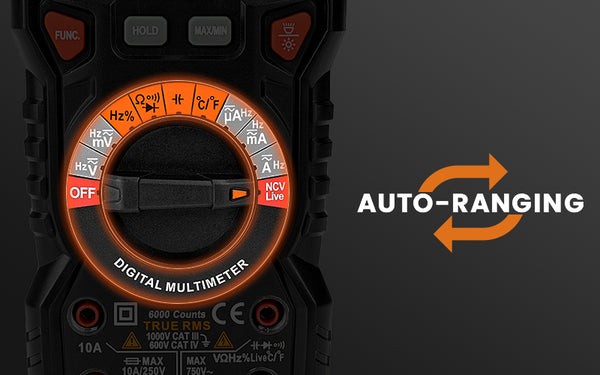
4. How to Check Fuel Pressure Sensor with a Multimeter
Testing a fuel pressure sensor with a multimeter is a straightforward process that can help you determine if the sensor is functioning correctly. According to automotive diagnostic experts, this test can save you time and money by identifying a faulty sensor before replacing other components. Here’s a step-by-step guide:
4.1. Gather Necessary Tools and Materials
Before you begin, make sure you have the following tools and materials:
- Multimeter: A digital multimeter is recommended for accurate readings.
- Service Manual: Consult your vehicle’s service manual for specific voltage and resistance values.
- Safety Glasses: Protect your eyes from potential hazards.
- Gloves: Protect your hands from fuel and electrical components.
4.2. Locate the Fuel Pressure Sensor
The fuel pressure sensor is typically located on the fuel rail, which is the component that supplies fuel to the fuel injectors. Consult your vehicle’s service manual to find the exact location of the sensor.
4.3. Inspect the Sensor and Wiring
Visually inspect the sensor and its wiring for any signs of damage, such as cracks, corrosion, or frayed wires. Ensure that the electrical connector is securely attached to the sensor.
4.4. Disconnect the Electrical Connector
Before testing, disconnect the electrical connector from the fuel pressure sensor. This will prevent any accidental electrical shocks and ensure accurate readings.
4.5. Perform a Resistance Test
- Set the Multimeter: Set your multimeter to the ohms (Ω) setting.
- Connect the Probes: Place the multimeter probes on the sensor terminals. Refer to your vehicle’s service manual to identify the correct terminals for resistance testing.
- Read the Resistance: Observe the resistance reading on the multimeter. Compare the reading to the specifications in your service manual. A significantly different reading indicates a faulty sensor.
4.6. Perform a Voltage Test
- Set the Multimeter: Set your multimeter to the DC voltage (V) setting.
- Reconnect the Electrical Connector: Reconnect the electrical connector to the fuel pressure sensor.
- Turn on the Ignition: Turn the ignition to the “ON” position, but do not start the engine.
- Backprobe the Connector: Use backprobing techniques to measure the voltage at the sensor terminals. Insert the multimeter probes into the back of the connector while it is still connected to the sensor.
- Read the Voltage: Observe the voltage reading on the multimeter. Compare the reading to the specifications in your service manual. A voltage reading outside the specified range indicates a potential problem.
4.7. Compare Readings to Specifications
Consult your vehicle’s service manual for the specified resistance and voltage values for the fuel pressure sensor. Compare your readings to these values to determine if the sensor is functioning correctly.
4.8. Interpret the Results
- Correct Readings: If the resistance and voltage readings are within the specified range, the fuel pressure sensor is likely functioning correctly.
- Incorrect Readings: If the readings are significantly different from the specified values, the sensor is likely faulty and needs to be replaced.
4.9. Testing with the Engine Running
In some cases, it may be necessary to test the fuel pressure sensor with the engine running to observe how the voltage changes with varying fuel pressure.
- Start the Engine: Start the engine and let it idle.
- Monitor Voltage: Use the multimeter to monitor the voltage at the sensor terminals while the engine is running.
- Vary Engine Speed: Increase the engine speed and observe how the voltage changes. The voltage should increase as the engine speed increases.
- Compare to Specifications: Compare the voltage readings to the specifications in your service manual. If the voltage does not change as expected, the sensor may be faulty.
4.10. Safety Precautions
- Always disconnect the electrical connector before performing resistance tests to avoid electrical shock.
- Be careful when working around fuel and electrical components.
- Consult your vehicle’s service manual for specific instructions and safety precautions.
4.11. Comparison Table
| Test | Procedure | Expected Result | Interpretation |
|---|---|---|---|
| Resistance Test | Measure resistance between sensor terminals with the connector disconnected. | Reading within specified range (refer to service manual). | Correct resistance: Sensor is likely functional. |
| Voltage Test | Measure voltage at sensor terminals with the connector connected. | Reading within specified range (refer to service manual). | Correct voltage: Sensor is likely functional. |
| Engine Running Test | Monitor voltage while the engine is running and engine speed is varied. | Voltage changes proportionally with engine speed (refer to service manual). | Voltage changes as expected: Sensor is likely functional. |
 Testing Fuel Pressure Sensor with Multimeter
5. Step-by-Step Guide: Replacing a Fuel Pressure Sensor
If testing indicates that your fuel pressure sensor is faulty, replacing it is a necessary step to restore your vehicle’s performance. According to automotive maintenance experts, this process can be completed with basic tools and some mechanical knowledge. Here’s a detailed guide:
5.1. Gather Necessary Tools and Materials
Before starting, gather the following tools and materials:
- New Fuel Pressure Sensor: Ensure it is the correct part for your vehicle.
- Wrench Set: For removing and installing the sensor.
- Socket Set: For additional removal options.
- Screwdrivers: Both flathead and Phillips head may be needed.
- Torque Wrench: For tightening the sensor to the correct specification.
- Safety Glasses: To protect your eyes.
- Gloves: To protect your hands from fuel and contaminants.
- Shop Rags: To clean up any spilled fuel.
5.2. Safety Precautions
- Disconnect the Battery: Disconnect the negative terminal of your car battery to prevent electrical shorts.
- Work in a Well-Ventilated Area: Fuel vapors are flammable and can be harmful if inhaled.
- Wear Safety Gear: Always wear safety glasses and gloves.
- No Open Flames: Ensure there are no open flames or sparks in the work area.
5.3. Locate the Fuel Pressure Sensor
The fuel pressure sensor is typically located on the fuel rail. Consult your vehicle’s service manual for the exact location.
5.4. Relieve Fuel Pressure
Before removing the sensor, it’s important to relieve the fuel pressure in the system.
- Locate the Fuel Pump Relay: Find the fuel pump relay in the fuse box.
- Remove the Relay: Remove the fuel pump relay.
- Start the Engine: Start the engine and let it run until it stalls. This will relieve the fuel pressure.
- Turn Off the Ignition: Turn off the ignition and attempt to start the engine again to ensure all pressure is relieved.
5.5. Disconnect the Electrical Connector
Disconnect the electrical connector from the fuel pressure sensor. Press the locking tab and gently pull the connector away from the sensor.
5.6. Remove the Old Sensor
- Use the Correct Wrench: Use the appropriate wrench to loosen the fuel pressure sensor.
- Carefully Unscrew: Carefully unscrew the sensor from the fuel rail. Be prepared for a small amount of fuel to spill.
- Clean the Area: Use a shop rag to clean any spilled fuel and debris from the fuel rail.
5.7. Install the New Sensor
- Apply Thread Sealant: Apply a small amount of thread sealant to the threads of the new fuel pressure sensor. This will help prevent leaks.
- Hand-Tighten: Hand-tighten the new sensor into the fuel rail.
- Torque to Specification: Use a torque wrench to tighten the sensor to the manufacturer’s specified torque. Overtightening can damage the sensor or the fuel rail.
5.8. Reconnect the Electrical Connector
Reconnect the electrical connector to the new fuel pressure sensor. Ensure the connector clicks into place and is securely attached.
5.9. Reinstall the Fuel Pump Relay
Reinstall the fuel pump relay into the fuse box.
5.10. Reconnect the Battery
Reconnect the negative terminal of your car battery.
5.11. Start the Engine and Check for Leaks
- Start the Engine: Start the engine and let it idle.
- Check for Leaks: Inspect the fuel pressure sensor and fuel rail for any fuel leaks. If you detect any leaks, tighten the sensor slightly or reapply thread sealant and reinstall.
- Monitor Performance: Monitor the engine performance for any signs of improvement or issues.
5.12. Clear Diagnostic Trouble Codes (DTCs)
Use an OBD-II scanner to clear any diagnostic trouble codes that may have been triggered during the process.
5.13. Test Drive
Take your vehicle for a test drive to ensure the new fuel pressure sensor is functioning correctly and the engine is running smoothly.
5.14. Comparison Table
| Step | Action | Details |
|---|---|---|
| 1. Preparation | Gather tools and materials. | New sensor, wrenches, sockets, screwdrivers, torque wrench, safety glasses, gloves, shop rags. |
| 2. Safety | Disconnect battery, work in a ventilated area, wear safety gear. | Disconnect negative terminal, ensure no open flames. |
| 3. Locate Sensor | Find the fuel pressure sensor on the fuel rail. | Consult vehicle’s service manual. |
| 4. Relieve Fuel Pressure | Remove fuel pump relay and start engine. | Let engine run until it stalls, then turn off ignition. |
| 5. Disconnect Connector | Disconnect the electrical connector from the sensor. | Press locking tab and gently pull. |
| 6. Remove Old Sensor | Use a wrench to unscrew the old sensor. | Be prepared for a small amount of fuel spillage. |
| 7. Install New Sensor | Apply thread sealant and hand-tighten. | Use a torque wrench to tighten to specification. |
| 8. Reconnect Connector | Reconnect the electrical connector. | Ensure it clicks into place. |
| 9. Reinstall Relay | Reinstall the fuel pump relay. | |
| 10. Reconnect Battery | Reconnect the battery. | |
| 11. Check for Leaks | Start the engine and inspect for fuel leaks. | Tighten sensor if needed, reapply sealant. |
| 12. Clear DTCs | Use OBD-II scanner to clear diagnostic trouble codes. | |
| 13. Test Drive | Test drive the vehicle. | Ensure engine runs smoothly. |
6. Tips for Maintaining Your Car’s Fuel System
Maintaining your car’s fuel system is essential for ensuring optimal performance, fuel efficiency, and longevity. According to automotive maintenance experts, following these tips can help prevent common problems and keep your fuel system in top condition:
6.1. Use High-Quality Fuel
Using high-quality fuel is crucial for preventing contaminants from entering the fuel system.
Explanation: Lower-quality fuels may contain more impurities, which can clog fuel filters and injectors, leading to reduced performance and potential damage.
What to Do: Choose fuel from reputable gas stations and consider using premium fuel, especially if recommended by your vehicle manufacturer.
6.2. Regularly Replace Fuel Filter
The fuel filter prevents dirt and debris from reaching the engine.
Explanation: A clogged fuel filter restricts fuel flow, which can cause poor performance, stalling, and damage to the fuel pump and injectors.
What to Do: Replace the fuel filter according to the manufacturer’s recommended schedule, typically every 20,000 to 30,000 miles.
6.3. Inspect Fuel Lines and Connections
Regularly inspect fuel lines and connections for any signs of leaks or damage.
Explanation: Leaks can lead to fuel loss, reduced fuel pressure, and potential fire hazards. Damaged lines can cause fuel starvation and engine damage.
What to Do: Visually inspect fuel lines and connections for cracks, corrosion, or fuel stains. Replace any damaged components immediately.
6.4. Keep Fuel Tank Full
Keeping the fuel tank full can help prevent condensation and rust.
Explanation: Condensation can form inside the fuel tank, especially during temperature changes. This moisture can lead to rust and corrosion, which can contaminate the fuel system.
What to Do: Try to keep your fuel tank at least half full, especially during colder months.
6.5. Use Fuel Injector Cleaner
Using a fuel injector cleaner can help remove deposits and maintain proper fuel flow.
Explanation: Over time, deposits can build up in fuel injectors, restricting fuel flow and affecting spray patterns. This can lead to reduced performance and fuel efficiency.
What to Do: Use a fuel injector cleaner every 3,000 to 5,000 miles, following the product instructions carefully.
6.6. Monitor Fuel Pressure
Regularly monitor fuel pressure to identify any potential issues early.
Explanation: Low fuel pressure can indicate a failing fuel pump, clogged filter, or other problems. High fuel pressure can indicate a faulty regulator.
What to Do: Use a fuel pressure gauge to monitor the fuel pressure at the fuel rail. Compare the readings to the manufacturer’s specifications.
6.7. Check Fuel Cap
Ensure that the fuel cap is properly sealed.
Explanation: A loose or damaged fuel cap can allow fuel vapors to escape, leading to reduced fuel economy and increased emissions. It can also trigger the check engine light.
What to Do: Check the fuel cap for cracks or damage and ensure it is securely tightened after each fill-up.
6.8. Avoid Running on Empty
Avoid running your car on an empty fuel tank.
Explanation: Running on empty can cause the fuel pump to suck up sediment from the bottom of the tank, which can clog the fuel filter and damage the pump.
What to Do: Refuel your car before the fuel level gets too low.
6.9. Follow Maintenance Schedule
Adhere to the manufacturer’s recommended maintenance schedule for your vehicle.
Explanation: Regular maintenance, including fuel system inspections and replacements, can help prevent problems and ensure optimal performance.
What to Do: Consult your vehicle’s service manual and follow the recommended maintenance schedule.
6.10. Comparison Table
| Tip | Explanation | What to Do |
|---|---|---|
| Use High-Quality Fuel | Prevents contaminants from entering the fuel system. | Choose fuel from reputable stations, consider premium fuel. |
| Replace Fuel Filter Regularly | Prevents dirt and debris from reaching the engine. | Replace every 20,000 to 30,000 miles. |
| Inspect Fuel Lines | Checks for leaks or damage. | Visually inspect for cracks, corrosion, or fuel stains; replace damaged components. |
| Keep Fuel Tank Full | Prevents condensation and rust. | Keep tank at least half full, especially in colder months. |
| Use Fuel Injector Cleaner | Removes deposits and maintains proper fuel flow. | Use every 3,000 to 5,000 miles. |
| Monitor Fuel Pressure | Identifies potential issues early. | Use a fuel pressure gauge, compare readings to specifications. |
| Check Fuel Cap | Ensures proper sealing. | Check for cracks or damage, tighten securely. |
| Avoid Running on Empty | Prevents fuel pump from sucking up sediment. | Refuel before the fuel level gets too low. |
| Follow Maintenance Schedule | Ensures regular inspections and replacements. | Consult service manual and adhere to recommended schedule. |
By following these tips and staying proactive with your car’s fuel system maintenance, you can ensure its longevity, efficiency, and reliability.
7. Frequently Asked Questions (FAQ)
7.1. How Many Volts Should Be in the Fuel Rail Pressure Sensor?
The voltage in the fuel rail pressure sensor can vary depending on the engine’s speed and load. Generally, a typical range is between 0.5 volts at idle and up to 4.5 volts at higher engine speeds. Refer to your vehicle’s service manual for specific voltage ranges.
7.2. What Happens if the Fuel Rail Pressure Sensor Is Unplugged?
If the fuel rail pressure sensor is unplugged, the engine control unit (ECU) will not receive accurate information about the fuel pressure. This can cause the engine to run poorly, stall, or enter a limp mode. The check engine light will also likely illuminate.
7.3. How Do I Know If My Fuel Sensor Is Bad?
Common signs of a bad fuel sensor include poor fuel economy, engine stalling or hesitation, rough idling, difficulty starting, and the check engine light illuminating. Testing the sensor with a multimeter can confirm if it’s functioning correctly.
7.4. Can a Bad Fuel Pressure Sensor Cause a No Start?
Yes, a bad fuel pressure sensor can cause a no-start condition. If the sensor provides inaccurate readings, the ECU may not deliver the correct amount of fuel to the engine, preventing it from starting.
7.5. Is It Safe to Drive with a Bad Fuel Pressure Sensor?
It is not recommended to drive with a bad fuel pressure sensor. A malfunctioning sensor can cause unpredictable engine behavior, reduced performance, and potential damage to other engine components. It’s best to have the sensor replaced as soon as possible.
7.6. How Often Should I Replace My Fuel Pressure Sensor?
The fuel pressure sensor should be replaced if it fails or shows signs of malfunction. There is no specific replacement interval, but regular inspections can help identify potential issues early.
7.7. Can a Bad Fuel Pressure Sensor Affect My Gas Mileage?
Yes, a bad fuel pressure sensor can significantly affect your gas mileage. Inaccurate readings can cause the engine to run rich or lean, leading to reduced fuel efficiency.
7.8. What Tools Do I Need to Replace a Fuel Pressure Sensor?
To replace a fuel pressure sensor, you will typically need a wrench set, socket set, screwdrivers, a torque wrench, safety glasses, gloves, and shop rags. Refer to your vehicle’s service manual for specific tool requirements.
7.9. How Much Does It Cost to Replace a Fuel Pressure Sensor?
The cost to replace a fuel pressure sensor can vary depending on the vehicle make and model, as well as the labor rates at your local repair shop. On average, the cost can range from $100 to $300, including parts and labor.
7.10. Where Can I Buy a Replacement Fuel Pressure Sensor?
You can purchase a replacement fuel pressure sensor from auto parts stores, online retailers, and your local car dealership. Ensure you buy a sensor that is compatible with your vehicle’s make and model. Contact CAR-TOOL.EDU.VN at 456 Elm Street, Dallas, TX 75201, United States or Whatsapp: +1 (641) 206-8880 for expert advice and recommendations.
8. Conclusion: Ensuring Optimal Fuel System Performance
In conclusion, checking and maintaining your fuel pressure sensor is essential for ensuring optimal fuel system performance and preventing potential engine problems. By understanding the sensor’s function, recognizing the symptoms of failure, and utilizing a multimeter for testing, you can effectively troubleshoot fuel system issues and keep your vehicle running smoothly.
CAR-TOOL.EDU.VN is your trusted resource for all your automotive diagnostic and repair needs. We offer detailed guides, expert advice, and high-quality tools to help you maintain your vehicle’s fuel system and ensure its longevity. For further assistance or to purchase a fuel pressure sensor, contact us at 456 Elm Street, Dallas, TX 75201, United States or Whatsapp: +1 (641) 206-8880. Visit our website at CAR-TOOL.EDU.VN for more information and resources.
Are you experiencing issues with your fuel pressure sensor and need expert advice? Don’t wait until the problem escalates. Contact CAR-TOOL.EDU.VN today for personalized assistance and high-quality replacement parts. Our team of experienced technicians is ready to help you diagnose and resolve your fuel system issues, ensuring your vehicle runs smoothly and efficiently. Reach out to us now via Whatsapp at +1 (641) 206-8880 and let us provide the solutions you need.