Diagnosing a check engine light can range from free to several hundred dollars, typically averaging between $75 and $150 at most repair shops, but it’s essential to understand what factors influence this cost. At CAR-TOOL.EDU.VN, we aim to provide clarity on the expenses involved and guide you toward cost-effective solutions for automotive diagnostics. This guidance helps you to get a better understanding of auto repair pricing, diagnostic service fees, and engine issue troubleshooting.
Contents
- 1. What is the Average Cost to Diagnose a Check Engine Light?
- 1.1. Factors Influencing Diagnostic Costs
- 1.2. Initial Inspection vs. Comprehensive Diagnosis
- 1.3. Free Diagnostic Services: Pros and Cons
- 2. Understanding Check Engine Light Codes
- 2.1. Common Check Engine Light Codes and Their Meanings
- 2.2. How to Interpret Diagnostic Trouble Codes (DTCs)
- 2.3. The Role of Oxygen Sensors and Catalytic Converters
- 2.4. The Impact of Faulty Spark Plugs and Ignition Coils
- 3. Steps Involved in Diagnosing a Check Engine Light
- 3.1. Initial Inspection and Code Retrieval
- 3.2. Analyzing Diagnostic Data and Performing Tests
- 3.3. Identifying the Root Cause of the Problem
- 3.4. Providing Repair Recommendations and Estimates
- 4. Common Repairs for Check Engine Light Issues
- 4.1. Replacing Oxygen Sensors
- 4.2. Replacing Catalytic Converters
- 4.3. Fixing Vacuum Leaks
- 4.4. Replacing Spark Plugs and Ignition Coils
- 4.5. Addressing Fuel System Issues
- 5. DIY vs. Professional Diagnosis and Repair
- 5.1. When to Consider DIY Diagnosis
- 5.2. When to Seek Professional Help
- 5.3. Benefits of Professional Diagnosis and Repair
- 6. Tips to Save Money on Check Engine Light Diagnosis and Repairs
- 6.1. Shop Around for Diagnostic Services
- 6.2. Get a Detailed Estimate Before Proceeding
- 6.3. Consider Independent Repair Shops
- 6.4. Use Quality Parts
- 6.5. Keep Up with Regular Maintenance
- 7. The Role of Automotive Diagnostic Tools
- 7.1. Basic OBD-II Scanners
- 7.2. Advanced Scan Tools
- 7.3. Using Scan Tools Effectively
- 8. Check Engine Light Myths and Misconceptions
- 8.1. Myth: The Check Engine Light Always Means Something Serious
- 8.2. Myth: Resetting the Check Engine Light Will Fix the Problem
- 8.3. Myth: You Need to Go to a Dealership for Check Engine Light Diagnosis
- 8.4. Myth: The Check Engine Light Will Tell You Exactly What’s Wrong
- 9. Preparing Your Vehicle for a Diagnostic Check
- 9.1. Gather Information About Your Vehicle
- 9.2. Note Any Symptoms You’ve Observed
- 9.3. Check for Any Recent Repairs or Maintenance
- 9.4. Ensure Easy Access to the OBD-II Port
- 10. Finding a Reputable Auto Repair Shop
- 10.1. Ask for Recommendations
- 10.2. Check Online Reviews
- 10.3. Look for Certifications
- 10.4. Visit the Shop in Person
- 10.5. Ask About Warranties
- FAQ: Diagnosing Check Engine Lights
- 1. What does it mean when my check engine light comes on?
- 2. Can I drive with the check engine light on?
- 3. How do I check my check engine light for free?
- 4. Is it worth buying my own OBD-II scanner?
- 5. How accurate are check engine light codes?
- 6. Can a bad gas cap cause the check engine light to come on?
- 7. How long does it take to diagnose a check engine light?
- 8. What is the most common reason for the check engine light to come on?
- 9. Will disconnecting the battery reset the check engine light?
- 10. How often should I have my car’s computer scanned for problems?
1. What is the Average Cost to Diagnose a Check Engine Light?
The average cost to diagnose a check engine light typically ranges from $75 to $150. This fee covers the technician’s time to connect a diagnostic scan tool, retrieve the error codes, and perform a preliminary assessment to determine the cause of the illuminated light. According to a 2023 report by RepairPal, the national average for a check engine light diagnostic service is $105. However, this price can vary based on the location, the complexity of the issue, and the shop’s labor rates.
1.1. Factors Influencing Diagnostic Costs
Several factors can influence the cost of diagnosing a check engine light:
- Labor Rates: The hourly labor rate of the auto repair shop is a significant factor. Shops in urban areas or those with highly skilled technicians may charge higher rates.
- Diagnostic Equipment: The type of diagnostic equipment used can affect the cost. Advanced tools that can perform in-depth analysis and pinpoint specific issues may justify a higher diagnostic fee.
- Complexity of the Problem: If the issue is straightforward and easily identifiable, the diagnostic process will be quicker and less expensive. However, if the problem is complex and requires extensive troubleshooting, the cost will increase.
- Vehicle Type: Some vehicles, particularly luxury or high-performance models, may require specialized diagnostic tools and expertise, leading to higher diagnostic costs.
1.2. Initial Inspection vs. Comprehensive Diagnosis
It’s essential to distinguish between a basic code scan and a comprehensive diagnosis.
- Basic Code Scan: Many auto parts stores offer a free service to read the error codes stored in your vehicle’s computer. This provides a starting point but doesn’t offer a complete diagnosis.
- Comprehensive Diagnosis: A comprehensive diagnosis involves a trained technician using advanced tools to analyze the data, perform tests, and identify the root cause of the problem. This is more thorough and accurate but also more expensive.
1.3. Free Diagnostic Services: Pros and Cons
Some auto parts stores offer free check engine light scans as a customer service. While this can provide a quick overview of potential issues, it has limitations:
- Pros:
- Cost-Effective: It’s a free service that can provide a general idea of the problem.
- Convenience: Easily accessible at most auto parts stores.
- Cons:
- Limited Information: The scan only provides the error codes without in-depth analysis.
- Lack of Expertise: The staff may not have the expertise to interpret the codes accurately or provide specific repair recommendations.
- Potential for Misdiagnosis: Relying solely on the code without further investigation can lead to misdiagnosis and unnecessary repairs.
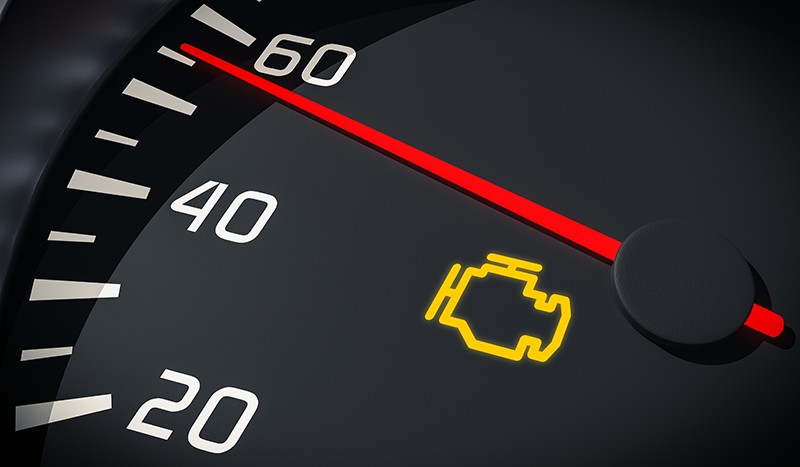 Check Engine Light
2. Understanding Check Engine Light Codes
Check engine light codes, also known as Diagnostic Trouble Codes (DTCs), are alphanumeric codes that indicate a specific issue within your vehicle’s engine or related systems. These codes are stored in the vehicle’s computer and can be retrieved using a diagnostic scan tool. Understanding these codes can help you grasp the nature of the problem and discuss it more effectively with a technician.
2.1. Common Check Engine Light Codes and Their Meanings
Here are some common check engine light codes and their typical meanings:
| Code | Description | Possible Causes |
|---|---|---|
| P0171 | System Too Lean (Bank 1) | Vacuum leak, faulty MAF sensor, fuel pump issue |
| P0300 | Random/Multiple Cylinder Misfire Detected | Faulty spark plugs, ignition coils, fuel injectors, vacuum leaks |
| P0420 | Catalyst System Efficiency Below Threshold (Bank 1) | Faulty catalytic converter, oxygen sensors, exhaust leaks |
| P0442 | Evaporative Emission Control System Leak Detected (Small Leak) | Loose gas cap, damaged EVAP system components, faulty purge valve |
| P0455 | Evaporative Emission Control System Leak Detected (Gross Leak) | Missing or loose gas cap, damaged EVAP system components, faulty purge valve |
| P0113 | Intake Air Temperature Sensor Circuit High Input | Faulty IAT sensor, wiring issues |
| P0102 | Mass or Volume Air Flow Circuit Low Input | Faulty MAF sensor, wiring issues, air leaks |
| P0131 | O2 Sensor Circuit Low Voltage (Bank 1, Sensor 1) | Faulty oxygen sensor, wiring issues, exhaust leaks |
| P0301 | Cylinder 1 Misfire Detected | Faulty spark plug, ignition coil, fuel injector, low compression |
| P0011 | “A” Camshaft Position – Timing Over-Advanced or System Performance (Bank 1) | Faulty camshaft position sensor, oil control valve, timing chain issues |
2.2. How to Interpret Diagnostic Trouble Codes (DTCs)
Interpreting DTCs involves understanding the code’s structure and meaning. Each code consists of a letter followed by four numbers:
- First Letter: Indicates the system the code relates to:
- P: Powertrain (engine, transmission)
- B: Body (interior, airbags)
- C: Chassis (brakes, suspension)
- U: Network (communication systems)
- Second Digit: Indicates whether the code is generic (0) or manufacturer-specific (1).
- Third Digit: Specifies the subsystem:
- 1: Fuel and air metering
- 2: Fuel and air metering (injector circuit)
- 3: Ignition system or misfire
- 4: Auxiliary emission controls
- 5: Vehicle speed control, idle control system
- 6: Computer output circuits
- 7: Transmission
- 8: Transmission
- Fourth and Fifth Digits: Indicate the specific fault within the subsystem.
2.3. The Role of Oxygen Sensors and Catalytic Converters
Two critical components often implicated by check engine light codes are oxygen sensors and catalytic converters.
- Oxygen Sensors: These sensors monitor the oxygen levels in the exhaust gas to ensure the engine is running efficiently. Faulty oxygen sensors can trigger codes like P0131 and P0137.
- Catalytic Converters: These devices reduce harmful emissions by converting pollutants into less toxic substances. A failing catalytic converter can trigger codes like P0420.
2.4. The Impact of Faulty Spark Plugs and Ignition Coils
Misfires, often indicated by codes like P0300 and P0301, can result from faulty spark plugs or ignition coils.
- Spark Plugs: These ignite the air-fuel mixture in the engine cylinders. Worn or damaged spark plugs can cause misfires and reduce engine performance.
- Ignition Coils: These provide the high-voltage spark needed to ignite the fuel. Faulty ignition coils can lead to misfires and rough running.
3. Steps Involved in Diagnosing a Check Engine Light
Diagnosing a check engine light involves a systematic approach to identify the root cause of the problem. Here are the typical steps a technician will follow:
3.1. Initial Inspection and Code Retrieval
The first step is to perform a visual inspection of the engine bay, checking for any obvious issues such as loose gas caps, disconnected hoses, or damaged wiring. The technician will then use a diagnostic scan tool to retrieve the stored error codes from the vehicle’s computer.
3.2. Analyzing Diagnostic Data and Performing Tests
After retrieving the codes, the technician will analyze the data to understand the context of the problem. This may involve:
- Reviewing Freeze Frame Data: This data captures the engine conditions at the moment the code was triggered, such as engine speed, load, and temperature.
- Performing Live Data Analysis: This involves monitoring the real-time performance of various sensors and components to identify any abnormalities.
- Conducting Specific Tests: Depending on the code and the symptoms, the technician may perform specific tests to isolate the problem. This could include testing the fuel pressure, checking the vacuum, or inspecting the ignition system.
3.3. Identifying the Root Cause of the Problem
Based on the diagnostic data and test results, the technician will determine the root cause of the issue. This may involve further investigation and testing of specific components or systems.
3.4. Providing Repair Recommendations and Estimates
Once the root cause is identified, the technician will provide you with a detailed explanation of the problem and recommend the necessary repairs. They will also provide an estimate of the cost, including parts and labor.
4. Common Repairs for Check Engine Light Issues
The repairs needed to address a check engine light issue can vary widely depending on the underlying cause. Here are some common repairs and their typical costs:
4.1. Replacing Oxygen Sensors
Faulty oxygen sensors are a common cause of check engine light illumination. Replacing an oxygen sensor typically costs between $100 and $300, including parts and labor. According to data from AAA, the average cost to replace an oxygen sensor is $244.
4.2. Replacing Catalytic Converters
A failing catalytic converter can be an expensive repair. The cost to replace a catalytic converter can range from $500 to $2500 or more, depending on the vehicle and the type of converter.
4.3. Fixing Vacuum Leaks
Vacuum leaks can cause a variety of engine problems and trigger the check engine light. Repairing a vacuum leak typically involves replacing damaged hoses or gaskets. The cost can range from $50 to $200, depending on the location and complexity of the repair.
4.4. Replacing Spark Plugs and Ignition Coils
Misfires caused by faulty spark plugs or ignition coils can be resolved by replacing these components. The cost to replace spark plugs can range from $50 to $300, while replacing ignition coils can cost between $150 and $600, depending on the vehicle and the number of components that need to be replaced.
4.5. Addressing Fuel System Issues
Fuel system problems, such as faulty fuel injectors or fuel pumps, can also trigger the check engine light. The cost to repair fuel system issues can vary widely depending on the specific problem and the components that need to be replaced. Replacing a fuel injector can cost between $100 and $350, while replacing a fuel pump can cost between $200 and $1000.
5. DIY vs. Professional Diagnosis and Repair
Deciding whether to diagnose and repair a check engine light issue yourself or take it to a professional depends on your skills, experience, and available tools.
5.1. When to Consider DIY Diagnosis
If you have some mechanical knowledge, basic tools, and a willingness to learn, you may be able to diagnose and repair some simple check engine light issues yourself. This could include:
- Checking and Tightening the Gas Cap: A loose gas cap is a common cause of EVAP system codes.
- Inspecting and Replacing Air Filters: A dirty air filter can affect engine performance and trigger the check engine light.
- Replacing Spark Plugs: If you’re comfortable working on your engine, replacing spark plugs can be a straightforward DIY task.
- Using a Basic OBD-II Scanner: A basic OBD-II scanner can retrieve error codes and provide some information about the problem.
5.2. When to Seek Professional Help
For more complex issues, it’s best to seek professional help. This includes:
- Complex Diagnostic Procedures: Diagnosing issues that require advanced diagnostic tools and expertise.
- Engine or Transmission Problems: These repairs require specialized knowledge and equipment.
- Emissions-Related Issues: Addressing emissions-related problems often requires specific tools and knowledge of emissions regulations.
- When You’re Unsure: If you’re not confident in your ability to diagnose and repair the problem, it’s best to leave it to the professionals.
5.3. Benefits of Professional Diagnosis and Repair
Professional diagnosis and repair offer several benefits:
- Accurate Diagnosis: Trained technicians have the expertise and tools to accurately diagnose the problem.
- Proper Repairs: Professionals can perform the necessary repairs correctly, ensuring the problem is resolved.
- Warranty Protection: Many repair shops offer warranties on their work, providing peace of mind.
- Time Savings: Professionals can diagnose and repair the problem more quickly than you could on your own.
6. Tips to Save Money on Check Engine Light Diagnosis and Repairs
While dealing with a check engine light can be frustrating, there are ways to save money on diagnosis and repairs.
6.1. Shop Around for Diagnostic Services
Don’t settle for the first repair shop you find. Call around and compare prices for diagnostic services. Some shops may offer lower diagnostic fees or specials.
6.2. Get a Detailed Estimate Before Proceeding
Before authorizing any repairs, ask for a detailed estimate that includes the cost of parts and labor. Review the estimate carefully and ask questions if anything is unclear.
6.3. Consider Independent Repair Shops
Independent repair shops often have lower labor rates than dealerships. As long as the shop has qualified technicians and a good reputation, it can be a cost-effective option.
6.4. Use Quality Parts
While it may be tempting to save money by using cheap parts, it’s generally better to use quality parts that are designed to last. This can help prevent future problems and save you money in the long run.
6.5. Keep Up with Regular Maintenance
Regular maintenance, such as oil changes, tune-ups, and fluid checks, can help prevent many of the problems that trigger the check engine light. Following your vehicle’s recommended maintenance schedule can save you money on repairs in the long run.
7. The Role of Automotive Diagnostic Tools
Automotive diagnostic tools play a crucial role in identifying and resolving check engine light issues. These tools range from basic code readers to advanced scan tools with extensive capabilities.
7.1. Basic OBD-II Scanners
Basic OBD-II scanners are affordable and easy to use. They can retrieve error codes and provide a brief description of the problem. These scanners are suitable for DIYers who want to get a general idea of what’s going on with their vehicle.
7.2. Advanced Scan Tools
Advanced scan tools offer more comprehensive diagnostic capabilities. They can:
- Retrieve Detailed Error Codes: Provide more specific information about the problem.
- Display Live Data: Monitor the real-time performance of various sensors and components.
- Perform Actuator Tests: Activate specific components to test their functionality.
- Access Manufacturer-Specific Codes: Read codes that are unique to certain vehicle makes and models.
7.3. Using Scan Tools Effectively
To use scan tools effectively, it’s essential to:
- Read the Manual: Familiarize yourself with the tool’s features and functions.
- Understand the Codes: Research the meaning of the error codes to get a better understanding of the problem.
- Use Live Data Wisely: Monitor the relevant data streams to identify any abnormalities.
- Follow Diagnostic Procedures: Use the scan tool in conjunction with diagnostic procedures to isolate the root cause of the issue.
8. Check Engine Light Myths and Misconceptions
There are many myths and misconceptions surrounding the check engine light. Here are a few common ones:
8.1. Myth: The Check Engine Light Always Means Something Serious
While the check engine light should never be ignored, it doesn’t always indicate a major problem. Sometimes it can be triggered by something as simple as a loose gas cap.
8.2. Myth: Resetting the Check Engine Light Will Fix the Problem
Resetting the check engine light without addressing the underlying issue will only temporarily turn off the light. The light will eventually come back on if the problem persists.
8.3. Myth: You Need to Go to a Dealership for Check Engine Light Diagnosis
You don’t necessarily need to go to a dealership for check engine light diagnosis. Many independent repair shops have the tools and expertise to diagnose and repair check engine light issues.
8.4. Myth: The Check Engine Light Will Tell You Exactly What’s Wrong
The check engine light provides a starting point for diagnosis but doesn’t always pinpoint the exact problem. Further investigation and testing are often needed to identify the root cause.
9. Preparing Your Vehicle for a Diagnostic Check
To ensure a smooth and accurate diagnostic check, it’s helpful to prepare your vehicle beforehand.
9.1. Gather Information About Your Vehicle
Before taking your vehicle to a repair shop, gather as much information as possible about its make, model, year, and engine type. This information can help the technician diagnose the problem more efficiently.
9.2. Note Any Symptoms You’ve Observed
Make a note of any symptoms you’ve observed, such as rough running, poor fuel economy, or unusual noises. This information can provide valuable clues for the technician.
9.3. Check for Any Recent Repairs or Maintenance
Inform the technician of any recent repairs or maintenance you’ve had done on your vehicle. This can help them rule out potential causes and focus on the most likely issues.
9.4. Ensure Easy Access to the OBD-II Port
The OBD-II port is typically located under the dashboard on the driver’s side. Make sure the port is easily accessible so the technician can connect the diagnostic scan tool.
10. Finding a Reputable Auto Repair Shop
Finding a reputable auto repair shop is crucial for accurate diagnosis and quality repairs. Here are some tips for finding a good shop:
10.1. Ask for Recommendations
Ask friends, family, or colleagues for recommendations. Personal referrals can be a reliable way to find a trustworthy repair shop.
10.2. Check Online Reviews
Read online reviews on websites like Google, Yelp, and the Better Business Bureau. Pay attention to the overall rating and read the comments to get a sense of the shop’s reputation.
10.3. Look for Certifications
Look for shops that employ certified technicians. Certifications from organizations like ASE (Automotive Service Excellence) indicate that the technicians have met certain standards of knowledge and skill.
10.4. Visit the Shop in Person
Visit the shop in person to get a feel for the environment. Is the shop clean and well-organized? Do the employees seem knowledgeable and helpful?
10.5. Ask About Warranties
Ask about the shop’s warranty policy. A reputable shop should offer a warranty on their work, providing peace of mind.
Navigating a check engine light diagnosis and repair doesn’t have to be a daunting task. By understanding the costs, steps involved, and common repairs, you can make informed decisions and save money. At CAR-TOOL.EDU.VN, we’re dedicated to providing you with the information and resources you need to keep your vehicle running smoothly. For more in-depth information about specific auto parts and diagnostic equipment, visit our website at CAR-TOOL.EDU.VN or contact us via WhatsApp at +1 (641) 206-8880. You can also visit us at 456 Elm Street, Dallas, TX 75201, United States.
Are you struggling to find reliable auto parts or diagnostic tools? Do you need expert advice to troubleshoot your vehicle’s check engine light? Contact CAR-TOOL.EDU.VN today for a consultation and discover how our team can help you find the right solutions for your automotive needs. Whether you’re a seasoned mechanic or a DIY enthusiast, we have the resources and expertise to assist you. Reach out to us via WhatsApp at +1 (641) 206-8880 or visit our website at CAR-TOOL.EDU.VN to learn more.
FAQ: Diagnosing Check Engine Lights
1. What does it mean when my check engine light comes on?
The check engine light indicates that your vehicle’s computer has detected a problem in one of its systems, such as the engine, transmission, or emissions system. It could be something as simple as a loose gas cap or as serious as a failing catalytic converter. According to the EPA, ignoring a check engine light can lead to increased emissions and potential damage to your vehicle.
2. Can I drive with the check engine light on?
Whether it’s safe to drive with the check engine light on depends on the severity of the problem. If the light is flashing, it indicates a serious issue that requires immediate attention, and you should stop driving as soon as it’s safe to do so. If the light is steady, it’s generally safe to drive, but you should have the problem diagnosed as soon as possible.
3. How do I check my check engine light for free?
Many auto parts stores, such as AutoZone and Advance Auto Parts, offer free check engine light scans. They will use a basic OBD-II scanner to retrieve the error codes and provide you with a printout.
4. Is it worth buying my own OBD-II scanner?
Buying your own OBD-II scanner can be a worthwhile investment, especially if you like to perform your own vehicle maintenance. Basic scanners can be purchased for as little as $20, while more advanced scanners with additional features can cost several hundred dollars.
5. How accurate are check engine light codes?
Check engine light codes provide a starting point for diagnosis but don’t always pinpoint the exact problem. The codes indicate which system is experiencing a problem, but further testing is often needed to identify the root cause.
6. Can a bad gas cap cause the check engine light to come on?
Yes, a loose or damaged gas cap is a common cause of EVAP system codes, which can trigger the check engine light. The gas cap prevents fuel vapors from escaping into the atmosphere, and if it’s not sealing properly, it can cause the system to detect a leak.
7. How long does it take to diagnose a check engine light?
The time it takes to diagnose a check engine light can vary depending on the complexity of the problem. Simple issues can be diagnosed in as little as 30 minutes, while more complex problems may take several hours.
8. What is the most common reason for the check engine light to come on?
According to a survey by CarMD, the most common reason for the check engine light to come on is a faulty oxygen sensor. Other common causes include loose gas caps, failing catalytic converters, and misfires.
9. Will disconnecting the battery reset the check engine light?
Disconnecting the battery can reset the check engine light, but it’s not recommended as a solution. Resetting the light without addressing the underlying issue will only temporarily turn off the light, and it will eventually come back on. Additionally, disconnecting the battery can erase other important data from your vehicle’s computer.
10. How often should I have my car’s computer scanned for problems?
It’s a good idea to have your car’s computer scanned for problems whenever the check engine light comes on or if you’re experiencing any unusual symptoms, such as rough running or poor fuel economy. Regular maintenance checks can also help identify potential problems before they become serious.