Using a scan tool to verify a repair is essential for ensuring the effectiveness and accuracy of automotive work, identifying issues, confirming resolutions, and optimizing vehicle performance. A scan tool, also known as a diagnostic scanner, allows technicians to read and interpret data from a vehicle’s computer system, providing valuable insights into its operation and health, and CAR-TOOL.EDU.VN can assist you with selecting the right tools and understanding their capabilities. This article explores how to effectively use a scan tool to verify repairs, understand live data, and interpret diagnostic trouble codes.
Contents
- 1. Understanding the Role of Scan Tools in Verifying Repairs
- 1.1. Diagnostic Capabilities
- 1.2. Live Data Analysis
- 1.3. Benefits of Using Scan Tools for Verification
- 2. Preparing for the Verification Process
- 2.1. Gathering Information
- 2.2. Setting Up the Scan Tool
- 2.3. Understanding Vehicle-Specific Requirements
- 3. Step-by-Step Guide to Verifying Repairs with a Scan Tool
- 3.1. Reading Initial DTCs
- 3.2. Clearing DTCs
- 3.3. Monitoring Live Data
- 3.4. Performing Post-Repair Tests
- 3.5. Verifying Repair Effectiveness
- 4. Interpreting Scan Tool Data
- 4.1. Understanding Diagnostic Trouble Codes (DTCs)
- 4.2. Analyzing Live Data Streams
- 4.3. Using Freeze Frame Data
- 5. Advanced Scan Tool Functions
- 5.1. Bi-Directional Control
- 5.2. Network Scanning
- 5.3. Guided Diagnostics
- 6. Common Mistakes to Avoid
- 6.1. Neglecting Basic Mechanical Checks
- 6.2. Misinterpreting DTCs
- 6.3. Ignoring Live Data Patterns
- 6.4. Skipping Post-Repair Verification
- 7. Scan Tool Maintenance and Updates
- 7.1. Software Updates
- 7.2. Hardware Maintenance
- 7.3. Data Backup
- 8. Choosing the Right Scan Tool
- 8.1. Types of Scan Tools
- 8.2. Key Features to Consider
- 8.3. Popular Scan Tool Brands
- 9. Integrating Scan Tools with Other Diagnostic Tools
- 9.1. Multimeters
- 9.2. Oscilloscopes
- 9.3. Smoke Machines
- 10. Staying Updated with Automotive Technology
- 10.1. Training Courses
- 10.2. Industry Publications
- 10.3. Networking
- Conclusion
- FAQ: Using Scan Tools for Repair Verification
- 1. What is a scan tool and how does it help verify repairs?
- 2. What are Diagnostic Trouble Codes (DTCs) and how do I interpret them?
- 3. What is live data and why is it important for verifying repairs?
- 4. How do I use a scan tool to clear DTCs after a repair?
- 5. What are some common mistakes to avoid when using a scan tool?
- 6. Can I use a scan tool on any vehicle?
- 7. How often should I update the software on my scan tool?
- 8. What is bi-directional control and how can it help with verifying repairs?
- 9. How do I integrate a scan tool with other diagnostic tools like multimeters and oscilloscopes?
- 10. Where can I find reliable information and training courses on using scan tools effectively?
1. Understanding the Role of Scan Tools in Verifying Repairs
Scan tools are indispensable for modern automotive repair, offering a window into the complex electronic systems of vehicles. They can read diagnostic trouble codes (DTCs), access live data streams, and perform tests to verify system functionality.
1.1. Diagnostic Capabilities
A scan tool’s primary function is to read and interpret diagnostic trouble codes (DTCs) stored in the vehicle’s computer, providing a starting point for diagnosing issues.
- Reading DTCs: Scan tools retrieve codes that indicate problems within the vehicle’s systems, such as the engine, transmission, or ABS.
- Clearing DTCs: After a repair, scan tools can clear these codes to ensure the issue is resolved and to monitor for any recurrence.
- Enhanced Diagnostics: Advanced scan tools offer enhanced diagnostic capabilities, allowing technicians to delve deeper into specific systems and components.
1.2. Live Data Analysis
Beyond reading codes, scan tools display live data streams, showing real-time information from various sensors and modules within the vehicle.
- Sensor Monitoring: Technicians can monitor sensor readings, such as engine temperature, oxygen sensor output, and throttle position, to identify anomalies.
- System Performance: Live data helps assess the performance of different systems, like fuel delivery, ignition, and emissions control.
- Component Testing: Some scan tools allow technicians to activate or deactivate specific components, such as fuel injectors or solenoids, to verify their operation.
1.3. Benefits of Using Scan Tools for Verification
Using scan tools to verify repairs offers several benefits:
- Accuracy: Scan tools provide precise data, reducing guesswork and ensuring accurate diagnoses.
- Efficiency: They streamline the verification process, saving time and labor costs.
- Comprehensive Assessment: Scan tools allow for a comprehensive assessment of the vehicle’s systems, ensuring all related issues are addressed.
- Customer Confidence: Demonstrating the use of scan tools can build customer confidence by showing a commitment to thorough and accurate repairs.
2. Preparing for the Verification Process
Before using a scan tool to verify a repair, it’s important to prepare thoroughly. This involves gathering necessary information, ensuring the scan tool is properly set up, and understanding the vehicle’s specific requirements.
2.1. Gathering Information
Collect as much information as possible about the repair and the vehicle’s history.
- Repair Orders: Review the original repair order to understand the initial complaint, the diagnostic steps taken, and the repairs performed.
- Vehicle History: Check the vehicle’s service history for any recurring issues or related problems.
- Technical Service Bulletins (TSBs): Consult TSBs for any known issues or recommended procedures related to the vehicle and the repair.
- According to the National Highway Traffic Safety Administration (NHTSA), TSBs provide valuable information about potential problems and solutions for specific vehicles.
2.2. Setting Up the Scan Tool
Ensure the scan tool is properly connected to the vehicle and configured for the specific make, model, and year.
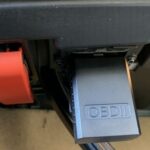
- Connection: Connect the scan tool to the vehicle’s diagnostic port (usually located under the dashboard).
- Vehicle Selection: Select the correct vehicle information on the scan tool to ensure accurate data retrieval.
- Software Updates: Verify the scan tool has the latest software updates to access the most current diagnostic information.
2.3. Understanding Vehicle-Specific Requirements
Each vehicle may have unique diagnostic requirements.
- OBD-II Standards: Familiarize yourself with the OBD-II standards and any vehicle-specific adaptations.
- The OBD-II standard mandates a standardized set of diagnostic codes and data parameters for all vehicles sold in the United States since 1996, according to the Environmental Protection Agency (EPA).
- Manufacturer Guidelines: Consult the vehicle manufacturer’s service information for specific diagnostic procedures and requirements.
- Wiring Diagrams: Review wiring diagrams to understand the relationships between different components and systems.
3. Step-by-Step Guide to Verifying Repairs with a Scan Tool
The process of verifying repairs with a scan tool involves several key steps, from reading initial DTCs to monitoring live data and performing post-repair tests.
3.1. Reading Initial DTCs
Start by reading the diagnostic trouble codes (DTCs) stored in the vehicle’s computer.
- Connect the Scan Tool: Connect the scan tool to the vehicle’s diagnostic port.
- Retrieve Codes: Use the scan tool to retrieve any stored DTCs.
- Record Codes: Document the DTCs, noting the code numbers, descriptions, and any freeze frame data.
- Freeze frame data captures the sensor values at the moment the DTC was triggered, providing valuable context for the issue.
3.2. Clearing DTCs
After noting the initial DTCs, clear them from the vehicle’s computer.
- Clear Codes: Use the scan tool to clear the stored DTCs.
- Verify Clearing: Confirm that the codes have been successfully cleared.
- Note Any Persistent Codes: If any codes cannot be cleared, investigate further as they may indicate an unresolved issue.
3.3. Monitoring Live Data
Monitor live data streams to assess the performance of the repaired system and related components.
- Select Relevant Parameters: Choose the data parameters relevant to the repair, such as sensor readings, engine RPM, and fuel trim values.
- Observe Data Patterns: Monitor the data patterns under various operating conditions, such as idle, acceleration, and deceleration.
- Identify Anomalies: Look for any unusual or out-of-range values that may indicate a problem.
- According to a study by the American Society for Automotive Engineers (SAE), monitoring live data is crucial for identifying intermittent faults and performance issues.
3.4. Performing Post-Repair Tests
Perform specific tests to verify the functionality of the repaired system.
- System Tests: Use the scan tool to perform system tests, such as ABS self-tests, fuel injector tests, or EGR valve tests.
- Component Activation: Activate or deactivate specific components using the scan tool to verify their operation.
- Functional Checks: Perform functional checks, such as checking the operation of the air conditioning system or the power windows, to ensure they are working correctly.
3.5. Verifying Repair Effectiveness
After performing the tests, verify that the repair has been effective.
- Re-Read DTCs: Check for any new or recurring DTCs.
- Compare Data: Compare the live data readings before and after the repair to ensure the system is functioning within the expected parameters.
- Road Test: Perform a road test to verify the repair under real-world driving conditions.
4. Interpreting Scan Tool Data
Interpreting scan tool data requires a thorough understanding of automotive systems and the ability to analyze data patterns and identify anomalies.
4.1. Understanding Diagnostic Trouble Codes (DTCs)
DTCs are standardized codes that indicate specific problems within the vehicle’s systems.
- Code Structure: Understand the structure of DTCs, which typically consist of a letter followed by four numbers.
- The letter indicates the system (e.g., P for Powertrain, B for Body, C for Chassis, U for Network).
- The first number indicates whether the code is generic (0) or manufacturer-specific (1).
- The remaining numbers indicate the specific fault.
- Code Definitions: Consult a reliable source, such as a repair manual or online database, to understand the definition of each DTC.
- Troubleshooting Steps: Follow the recommended troubleshooting steps for each DTC to diagnose and repair the issue.
4.2. Analyzing Live Data Streams
Analyzing live data streams involves monitoring real-time sensor values and identifying any anomalies.
- Normal Ranges: Know the normal operating ranges for various sensors and components.
- Consult the vehicle manufacturer’s service information for specific data ranges.
- Data Patterns: Look for patterns in the data, such as gradual changes, sudden spikes, or erratic fluctuations.
- Correlation: Correlate data from different sensors to identify related issues.
- For example, a lean fuel trim value combined with a low oxygen sensor reading may indicate a vacuum leak.
4.3. Using Freeze Frame Data
Freeze frame data provides a snapshot of the sensor values at the moment a DTC was triggered.
- Context: Use freeze frame data to understand the conditions under which the fault occurred, such as engine speed, load, and temperature.
- Analysis: Analyze the freeze frame data to identify any unusual values that may have contributed to the fault.
- Troubleshooting: Use the freeze frame data to guide your troubleshooting efforts and focus on the most likely causes of the problem.
5. Advanced Scan Tool Functions
Advanced scan tools offer a range of functions beyond basic code reading and live data monitoring.
5.1. Bi-Directional Control
Bi-directional control allows technicians to send commands to the vehicle’s computer and activate specific components.
- Component Testing: Use bi-directional control to test the functionality of components such as fuel injectors, solenoids, and relays.
- System Calibration: Calibrate systems such as the throttle position sensor or the steering angle sensor using bi-directional control.
- Module Programming: Program or reprogram electronic control modules (ECMs) using bi-directional control.
5.2. Network Scanning
Network scanning allows technicians to scan the vehicle’s entire network and identify all connected modules.
- Module Identification: Identify all the electronic control modules (ECMs) on the vehicle’s network.
- Communication Issues: Diagnose communication issues between modules.
- Software Updates: Check for available software updates for each module.
5.3. Guided Diagnostics
Guided diagnostics provide step-by-step instructions for diagnosing specific problems.
- Troubleshooting Trees: Follow troubleshooting trees to systematically diagnose the issue.
- Test Procedures: Perform specific tests as directed by the guided diagnostics.
- Component Locations: Locate components using diagrams and illustrations provided by the guided diagnostics.
6. Common Mistakes to Avoid
Avoid common mistakes when using scan tools to ensure accurate diagnoses and effective repairs.
6.1. Neglecting Basic Mechanical Checks
Don’t rely solely on the scan tool without performing basic mechanical checks.
- Visual Inspection: Perform a thorough visual inspection of the vehicle to identify any obvious problems, such as damaged wiring, loose connections, or leaking fluids.
- Physical Tests: Perform physical tests, such as checking the compression or testing the fuel pressure, to verify the condition of mechanical components.
- Verification: Use the scan tool to verify your findings and confirm the diagnosis.
6.2. Misinterpreting DTCs
Understand the meaning of DTCs and avoid making assumptions based solely on the code description.
- Code Definitions: Consult a reliable source for accurate code definitions.
- Troubleshooting Steps: Follow the recommended troubleshooting steps for each DTC.
- Root Cause: Identify the root cause of the problem, rather than simply replacing the component indicated by the DTC.
6.3. Ignoring Live Data Patterns
Pay attention to live data patterns and identify any anomalies that may indicate a problem.
- Normal Ranges: Know the normal operating ranges for various sensors and components.
- Data Correlation: Correlate data from different sensors to identify related issues.
- Intermittent Faults: Monitor live data over time to identify intermittent faults that may not trigger a DTC.
6.4. Skipping Post-Repair Verification
Always perform post-repair verification to ensure the repair has been effective.
- Re-Read DTCs: Check for any new or recurring DTCs.
- Compare Data: Compare the live data readings before and after the repair to ensure the system is functioning within the expected parameters.
- Road Test: Perform a road test to verify the repair under real-world driving conditions.
7. Scan Tool Maintenance and Updates
Proper maintenance and regular updates are essential for ensuring the scan tool operates reliably and provides accurate diagnostic information.
7.1. Software Updates
Install software updates regularly to access the latest diagnostic information and features.
- Update Frequency: Check for updates regularly, especially when working on newer vehicles.
- Installation Process: Follow the manufacturer’s instructions for installing software updates.
- Compatibility: Ensure the updates are compatible with your scan tool and the vehicles you are working on.
7.2. Hardware Maintenance
Keep the scan tool hardware in good condition to ensure reliable operation.
- Cleaning: Clean the scan tool regularly to remove dirt and debris.
- Cable Inspection: Inspect the cables for damage and replace them if necessary.
- Battery Care: Maintain the scan tool’s battery by charging it regularly and storing it properly when not in use.
7.3. Data Backup
Back up the scan tool’s data regularly to prevent data loss in case of a malfunction.
- Backup Frequency: Back up the data at least once a month, or more frequently if you are making significant changes to the scan tool’s configuration.
- Backup Location: Store the backup data in a safe location, such as a cloud storage service or an external hard drive.
- Restoration Process: Know how to restore the data from a backup in case of a malfunction.
8. Choosing the Right Scan Tool
Selecting the right scan tool depends on your specific needs and the types of vehicles you work on.
8.1. Types of Scan Tools
There are several types of scan tools available, each with its own features and capabilities.
- Code Readers: Basic code readers are inexpensive and can read and clear DTCs.
- Handheld Scan Tools: Handheld scan tools offer more advanced features, such as live data monitoring and bi-directional control.
- PC-Based Scan Tools: PC-based scan tools connect to a computer and offer a wide range of features, including advanced diagnostics and module programming.
- Professional Scan Tools: Professional scan tools are designed for use in automotive repair shops and offer the most comprehensive diagnostic capabilities.
8.2. Key Features to Consider
Consider the following features when choosing a scan tool:
- Vehicle Coverage: Ensure the scan tool supports the makes and models of vehicles you work on.
- Diagnostic Capabilities: Look for a scan tool with the diagnostic capabilities you need, such as live data monitoring, bi-directional control, and guided diagnostics.
- Ease of Use: Choose a scan tool that is easy to use and has a clear and intuitive interface.
- Software Updates: Ensure the scan tool receives regular software updates to stay current with the latest vehicle technology.
- Customer Support: Look for a scan tool with good customer support in case you need help with troubleshooting or using the tool.
8.3. Popular Scan Tool Brands
Several popular scan tool brands are known for their quality and reliability.
- Snap-on: Snap-on is a leading manufacturer of professional scan tools, known for their advanced features and comprehensive vehicle coverage.
- Autel: Autel offers a range of scan tools for both professional and DIY use, known for their ease of use and affordability.
- Launch: Launch is a popular brand of scan tools, known for their comprehensive diagnostic capabilities and competitive pricing.
- Bosch: Bosch is a well-known brand in the automotive industry, offering a range of scan tools for various applications.
9. Integrating Scan Tools with Other Diagnostic Tools
Scan tools can be integrated with other diagnostic tools to provide a more comprehensive diagnostic solution.
9.1. Multimeters
Multimeters can be used to measure voltage, current, and resistance in electrical circuits.
- Circuit Testing: Use a multimeter to test the continuity of circuits and identify shorts or opens.
- Sensor Testing: Test the output of sensors using a multimeter to verify their accuracy.
- Component Testing: Test the functionality of components such as relays and solenoids using a multimeter.
9.2. Oscilloscopes
Oscilloscopes can be used to display electrical signals over time.
- Signal Analysis: Analyze the shape and amplitude of electrical signals to identify problems such as noise, distortion, or intermittent faults.
- Sensor Testing: Test the output of sensors using an oscilloscope to verify their accuracy.
- Ignition System Analysis: Analyze the ignition system using an oscilloscope to identify problems such as misfires or spark plug issues.
9.3. Smoke Machines
Smoke machines can be used to identify leaks in vacuum and exhaust systems.
- Vacuum Leaks: Identify vacuum leaks by injecting smoke into the intake manifold and looking for smoke escaping from vacuum lines or seals.
- Exhaust Leaks: Identify exhaust leaks by injecting smoke into the exhaust system and looking for smoke escaping from exhaust pipes or gaskets.
- EVAP System Leaks: Identify leaks in the EVAP system by injecting smoke into the system and looking for smoke escaping from fuel lines or components.
10. Staying Updated with Automotive Technology
Automotive technology is constantly evolving, so it’s important to stay updated with the latest developments.
10.1. Training Courses
Attend training courses to learn about new automotive technologies and diagnostic techniques.
- Manufacturer Training: Attend training courses offered by vehicle manufacturers to learn about their specific systems and diagnostic procedures.
- Industry Training: Attend training courses offered by industry organizations such as the National Institute for Automotive Service Excellence (ASE) to learn about general automotive technologies and diagnostic techniques.
- Online Training: Take online training courses to learn about specific topics or to stay updated with the latest developments.
10.2. Industry Publications
Read industry publications to stay informed about new automotive technologies and diagnostic techniques.
- Trade Magazines: Subscribe to trade magazines such as Automotive Engineering International or Motor Age to stay informed about the latest developments in the automotive industry.
- Technical Journals: Read technical journals such as the SAE International Journal of Engines to learn about new research and development in automotive technology.
- Online Forums: Participate in online forums to discuss automotive technologies and diagnostic techniques with other professionals.
10.3. Networking
Network with other automotive professionals to share knowledge and learn from their experiences.
- Industry Events: Attend industry events such as trade shows and conferences to meet other professionals and learn about new technologies.
- Professional Organizations: Join professional organizations such as the Automotive Service Association (ASA) to connect with other professionals and share knowledge.
- Online Communities: Participate in online communities to discuss automotive technologies and diagnostic techniques with other professionals.
Conclusion
Effectively using a scan tool to verify repairs is crucial for ensuring the accuracy, efficiency, and quality of automotive work. By understanding the diagnostic capabilities of scan tools, preparing thoroughly for the verification process, interpreting data accurately, and integrating scan tools with other diagnostic tools, technicians can confidently verify repairs and provide exceptional service. Staying updated with automotive technology through training courses, industry publications, and networking is also essential for maintaining expertise in this rapidly evolving field. With CAR-TOOL.EDU.VN, you can find the right tools and resources to enhance your diagnostic skills and excel in automotive repair, so contact us at 456 Elm Street, Dallas, TX 75201, United States, or via Whatsapp at +1 (641) 206-8880, or visit our website at CAR-TOOL.EDU.VN for expert guidance. Let CAR-TOOL.EDU.VN help you elevate your automotive repair capabilities today with our comprehensive tools, resources, and expert support!
FAQ: Using Scan Tools for Repair Verification
1. What is a scan tool and how does it help verify repairs?
A scan tool, also known as a diagnostic scanner, is an electronic device used to interface with a vehicle’s onboard computer system. It helps verify repairs by reading diagnostic trouble codes (DTCs), monitoring live data, and performing system tests to ensure the repairs have been effective and the vehicle is functioning correctly.
2. What are Diagnostic Trouble Codes (DTCs) and how do I interpret them?
Diagnostic Trouble Codes (DTCs) are codes stored in a vehicle’s computer that indicate a problem with a specific system or component. They are typically a five-character code (e.g., P0300). To interpret them, consult a repair manual or online database that provides the definition and possible causes for each code.
3. What is live data and why is it important for verifying repairs?
Live data refers to the real-time information from various sensors and modules within the vehicle, such as engine temperature, RPM, and oxygen sensor readings. It’s important because it allows you to monitor the performance of the repaired system under different operating conditions to ensure it’s functioning within normal parameters.
4. How do I use a scan tool to clear DTCs after a repair?
Connect the scan tool to the vehicle’s diagnostic port, navigate to the section for reading codes, and then select the option to clear codes. Confirm that the codes have been successfully cleared and monitor for any recurrence.
5. What are some common mistakes to avoid when using a scan tool?
Common mistakes include neglecting basic mechanical checks, misinterpreting DTCs, ignoring live data patterns, and skipping post-repair verification. Always perform a thorough inspection and verification to ensure an accurate diagnosis and effective repair.
6. Can I use a scan tool on any vehicle?
Most modern scan tools are compatible with all vehicles that comply with the OBD-II standard, which has been mandatory for vehicles sold in the United States since 1996. However, some advanced functions may only be available for specific makes and models, so ensure the scan tool supports the vehicle you’re working on.
7. How often should I update the software on my scan tool?
You should update the software on your scan tool regularly, especially when working on newer vehicles. Check for updates at least once a month to ensure you have the latest diagnostic information and features.
8. What is bi-directional control and how can it help with verifying repairs?
Bi-directional control allows you to send commands to the vehicle’s computer and activate specific components, such as fuel injectors or solenoids. This can help verify repairs by testing the functionality of components and systems directly.
9. How do I integrate a scan tool with other diagnostic tools like multimeters and oscilloscopes?
Use the scan tool to read DTCs and monitor live data, then use multimeters to test electrical circuits and components, and oscilloscopes to analyze electrical signals. Integrating these tools provides a more comprehensive diagnostic solution.
10. Where can I find reliable information and training courses on using scan tools effectively?
You can find reliable information and training courses from vehicle manufacturers, industry organizations like ASE, and online platforms. CAR-TOOL.EDU.VN also offers resources and expert guidance on selecting and using scan tools effectively.