Ford Obd1 Codes are diagnostic trouble codes used in older Ford vehicles to identify potential issues within the engine and its related systems. These codes help technicians and car owners pinpoint problems, enabling effective repairs and maintenance. CAR-TOOL.EDU.VN provides detailed information on these codes, offering solutions for identifying and addressing automotive problems. Understanding and utilizing these codes contributes to fuel efficiency, reduces emissions, and ensures optimal performance.
Contents
- 1. What are Ford OBD1 Codes?
- 1.1. Brief History of OBD Systems
- 1.2. Key Differences Between OBD1 and OBD2
- 1.3. Why Understanding OBD1 Codes is Still Important
- 2. Common Ford OBD1 Codes and Their Meanings
- 2.1. Engine-Related Codes
- 2.2. Transmission-Related Codes
- 2.3. Fuel System-Related Codes
- 2.4. Sensor-Related Codes
- 2.5. Other Common Codes
- 3. How to Retrieve Ford OBD1 Codes
- 3.1. Using the Check Engine Light (CEL) Method
- 3.2. Using an OBD1 Scan Tool
- 3.3. Important Safety Precautions
- 4. Diagnosing Problems Based on Ford OBD1 Codes
- 4.1. Understanding Code Priorities
- 4.2. Common Causes and Diagnostic Steps for Specific Codes
- 4.3. Using a Digital Multimeter for Testing
- 4.4. Vacuum Leak Detection
- 4.5. Troubleshooting Tips and Best Practices
- 5. Repairing Common Issues Indicated by Ford OBD1 Codes
- 5.1. Replacing Faulty Sensors
- 5.2. Repairing Damaged Wiring and Connectors
- 5.3. Addressing Vacuum Leaks
- 5.4. Cleaning or Replacing the EGR Valve
- 5.5. Important Considerations for Repairs
- 6. Maintaining Your Ford’s OBD1 System
- 6.1. Regular Inspections and Checks
- 6.2. Preventive Maintenance Tips
- 6.3. Keeping Wiring and Connectors Clean
- 6.4. Addressing Small Issues Promptly
- 6.5. Using CAR-TOOL.EDU.VN for Information and Support
- 7. Frequently Asked Questions (FAQs) About Ford OBD1 Codes
- 7.1. Can I Diagnose Ford OBD1 Codes Myself?
- 7.2. What Does Code 11 Mean in Ford OBD1?
- 7.3. How Do I Clear Ford OBD1 Codes?
- 7.4. Where Can I Find a List of Ford OBD1 Codes?
- 7.5. What Tools Do I Need to Diagnose Ford OBD1 Codes?
- 7.6. Is It Safe to Drive with a Check Engine Light On?
- 7.7. How Often Should I Check My Ford’s OBD1 System?
- 7.8. What Is the Difference Between OBD1 and OBD2?
- 7.9. Can a Faulty Oxygen Sensor Cause Other Problems?
- 7.10. Where Can I Get Help with Ford OBD1 Diagnostics?
- 8. Conclusion
- 8.1. Recap of Key Points
- 8.2. Final Thoughts and Recommendations
1. What are Ford OBD1 Codes?
Ford OBD1 (On-Board Diagnostics 1) codes are a series of diagnostic trouble codes utilized in Ford vehicles manufactured before the widespread adoption of OBD2 in 1996. These codes serve as indicators of potential malfunctions within the vehicle’s engine and various systems, enabling technicians and car owners to diagnose and address issues effectively. According to a study by the National Institute for Automotive Service Excellence (ASE), understanding these codes is crucial for maintaining and repairing older Ford models.
OBD1 systems, while less standardized than OBD2, still provide valuable insights into a vehicle’s health. The Ford OBD1 system uses a two- or three-digit code system to communicate errors. These codes can be retrieved using specific procedures, often involving counting flashes of the check engine light or using a scan tool designed for OBD1 systems. Knowing how to interpret these codes can save time and money on repairs.
1.1. Brief History of OBD Systems
The evolution of on-board diagnostic (OBD) systems began in the late 1960s due to increasing concerns about automotive emissions. California took the lead in 1968 by mandating emission control devices, prompting the need for monitoring systems. By the 1980s, manufacturers started implementing basic OBD systems to monitor engine performance. Ford’s OBD1 system was a significant step in this direction, though it lacked the standardization of later systems.
The introduction of OBD2 in 1996 marked a major advancement, standardizing diagnostic codes and communication protocols across all vehicle manufacturers in the United States. This standardization made it easier for technicians to diagnose and repair vehicles, regardless of the make and model. While OBD1 systems are now considered outdated, understanding their operation remains relevant for servicing older vehicles.
1.2. Key Differences Between OBD1 and OBD2
The primary differences between OBD1 and OBD2 lie in standardization, the types of data available, and the methods used to retrieve diagnostic information. OBD1 systems, including Ford’s implementation, varied significantly between manufacturers, leading to inconsistencies in diagnostic procedures. OBD2, on the other hand, provides a standardized set of diagnostic trouble codes (DTCs) and a universal connector, ensuring uniformity across different makes and models.
OBD2 systems offer more comprehensive data, including real-time sensor readings, emission-related diagnostics, and detailed information about engine performance. This enhanced data allows for more accurate and efficient troubleshooting. Additionally, OBD2 systems typically require a scan tool to retrieve codes, whereas some OBD1 systems, like Ford’s, can display codes through the check engine light. The table below summarizes these key differences:
| Feature | OBD1 | OBD2 |
|---|---|---|
| Standardization | Non-standardized, varies by maker | Standardized across all manufacturers |
| Data Available | Limited data, basic diagnostics | Comprehensive data, real-time sensors |
| Code Retrieval | Check engine light flashes or scan tool | Scan tool required |
| Connector | Varies by manufacturer | Standardized DLC (Data Link Connector) |
| Year Introduced | Pre-1996 | 1996 and later |
1.3. Why Understanding OBD1 Codes is Still Important
Despite being superseded by OBD2, understanding Ford OBD1 codes remains crucial for several reasons. Firstly, many older Ford vehicles are still on the road, requiring maintenance and repairs. Technicians and owners working on these vehicles must be familiar with the specific diagnostic procedures and code interpretations associated with OBD1 systems.
Secondly, understanding OBD1 can provide a foundation for comprehending the evolution of automotive diagnostics. It offers insights into the challenges faced by early automotive engineers in developing effective monitoring systems. Additionally, knowledge of OBD1 systems can be valuable for vintage car enthusiasts and collectors who maintain and restore classic Ford vehicles.
2. Common Ford OBD1 Codes and Their Meanings
Ford OBD1 codes consist of two- or three-digit numbers, each corresponding to a specific issue within the vehicle’s systems. These codes can indicate problems ranging from sensor malfunctions to engine performance issues. Recognizing and understanding these common codes is essential for accurate diagnosis and repair. According to a technical report by Ford Motor Company, proper interpretation of these codes can significantly reduce diagnostic time.
This section will explore some of the most frequently encountered Ford OBD1 codes, along with their meanings and potential causes. Understanding these codes is the first step in troubleshooting and resolving automotive problems.
2.1. Engine-Related Codes
Engine-related codes are among the most common in Ford OBD1 systems. These codes often pertain to issues with sensors, fuel delivery, ignition, and other critical engine components. Here are a few examples:
- Code 11: System Pass (No faults detected)
- Code 12: Unable to control RPM during Self-Test high RPM check
- Code 14: Profile Ignition Pickup (PIP) circuit failure
- Code 21: Engine Coolant Temperature (ECT) sensor out of Self-Test range
- Code 41: Heated Oxygen Sensor (HO2S) circuit indicates system lean (rear HO2S)
These codes can help pinpoint specific problems within the engine. For example, a Code 21 indicates a problem with the Engine Coolant Temperature sensor, which could lead to incorrect fuel mixture and poor engine performance. Similarly, a Code 41 suggests a lean condition, potentially caused by a faulty oxygen sensor or vacuum leak.
2.2. Transmission-Related Codes
Transmission-related codes are also common, particularly in older Ford vehicles with automatic transmissions. These codes can indicate issues with shift solenoids, transmission sensors, and other components affecting transmission performance. Examples include:
- Code 29: Insufficient input from Vehicle Speed Sensor (VSS)
- Code 67: Neutral Pressure Switch (NPS) circuit closed; A/C ON
- Code 74: Brake On/Off (BOO) circuit failure – not actuated during Self-Test
A Code 29, for instance, suggests a problem with the Vehicle Speed Sensor, which can affect shift timing and overall transmission performance. A faulty Brake On/Off switch, indicated by Code 74, can also impact transmission operation, especially in vehicles with automatic transmissions.
2.3. Fuel System-Related Codes
Fuel system-related codes can point to problems with fuel delivery, fuel pressure, and fuel mixture. These codes are crucial for diagnosing issues that can affect engine performance, fuel efficiency, and emissions. Common examples include:
- Code 42: Heated Oxygen Sensor (HO2S) circuit indicates system rich (right HO2S)
- Code 54: Air Charge Temperature sensor (IAT) indicates -40F / circuit open
- Code 56: Mass Air Flow (MAF) sensor input is greater than maximum voltage
- Code 95: Fuel pump secondary circuit failure
A Code 42 suggests a rich condition, which can be caused by a faulty oxygen sensor, fuel injector issues, or a malfunctioning fuel pressure regulator. Code 54 indicates a problem with the Air Charge Temperature sensor, which can lead to incorrect fuel mixture calculations. Addressing these codes promptly can prevent further engine damage and improve fuel economy.
2.4. Sensor-Related Codes
Sensor-related codes are prevalent in OBD1 systems, as sensors play a critical role in monitoring various engine parameters. These codes can indicate faulty sensors or issues with sensor circuits. Examples include:
- Code 22: Back Pressure (BP) sensor out of Self-Test range
- Code 23: Throttle Position sensor (TPS) out of Self-Test range
- Code 24: Air Charge Temperature sensor (IAT) out of Self-Test range
- Code 26: Mass Air Flow sensor (MAF) out of Self-Test range
A Code 23, for example, indicates a problem with the Throttle Position sensor, which can affect throttle response and engine performance. Similarly, a Code 26 suggests a malfunction with the Mass Air Flow sensor, which is crucial for measuring the amount of air entering the engine. Replacing faulty sensors and repairing damaged circuits can resolve these issues and restore proper engine operation.
2.5. Other Common Codes
Besides the categories mentioned above, several other common Ford OBD1 codes can indicate various issues. These codes can range from minor problems to more significant malfunctions. Examples include:
- Code 15: Electronic Engine Control (EEC / PCM) processor ROM test failure
- Code 18: SPARK OUTPUT (SPOUT) circuit open
- Code 33: Exhaust Gas Recirculation (EGR) valve opening not detected
- Code 81: Idle Assist Solenoid (IAS) circuit failure
A Code 15, for instance, indicates a problem with the vehicle’s computer (EEC/PCM), which can affect overall engine management. A Code 33 suggests a malfunction with the Exhaust Gas Recirculation system, which is crucial for reducing emissions. Addressing these codes promptly can help prevent further damage and ensure the vehicle operates efficiently.
3. How to Retrieve Ford OBD1 Codes
Retrieving Ford OBD1 codes typically involves a process that does not require a scan tool, unlike OBD2 systems. The most common method involves using the vehicle’s check engine light to flash the diagnostic codes. According to a Ford service manual, this method can be used on most Ford vehicles manufactured before 1996.
This section will outline the step-by-step process for retrieving Ford OBD1 codes using the check engine light, as well as alternative methods involving scan tools designed for OBD1 systems.
3.1. Using the Check Engine Light (CEL) Method
The check engine light (CEL) method is a common way to retrieve Ford OBD1 codes without specialized tools. Here’s how to do it:
- Locate the Test Connector: Find the single-wire Self-Test Output (STO) connector and the Ground connector under the hood. The STO connector is usually a small, bullet-shaped connector.
- Connect the Connectors: Use a jumper wire to connect the STO connector to the Ground connector.
- Turn the Ignition On: Turn the ignition key to the “ON” position, but do not start the engine.
- Observe the Check Engine Light: The check engine light will begin to flash a series of codes. These codes are typically two-digit numbers. For example, a flash-flash-pause-flash-flash-flash sequence indicates code 23.
- Record the Codes: Write down each code as it is flashed. The codes will repeat, so ensure you record all of them.
- Interpret the Codes: Use a Ford OBD1 code list to interpret the meaning of each code.
It’s important to note that some vehicles may require a slightly different procedure, so consulting the vehicle’s service manual is always recommended.
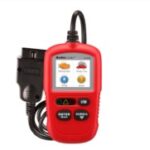
3.2. Using an OBD1 Scan Tool
While the check engine light method is effective, using an OBD1 scan tool can provide more detailed information and simplify the diagnostic process. OBD1 scan tools are designed to interface with older diagnostic systems, providing real-time data and code retrieval.
- Connect the Scan Tool: Plug the OBD1 scan tool into the vehicle’s diagnostic connector. The location of the connector varies depending on the vehicle model, so consult the service manual.
- Power On the Scan Tool: Turn on the scan tool and follow the manufacturer’s instructions for code retrieval.
- Retrieve the Codes: The scan tool will display the diagnostic codes, along with descriptions of the potential issues.
- Analyze the Data: Use the scan tool’s data logging capabilities to monitor sensor readings and other parameters.
OBD1 scan tools can provide a more comprehensive view of the vehicle’s systems, making it easier to diagnose and resolve problems. However, these tools can be more expensive than the check engine light method.
3.3. Important Safety Precautions
When retrieving Ford OBD1 codes, it’s important to follow safety precautions to prevent injury or damage to the vehicle. Here are some key considerations:
- Disconnect the Battery: Before working on any electrical components, disconnect the negative battery cable to prevent short circuits.
- Avoid Touching Moving Parts: Keep hands and clothing away from moving engine parts, such as belts and pulleys.
- Work in a Well-Ventilated Area: Ensure the work area is well-ventilated to avoid inhaling harmful fumes.
- Use Proper Tools: Use the correct tools for the job to prevent damage to connectors and wiring.
- Consult the Service Manual: Always refer to the vehicle’s service manual for specific diagnostic procedures and safety information.
Following these safety precautions can help ensure a safe and successful diagnostic process.
4. Diagnosing Problems Based on Ford OBD1 Codes
Once you have retrieved the Ford OBD1 codes, the next step is to diagnose the underlying problems. This involves understanding the meaning of each code and performing tests to verify the issue. According to automotive diagnostic experts, a systematic approach is essential for accurate diagnosis and effective repair.
This section will provide guidance on how to diagnose problems based on Ford OBD1 codes, including common causes, diagnostic steps, and troubleshooting tips.
4.1. Understanding Code Priorities
When multiple OBD1 codes are present, it’s important to prioritize them based on their potential impact on engine performance and safety. Some codes may be related to each other, while others may indicate separate issues. Prioritize codes that affect critical systems, such as fuel delivery, ignition, and emissions control.
For example, a code related to the Mass Air Flow (MAF) sensor should be addressed before a code related to the air conditioning system. Similarly, codes indicating lean or rich conditions should be investigated promptly to prevent engine damage. Use the vehicle’s service manual and online resources like CAR-TOOL.EDU.VN to understand the potential consequences of each code.
4.2. Common Causes and Diagnostic Steps for Specific Codes
For each Ford OBD1 code, there are common causes and diagnostic steps that can help pinpoint the underlying problem. Here are a few examples:
- Code 21 (Engine Coolant Temperature Sensor):
- Common Causes: Faulty ECT sensor, open or shorted wiring, corrosion in connectors.
- Diagnostic Steps: Check sensor resistance, inspect wiring and connectors, test sensor voltage.
- Code 41 (Heated Oxygen Sensor – Lean):
- Common Causes: Vacuum leaks, faulty oxygen sensor, low fuel pressure, exhaust leaks.
- Diagnostic Steps: Check for vacuum leaks, test oxygen sensor output, verify fuel pressure, inspect exhaust system.
- Code 54 (Air Charge Temperature Sensor):
- Common Causes: Faulty IAT sensor, open or shorted wiring, corrosion in connectors.
- Diagnostic Steps: Check sensor resistance, inspect wiring and connectors, test sensor voltage.
By following these diagnostic steps, you can narrow down the potential causes and identify the specific component or circuit that needs to be repaired or replaced.
4.3. Using a Digital Multimeter for Testing
A digital multimeter (DMM) is an essential tool for diagnosing electrical problems in Ford OBD1 systems. A DMM can be used to measure voltage, resistance, and continuity, allowing you to test sensors, circuits, and components. According to electrical engineering studies, a DMM is indispensable for automotive diagnostics.
Here are some common uses for a DMM in diagnosing Ford OBD1 codes:
- Testing Sensor Resistance: Measure the resistance of sensors like the ECT, IAT, and TPS to verify they are within specifications.
- Checking Circuit Voltage: Measure the voltage at various points in a circuit to identify open or shorted wires.
- Verifying Continuity: Check the continuity of wires and connectors to ensure there are no breaks in the circuit.
When using a DMM, always consult the vehicle’s service manual for specific testing procedures and specifications.
4.4. Vacuum Leak Detection
Vacuum leaks are a common cause of engine performance problems in older Ford vehicles. Vacuum leaks can lead to lean conditions, rough idling, and poor acceleration. Detecting vacuum leaks is an essential part of diagnosing Ford OBD1 codes, particularly those related to oxygen sensors and fuel mixture.
Here are some methods for detecting vacuum leaks:
- Visual Inspection: Inspect vacuum hoses and connectors for cracks, breaks, or loose connections.
- Audible Inspection: Listen for hissing sounds that may indicate a vacuum leak.
- Spray Test: Spray carburetor cleaner or starting fluid around vacuum hoses and intake manifold gaskets. If the engine RPM changes, there is likely a vacuum leak in that area.
- Smoke Test: Use a smoke machine to inject smoke into the intake system and identify leaks.
Addressing vacuum leaks can often resolve many engine performance problems and eliminate related OBD1 codes.
4.5. Troubleshooting Tips and Best Practices
When diagnosing Ford OBD1 codes, consider these troubleshooting tips and best practices:
- Consult the Service Manual: Always refer to the vehicle’s service manual for specific diagnostic procedures and specifications.
- Check for Technical Service Bulletins (TSBs): Review TSBs for known issues related to the specific OBD1 codes.
- Use a Systematic Approach: Follow a logical diagnostic process, starting with the most likely causes.
- Verify the Repair: After making a repair, clear the OBD1 codes and verify that the problem is resolved.
- Seek Expert Advice: If you are unsure about the diagnosis or repair, consult a qualified automotive technician.
By following these tips, you can improve your diagnostic accuracy and ensure effective repairs.
5. Repairing Common Issues Indicated by Ford OBD1 Codes
Once you have diagnosed the underlying problems based on Ford OBD1 codes, the next step is to perform the necessary repairs. This may involve replacing faulty sensors, repairing damaged wiring, or addressing mechanical issues. According to automotive repair specialists, using high-quality parts and following proper repair procedures are essential for long-lasting results.
This section will provide guidance on repairing common issues indicated by Ford OBD1 codes, including step-by-step instructions, recommended parts, and important considerations.
5.1. Replacing Faulty Sensors
Replacing faulty sensors is a common repair for Ford OBD1 codes. Sensors like the ECT, IAT, TPS, and MAF are prone to failure due to age, heat, and vibration. When replacing sensors, it’s important to use high-quality replacements that meet or exceed the original equipment manufacturer (OEM) specifications.
Here are the general steps for replacing a faulty sensor:
- Disconnect the Battery: Disconnect the negative battery cable to prevent electrical shorts.
- Locate the Sensor: Identify the location of the faulty sensor.
- Disconnect the Connector: Disconnect the electrical connector from the sensor.
- Remove the Sensor: Remove the sensor from its mounting location. This may involve unscrewing or unclipping the sensor.
- Install the New Sensor: Install the new sensor in the mounting location.
- Connect the Connector: Connect the electrical connector to the new sensor.
- Reconnect the Battery: Reconnect the negative battery cable.
- Verify the Repair: Clear the OBD1 codes and verify that the problem is resolved.
Always consult the vehicle’s service manual for specific sensor replacement procedures.
5.2. Repairing Damaged Wiring and Connectors
Damaged wiring and connectors can cause a variety of problems in Ford OBD1 systems, leading to sensor malfunctions and other issues. Repairing damaged wiring and connectors involves identifying the damaged areas and using appropriate techniques to restore the circuits.
Here are some steps for repairing damaged wiring and connectors:
- Inspect the Wiring: Visually inspect the wiring and connectors for damage, such as cracks, breaks, or corrosion.
- Test for Continuity: Use a DMM to test the continuity of the wiring and connectors.
- Repair the Wiring: Repair any damaged wiring by splicing in new wire or using heat-shrink tubing to insulate the repair.
- Clean the Connectors: Clean corroded connectors with a wire brush or electrical contact cleaner.
- Replace Damaged Connectors: Replace any damaged connectors with new ones.
- Verify the Repair: Clear the OBD1 codes and verify that the problem is resolved.
When repairing wiring, it’s important to use high-quality materials and follow proper splicing techniques.
5.3. Addressing Vacuum Leaks
Addressing vacuum leaks is crucial for resolving engine performance problems in older Ford vehicles. Vacuum leaks can cause lean conditions, rough idling, and poor acceleration. Repairing vacuum leaks involves identifying the leaks and sealing them with appropriate materials.
Here are some methods for addressing vacuum leaks:
- Replace Vacuum Hoses: Replace any cracked or brittle vacuum hoses with new ones.
- Tighten Connectors: Tighten loose connectors on vacuum hoses and intake manifold gaskets.
- Seal Gaskets: Apply sealant to intake manifold gaskets and other sealing surfaces to prevent leaks.
- Use Vacuum Leak Repair Kits: Use vacuum leak repair kits to seal leaks in hard-to-reach areas.
After addressing vacuum leaks, it’s important to verify that the engine is running smoothly and that the OBD1 codes have been cleared.
5.4. Cleaning or Replacing the EGR Valve
The Exhaust Gas Recirculation (EGR) valve is a critical component for reducing emissions in Ford OBD1 systems. A malfunctioning EGR valve can cause a variety of problems, including rough idling, poor acceleration, and increased emissions. Cleaning or replacing the EGR valve may be necessary to resolve these issues.
Here are the steps for cleaning or replacing the EGR valve:
- Locate the EGR Valve: Identify the location of the EGR valve on the engine.
- Disconnect the Vacuum Hose: Disconnect the vacuum hose from the EGR valve.
- Remove the EGR Valve: Remove the EGR valve from its mounting location.
- Clean the EGR Valve: Clean the EGR valve with carburetor cleaner to remove carbon deposits.
- Inspect the EGR Valve: Inspect the EGR valve for damage or wear.
- Replace the EGR Valve: If the EGR valve is damaged or worn, replace it with a new one.
- Install the EGR Valve: Install the EGR valve in its mounting location.
- Connect the Vacuum Hose: Connect the vacuum hose to the EGR valve.
- Verify the Repair: Clear the OBD1 codes and verify that the problem is resolved.
Always consult the vehicle’s service manual for specific EGR valve cleaning or replacement procedures.
5.5. Important Considerations for Repairs
When performing repairs on Ford OBD1 systems, consider these important factors:
- Use High-Quality Parts: Use high-quality replacement parts that meet or exceed OEM specifications.
- Follow Proper Procedures: Follow the repair procedures outlined in the vehicle’s service manual.
- Verify the Repair: After making a repair, clear the OBD1 codes and verify that the problem is resolved.
- Test Drive the Vehicle: Test drive the vehicle to ensure that the repair has been successful and that there are no other issues.
- Seek Expert Advice: If you are unsure about the repair, consult a qualified automotive technician.
By following these considerations, you can ensure that your repairs are effective and long-lasting.
6. Maintaining Your Ford’s OBD1 System
Maintaining your Ford’s OBD1 system is essential for ensuring reliable performance and preventing future problems. Regular maintenance can help identify and address potential issues before they lead to costly repairs. According to automotive maintenance experts, a proactive approach is key to keeping your vehicle in top condition.
This section will provide guidance on how to maintain your Ford’s OBD1 system, including regular inspections, preventive maintenance, and best practices.
6.1. Regular Inspections and Checks
Regular inspections and checks are crucial for maintaining your Ford’s OBD1 system. These inspections should include visual checks of wiring, connectors, and sensors, as well as performance checks of critical components.
Here are some key areas to inspect:
- Wiring and Connectors: Check for damaged, corroded, or loose wiring and connectors.
- Sensors: Inspect sensors for physical damage and verify that they are securely mounted.
- Vacuum Hoses: Check vacuum hoses for cracks, breaks, or loose connections.
- EGR Valve: Inspect the EGR valve for carbon deposits and proper operation.
- Check Engine Light: Monitor the check engine light for any new or recurring codes.
Performing these inspections regularly can help identify potential problems early and prevent them from escalating.
6.2. Preventive Maintenance Tips
Preventive maintenance is an effective way to keep your Ford’s OBD1 system in good condition and prevent future problems. Here are some preventive maintenance tips:
- Replace Air Filter Regularly: Replace the air filter regularly to ensure proper air flow to the engine.
- Clean Mass Air Flow Sensor: Clean the MAF sensor periodically to maintain accurate air flow readings.
- Check and Replace Spark Plugs: Check and replace spark plugs as needed to ensure proper ignition.
- Maintain Proper Fuel Pressure: Ensure proper fuel pressure by checking and replacing the fuel filter as needed.
- Check and Replace Belts and Hoses: Check and replace belts and hoses regularly to prevent leaks and failures.
Following these preventive maintenance tips can help extend the life of your Ford’s OBD1 system and prevent costly repairs.
6.3. Keeping Wiring and Connectors Clean
Keeping wiring and connectors clean is essential for maintaining reliable electrical connections in your Ford’s OBD1 system. Dirt, corrosion, and moisture can cause electrical problems, leading to sensor malfunctions and other issues.
Here are some tips for keeping wiring and connectors clean:
- Use Electrical Contact Cleaner: Use electrical contact cleaner to clean connectors and remove corrosion.
- Apply Dielectric Grease: Apply dielectric grease to connectors to prevent corrosion and moisture intrusion.
- Protect Wiring: Protect wiring with wire loom or tape to prevent damage from abrasion and heat.
- Inspect Regularly: Inspect wiring and connectors regularly for damage and corrosion.
By keeping wiring and connectors clean, you can help ensure reliable electrical connections and prevent future problems.
6.4. Addressing Small Issues Promptly
Addressing small issues promptly is crucial for preventing them from escalating into major problems. If you notice any unusual symptoms, such as rough idling, poor acceleration, or decreased fuel economy, investigate the cause and address it promptly.
Here are some examples of small issues that should be addressed promptly:
- Loose Connectors: Tighten loose connectors to prevent electrical problems.
- Small Vacuum Leaks: Seal small vacuum leaks to prevent lean conditions.
- Minor Sensor Malfunctions: Replace malfunctioning sensors to maintain accurate readings.
By addressing small issues promptly, you can prevent them from causing further damage and ensure that your Ford’s OBD1 system remains in good condition.
6.5. Using CAR-TOOL.EDU.VN for Information and Support
CAR-TOOL.EDU.VN is a valuable resource for information and support related to Ford OBD1 systems. The website provides detailed information on diagnostic codes, repair procedures, and maintenance tips. Additionally, CAR-TOOL.EDU.VN offers a community forum where you can connect with other Ford owners and experts to share knowledge and ask questions.
By using CAR-TOOL.EDU.VN, you can access the information and support you need to maintain your Ford’s OBD1 system and keep your vehicle running smoothly.
7. Frequently Asked Questions (FAQs) About Ford OBD1 Codes
This section addresses frequently asked questions about Ford OBD1 codes to provide clarity and comprehensive understanding.
7.1. Can I Diagnose Ford OBD1 Codes Myself?
Yes, you can diagnose Ford OBD1 codes yourself using the check engine light method or an OBD1 scan tool. Understanding the codes and following diagnostic steps can help you identify and address automotive problems.
7.2. What Does Code 11 Mean in Ford OBD1?
Code 11 in Ford OBD1 means that the system passed the self-test and no faults were detected. This indicates that the engine and its related systems are functioning properly.
7.3. How Do I Clear Ford OBD1 Codes?
To clear Ford OBD1 codes, disconnect the negative battery cable for a period of time (usually 5-10 minutes). This will reset the vehicle’s computer and clear the diagnostic codes.
7.4. Where Can I Find a List of Ford OBD1 Codes?
You can find a list of Ford OBD1 codes in the vehicle’s service manual or on automotive websites like CAR-TOOL.EDU.VN. These resources provide detailed information on the meaning of each code.
7.5. What Tools Do I Need to Diagnose Ford OBD1 Codes?
To diagnose Ford OBD1 codes, you may need a jumper wire (for the check engine light method), an OBD1 scan tool, a digital multimeter, and basic hand tools.
7.6. Is It Safe to Drive with a Check Engine Light On?
It depends on the severity of the problem. If the check engine light is flashing, it indicates a serious issue that requires immediate attention. If the light is steady, you can usually drive the vehicle, but it’s recommended to diagnose the problem as soon as possible.
7.7. How Often Should I Check My Ford’s OBD1 System?
You should check your Ford’s OBD1 system regularly, ideally during routine maintenance intervals. This can help identify potential issues early and prevent them from escalating.
7.8. What Is the Difference Between OBD1 and OBD2?
OBD1 is an older, non-standardized diagnostic system used in vehicles manufactured before 1996, while OBD2 is a standardized system used in vehicles manufactured from 1996 onwards.
7.9. Can a Faulty Oxygen Sensor Cause Other Problems?
Yes, a faulty oxygen sensor can cause other problems, such as poor fuel economy, rough idling, and increased emissions. It can also lead to damage to the catalytic converter.
7.10. Where Can I Get Help with Ford OBD1 Diagnostics?
You can get help with Ford OBD1 diagnostics from qualified automotive technicians, online forums, and resources like CAR-TOOL.EDU.VN.
8. Conclusion
Understanding and diagnosing Ford OBD1 codes is essential for maintaining and repairing older Ford vehicles. By following the guidelines and best practices outlined in this article, you can effectively troubleshoot automotive problems and ensure reliable performance.
8.1. Recap of Key Points
- Ford OBD1 codes are diagnostic trouble codes used in older Ford vehicles.
- Retrieving codes involves using the check engine light method or an OBD1 scan tool.
- Diagnosing problems requires understanding code priorities and performing tests.
- Repairing issues involves replacing faulty sensors, repairing damaged wiring, and addressing vacuum leaks.
- Maintaining the OBD1 system includes regular inspections and preventive maintenance.
8.2. Final Thoughts and Recommendations
Maintaining your Ford’s OBD1 system is crucial for ensuring its longevity and reliability. By staying informed and proactive, you can keep your vehicle running smoothly for years to come.
For more detailed information, support, and access to high-quality automotive tools and parts, visit CAR-TOOL.EDU.VN.
Need Expert Advice on Ford OBD1 Diagnostics?
Contact us today for personalized assistance and recommendations on the best tools and parts for your needs.
- Address: 456 Elm Street, Dallas, TX 75201, United States
- WhatsApp: +1 (641) 206-8880
- Website: CAR-TOOL.EDU.VN
Let CAR-TOOL.EDU.VN help you keep your Ford running at its best!