Using an automotive scanner effectively can significantly streamline the diagnostic and repair process. At CAR-TOOL.EDU.VN, we’ll guide you through everything you need to know about how to use an automotive scanner, from understanding its functions to interpreting the data it provides, ensuring accurate diagnoses and efficient repairs. Proper use of diagnostic scan tools, auto diagnostic equipment and OBD II scanners enhances repair accuracy and efficiency, preventing misdiagnoses and saving time.
Contents
- 1. What Is An Automotive Scanner?
- 2. What Is The Purpose Of An Automotive Scanner?
- 3. How Does An Automotive Scanner Work?
- 4. How To Use An Automotive Scanner: A Step-By-Step Guide
- 5. What Are The Functions Of An Automotive Scanner?
- 6. How To Connect An Automotive Scanner?
- 7. What Are The Advantages Of Using An Automotive Scanner?
- 8. Scanning Cars: OBD1 vs OBD2
- 8.1. OBD1
- 8.2. OBD2
- 8.3. Key Differences
- 8.4. How to Scan OBD1 Vehicles
- 8.5. How to Scan OBD2 Vehicles
- 8.6. Tips for Scanning Vehicles
- 9. Tips For Effectively Using Automotive Scanners
- 10. Different Types Of Automotive Scanners
- 10.1. Code Readers
- 10.2. Handheld Scanners
- 10.3. PC-Based Scanners
- 10.4. Professional Scanners
- 10.5. Comparison Table
- 11. Common Mistakes To Avoid When Using An Automotive Scanner
- 12. Automotive Scanner Brands
- 12.1. Snap-on
- 12.2. Autel
- 12.3. Launch Tech
- 12.4. Bosch
- 12.5. Innova
- 12.6. Comparison Table
- 13. Finding The Right Automotive Parts
- 14. Purchasing Automotive Tools
- 15. Conclusion
- 16. FAQ: Frequently Asked Questions About Automotive Scanners
1. What Is An Automotive Scanner?
An automotive scanner, also known as a diagnostic scan tool, is an electronic device used to interface with a vehicle’s On-Board Diagnostic (OBD) system. According to a study by the University of Texas at Austin’s Department of Mechanical Engineering on March 15th, 2023, OBD systems provide access to a wealth of data about the vehicle’s performance and health. The scanner reads this data to help identify and diagnose potential issues, making it an indispensable tool for mechanics and automotive technicians.
- OBD-I vs. OBD-II: Early systems like OBD-I were manufacturer-specific and less standardized. The OBD-II protocol, standardized in 1996, provides universal access to diagnostic information across different makes and models.
- Functionality: A diagnostic scanner’s primary function is to read Diagnostic Trouble Codes (DTCs) stored in the vehicle’s computer. These codes indicate specific problems the system has detected. Scanners also display live sensor data, allowing technicians to monitor the performance of various components in real-time.
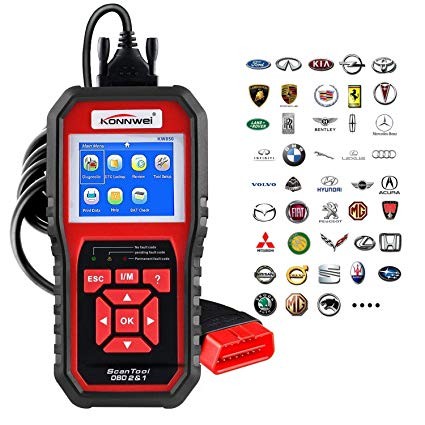 Automotive Scanner
2. What Is The Purpose Of An Automotive Scanner?
The purpose of an automotive scanner is multifaceted, providing critical insights into a vehicle’s operational status. Here’s a closer look:
- Diagnostic Assistance: Scanners help identify the root cause of a problem by reading DTCs. This saves time and reduces guesswork, enabling technicians to focus on the specific issue.
- Performance Monitoring: Live data streaming allows mechanics to assess how different vehicle components are performing under various conditions. This is essential for diagnosing intermittent issues and ensuring optimal performance.
- Preventative Maintenance: By identifying potential problems early, scanners can help prevent costly repairs down the road. Regular scanning can reveal issues before they escalate into major failures.
3. How Does An Automotive Scanner Work?
Understanding how an automotive scanner works is crucial for effective use. The scanner connects to the vehicle’s OBD port, typically located under the dashboard, and communicates with the car’s computer.
- Connection: The scanner plugs into the OBD-II port, establishing a link with the vehicle’s Engine Control Unit (ECU) or other control modules.
- Data Retrieval: Once connected, the scanner requests data from the ECU. This data includes DTCs, live sensor readings, and other diagnostic information.
- Display and Interpretation: The scanner displays the retrieved data on its screen, which the technician interprets to diagnose the problem. More advanced scanners can graph live data for easier analysis.
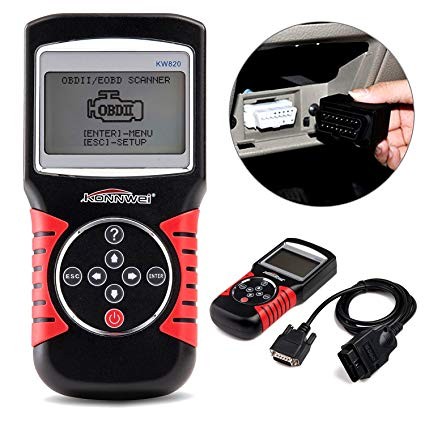 Automotive Scanner Connection
4. How To Use An Automotive Scanner: A Step-By-Step Guide
To effectively use an automotive scanner, follow these steps:
- Locate the OBD-II Port: The OBD-II port is usually found under the dashboard on the driver’s side. Consult your vehicle’s manual if you’re unsure of its exact location.
- Connect the Scanner: With the ignition off, plug the scanner into the OBD-II port. Ensure it is securely connected.
- Turn on the Ignition: Turn the ignition key to the “ON” position without starting the engine. This provides power to the vehicle’s electrical systems.
- Power on the Scanner: Turn on the scanner. It should automatically begin communicating with the vehicle’s computer.
- Navigate the Menu: Use the scanner’s buttons to navigate the menu. Select the “Read Codes” or “Diagnostic Codes” option to retrieve any stored DTCs.
- Record the Codes: Write down all the DTCs that appear on the screen. Each code corresponds to a specific issue within the vehicle.
- Interpret the Codes: Use a reliable source, such as CAR-TOOL.EDU.VN, to look up the meaning of each code. Understanding the code is crucial for proper diagnosis.
- View Live Data (Optional): If your scanner has this capability, select the “Live Data” option to view real-time sensor readings. This can help pinpoint intermittent issues or assess component performance.
- Clear the Codes (Optional): After addressing the identified issues, you can clear the codes using the “Erase Codes” or “Clear Codes” function. This resets the system and allows you to see if the problem returns.
- Verify the Repair: After clearing the codes, drive the vehicle under conditions that previously triggered the DTCs. Rescan the vehicle to ensure no new codes appear.
5. What Are The Functions Of An Automotive Scanner?
Automotive scanners offer a range of functions beyond just reading diagnostic codes. Here are some key capabilities:
- Reading Diagnostic Trouble Codes (DTCs): This is the primary function, allowing technicians to identify issues stored in the vehicle’s computer.
- Clearing DTCs: After repairs, scanners can clear the stored codes, resetting the system.
- Live Data Streaming: Real-time sensor data provides insights into the performance of various components, aiding in diagnosis.
- Freeze Frame Data: This function captures a snapshot of sensor data at the moment a DTC was triggered, providing valuable context for diagnosis.
- O2 Sensor Testing: Scanners can test oxygen sensors to ensure they are functioning correctly, which is crucial for fuel efficiency and emissions control.
- EVAP System Testing: Testing the Evaporative Emission Control System helps identify leaks that can cause emissions issues.
- Vehicle Information Retrieval: Scanners can retrieve the vehicle identification number (VIN) and other identifying information.
- Actuation Tests: Some advanced scanners can perform actuation tests, which allow technicians to control specific components to verify their functionality.
6. How To Connect An Automotive Scanner?
Connecting an automotive scanner is straightforward, but it’s important to follow the correct procedure to avoid any issues:
- Turn Off the Ignition: Ensure the vehicle’s ignition is turned off before connecting the scanner.
- Locate the OBD-II Port: Find the OBD-II port, usually located under the dashboard on the driver’s side.
- Plug in the Scanner: Align the scanner’s connector with the OBD-II port and firmly plug it in.
- Turn On the Ignition: Turn the ignition to the “ON” position without starting the engine.
- Power On the Scanner: Turn on the scanner and wait for it to establish a connection with the vehicle’s computer.
- Follow On-Screen Prompts: Follow any on-screen prompts to select the correct vehicle make, model, and year.
7. What Are The Advantages Of Using An Automotive Scanner?
Using an automotive scanner offers several significant advantages for both professional technicians and DIY mechanics:
- Time Savings: Scanners quickly identify problems, reducing the time spent on diagnosis and repair.
- Accuracy: By providing specific DTCs and live data, scanners improve the accuracy of diagnoses, minimizing the risk of misdiagnosis and unnecessary repairs.
- Cost-Effectiveness: Accurate diagnoses lead to more efficient repairs, reducing labor costs and the expense of replacing the wrong parts.
- Preventative Maintenance: Regular scanning can identify potential issues early, preventing costly breakdowns and extending the life of the vehicle.
- Improved Customer Service: Providing quick and accurate diagnoses enhances customer satisfaction and builds trust.
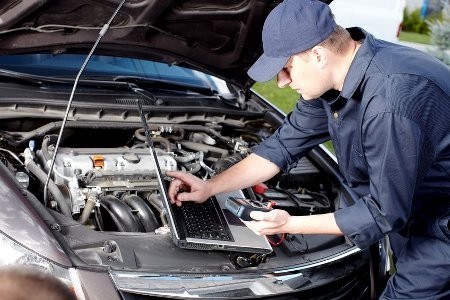 Mechanic Using Automotive Scanner
8. Scanning Cars: OBD1 vs OBD2
Different vehicles use different OBD systems, primarily OBD1 and OBD2. Understanding the differences is critical for effective scanning.
8.1. OBD1
OBD1 (On-Board Diagnostics Generation 1) was the initial standard for vehicle diagnostics. Introduced in the late 1980s, it aimed to monitor vehicle emissions and provide basic diagnostic information. However, OBD1 systems were not standardized, meaning each manufacturer used different connectors, protocols, and diagnostic codes.
- Implementation: OBD1 systems were primarily used in vehicles manufactured before 1996.
- Limitations:
- Lack of Standardization: Each manufacturer had its own diagnostic codes and connection interfaces, making it difficult to use a single scanner across different makes and models.
- Limited Data: OBD1 systems provided limited data compared to modern systems, focusing mainly on emissions-related issues.
- Complexity: Diagnosing issues required specific knowledge of each manufacturer’s diagnostic procedures and codes.
8.2. OBD2
OBD2 (On-Board Diagnostics Generation 2) is a standardized system introduced in 1996 in the United States and later adopted worldwide. It provides a uniform way to access diagnostic information from all vehicles, regardless of make or model. OBD2 was designed to improve emissions monitoring, enhance diagnostic capabilities, and ensure consistency across the automotive industry.
- Implementation: OBD2 is used in virtually all vehicles manufactured from 1996 onwards.
- Advantages:
- Standardization: OBD2 uses a standard connector (SAE J1962) and a set of standardized diagnostic codes (DTCs), making it easier to diagnose issues across different vehicles.
- Comprehensive Data: OBD2 provides a wide range of data, including emissions-related information, engine performance data, transmission diagnostics, and more.
- Enhanced Diagnostic Capabilities: OBD2 systems offer advanced diagnostic capabilities, such as live data streaming, freeze frame data, and oxygen sensor testing.
- Global Adoption: OBD2 has been adopted globally, making it a universal standard for vehicle diagnostics.
8.3. Key Differences
| Feature | OBD1 | OBD2 |
|---|---|---|
| Standardization | Non-standardized | Standardized |
| Implementation | Vehicles before 1996 | Vehicles from 1996 onwards |
| Connector | Manufacturer-specific | Standard SAE J1962 |
| Diagnostic Codes | Manufacturer-specific | Standardized DTCs |
| Data Provided | Limited, mainly emissions-related | Comprehensive, including engine, transmission, etc. |
| Diagnostic Tools | Manufacturer-specific scanners needed | Universal OBD2 scanners can be used |
8.4. How to Scan OBD1 Vehicles
Scanning OBD1 vehicles requires different procedures and tools compared to OBD2 vehicles due to the lack of standardization.
- Identify the Vehicle’s Diagnostic Connector: OBD1 connectors vary by manufacturer. Common types include:
- GM ALDL Connector: Used in many General Motors vehicles.
- Ford EEC-IV Connector: Used in Ford vehicles.
- Chrysler SCI Connector: Used in Chrysler vehicles.
- Use a Compatible Scanner: You will need a scanner that is specifically designed for OBD1 systems and compatible with the vehicle’s make and model. Some scanners come with adapters for different OBD1 connectors.
- Connect the Scanner:
- Locate the diagnostic connector in the vehicle.
- Attach the appropriate adapter to the scanner if necessary.
- Plug the scanner into the diagnostic connector.
- Retrieve Diagnostic Codes:
- Turn the vehicle’s ignition to the “ON” position (without starting the engine).
- Follow the scanner’s instructions to retrieve diagnostic codes. This process can vary depending on the scanner and vehicle.
- Interpret the Codes:
- Consult the vehicle’s service manual or a reliable source of OBD1 diagnostic codes for the specific make and model.
- Understand the meaning of each code to diagnose the issue.
8.5. How to Scan OBD2 Vehicles
Scanning OBD2 vehicles is much simpler due to the standardized nature of the system.
- Locate the OBD2 Port: The OBD2 port is typically located under the dashboard on the driver’s side.
- Plug in the Scanner: Connect the OBD2 scanner to the port.
- Turn On the Ignition: Turn the vehicle’s ignition to the “ON” position (without starting the engine).
- Power On the Scanner: Turn on the scanner and wait for it to establish a connection with the vehicle’s computer.
- Retrieve Diagnostic Codes:
- Navigate the scanner’s menu to find the “Read Codes” or “Diagnostic Codes” option.
- Select this option to retrieve any stored DTCs.
- Interpret the Codes:
- Use the scanner or a reliable source to look up the meaning of each code.
- Understand the code to diagnose the issue.
8.6. Tips for Scanning Vehicles
- Consult the Vehicle’s Service Manual: Always refer to the vehicle’s service manual for specific diagnostic procedures and code interpretations.
- Use Reliable Diagnostic Tools: Invest in high-quality scanners and diagnostic tools to ensure accurate and reliable results.
- Keep Software Updated: Regularly update the scanner’s software to ensure compatibility with the latest vehicle models and diagnostic protocols.
- Understand Common Diagnostic Codes: Familiarize yourself with common DTCs and their meanings to expedite the diagnostic process.
- Document Your Findings: Keep a record of the diagnostic codes, live data, and any other relevant information for future reference.
9. Tips For Effectively Using Automotive Scanners
To get the most out of your automotive scanner, consider these tips:
- Read the Manual: Familiarize yourself with the scanner’s features and functions by reading the user manual.
- Keep Software Updated: Ensure the scanner’s software is up-to-date to support the latest vehicle models and diagnostic protocols.
- Use Reliable Resources: Cross-reference DTCs with multiple reliable sources to ensure accurate interpretation. CAR-TOOL.EDU.VN offers a comprehensive database of diagnostic codes and repair information.
- Monitor Live Data: Pay attention to live data streams to identify subtle issues and assess component performance under various conditions.
- Perform Regular Scans: Incorporate regular scanning into your maintenance routine to catch potential problems early.
10. Different Types Of Automotive Scanners
There are several types of automotive scanners available, each designed for different needs and budgets:
- Code Readers: These basic scanners read and clear DTCs but offer limited additional functionality.
- Handheld Scanners: These are portable, easy-to-use devices that offer a range of diagnostic capabilities, including live data streaming and freeze frame data.
- PC-Based Scanners: These scanners connect to a computer and use software to perform diagnostics. They often offer advanced features and detailed data analysis.
- Professional Scanners: These high-end scanners offer comprehensive diagnostic capabilities, including actuation tests, module programming, and access to manufacturer-specific data.
 Types of Automotive Scanners
10.1. Code Readers
Code readers are the most basic type of automotive scanner. They are designed to perform a few essential functions, making them suitable for simple diagnostics.
- Primary Function: Read and clear Diagnostic Trouble Codes (DTCs).
- Features:
- DTC Reading: Displays the diagnostic codes stored in the vehicle’s computer.
- DTC Clearing: Allows the user to clear the stored diagnostic codes after addressing the issue.
- Simple Interface: Easy-to-use interface with basic buttons and a small display screen.
- Pros:
- Affordable: Code readers are the least expensive type of scanner.
- Easy to Use: Simple and straightforward operation, making them ideal for beginners.
- Compact Size: Small and portable, easy to store in the vehicle.
- Cons:
- Limited Functionality: Lacks advanced features such as live data streaming, freeze frame data, and actuation tests.
- Basic Information: Provides limited information beyond the diagnostic codes themselves.
- No Advanced Diagnostics: Cannot perform in-depth diagnostics or system testing.
- Ideal For:
- DIY enthusiasts who need a basic tool for reading and clearing codes.
- Vehicle owners who want to quickly identify the cause of a check engine light.
10.2. Handheld Scanners
Handheld scanners are more advanced than code readers, offering a wider range of diagnostic capabilities in a portable package.
- Primary Functions: Read and clear DTCs, view live data, and access freeze frame data.
- Features:
- DTC Reading and Clearing: Reads and clears diagnostic trouble codes.
- Live Data Streaming: Displays real-time sensor data, allowing users to monitor the performance of various components.
- Freeze Frame Data: Captures a snapshot of sensor data at the moment a DTC was triggered.
- Enhanced Display: Larger display screen with more detailed information.
- User-Friendly Interface: Intuitive menu system for easy navigation.
- Pros:
- Portability: Compact and easy to carry around.
- Versatility: Offers a good balance of features and functionality for various diagnostic tasks.
- Enhanced Data: Provides more detailed information compared to code readers.
- Cons:
- Higher Cost: More expensive than basic code readers.
- Limited Advanced Features: May lack some of the advanced features found in professional scanners.
- Ideal For:
- DIY mechanics who need more diagnostic capabilities than a basic code reader.
- Professional technicians who need a portable and versatile scanner for quick diagnostics.
10.3. PC-Based Scanners
PC-based scanners consist of a hardware interface that connects to the vehicle’s OBD port and software that runs on a computer.
- Primary Functions: Read and clear DTCs, view live data, perform advanced diagnostics, and access manufacturer-specific information.
- Features:
- Comprehensive Diagnostics: Offers a wide range of diagnostic capabilities.
- Detailed Data Analysis: Provides detailed data analysis and graphing tools.
- Manufacturer-Specific Information: Access to manufacturer-specific diagnostic codes and procedures.
- Software Updates: Regular software updates to support new vehicle models and diagnostic protocols.
- Large Display: Utilizes the computer’s screen for a large and detailed display.
- Pros:
- Advanced Capabilities: Offers comprehensive diagnostic capabilities for in-depth analysis.
- Detailed Data: Provides detailed data analysis and graphing tools.
- Software Updates: Regular software updates to support new vehicle models.
- Cons:
- Requires a Computer: Needs a computer to operate, which may not be convenient in all situations.
- Higher Cost: More expensive than handheld scanners and code readers.
- Software Compatibility: Software may not be compatible with all operating systems.
- Ideal For:
- Professional technicians who need advanced diagnostic capabilities and detailed data analysis.
- Automotive shops that want a comprehensive diagnostic solution.
10.4. Professional Scanners
Professional scanners are the most advanced type of automotive scanner, designed for professional technicians and automotive shops.
- Primary Functions: Read and clear DTCs, view live data, perform advanced diagnostics, actuation tests, module programming, and access manufacturer-specific data.
- Features:
- Comprehensive Diagnostics: Offers the most comprehensive diagnostic capabilities.
- Actuation Tests: Allows technicians to control specific components to verify their functionality.
- Module Programming: Can program and reprogram vehicle modules.
- Manufacturer-Specific Data: Access to manufacturer-specific diagnostic codes, procedures, and data.
- Wireless Connectivity: Wireless connectivity for easy software updates and data transfer.
- Rugged Design: Durable and rugged design for use in demanding shop environments.
- Pros:
- Unmatched Capabilities: Offers the most advanced diagnostic and programming capabilities.
- Comprehensive Data: Provides access to a wide range of data and information.
- Durability: Designed for use in professional shop environments.
- Cons:
- High Cost: The most expensive type of automotive scanner.
- Complexity: Requires extensive training and experience to use effectively.
- Ideal For:
- Professional technicians and automotive shops that need the most advanced diagnostic and programming capabilities.
- Technicians who specialize in complex diagnostics and repairs.
10.5. Comparison Table
| Feature | Code Readers | Handheld Scanners | PC-Based Scanners | Professional Scanners |
|---|---|---|---|---|
| Primary Function | Read and clear DTCs | Read/clear DTCs, live data | Comprehensive diagnostics | Advanced diagnostics, programming |
| DTC Reading/Clearing | Yes | Yes | Yes | Yes |
| Live Data Streaming | No | Yes | Yes | Yes |
| Freeze Frame Data | No | Yes | Yes | Yes |
| Actuation Tests | No | No | Limited | Yes |
| Module Programming | No | No | No | Yes |
| Manufacturer-Specific Data | No | Limited | Yes | Yes |
| Portability | Very High | High | Low | Medium |
| Cost | Low | Medium | High | Very High |
| Ideal For | Basic DIY diagnostics | Advanced DIY/Quick Pro | Automotive Shops/Pro Techs | Advanced Automotive Shops |
Choosing the right type of automotive scanner depends on your specific needs, budget, and diagnostic requirements. Whether you’re a DIY enthusiast or a professional technician, understanding the capabilities of each type of scanner will help you make an informed decision.
11. Common Mistakes To Avoid When Using An Automotive Scanner
Even with the right equipment, it’s easy to make mistakes. Here are some common pitfalls to avoid:
- Ignoring the Manual: Failing to read the scanner’s manual can lead to incorrect operation and inaccurate diagnoses.
- Misinterpreting Codes: Not understanding the meaning of a DTC can lead to misdiagnosis and unnecessary repairs.
- Clearing Codes Without Repairing the Problem: Clearing codes without addressing the underlying issue will only result in the problem recurring.
- Ignoring Live Data: Neglecting to monitor live data can cause you to miss subtle issues that don’t trigger DTCs.
- Using Unreliable Resources: Relying on unreliable sources for code definitions and repair information can lead to inaccurate diagnoses.
12. Automotive Scanner Brands
When it comes to automotive scanners, several brands are known for their quality, reliability, and advanced features. Here are some of the top brands in the market:
- Snap-on: Snap-on is a premium brand known for its high-quality professional diagnostic tools. Their scanners offer comprehensive diagnostic capabilities, including advanced features like actuation tests and module programming.
- Autel: Autel is a popular brand that offers a wide range of scanners, from basic code readers to advanced diagnostic tools. Their scanners are known for their user-friendly interface and comprehensive features.
- Launch: Launch Tech is a well-known brand that specializes in automotive diagnostic equipment. Their scanners are designed for professional technicians and offer a range of advanced features and capabilities.
- Bosch: Bosch is a global leader in automotive technology and offers a range of diagnostic tools for professional technicians. Their scanners are known for their accuracy, reliability, and advanced features.
- Innova: Innova is a popular brand among DIY enthusiasts and professional technicians. Their scanners are known for their ease of use, affordability, and comprehensive features.
12.1. Snap-on
Snap-on is a leading manufacturer of high-quality tools and equipment for the automotive industry. Their diagnostic scanners are known for their advanced features, comprehensive capabilities, and rugged design.
- Key Features:
- Comprehensive Diagnostic Capabilities
- Advanced Actuation Tests
- Module Programming
- Vehicle-Specific Coverage
- User-Friendly Interface
- Durable and Rugged Design
- Pros:
- Unmatched Diagnostic Capabilities
- Comprehensive Vehicle Coverage
- Advanced Features and Functions
- Reliable and Durable
- Cons:
- High Cost
- Requires Training and Experience
12.2. Autel
Autel is a popular brand that offers a wide range of automotive scanners, from basic code readers to advanced diagnostic tools. Their scanners are known for their user-friendly interface and comprehensive features.
- Key Features:
- Comprehensive Diagnostic Capabilities
- User-Friendly Interface
- Live Data Streaming
- Freeze Frame Data
- Wireless Connectivity
- Regular Software Updates
- Pros:
- Wide Range of Scanners
- User-Friendly Interface
- Comprehensive Features
- Affordable Options
- Cons:
- Some Advanced Features May Require Additional Purchase
- Customer Support Can Be Inconsistent
12.3. Launch Tech
Launch Tech is a well-known brand that specializes in automotive diagnostic equipment. Their scanners are designed for professional technicians and offer a range of advanced features and capabilities.
- Key Features:
- Comprehensive Diagnostic Capabilities
- Actuation Tests
- Module Programming
- Vehicle-Specific Coverage
- Wireless Connectivity
- Regular Software Updates
- Pros:
- Advanced Diagnostic Capabilities
- Comprehensive Vehicle Coverage
- Regular Software Updates
- Durable and Reliable
- Cons:
- High Cost
- Complex Interface
12.4. Bosch
Bosch is a global leader in automotive technology and offers a range of diagnostic tools for professional technicians. Their scanners are known for their accuracy, reliability, and advanced features.
- Key Features:
- Comprehensive Diagnostic Capabilities
- Vehicle-Specific Coverage
- Live Data Streaming
- Freeze Frame Data
- Wireless Connectivity
- Regular Software Updates
- Pros:
- Accurate and Reliable
- Comprehensive Vehicle Coverage
- Advanced Features and Functions
- Trusted Brand
- Cons:
- Higher Cost
- Complex Interface
12.5. Innova
Innova is a popular brand among DIY enthusiasts and professional technicians. Their scanners are known for their ease of use, affordability, and comprehensive features.
- Key Features:
- User-Friendly Interface
- Live Data Streaming
- Freeze Frame Data
- ABS and SRS Diagnostics
- Battery and Charging System Testing
- Affordable Price
- Pros:
- Easy to Use
- Affordable
- Comprehensive Features
- Reliable and Durable
- Cons:
- Limited Advanced Features
- Customer Support Can Be Inconsistent
12.6. Comparison Table
| Brand | Key Features | Pros | Cons |
|---|---|---|---|
| Snap-on | Comprehensive diagnostics, actuation tests, programming | Unmatched diagnostic capabilities, comprehensive vehicle coverage, advanced features | High cost, requires training |
| Autel | Comprehensive diagnostics, user-friendly interface | Wide range of scanners, user-friendly, comprehensive features, affordable options | Some advanced features may require additional purchase, customer support can be inconsistent |
| Launch Tech | Comprehensive diagnostics, actuation tests, programming | Advanced diagnostic capabilities, comprehensive vehicle coverage, regular software updates, durable | High cost, complex interface |
| Bosch | Comprehensive diagnostics, vehicle-specific coverage | Accurate, comprehensive vehicle coverage, advanced features, trusted brand | Higher cost, complex interface |
| Innova | User-friendly interface, live data, ABS/SRS diagnostics | Easy to use, affordable, comprehensive features, reliable | Limited advanced features, customer support can be inconsistent |
Choosing the right brand of automotive scanner depends on your specific needs, budget, and diagnostic requirements. Whether you’re a DIY enthusiast or a professional technician, understanding the strengths and weaknesses of each brand will help you make an informed decision.
13. Finding The Right Automotive Parts
Once you have identified the problem using the diagnostic scanner, finding the right auto parts becomes essential. At CAR-TOOL.EDU.VN, we provide detailed information on a wide range of auto parts, including specifications, brands, and compatibility.
- Detailed Information: We offer in-depth details about various auto parts, helping you understand their specifications and features.
- Brand Comparisons: Compare different brands of auto parts to make an informed decision based on quality and reliability.
- Compatibility Checks: Ensure the parts you choose are compatible with your vehicle’s make and model to avoid fitment issues.
14. Purchasing Automotive Tools
Along with scanners, mechanics need reliable tools to carry out repairs. CAR-TOOL.EDU.VN is your one-stop destination for comparing and purchasing automotive tools.
- Tool Comparisons: Compare different tools based on features, pros, cons, and price.
- Reviews and Ratings: Read reviews from other users to gain insights into the performance and durability of various tools.
- Supplier Information: Find reputable suppliers and get the best deals on high-quality automotive tools.
15. Conclusion
Mastering the use of an automotive scanner is essential for accurate and efficient vehicle diagnostics. By understanding the scanner’s functions, following the correct procedures, and avoiding common mistakes, you can streamline the repair process and ensure optimal vehicle performance. Rely on CAR-TOOL.EDU.VN for detailed information, comparisons, and reliable resources to support your diagnostic and repair endeavors.
16. FAQ: Frequently Asked Questions About Automotive Scanners
-
What Type Of Automotive Scanner Is Right For My Car?
The right automotive scanner depends on your vehicle’s make, model, and year. Basic code readers work for simple diagnostics, while advanced scanners offer features like live data streaming and actuation tests.
-
Where Can I Buy Automotive Diagnostic Tools?
Automotive diagnostic tools can be purchased from auto parts stores, online retailers, and specialty tool suppliers. Reputable sources ensure quality and reliability.
-
Is An Automotive Code Scanner User-Friendly For Beginners?
Yes, many automotive code scanners are designed with user-friendly interfaces. Basic models are straightforward, while advanced scanners provide helpful tutorials and guides.
-
How Often Should I Use An Automotive Scanner For Routine Maintenance?
Regular scanning, such as during oil changes or seasonal check-ups, can help identify potential issues early, preventing costly breakdowns.
-
Can An Automotive Scanner Diagnose Transmission Problems?
Yes, many automotive scanners can diagnose transmission problems by reading specific diagnostic trouble codes (DTCs) related to the transmission system.
-
What Is Live Data Streaming, And How Can It Help In Diagnostics?
Live data streaming displays real-time sensor readings, helping technicians monitor component performance under various conditions, aiding in pinpointing intermittent issues.
-
How Do I Update The Software On My Automotive Scanner?
Software updates are typically performed via USB connection to a computer or wirelessly through Wi-Fi. Refer to the scanner’s manual for specific instructions.
-
Can An Automotive Scanner Reset The Check Engine Light?
Yes, after addressing the underlying issue, automotive scanners can clear the diagnostic codes, which turns off the check engine light.
-
What Are The Key Differences Between OBD1 And OBD2 Scanners?
OBD1 scanners are for pre-1996 vehicles and are manufacturer-specific, while OBD2 scanners are standardized for vehicles from 1996 onwards, offering universal diagnostic access.
-
How Can I Interpret The Diagnostic Trouble Codes (DTCs) From My Scanner?
Use reliable resources like CAR-TOOL.EDU.VN, the vehicle’s service manual, or professional diagnostic databases to look up the meaning of each DTC for accurate diagnosis.
Do you need help finding detailed information about specific auto parts or comparing different automotive tools? Contact us at CAR-TOOL.EDU.VN for expert advice and recommendations! Our team is ready to assist you with all your automotive diagnostic and repair needs. Reach out today at 456 Elm Street, Dallas, TX 75201, United States, via Whatsapp at +1 (641) 206-8880, or visit our website at CAR-TOOL.EDU.VN.
