Autozone Diagnostic Cost offers a free service to help you identify car problems through diagnostic tests, pinpointing issues accurately with expert assistance. CAR-TOOL.EDU.VN provides comprehensive information, comparisons, and user reviews to help you make informed decisions, ensuring you find reliable parts and tools for effective repairs. Discover how AutoZone’s diagnostic services can save you time and money, utilizing their expert knowledge and trusted resources for your vehicle’s needs, including engine codes, automotive repairs, and vehicle maintenance.
Contents
- 1. Understanding AutoZone’s Diagnostic Services
- 1.1. What Does the Service Include?
- 1.2. What the Service Doesn’t Include
- 1.3. Why is this Service Valuable?
- 2. Factors Influencing Diagnostic Costs at Auto Repair Shops
- 2.1. Complexity of the Problem
- 2.2. Type of Vehicle
- 2.3. Shop’s Labor Rate
- 2.4. Diagnostic Equipment Used
- 3. Step-by-Step Guide to Diagnosing Your Car Problem
- 3.1. Gather Information
- 3.2. Perform a Visual Inspection
- 3.3. Read the Diagnostic Trouble Codes (DTCs)
- 3.4. Research Potential Causes
- 3.5. Perform Basic Tests
- 3.6. Consult a Professional
- 4. Common Diagnostic Trouble Codes and Their Meanings
- 4.1. P0171 and P0174: System Too Lean
- 4.2. P0300: Random/Multiple Cylinder Misfire Detected
- 4.3. P0420: Catalyst System Efficiency Below Threshold
- 4.4. P0442: Evaporative Emission Control System Leak Detected (Small Leak)
- 4.5. P0505: Idle Control System Malfunction
- 4.6. P0113: Intake Air Temperature Sensor 1 Circuit High
- 4.7. P0118: Engine Coolant Temperature Sensor 1 Circuit High
- 4.8. P0340: Camshaft Position Sensor ‘A’ Circuit (Bank 1 or Single Sensor)
- 4.9. P0401: Exhaust Gas Recirculation Flow Insufficient Detected
- 4.10. P0455: Evaporative Emission Control System Leak Detected (Gross Leak)
- 5. DIY vs. Professional Diagnostics: Making the Right Choice
- 5.1. When to DIY
- 5.2. When to Seek Professional Help
- 5.3. Tools and Equipment
- 5.4. Safety Precautions
- 6. Saving Money on Car Diagnostics and Repairs
- 6.1. Regular Maintenance
- 6.2. Shop Around for Quotes
- 6.3. Use Quality Parts
- 6.4. Negotiate Prices
- 6.5. Do Some Repairs Yourself
- 7. The Role of CAR-TOOL.EDU.VN in Automotive Diagnostics
- 7.1. Providing Detailed Information
- 7.2. Comparing Products
- 7.3. Connecting with Experts
- 8. Advanced Diagnostic Techniques
- 8.1. Scan Tool Diagnostics
- 8.2. Oscilloscope Diagnostics
- 8.3. Smoke Testing
- 8.4. Fuel System Testing
- 9. Case Studies: Real-World Diagnostic Scenarios
- 9.1. Case Study 1: P0171 Code on a Toyota Corolla
- 9.2. Case Study 2: P0300 Code on a Honda Civic
- 9.3. Case Study 3: P0420 Code on a Ford F-150
- 10. Staying Updated with Automotive Diagnostic Technology
- 10.1. Training Courses
- 10.2. Industry Publications
- 10.3. Diagnostic Tools
1. Understanding AutoZone’s Diagnostic Services
AutoZone’s diagnostic services are designed to help car owners quickly identify potential issues with their vehicles. These services primarily revolve around reading diagnostic trouble codes (DTCs) using an OBD-II scanner. This is a crucial first step in understanding why your “Check Engine Light” is on. According to a study by the National Institute for Automotive Service Excellence (ASE), accurate diagnostics can reduce repair costs by up to 40%.
AutoZone provides a complimentary Fix Finder service that efficiently diagnoses warning lights, including Check Engine, ABS, and maintenance indicators. AutoZone’s experts provide you with a clear and concise report based on millions of technician-verified fixes.
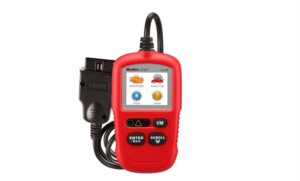 Autel AL329 Obdii Code Reader
1.1. What Does the Service Include?
- Code Reading: AutoZone employees use an OBD-II scanner to read the diagnostic trouble codes (DTCs) stored in your vehicle’s computer. These codes provide clues about potential problems.
- Code Interpretation: They can provide a basic interpretation of what the codes mean, helping you understand the potential issues your car might be facing.
- Printed Report: AutoZone often provides a printed report listing the codes and their general descriptions.
- Possible Solutions: Based on the codes, they might suggest common fixes or replacement parts that could address the problem.
1.2. What the Service Doesn’t Include
- In-depth Diagnosis: AutoZone’s service is primarily a code reading service. They do not perform in-depth diagnostic procedures to pinpoint the exact cause of the problem.
- Hands-on Inspection: They won’t physically inspect your vehicle’s components or systems to identify the root cause of the issue.
- Guaranteed Solutions: The suggestions provided are based on common fixes associated with the codes. They do not guarantee that these solutions will resolve the problem.
1.3. Why is this Service Valuable?
While AutoZone’s diagnostic service has limitations, it offers several benefits:
- Cost-Effective: The service is free, making it an accessible starting point for diagnosing car problems.
- Time-Saving: It can quickly provide you with information about potential issues, saving you time compared to researching symptoms on your own.
- Informed Decisions: Knowing the DTCs can help you make more informed decisions about repairs, whether you choose to DIY or take your car to a professional mechanic.
2. Factors Influencing Diagnostic Costs at Auto Repair Shops
If AutoZone’s free service isn’t enough, you might consider taking your car to a professional auto repair shop for a more thorough diagnosis. The diagnostic costs at these shops can vary widely depending on several factors. According to a 2022 report by RepairPal, the average diagnostic cost at an auto repair shop ranges from $88 to $111.
2.1. Complexity of the Problem
The more complex the issue, the more time and expertise it will require to diagnose. Here’s how problem complexity impacts costs:
- Simple Issues: A straightforward problem, such as a faulty sensor, might only require a quick scan and a simple test, resulting in a lower diagnostic cost.
- Complex Issues: Intermittent problems, multiple error codes, or issues affecting multiple systems can take significantly longer to diagnose, increasing the cost. For instance, diagnosing an electrical system issue that requires tracing wires and testing various components will be more expensive than identifying a simple mechanical problem.
2.2. Type of Vehicle
The make and model of your vehicle can also influence diagnostic costs:
- Specialized Tools and Knowledge: High-end or luxury vehicles often require specialized diagnostic tools and knowledge. Technicians working on these vehicles need specific training and certifications, which can lead to higher labor rates.
- Access to Information: Some manufacturers provide limited access to diagnostic information, making it harder for independent shops to troubleshoot issues. This can increase the time required and, consequently, the diagnostic cost.
- Parts Availability: If the diagnostic process requires specific parts to be tested or temporarily installed, the availability and cost of these parts can affect the overall expense.
2.3. Shop’s Labor Rate
Labor rates vary significantly from shop to shop, depending on location, overhead costs, and the shop’s reputation. Here’s what to consider:
- Location: Shops in urban areas or regions with a higher cost of living typically have higher labor rates compared to those in rural areas.
- Overhead Costs: Shops with modern facilities, advanced equipment, and a large staff tend to have higher overhead costs, which are often reflected in their labor rates.
- Reputation and Expertise: Well-established shops with certified technicians and a strong reputation for quality work can often charge higher labor rates.
2.4. Diagnostic Equipment Used
The type of diagnostic equipment used can also affect the cost. Advanced equipment can quickly and accurately pinpoint problems, but it comes at a higher price:
- Basic Scanners: Simple OBD-II scanners can read basic trouble codes, but they may not provide detailed information or perform advanced tests.
- Advanced Diagnostic Tools: High-end diagnostic tools, such as scan tools with bidirectional control, oscilloscopes, and specialized software, can perform in-depth analysis and pinpoint the root cause of complex issues.
- Specialized Software: Some vehicles require proprietary software for diagnostics, which can add to the cost.
3. Step-by-Step Guide to Diagnosing Your Car Problem
Diagnosing a car problem can seem daunting, but following a structured approach can make the process more manageable. Here’s a step-by-step guide to help you diagnose your car’s issues effectively.
3.1. Gather Information
- Symptoms: Start by noting all the symptoms your car is exhibiting. Is the “Check Engine Light” on? Are there unusual noises, smells, or vibrations? Is the car performing poorly in any way?
- Recent Events: Consider any recent events that might be related to the problem. Did the issue start after a recent repair, accident, or weather event?
- Maintenance History: Review your car’s maintenance records. When was the last time you had an oil change, tune-up, or other major service?
- Driving Conditions: Note the conditions under which the problem occurs. Does it happen when the engine is cold or warm? At high speeds or low speeds?
3.2. Perform a Visual Inspection
- Under the Hood: Check for obvious signs of damage, such as leaks, frayed wires, or loose connections. Inspect the fluid levels, including oil, coolant, brake fluid, and power steering fluid.
- Under the Car: Look for leaks, rust, or damage to the exhaust system, suspension components, and other undercarriage parts.
- Tires: Check the tire pressure and look for signs of uneven wear, which could indicate alignment or suspension issues.
- Lights: Test all the lights, including headlights, taillights, brake lights, and turn signals.
3.3. Read the Diagnostic Trouble Codes (DTCs)
- Use an OBD-II Scanner: Connect an OBD-II scanner to your car’s diagnostic port, usually located under the dashboard.
- Record the Codes: Write down all the DTCs that appear on the scanner.
- Interpret the Codes: Use online resources, your car’s service manual, or AutoZone’s free Fix Finder service to interpret the codes. Understand what each code means and what systems it relates to.
3.4. Research Potential Causes
- Online Forums: Search online forums and communities related to your car’s make and model. Other owners may have experienced similar issues and can provide valuable insights.
- Technical Service Bulletins (TSBs): Check for TSBs issued by the manufacturer. TSBs describe known problems and recommended fixes for specific vehicles.
- Repair Manuals: Consult a repair manual for your car. These manuals provide detailed information about troubleshooting and repairing various systems.
3.5. Perform Basic Tests
- Battery Test: Use a multimeter to check the battery voltage. A fully charged battery should read around 12.6 volts.
- Alternator Test: With the engine running, check the voltage at the battery terminals. It should be between 13.7 and 14.7 volts.
- Spark Plug Test: Inspect the spark plugs for signs of wear or damage. A worn or fouled spark plug can cause misfires and poor performance.
- Vacuum Leak Test: Use a vacuum gauge or propane torch to check for vacuum leaks. Leaks can cause rough idling, poor acceleration, and other issues.
3.6. Consult a Professional
- When to Seek Help: If you’re unable to diagnose the problem yourself or if the issue is complex or safety-related, consult a professional mechanic.
- Provide Information: Share all the information you’ve gathered, including symptoms, DTCs, and any tests you’ve performed.
- Get an Estimate: Ask for a detailed estimate of the diagnostic and repair costs before authorizing any work.
4. Common Diagnostic Trouble Codes and Their Meanings
Understanding common diagnostic trouble codes (DTCs) can provide valuable insights into your car’s problems. Here’s a list of some of the most common codes and their meanings. According to the Environmental Protection Agency (EPA), addressing these common codes promptly can improve fuel efficiency by up to 40%.
4.1. P0171 and P0174: System Too Lean
- Meaning: These codes indicate that the engine is running with too little fuel or too much air.
- Possible Causes: Vacuum leaks, faulty oxygen sensors, a dirty mass airflow sensor, or a weak fuel pump.
- Symptoms: Poor fuel economy, rough idling, and hesitation during acceleration.
4.2. P0300: Random/Multiple Cylinder Misfire Detected
- Meaning: This code indicates that one or more cylinders are misfiring randomly.
- Possible Causes: Worn spark plugs, faulty ignition coils, a clogged fuel injector, or low compression.
- Symptoms: Rough idling, reduced power, and a flashing “Check Engine Light”.
4.3. P0420: Catalyst System Efficiency Below Threshold
- Meaning: This code indicates that the catalytic converter is not functioning efficiently.
- Possible Causes: A failing catalytic converter, faulty oxygen sensors, or exhaust leaks.
- Symptoms: Poor fuel economy, reduced power, and a sulfur smell from the exhaust.
4.4. P0442: Evaporative Emission Control System Leak Detected (Small Leak)
- Meaning: This code indicates a small leak in the evaporative emission control system.
- Possible Causes: A loose or damaged gas cap, a cracked evaporative emission hose, or a faulty purge valve.
- Symptoms: No noticeable symptoms, but the “Check Engine Light” will be on.
4.5. P0505: Idle Control System Malfunction
- Meaning: This code indicates a problem with the idle control system.
- Possible Causes: A faulty idle air control valve, vacuum leaks, or a dirty throttle body.
- Symptoms: Rough idling, stalling, and difficulty starting the engine.
4.6. P0113: Intake Air Temperature Sensor 1 Circuit High
- Meaning: The signal from the intake air temperature sensor is higher than expected.
- Possible Causes: Damaged sensor, open circuit, faulty connection.
- Symptoms: Reduced fuel economy, poor engine performance.
4.7. P0118: Engine Coolant Temperature Sensor 1 Circuit High
- Meaning: The signal from the engine coolant temperature sensor is higher than expected.
- Possible Causes: Damaged sensor, open circuit, faulty connection.
- Symptoms: Difficulty starting, poor engine performance.
4.8. P0340: Camshaft Position Sensor ‘A’ Circuit (Bank 1 or Single Sensor)
- Meaning: The signal from the camshaft position sensor is irregular or missing.
- Possible Causes: Defective sensor, wiring issues, timing belt problems.
- Symptoms: Stalling, difficulty starting, poor engine performance.
4.9. P0401: Exhaust Gas Recirculation Flow Insufficient Detected
- Meaning: Insufficient exhaust gas recirculation detected.
- Possible Causes: Clogged EGR valve, vacuum leaks, faulty sensors.
- Symptoms: Rough idling, poor engine performance.
4.10. P0455: Evaporative Emission Control System Leak Detected (Gross Leak)
- Meaning: Large leak detected in the evaporative emission control system.
- Possible Causes: Missing or damaged gas cap, damaged EVAP lines.
- Symptoms: Fuel smell, check engine light.
5. DIY vs. Professional Diagnostics: Making the Right Choice
Deciding whether to diagnose your car problems yourself or seek professional help depends on your skills, experience, and the complexity of the issue.
5.1. When to DIY
- Simple Issues: If the problem is straightforward, such as a loose gas cap or a blown fuse, you can likely handle it yourself.
- Basic Maintenance: Tasks like changing the oil, replacing spark plugs, or swapping out a battery are typically within the capabilities of most DIYers.
- Cost Savings: Diagnosing and repairing simple issues yourself can save you money on labor costs.
5.2. When to Seek Professional Help
- Complex Issues: If the problem is complex or involves multiple systems, it’s best to consult a professional mechanic.
- Lack of Experience: If you’re not comfortable working on cars or lack the necessary tools and equipment, seek professional help.
- Safety Concerns: Issues involving the brakes, airbags, or other safety-related systems should be handled by a qualified technician.
5.3. Tools and Equipment
- Basic Tools: A basic set of tools, including wrenches, sockets, screwdrivers, and pliers, is essential for most DIY car repairs.
- Diagnostic Tools: An OBD-II scanner is a valuable tool for reading diagnostic trouble codes. A multimeter can be used to test electrical components.
- Specialty Tools: Some repairs require specialty tools, such as a torque wrench, compression tester, or fuel pressure gauge.
5.4. Safety Precautions
- Disconnect the Battery: Always disconnect the negative battery cable before working on electrical components.
- Use Jack Stands: When lifting a car, always use jack stands to support the vehicle. Never work under a car supported only by a jack.
- Wear Safety Glasses: Protect your eyes from debris and chemicals by wearing safety glasses.
- Work in a Well-Ventilated Area: When working with chemicals, such as fuel or brake cleaner, work in a well-ventilated area to avoid inhaling harmful fumes.
6. Saving Money on Car Diagnostics and Repairs
Car repairs can be expensive, but there are several ways to save money without compromising quality or safety.
6.1. Regular Maintenance
- Follow the Maintenance Schedule: Adhere to your car’s recommended maintenance schedule, including oil changes, filter replacements, and fluid checks.
- Preventive Maintenance: Perform preventive maintenance tasks, such as flushing the cooling system and changing the transmission fluid, to prevent major problems down the road.
6.2. Shop Around for Quotes
- Get Multiple Estimates: Obtain quotes from several different repair shops before authorizing any work.
- Compare Prices: Compare the prices for parts and labor, and ask for a breakdown of the costs.
6.3. Use Quality Parts
- OEM vs. Aftermarket: Consider using original equipment manufacturer (OEM) parts or high-quality aftermarket parts.
- Warranty: Choose parts with a warranty to protect yourself against defects.
6.4. Negotiate Prices
- Ask for Discounts: Don’t be afraid to ask for discounts, especially if you’re a repeat customer or paying with cash.
- Bundle Services: Ask if the shop offers discounts for bundling multiple services together.
6.5. Do Some Repairs Yourself
- Simple Repairs: Consider doing simple repairs yourself, such as replacing a battery or changing the air filter.
- Research: Research the repair thoroughly before attempting it, and make sure you have the necessary tools and equipment.
7. The Role of CAR-TOOL.EDU.VN in Automotive Diagnostics
CAR-TOOL.EDU.VN serves as a valuable resource for car owners and enthusiasts looking to diagnose and repair their vehicles effectively. It offers a wealth of information, comparisons, and user reviews to help you make informed decisions.
7.1. Providing Detailed Information
- Technical Specifications: CAR-TOOL.EDU.VN offers detailed technical specifications for various car parts and tools, helping you understand their capabilities and limitations.
- Troubleshooting Guides: The website provides troubleshooting guides that walk you through the diagnostic process step-by-step, from gathering information to performing basic tests.
7.2. Comparing Products
- Side-by-Side Comparisons: CAR-TOOL.EDU.VN allows you to compare different products side-by-side, highlighting their features, pros, and cons.
- User Reviews: The website features user reviews that provide real-world feedback on various products, helping you make informed decisions.
7.3. Connecting with Experts
- Expert Advice: CAR-TOOL.EDU.VN connects you with experienced mechanics and technicians who can provide expert advice and guidance.
- Community Forums: The website hosts community forums where you can ask questions, share your experiences, and learn from other car owners.
8. Advanced Diagnostic Techniques
For complex issues, advanced diagnostic techniques may be necessary to pinpoint the root cause of the problem. These techniques often require specialized tools and expertise.
8.1. Scan Tool Diagnostics
- Bidirectional Control: Advanced scan tools offer bidirectional control, allowing technicians to command various components and systems to activate or deactivate.
- Data Logging: Scan tools can log data from various sensors and systems in real-time, allowing technicians to analyze the data and identify anomalies.
8.2. Oscilloscope Diagnostics
- Waveform Analysis: An oscilloscope can display electrical signals as waveforms, allowing technicians to analyze the signals and identify issues such as shorts, opens, and voltage drops.
- Component Testing: Oscilloscopes can be used to test various components, such as sensors, actuators, and ignition coils.
8.3. Smoke Testing
- Vacuum and Evap Leaks: A smoke machine can be used to introduce smoke into the intake or evaporative emission system, allowing technicians to identify vacuum and evap leaks.
8.4. Fuel System Testing
- Fuel Pressure Testing: A fuel pressure gauge can be used to measure the fuel pressure at various points in the fuel system.
- Fuel Injector Testing: Fuel injectors can be tested for flow, resistance, and spray pattern.
9. Case Studies: Real-World Diagnostic Scenarios
To illustrate the diagnostic process, here are a few case studies based on real-world scenarios.
9.1. Case Study 1: P0171 Code on a Toyota Corolla
- Symptoms: The “Check Engine Light” was on, and the car had poor fuel economy.
- DTC: P0171 (System Too Lean, Bank 1)
- Diagnosis: The technician performed a smoke test and found a vacuum leak at the intake manifold gasket.
- Solution: The intake manifold gasket was replaced, and the code was cleared.
9.2. Case Study 2: P0300 Code on a Honda Civic
- Symptoms: The “Check Engine Light” was flashing, and the car had a rough idle.
- DTC: P0300 (Random/Multiple Cylinder Misfire Detected)
- Diagnosis: The technician performed a compression test and found low compression on cylinder number 3.
- Solution: The engine was disassembled, and a burnt valve was found on cylinder number 3. The valve was replaced, and the engine was reassembled.
9.3. Case Study 3: P0420 Code on a Ford F-150
- Symptoms: The “Check Engine Light” was on, and the car had reduced power.
- DTC: P0420 (Catalyst System Efficiency Below Threshold)
- Diagnosis: The technician used a scan tool to monitor the oxygen sensor readings and found that the catalytic converter was not functioning efficiently.
- Solution: The catalytic converter was replaced, and the code was cleared.
10. Staying Updated with Automotive Diagnostic Technology
The field of automotive diagnostics is constantly evolving, with new technologies and techniques emerging all the time. Staying updated with the latest advancements is essential for both DIYers and professional mechanics.
10.1. Training Courses
- Online Courses: Numerous online courses offer training in automotive diagnostics.
- Technical Schools: Technical schools and community colleges offer automotive technology programs that cover diagnostics.
- Manufacturer Training: Some manufacturers offer training courses for their vehicles.
10.2. Industry Publications
- Trade Magazines: Trade magazines, such as Motor Age and Automotive Engineering International, provide information about the latest diagnostic technologies and techniques.
- Online Forums: Online forums and communities provide a platform for sharing information and asking questions about automotive diagnostics.
10.3. Diagnostic Tools
- Software Updates: Keep your diagnostic tools updated with the latest software.
- New Technologies: Invest in new diagnostic tools as needed to stay current with the latest technologies.
Navigating car diagnostics doesn’t have to be a solo journey. At CAR-TOOL.EDU.VN, we’re committed to providing you with the information and resources you need to keep your vehicle running smoothly. Whether it’s deciphering a mysterious engine code or comparing the latest diagnostic tools, we’re here to help.
Do you have questions about a specific car problem or need advice on choosing the right diagnostic tool? Our team of experts is just a message away. Contact us via WhatsApp at +1 (641) 206-8880 or visit our website at CAR-TOOL.EDU.VN for personalized assistance. We’re located at 456 Elm Street, Dallas, TX 75201, United States, ready to assist you in making informed decisions about your car’s health.