Using a diagnostic scanner for cars helps you quickly identify and address automotive issues. At CAR-TOOL.EDU.VN, we provide expert insights on using these tools to ensure your vehicle runs smoothly. Learn how to connect, interpret codes, and save on repair costs with our detailed guide. This guide will cover diagnostic tools, auto repair tools, and vehicle maintenance.
Contents
- 1. Understanding the Basics of Diagnostic Scanners
- 1.1 What is an OBD2 Scanner?
- 1.2 Why Use a Diagnostic Scanner?
- 1.3 Types of Diagnostic Scanners
- 2. Preparing to Use a Diagnostic Scanner
- 2.1 Gathering Necessary Information
- 2.2 Safety Precautions
- 2.3 Understanding Your Vehicle’s OBD2 Port
- 3. Step-by-Step Guide: How to Connect Your Diagnostic Scanner
- 3.1 Locating the OBD2 Port
- 3.2 Connecting the Scanner
- 3.3 Powering On the Scanner
- 3.4 Initial Setup (If Required)
- 4. Navigating the Diagnostic Scanner Menu
- 4.1 Understanding the Menu Options
- 4.2 Using the Scanner Buttons
- 4.3 Connecting to a Computer
- 5. Reading and Interpreting Diagnostic Trouble Codes (DTCs)
- 5.1 Retrieving DTCs
- 5.2 Understanding the Code Structure
- 5.3 Common DTC Examples
- 5.4 Using Online Resources for Code Definitions
- 6. Utilizing Live Data and Freeze Frame
- 6.1 Accessing Live Data
- 6.2 Analyzing Live Data
- 6.3 Understanding Freeze Frame Data
- 6.4 Using Freeze Frame for Diagnosis
- 7. Clearing Diagnostic Trouble Codes (DTCs)
- 7.1 Accessing the “Erase Codes” Function
- 7.2 Understanding the Implications of Clearing Codes
- 7.3 Steps to Clear Codes
- 8. Advanced Functions of Diagnostic Scanners
- 8.1 Bi-Directional Control
- 8.2 Programming and Coding
- 8.3 Special Functions
- 8.4 Accessing OEM Information
- 9. Choosing the Right Diagnostic Scanner
- 9.1 Consider Your Needs
- 9.2 Budget
- 9.3 Features and Capabilities
- 9.4 Reviews and Recommendations
- 10. Maintaining Your Diagnostic Scanner
- 10.1 Proper Storage
- 10.2 Software Updates
- 10.3 Cable Care
- 10.4 Battery Maintenance
- 10.5 Cleaning
- 11. Troubleshooting Common Scanner Issues
- 11.1 Scanner Won’t Connect
- 11.2 Scanner Won’t Power On
- 11.3 Inaccurate Readings
- 11.4 Communication Errors
- 11.5 Scanner Freezes or Locks Up
- 12. Real-World Applications of Diagnostic Scanners
- 12.1 Check Engine Light Diagnosis
- 12.2 Pre-Purchase Inspections
- 12.3 Performance Monitoring
- 12.4 Routine Maintenance
- 13. Future Trends in Diagnostic Scanner Technology
- 13.1 Wireless Connectivity
- 13.2 Artificial Intelligence (AI)
- 13.3 Enhanced Graphics and User Interfaces
- 13.4 Augmented Reality (AR)
- 14. Benefits of Using CAR-TOOL.EDU.VN for Automotive Diagnostics
- 14.1 Expert Insights and Guidance
- 14.2 Up-to-Date Information
- 14.3 Community Support
- 14.4 Product Recommendations
- 15. Common Mistakes to Avoid When Using a Diagnostic Scanner
- 15.1 Not Reading the Manual
- 15.2 Clearing Codes Without Addressing the Issue
- 15.3 Ignoring Live Data
- 15.4 Incorrect Vehicle Information
- 15.5 Overreliance on the Scanner
- FAQ: Frequently Asked Questions About Diagnostic Scanners
- What is the best diagnostic scanner for cars?
- Can a diagnostic scanner fix my car?
- How often should I use a diagnostic scanner?
- Is it safe to clear diagnostic codes myself?
- Do all cars have an OBD2 port?
- Can I use a diagnostic scanner while driving?
- What does it mean when my scanner says “no codes found”?
- Can I use a smartphone app as a diagnostic scanner?
- How do I update my diagnostic scanner?
- What is the difference between a generic and a manufacturer-specific code?
- Conclusion: Empowering You with Diagnostic Knowledge
1. Understanding the Basics of Diagnostic Scanners
What is a diagnostic scanner for cars? A diagnostic scanner, also known as an OBD2 scanner or code reader, is an essential tool for car maintenance and repair. It allows you to communicate with your vehicle’s onboard computer system to read diagnostic trouble codes (DTCs), monitor real-time data, and assess the overall health of your car. These tools help both professional mechanics and DIY enthusiasts diagnose and resolve automotive issues efficiently.
1.1 What is an OBD2 Scanner?
An OBD2 (On-Board Diagnostics II) scanner is a device used to access the data from a vehicle’s computer system. According to the Environmental Protection Agency (EPA), OBD2 systems have been standard on all cars and light trucks sold in the U.S. since 1996, ensuring compatibility across a wide range of vehicles.
1.2 Why Use a Diagnostic Scanner?
Using a diagnostic scanner offers several advantages:
- Early Issue Detection: Detect problems before they escalate into costly repairs.
- Informed Repairs: Understand the nature of the problem to make informed repair decisions.
- Cost Savings: Avoid unnecessary trips to the mechanic by diagnosing issues yourself.
- Performance Monitoring: Keep track of your vehicle’s performance and maintenance needs.
1.3 Types of Diagnostic Scanners
There are various types of diagnostic scanners available, each with different features and capabilities:
- Basic Code Readers: These scanners read and clear DTCs, providing a simple and affordable solution for basic diagnostics.
- Enhanced Scanners: These offer additional features such as live data streaming, freeze frame data, and advanced diagnostics for specific vehicle systems.
- Professional-Grade Scanners: Used by mechanics, these scanners provide comprehensive diagnostics, bi-directional control, and advanced functionalities like programming and module resetting.
- Smartphone-Based Scanners: These scanners connect to your smartphone via Bluetooth or Wi-Fi and use a mobile app for diagnostics, offering convenience and portability.
2. Preparing to Use a Diagnostic Scanner
How do you prepare to use a diagnostic scanner? Before using a diagnostic scanner, it’s important to ensure you have the right tool and are familiar with your vehicle’s specifications. This preparation will help you get the most accurate and useful information from the scan.
2.1 Gathering Necessary Information
Before you begin, gather the following information:
- Vehicle Identification Number (VIN): Locate your VIN, typically found on the dashboard or doorframe. This number provides specific details about your vehicle’s make, model, and year.
- Vehicle Specifications: Know your vehicle’s engine type, transmission, and any specific features relevant to the diagnostic process.
- Scanner Manual: Read the scanner’s manual to understand its functions, capabilities, and any specific instructions for your vehicle.
2.2 Safety Precautions
Follow these safety precautions when using a diagnostic scanner:
- Park Safely: Ensure your vehicle is parked in a safe, well-ventilated area.
- Turn Off the Ignition: Turn off the ignition before connecting or disconnecting the scanner.
- Avoid Distractions: Do not operate the scanner while driving.
- Battery Safety: Be cautious when working around the vehicle’s battery to avoid electrical shocks.
2.3 Understanding Your Vehicle’s OBD2 Port
The OBD2 port is typically located under the dashboard on the driver’s side. However, its exact location can vary depending on the vehicle’s make and model. Consult your vehicle’s manual to find the precise location.
3. Step-by-Step Guide: How to Connect Your Diagnostic Scanner
How do you connect a diagnostic scanner? Connecting a diagnostic scanner is a straightforward process, but it’s crucial to follow the correct steps to ensure a proper connection and accurate readings. Here’s a step-by-step guide:
3.1 Locating the OBD2 Port
- Check Under the Dashboard: Look under the driver’s side dashboard. The OBD2 port is usually within easy reach.
- Consult Your Manual: If you can’t find the port, refer to your vehicle’s manual for its exact location.
- Use a Flashlight: Use a flashlight to help you see the port clearly.
3.2 Connecting the Scanner
- Turn Off the Ignition: Ensure the vehicle’s ignition is turned off.
- Plug in the Scanner: Align the scanner’s connector with the OBD2 port and firmly push it in. You may feel a slight click when it’s properly connected.
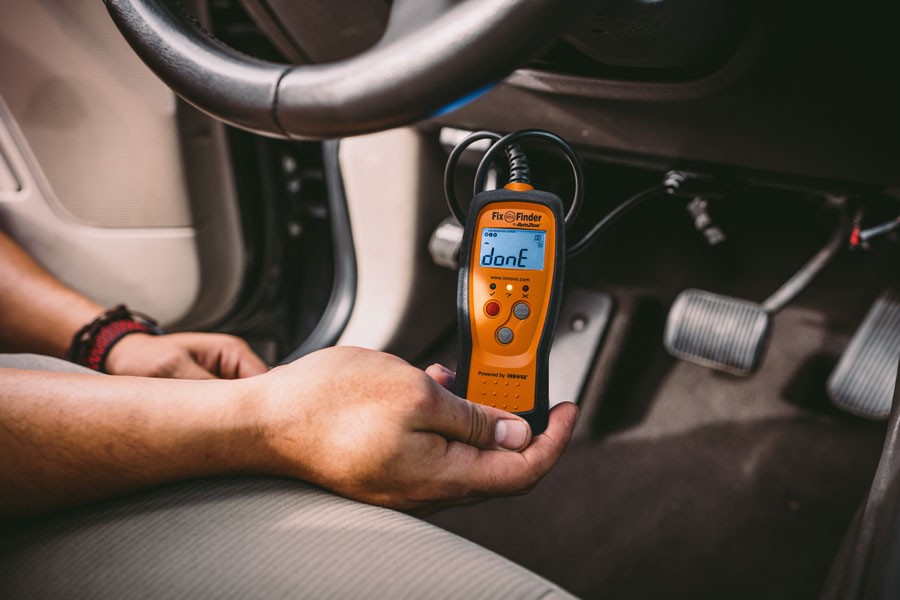 Connecting an OBD2 scanner to the OBD2 port
3.3 Powering On the Scanner
- Turn the Ignition to “ON” Position: Turn the ignition to the “ON” position without starting the engine. This provides power to the vehicle’s electrical system and allows the scanner to communicate with the computer.
- Wait for the Scanner to Boot Up: The scanner will usually power on automatically. If not, press the power button. Wait for the scanner to complete its boot sequence.
3.4 Initial Setup (If Required)
Some scanners may require an initial setup, such as selecting the vehicle’s make, model, and year. Follow the on-screen instructions to complete this setup.
4. Navigating the Diagnostic Scanner Menu
How do you navigate a diagnostic scanner menu? Once the scanner is connected and powered on, you’ll need to navigate its menu to access the various diagnostic functions. Here’s how to do it:
4.1 Understanding the Menu Options
Familiarize yourself with the common menu options:
- Read Codes: This option retrieves diagnostic trouble codes (DTCs) stored in the vehicle’s computer.
- Erase Codes: This option clears DTCs and resets the check engine light. Use this function with caution and only after addressing the underlying issues.
- Live Data: This option displays real-time data from various sensors, allowing you to monitor the vehicle’s performance.
- Freeze Frame: This option captures a snapshot of the sensor data at the moment a DTC was set, providing valuable information for diagnosing intermittent issues.
- Vehicle Information: This option displays the vehicle’s VIN and other identifying information.
- I/M Readiness: This option checks the status of various emission-related systems to determine if the vehicle is ready for a smog test.
4.2 Using the Scanner Buttons
Most scanners have buttons for navigation:
- Arrow Buttons: Use these to scroll through the menu options.
- Enter Button: Press this to select an option.
- Back Button: Press this to return to the previous menu.
4.3 Connecting to a Computer
Some scanners allow you to connect to a computer for software updates or data logging. Follow the instructions in the scanner’s manual to establish this connection.
5. Reading and Interpreting Diagnostic Trouble Codes (DTCs)
How do you read and interpret DTCs? Reading and understanding DTCs is crucial for diagnosing automotive issues. Here’s how to do it effectively:
5.1 Retrieving DTCs
- Select “Read Codes”: Navigate to the “Read Codes” option in the scanner’s menu and select it.
- View the Codes: The scanner will display any stored DTCs. Note down each code for further analysis.
5.2 Understanding the Code Structure
DTCs follow a standardized format:
-
First Character: Indicates the system:
- P: Powertrain (engine, transmission)
- B: Body (airbags, interior)
- C: Chassis (suspension, brakes)
- U: Network (communication)
-
Second Character: Indicates whether the code is generic or manufacturer-specific:
- 0: Generic (SAE) code
- 1: Manufacturer-specific code
-
Third Character: Indicates the subsystem:
- 1: Fuel and air metering
- 2: Fuel and air metering (injector circuit)
- 3: Ignition system or misfire
- 4: Auxiliary emission controls
- 5: Vehicle speed control and idle control system
- 6: Computer output system
- 7: Transmission
- 8: Transmission
-
Fourth and Fifth Characters: Provide specific information about the fault.
5.3 Common DTC Examples
Here are some common DTC examples:
- P0300: Random/Multiple Cylinder Misfire Detected
- P0171: System Too Lean (Bank 1)
- P0420: Catalyst System Efficiency Below Threshold (Bank 1)
- P0101: Mass Air Flow (MAF) Sensor Circuit Range/Performance Problem
5.4 Using Online Resources for Code Definitions
Use online resources like CAR-TOOL.EDU.VN to look up the definitions of DTCs. Enter the code to find detailed information about the potential causes and solutions.
6. Utilizing Live Data and Freeze Frame
How do you utilize live data and freeze frame features? Live data and freeze frame are powerful features that provide real-time and historical insights into your vehicle’s performance. Here’s how to use them effectively:
6.1 Accessing Live Data
- Select “Live Data”: Navigate to the “Live Data” option in the scanner’s menu and select it.
- Choose Parameters: Select the parameters you want to monitor, such as engine RPM, coolant temperature, oxygen sensor voltage, and fuel trim.
- Monitor the Data: Observe the data as you drive or run the engine. Look for unusual readings or fluctuations that may indicate a problem.
6.2 Analyzing Live Data
- Compare to Specifications: Compare the live data readings to the vehicle’s specifications. Refer to your vehicle’s manual or online resources for the correct values.
- Identify Trends: Look for trends or patterns in the data. For example, a gradually increasing coolant temperature may indicate a cooling system issue.
- Check Sensor Response: Ensure that sensors are responding correctly to changes in operating conditions. For example, the oxygen sensor voltage should fluctuate as the engine runs.
6.3 Understanding Freeze Frame Data
- Access Freeze Frame Data: After reading DTCs, the scanner may offer the option to view freeze frame data associated with a specific code.
- Review the Data: The freeze frame data will show the values of various parameters at the moment the DTC was set. This can help you understand the conditions that led to the fault.
6.4 Using Freeze Frame for Diagnosis
- Identify Triggering Conditions: Look for unusual values in the freeze frame data that may have triggered the DTC.
- Correlate with Live Data: Use the freeze frame data to guide your analysis of live data. Focus on the parameters that were abnormal at the time the DTC was set.
7. Clearing Diagnostic Trouble Codes (DTCs)
How do you clear DTCs? Clearing DTCs is a simple process, but it should be done with caution and only after addressing the underlying issues. Here’s how to do it:
7.1 Accessing the “Erase Codes” Function
- Navigate to “Erase Codes”: In the scanner’s menu, navigate to the “Erase Codes” or “Clear Codes” option and select it.
- Confirm Your Selection: The scanner may ask you to confirm your selection. Read the warning message carefully before proceeding.
7.2 Understanding the Implications of Clearing Codes
- Loss of Diagnostic Data: Clearing codes erases all stored DTCs and freeze frame data, making it harder to diagnose intermittent issues.
- Resetting Emission Monitors: Clearing codes also resets the emission monitors, which may prevent you from passing a smog test until the monitors have completed their cycles.
7.3 Steps to Clear Codes
- Address the Underlying Issues: Before clearing codes, make sure you have diagnosed and addressed the underlying issues that caused the DTCs.
- Confirm and Clear: Follow the scanner’s instructions to confirm your selection and clear the codes.
- Verify the Repair: After clearing the codes, start the engine and monitor the vehicle’s performance to ensure the issue has been resolved and the codes do not return.
8. Advanced Functions of Diagnostic Scanners
What are the advanced functions of diagnostic scanners? Advanced diagnostic scanners offer a range of powerful functions that can help you perform more comprehensive diagnostics and repairs. Here are some key advanced functions:
8.1 Bi-Directional Control
Bi-directional control allows you to send commands to the vehicle’s computer to activate specific components or systems. This can be useful for testing actuators, solenoids, and other devices.
8.2 Programming and Coding
Some advanced scanners can perform programming and coding functions, such as:
- Module Programming: Replacing or reprogramming electronic control modules (ECMs).
- Key Programming: Programming new keys or key fobs.
- Injector Coding: Coding fuel injectors to ensure proper fuel delivery.
8.3 Special Functions
Advanced scanners may also offer special functions like:
- Oil Reset: Resetting the oil life monitor after an oil change.
- Brake Bleeding: Activating the ABS system to bleed the brakes.
- Throttle Relearn: Resetting the throttle position sensor after cleaning or replacement.
8.4 Accessing OEM Information
Some scanners provide access to OEM (Original Equipment Manufacturer) information, such as technical service bulletins (TSBs) and repair procedures. This can be invaluable for diagnosing and repairing complex issues.
9. Choosing the Right Diagnostic Scanner
How do you choose the right diagnostic scanner? Selecting the right diagnostic scanner depends on your needs, budget, and the types of vehicles you work on. Here are some factors to consider:
9.1 Consider Your Needs
- DIY Enthusiast: A basic code reader may be sufficient for simple diagnostics and maintenance.
- Professional Mechanic: A professional-grade scanner with advanced functions and OEM information is essential.
- Specific Vehicle Types: If you work on specific types of vehicles, such as European or Asian cars, choose a scanner that offers specialized coverage for those makes and models.
9.2 Budget
Diagnostic scanners range in price from under $100 for basic code readers to several thousand dollars for professional-grade models. Set a budget and choose a scanner that offers the best features for your price range.
9.3 Features and Capabilities
Consider the following features and capabilities:
- Code Reading and Clearing: Essential for all scanners.
- Live Data: Provides real-time insights into vehicle performance.
- Freeze Frame: Helps diagnose intermittent issues.
- Bi-Directional Control: Allows you to activate components and systems.
- Programming and Coding: Enables advanced repairs and module replacement.
- OEM Information: Provides access to valuable repair information.
- Update Availability: Ensure the scanner can be updated with the latest software and vehicle coverage.
9.4 Reviews and Recommendations
Read online reviews and ask for recommendations from other mechanics or DIY enthusiasts to get insights into the performance and reliability of different scanners.
10. Maintaining Your Diagnostic Scanner
How do you maintain your diagnostic scanner? Proper maintenance will ensure that your diagnostic scanner remains in good working condition and provides accurate readings for years to come. Here are some maintenance tips:
10.1 Proper Storage
- Keep it Clean: Store the scanner in a clean, dry place to protect it from dust, moisture, and extreme temperatures.
- Use a Case: Use a carrying case to protect the scanner from physical damage.
10.2 Software Updates
- Regularly Update: Check for software updates regularly and install them to ensure the scanner has the latest vehicle coverage and features.
- Follow Instructions: Follow the manufacturer’s instructions carefully when updating the software.
10.3 Cable Care
- Avoid Kinking: Avoid kinking or bending the cable excessively, as this can damage the wires inside.
- Inspect Regularly: Inspect the cable regularly for signs of wear or damage and replace it if necessary.
10.4 Battery Maintenance
- Keep Charged: If your scanner has a rechargeable battery, keep it charged to ensure it is ready when you need it.
- Replace When Necessary: If the battery no longer holds a charge, replace it with a new one.
10.5 Cleaning
- Wipe Down: Wipe down the scanner with a soft, damp cloth to remove dirt and grime.
- Avoid Solvents: Avoid using harsh solvents or chemicals, as they can damage the scanner’s plastic components.
11. Troubleshooting Common Scanner Issues
What are some common issues when using diagnostic scanners? Even with proper use and maintenance, you may encounter some common issues when using a diagnostic scanner. Here’s how to troubleshoot them:
11.1 Scanner Won’t Connect
- Check the Connection: Ensure the scanner is securely plugged into the OBD2 port.
- Verify Power: Make sure the ignition is turned to the “ON” position.
- Inspect the Port: Check the OBD2 port for damage or corrosion.
11.2 Scanner Won’t Power On
- Check the Battery: Ensure the scanner’s battery is charged or replace it if necessary.
- Verify Power Source: If the scanner is powered by the vehicle’s battery, check the vehicle’s battery voltage.
11.3 Inaccurate Readings
- Check the Vehicle Information: Ensure the scanner has the correct vehicle information (make, model, year).
- Update Software: Update the scanner’s software to ensure it has the latest vehicle coverage.
11.4 Communication Errors
- Check the Cable: Ensure the cable is in good condition and securely connected.
- Try Another Vehicle: Try the scanner on another vehicle to see if the issue is with the scanner or the vehicle.
11.5 Scanner Freezes or Locks Up
- Restart the Scanner: Try restarting the scanner.
- Update Software: Update the scanner’s software to fix any bugs or glitches.
12. Real-World Applications of Diagnostic Scanners
How are diagnostic scanners used in the real world? Diagnostic scanners are used in a variety of real-world applications by both professional mechanics and DIY enthusiasts. Here are some examples:
12.1 Check Engine Light Diagnosis
- Identify the Problem: When the check engine light comes on, a diagnostic scanner can quickly identify the underlying problem by reading the DTCs.
- Plan the Repair: Use the DTC information to plan the repair and purchase the necessary parts.
12.2 Pre-Purchase Inspections
- Assess Vehicle Health: Before buying a used car, use a diagnostic scanner to assess the vehicle’s overall health and identify any potential problems.
- Negotiate Price: Use the scanner’s findings to negotiate the price with the seller.
12.3 Performance Monitoring
- Track Vehicle Performance: Use the scanner’s live data feature to track the vehicle’s performance and identify any issues that may be affecting fuel economy or power.
- Optimize Settings: Use the scanner to optimize settings such as fuel trim and ignition timing for maximum performance.
12.4 Routine Maintenance
- Reset Maintenance Reminders: Use the scanner to reset maintenance reminders after performing routine maintenance tasks such as oil changes and tire rotations.
- Monitor System Health: Use the scanner to monitor the health of various systems and identify potential problems before they become serious.
13. Future Trends in Diagnostic Scanner Technology
What are the future trends in diagnostic scanner technology? The field of diagnostic scanner technology is constantly evolving, with new features and capabilities being introduced regularly. Here are some key future trends:
13.1 Wireless Connectivity
- Bluetooth and Wi-Fi: More scanners will offer wireless connectivity via Bluetooth and Wi-Fi, allowing you to connect to your smartphone or tablet for diagnostics.
- Cloud-Based Data: Scanners will increasingly rely on cloud-based data storage and analysis, providing access to vast amounts of diagnostic information.
13.2 Artificial Intelligence (AI)
- AI-Powered Diagnostics: AI will be used to analyze diagnostic data and provide more accurate and comprehensive diagnoses.
- Predictive Maintenance: AI will be used to predict potential problems before they occur, allowing for proactive maintenance.
13.3 Enhanced Graphics and User Interfaces
- Touchscreen Displays: Scanners will feature larger, more intuitive touchscreen displays.
- 3D Graphics: Scanners will use 3D graphics to display diagnostic data and system diagrams.
13.4 Augmented Reality (AR)
- AR-Guided Repairs: AR will be used to guide you through repair procedures, providing step-by-step instructions and visual aids.
- Real-Time Data Overlay: AR will overlay real-time diagnostic data onto the vehicle, allowing you to see the data in context.
14. Benefits of Using CAR-TOOL.EDU.VN for Automotive Diagnostics
What are the benefits of using CAR-TOOL.EDU.VN for automotive diagnostics? At CAR-TOOL.EDU.VN, we are committed to providing you with the most accurate, up-to-date, and comprehensive information on automotive diagnostics. Here are some of the benefits of using our website:
14.1 Expert Insights and Guidance
- Comprehensive Articles: We offer a wide range of articles and guides on automotive diagnostics, covering everything from basic code reading to advanced programming.
- Expert Advice: Our team of experienced mechanics and automotive experts provides valuable insights and guidance to help you diagnose and repair your vehicle.
14.2 Up-to-Date Information
- Latest Technology: We stay up-to-date on the latest diagnostic scanner technology and provide information on the newest features and capabilities.
- Vehicle Coverage: We provide information on the vehicle coverage of different scanners, helping you choose the right tool for your needs.
14.3 Community Support
- Forums and Discussions: Our forums and discussion boards allow you to connect with other mechanics and DIY enthusiasts, share your experiences, and ask for advice.
- Community Reviews: Read reviews from other users to get insights into the performance and reliability of different diagnostic scanners.
14.4 Product Recommendations
- Scanner Reviews: We provide unbiased reviews of diagnostic scanners from different manufacturers, helping you choose the right tool for your budget and needs.
- Recommended Products: We recommend specific scanners and accessories based on our expert analysis and user feedback.
15. Common Mistakes to Avoid When Using a Diagnostic Scanner
What are some common mistakes to avoid when using a diagnostic scanner? Using a diagnostic scanner can be a valuable tool for diagnosing and repairing your vehicle, but it’s important to avoid some common mistakes that can lead to inaccurate readings or further problems.
15.1 Not Reading the Manual
- Understand the Scanner: Always read the scanner’s manual before using it to understand its features, capabilities, and limitations.
- Follow Instructions: Follow the manufacturer’s instructions carefully to avoid damaging the scanner or your vehicle.
15.2 Clearing Codes Without Addressing the Issue
- Diagnose First: Never clear DTCs without first diagnosing and addressing the underlying issues.
- Recurring Issues: Clearing codes without fixing the problem will only cause the check engine light to come back on.
15.3 Ignoring Live Data
- Real-Time Insights: Don’t rely solely on DTCs. Use live data to monitor the vehicle’s performance and identify potential problems.
- Compare to Specifications: Compare live data readings to the vehicle’s specifications to identify deviations.
15.4 Incorrect Vehicle Information
- Enter Correct Data: Always enter the correct vehicle information (make, model, year) into the scanner to ensure accurate readings.
- Use VIN: Use the vehicle’s VIN to automatically populate the correct information.
15.5 Overreliance on the Scanner
- Use as a Guide: Remember that a diagnostic scanner is a tool, not a solution. Use it as a guide to help you diagnose the problem, but don’t rely on it exclusively.
- Consider Other Factors: Consider other factors such as the vehicle’s history, maintenance records, and visual inspection when diagnosing a problem.
FAQ: Frequently Asked Questions About Diagnostic Scanners
What is the best diagnostic scanner for cars?
The best diagnostic scanner for cars depends on your needs and budget. For basic DIY use, a simple code reader may suffice. For professional mechanics, a high-end scanner with advanced features is recommended. Brands like Snap-on, Autel, and Launch are popular choices.
Can a diagnostic scanner fix my car?
No, a diagnostic scanner cannot fix your car. It helps identify the problem by reading diagnostic trouble codes (DTCs). Once you know the issue, you can then proceed with the necessary repairs.
How often should I use a diagnostic scanner?
You should use a diagnostic scanner whenever your check engine light comes on or if you notice any unusual symptoms in your vehicle’s performance. Regular scans can also help catch minor issues before they escalate.
Is it safe to clear diagnostic codes myself?
It is safe to clear diagnostic codes after you have diagnosed and repaired the underlying issue. Clearing codes without fixing the problem will only cause the check engine light to reappear.
Do all cars have an OBD2 port?
Most cars and light trucks sold in the U.S. since 1996 have an OBD2 port. The port is typically located under the dashboard on the driver’s side.
Can I use a diagnostic scanner while driving?
It is not recommended to use a diagnostic scanner while driving, as it can be distracting and dangerous. Connect the scanner when the vehicle is stationary and parked safely.
What does it mean when my scanner says “no codes found”?
If your scanner says “no codes found,” it means that there are no stored diagnostic trouble codes (DTCs) in the vehicle’s computer. However, this does not necessarily mean that there are no issues with the vehicle.
Can I use a smartphone app as a diagnostic scanner?
Yes, you can use a smartphone app as a diagnostic scanner by pairing it with a Bluetooth OBD2 adapter. These apps can read DTCs, display live data, and perform other basic functions.
How do I update my diagnostic scanner?
Most diagnostic scanners can be updated via a USB connection to a computer or through a Wi-Fi connection. Check the manufacturer’s website for update instructions and software downloads.
What is the difference between a generic and a manufacturer-specific code?
A generic code (indicated by a “0” as the second character) is a standardized code that applies to all vehicles. A manufacturer-specific code (indicated by a “1” as the second character) is a code that is specific to a particular make or model of vehicle.
Conclusion: Empowering You with Diagnostic Knowledge
Using a diagnostic scanner for cars is a valuable skill that empowers you to take control of your vehicle’s maintenance and repair. By understanding the basics of diagnostic scanners, learning how to connect and navigate the menu, and knowing how to interpret diagnostic trouble codes, you can save time, money, and hassle. At CAR-TOOL.EDU.VN, we are dedicated to providing you with the knowledge and resources you need to become a confident and informed car owner.
Ready to take control of your vehicle’s diagnostics? Contact CAR-TOOL.EDU.VN today for expert advice and support. Our team is here to help you find the right diagnostic tools and provide guidance on using them effectively. Reach out to us at 456 Elm Street, Dallas, TX 75201, United States, or call us at +1 (641) 206-8880. You can also visit our website at CAR-TOOL.EDU.VN for more information. Let us help you keep your vehicle running smoothly with our trusted diagnostic solutions.