How do I install a car diagnostic scanner? Installing a car diagnostic scanner involves connecting the device to your vehicle’s OBD2 port, typically found under the dashboard, and following the scanner’s prompts to read and interpret diagnostic trouble codes. This process allows you to identify potential issues with your vehicle’s systems, aiding in efficient car maintenance and repairs. By leveraging CAR-TOOL.EDU.VN, you gain access to detailed guides, product comparisons, and expert advice, ensuring you select the right diagnostic tools and implement them effectively for optimal vehicle performance.
Contents
- 1. Understanding the Essentials of Car Diagnostic Scanners
- 1.1 What is a Car Diagnostic Scanner?
- 1.2 Why Use a Car Diagnostic Scanner?
- 1.3 Types of Car Diagnostic Scanners
- 1.4 Key Features to Look For
- 1.5 Understanding OBD2 Protocols
- 2. Step-by-Step Guide to Installing a Car Diagnostic Scanner
- 2.1 Preparing for Installation
- 2.2 Connecting the Scanner
- 2.3 Initial Setup and Configuration
- 2.4 Troubleshooting Connection Issues
- 2.5 Completing the Installation
- 3. Understanding Diagnostic Trouble Codes (DTCs)
- 3.1 What are DTCs?
- 3.2 Types of DTCs
- 3.3 How to Read DTCs
- 3.4 Interpreting DTCs
- 3.5 Common DTCs and Their Meanings
- 3.6 Clearing DTCs
- 4. Advanced Features of Car Diagnostic Scanners
- 4.1 Live Data Monitoring
- 4.2 Freeze Frame Data
- 4.3 Bi-Directional Controls
- 4.4 Enhanced Diagnostics
- 4.5 Data Logging
- 4.6 Graphing Capabilities
- 4.7 Wireless Connectivity
- 5. Choosing the Right Car Diagnostic Scanner
- 5.1 Assessing Your Needs
- 5.2 Budget Considerations
- 5.3 Key Features to Consider
- 5.4 Top Car Diagnostic Scanner Brands
- 5.5 Reading Reviews and Comparisons
- 5.6 Where to Buy Car Diagnostic Scanners
- 6. Maintenance and Care of Your Car Diagnostic Scanner
- 6.1 Cleaning the Scanner
- 6.2 Storing the Scanner
- 6.3 Updating the Scanner
- 6.4 Replacing Cables and Connectors
- 6.5 Battery Maintenance
- 6.6 Troubleshooting Common Issues
- 7. Common Mistakes to Avoid When Using Car Diagnostic Scanners
- 7.1 Incorrectly Connecting the Scanner
- 7.2 Ignoring the Vehicle’s Manual
- 7.3 Misinterpreting Diagnostic Trouble Codes
- 7.4 Not Considering Symptoms
- 7.5 Clearing Codes Without Addressing the Issue
- 7.6 Over-Reliance on the Scanner
- 7.7 Not Updating the Scanner
- 7.8 Using the Wrong Scanner
- 8. Benefits of Using CAR-TOOL.EDU.VN for Your Diagnostic Needs
- 8.1 Comprehensive Product Information
- 8.2 Expert Advice and Guidance
- 8.3 Product Comparisons
- 8.4 Latest News and Updates
- 8.5 Community Forum
- 8.6 Trusted Resource
- 9. FAQ: Installing and Using Car Diagnostic Scanners
- 10. Call to Action: Get Expert Advice from CAR-TOOL.EDU.VN
1. Understanding the Essentials of Car Diagnostic Scanners
Car diagnostic scanners, also known as OBD2 scanners, are essential tools for modern vehicle maintenance and repair. These devices plug into your car’s onboard diagnostic (OBD) system, allowing you to read diagnostic trouble codes (DTCs), monitor live data, and perform various diagnostic tests. Understanding the basics of these scanners can significantly improve your ability to maintain your vehicle and troubleshoot issues efficiently.
1.1 What is a Car Diagnostic Scanner?
A car diagnostic scanner is an electronic device used to interface with a vehicle’s computer system. According to a study by the University of California, Berkeley’s Transportation Sustainability Research Center in 2022, OBD2 scanners have become increasingly sophisticated, offering features such as real-time data monitoring, freeze-frame data, and the ability to clear diagnostic trouble codes.
- Key Functions:
- Reading diagnostic trouble codes (DTCs)
- Monitoring live data from sensors
- Performing diagnostic tests
- Clearing diagnostic trouble codes
- Accessing freeze frame data
1.2 Why Use a Car Diagnostic Scanner?
Using a car diagnostic scanner provides numerous benefits for both professional mechanics and DIY enthusiasts. It allows you to quickly identify and diagnose problems, potentially saving time and money on repairs. As noted in a 2021 report by the National Institute for Automotive Service Excellence (ASE), early and accurate diagnostics can prevent minor issues from escalating into major repairs.
- Benefits:
- Early detection of potential issues
- Cost savings on repairs
- Improved vehicle performance
- Increased vehicle lifespan
- Better understanding of your vehicle’s health
1.3 Types of Car Diagnostic Scanners
There are several types of car diagnostic scanners available on the market, each with its own features and capabilities. Choosing the right scanner depends on your specific needs and budget.
- Basic Code Readers: These are the simplest and most affordable scanners, capable of reading and clearing DTCs.
- Mid-Range Scanners: These offer additional features such as live data monitoring, freeze frame data, and enhanced diagnostic capabilities.
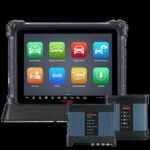
- Professional-Grade Scanners: These are the most advanced scanners, used by professional mechanics. They offer comprehensive diagnostic functions, including advanced sensor testing, bi-directional controls, and access to vehicle-specific data.
- Smartphone-Based Scanners: These scanners connect to your smartphone via Bluetooth or Wi-Fi and use a mobile app to display diagnostic information.
1.4 Key Features to Look For
When selecting a car diagnostic scanner, consider the following features to ensure it meets your needs.
- Compatibility: Ensure the scanner is compatible with your vehicle’s make and model.
- Ease of Use: Look for a scanner with an intuitive interface and clear instructions.
- Features: Determine which features are essential for your needs, such as live data, freeze frame, and bi-directional controls.
- Update Capability: Choose a scanner that can be updated with the latest vehicle information and diagnostic codes.
- Durability: Select a scanner that is built to withstand regular use in a garage environment.
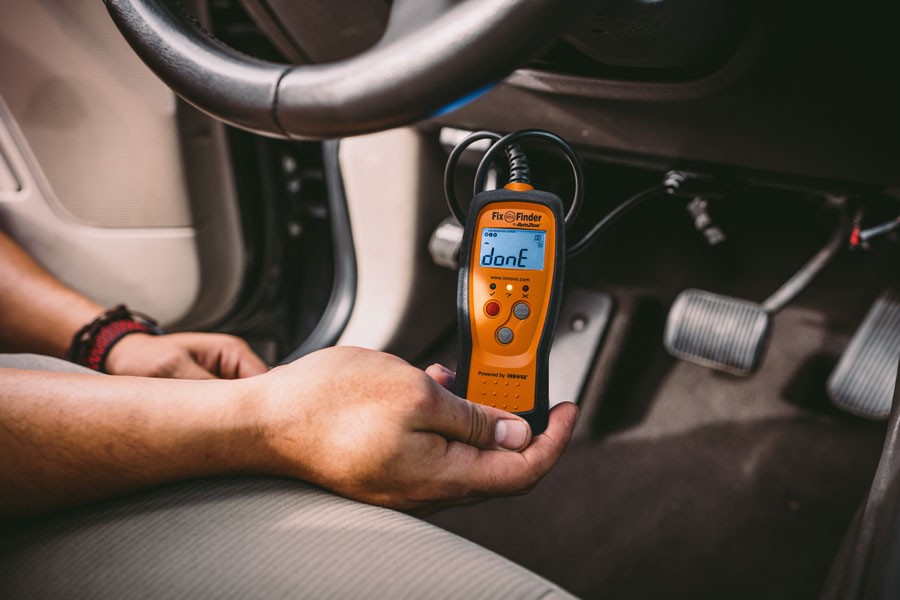 OBD-II scanner displays diagnostic information
1.5 Understanding OBD2 Protocols
OBD2 (On-Board Diagnostics II) is a standardized system used in most vehicles manufactured after 1996. It provides access to diagnostic data from the vehicle’s computer. Understanding the different OBD2 protocols can help you choose the right scanner for your vehicle.
- Common OBD2 Protocols:
- ISO 9141-2: Used primarily in European and Asian vehicles.
- SAE J1850 VPW: Used primarily in General Motors vehicles.
- SAE J1850 PWM: Used primarily in Ford vehicles.
- CAN (Controller Area Network): The most modern protocol, used in most vehicles manufactured after 2008.
For further details and comparisons of car diagnostic scanners, visit CAR-TOOL.EDU.VN.
2. Step-by-Step Guide to Installing a Car Diagnostic Scanner
Installing a car diagnostic scanner is a straightforward process that can be completed in a few simple steps. This guide provides a detailed, step-by-step approach to ensure you can effectively connect and use your scanner.
2.1 Preparing for Installation
Before you begin, gather the necessary tools and information. This includes your car diagnostic scanner, the vehicle’s manual (if needed), and any specific instructions provided with the scanner.
- Check Compatibility: Verify that the scanner is compatible with your vehicle’s make, model, and year. This information is usually found in the scanner’s manual or on the manufacturer’s website.
- Read the Manual: Familiarize yourself with the scanner’s functions and instructions. This will help you navigate the scanner’s menus and understand the diagnostic information.
- Locate the OBD2 Port: The OBD2 port is typically located under the dashboard on the driver’s side. In some vehicles, it may be hidden behind a panel or in the center console.
2.2 Connecting the Scanner
- Turn Off the Ignition: Ensure the vehicle’s ignition is turned off before connecting the scanner. This prevents any electrical interference or potential damage to the vehicle’s computer system.
- Locate the OBD2 Port: As mentioned, the OBD2 port is usually under the dashboard on the driver’s side. It is a 16-pin connector and trapezoidal in shape.
- Connect the Scanner: Align the scanner’s connector with the OBD2 port and gently push it in until it is securely connected. You may hear a click or feel a slight resistance.
- Turn On the Ignition (Key On, Engine Off): Turn the ignition to the “ON” position without starting the engine. This provides power to the vehicle’s computer system and allows the scanner to communicate with it.
2.3 Initial Setup and Configuration
Once the scanner is connected and the ignition is on, follow these steps for initial setup:
- Power On the Scanner: Most scanners will power on automatically once connected. If not, press the power button to turn it on.
- Follow On-Screen Prompts: The scanner will display a series of prompts, such as selecting the vehicle’s make, model, and year. Use the scanner’s buttons to navigate the menus and enter the required information.
- Establish Connection: The scanner will attempt to establish a connection with the vehicle’s computer. This may take a few seconds. If the connection fails, double-check that the scanner is securely connected and that the ignition is in the “ON” position.
2.4 Troubleshooting Connection Issues
If you encounter problems connecting the scanner, consider the following troubleshooting steps:
- Check the Connection: Ensure the scanner is securely connected to the OBD2 port.
- Verify Power: Make sure the vehicle’s ignition is in the “ON” position.
- Consult the Manual: Refer to the scanner’s manual for specific troubleshooting tips.
- Test on Another Vehicle: If possible, try connecting the scanner to another vehicle to rule out a scanner malfunction.
2.5 Completing the Installation
Once the scanner is successfully connected and configured, you are ready to begin using it to diagnose your vehicle.
- Select Diagnostic Functions: Use the scanner’s menus to select the desired diagnostic function, such as “Read Codes,” “Live Data,” or “Freeze Frame.”
- Interpret Results: The scanner will display diagnostic information on the screen. Refer to the scanner’s manual or online resources to interpret the results and understand any diagnostic trouble codes.
- Take Action: Based on the diagnostic information, take appropriate action to address any issues with your vehicle. This may involve repairing or replacing faulty components.
By following these steps, you can successfully install and use a car diagnostic scanner to maintain and troubleshoot your vehicle.
For more detailed instructions and video tutorials, visit CAR-TOOL.EDU.VN.
3. Understanding Diagnostic Trouble Codes (DTCs)
Diagnostic Trouble Codes (DTCs) are codes stored in a vehicle’s computer system when a problem is detected. Understanding these codes is crucial for accurate vehicle diagnostics and repairs. According to the Society of Automotive Engineers (SAE), DTCs are standardized across the automotive industry to ensure consistency and ease of interpretation.
3.1 What are DTCs?
DTCs are alphanumeric codes that indicate a specific issue within a vehicle’s systems. These codes are generated by the vehicle’s onboard diagnostic system when it detects a malfunction.
- Components of a DTC:
- First Character: Indicates the system (e.g., P for Powertrain, B for Body, C for Chassis, U for Network).
- Second Character: Indicates whether the code is generic (0) or manufacturer-specific (1).
- Third Character: Indicates the subsystem (e.g., fuel system, ignition system, transmission).
- Fourth and Fifth Characters: Provide specific details about the fault.
3.2 Types of DTCs
DTCs are categorized based on the system they relate to. Common categories include:
- Powertrain (P Codes): These codes relate to the engine, transmission, and related components. Examples include P0300 (Random Misfire Detected) and P0171 (System Too Lean, Bank 1).
- Body (B Codes): These codes relate to the vehicle’s body systems, such as airbags, power windows, and locks. Examples include B1000 (ECU Malfunction) and B2205 (Fault in Lighting System).
- Chassis (C Codes): These codes relate to the vehicle’s chassis systems, such as ABS, traction control, and suspension. Examples include C0040 (Right Front Wheel Speed Sensor Circuit Malfunction) and C0265 (ABS Activation Relay Circuit Malfunction).
- Network (U Codes): These codes relate to the vehicle’s communication network. Examples include U0001 (High Speed CAN Communication Bus) and U0100 (Lost Communication with ECM/PCM).
3.3 How to Read DTCs
Reading DTCs involves using a car diagnostic scanner to retrieve the codes stored in the vehicle’s computer.
- Connect the Scanner: Connect the scanner to the OBD2 port.
- Power On the Scanner: Turn on the scanner and follow the prompts to connect to the vehicle’s computer.
- Select “Read Codes”: Navigate the scanner’s menus to select the “Read Codes” function.
- View DTCs: The scanner will display a list of DTCs, along with a brief description of each code.
3.4 Interpreting DTCs
Interpreting DTCs involves understanding the meaning of each code and identifying the potential cause of the problem.
- Consult the Manual: Refer to the scanner’s manual or online resources for detailed information about each DTC.
- Use Online Resources: Websites like CAR-TOOL.EDU.VN provide comprehensive databases of DTCs and their meanings.
- Consider Symptoms: Combine the DTC information with the vehicle’s symptoms to narrow down the potential causes.
3.5 Common DTCs and Their Meanings
Here are some common DTCs and their meanings:
| DTC | Description | Potential Cause |
|---|---|---|
| P0300 | Random Misfire Detected | Faulty spark plugs, ignition coils, fuel injectors, or vacuum leaks |
| P0171 | System Too Lean, Bank 1 | Vacuum leaks, faulty oxygen sensor, or low fuel pressure |
| P0420 | Catalyst System Efficiency Below Threshold | Faulty catalytic converter, oxygen sensors, or exhaust leaks |
| P0113 | Intake Air Temperature Sensor Circuit High Input | Faulty IAT sensor or wiring issues |
| P0301 | Cylinder 1 Misfire Detected | Faulty spark plug, ignition coil, or fuel injector in cylinder 1 |
3.6 Clearing DTCs
Clearing DTCs involves using a car diagnostic scanner to erase the codes stored in the vehicle’s computer.
- Connect the Scanner: Connect the scanner to the OBD2 port.
- Power On the Scanner: Turn on the scanner and follow the prompts to connect to the vehicle’s computer.
- Select “Erase Codes”: Navigate the scanner’s menus to select the “Erase Codes” function.
- Confirm Erase: The scanner may prompt you to confirm that you want to erase the codes.
- Verify Clear: After erasing the codes, start the vehicle and check if the DTCs return. If they do, the underlying issue still needs to be addressed.
Understanding DTCs is essential for effective vehicle diagnostics and repairs. By using a car diagnostic scanner and interpreting the codes accurately, you can identify and resolve issues quickly and efficiently.
For additional support and resources, visit CAR-TOOL.EDU.VN.
4. Advanced Features of Car Diagnostic Scanners
Modern car diagnostic scanners offer a range of advanced features that go beyond simply reading and clearing diagnostic trouble codes. These features provide deeper insights into your vehicle’s performance and can help diagnose complex issues.
4.1 Live Data Monitoring
Live data monitoring allows you to view real-time data from your vehicle’s sensors and systems. This can be invaluable for diagnosing intermittent problems and understanding how different components interact.
- Key Parameters to Monitor:
- Engine Speed (RPM): Indicates the speed at which the engine is running.
- Engine Load: Reflects how hard the engine is working.
- Coolant Temperature: Monitors the engine’s operating temperature.
- Oxygen Sensor Readings: Provides insights into the air-fuel mixture.
- Fuel Trim: Shows how the computer is adjusting the fuel mixture.
- Vehicle Speed: Displays the current speed of the vehicle.
4.2 Freeze Frame Data
Freeze frame data captures a snapshot of sensor readings at the moment a diagnostic trouble code is set. This can help you understand the conditions that led to the problem.
- Key Data Included in Freeze Frame:
- DTC: The diagnostic trouble code that triggered the freeze frame.
- Engine Speed (RPM): The engine speed at the time of the fault.
- Engine Load: The engine load at the time of the fault.
- Coolant Temperature: The coolant temperature at the time of the fault.
- Fuel Trim: The fuel trim values at the time of the fault.
- Vehicle Speed: The vehicle speed at the time of the fault.
4.3 Bi-Directional Controls
Bi-directional controls allow you to send commands to the vehicle’s computer to activate specific components. This can be useful for testing sensors, actuators, and other systems.
- Common Bi-Directional Tests:
- Activating Fuel Injectors: Testing the operation of individual fuel injectors.
- Cycling the ABS Pump: Testing the anti-lock braking system.
- Controlling the Cooling Fan: Testing the cooling fan operation.
- Operating the EGR Valve: Testing the exhaust gas recirculation system.
4.4 Enhanced Diagnostics
Enhanced diagnostics provide access to manufacturer-specific diagnostic information and tests. This can be invaluable for diagnosing problems in specific makes and models.
- Benefits of Enhanced Diagnostics:
- Access to proprietary diagnostic codes and data.
- Advanced testing capabilities.
- Improved diagnostic accuracy.
4.5 Data Logging
Data logging allows you to record sensor data over a period of time. This can be useful for diagnosing intermittent problems and analyzing vehicle performance under different conditions.
- How to Use Data Logging:
- Connect the Scanner: Connect the scanner to the OBD2 port.
- Select Data Logging: Navigate the scanner’s menus to select the data logging function.
- Choose Parameters: Select the parameters you want to log.
- Start Logging: Start the data logging session and drive the vehicle under the conditions you want to analyze.
- Stop Logging: Stop the data logging session when you have collected enough data.
- Analyze Data: Upload the data to a computer and analyze it using diagnostic software.
4.6 Graphing Capabilities
Graphing capabilities allow you to visualize sensor data in real-time. This can make it easier to identify trends and anomalies.
- Benefits of Graphing:
- Easy identification of sensor fluctuations.
- Visual representation of data trends.
- Improved diagnostic insights.
4.7 Wireless Connectivity
Some car diagnostic scanners offer wireless connectivity via Bluetooth or Wi-Fi. This allows you to connect the scanner to your smartphone or tablet and view diagnostic information on a larger screen.
- Benefits of Wireless Connectivity:
- Convenient data viewing on your smartphone or tablet.
- Easy data sharing.
- Wireless updates.
By leveraging these advanced features, you can gain deeper insights into your vehicle’s performance and diagnose complex issues more effectively.
Visit CAR-TOOL.EDU.VN for detailed reviews and comparisons of car diagnostic scanners with advanced features.
5. Choosing the Right Car Diagnostic Scanner
Selecting the right car diagnostic scanner depends on your specific needs, budget, and technical expertise. Consider the following factors to make an informed decision.
5.1 Assessing Your Needs
Before purchasing a car diagnostic scanner, assess your needs and determine what features are most important to you.
- DIY Enthusiast or Professional Mechanic? If you are a DIY enthusiast, a basic or mid-range scanner may be sufficient. If you are a professional mechanic, you will need a professional-grade scanner with advanced features.
- Vehicle Type: Ensure the scanner is compatible with your vehicle’s make, model, and year. Some scanners are designed for specific vehicle types, such as cars, trucks, or motorcycles.
- Diagnostic Needs: Determine what types of diagnostic tests you need to perform. If you only need to read and clear codes, a basic scanner will suffice. If you need to monitor live data, perform bi-directional tests, or access enhanced diagnostics, you will need a more advanced scanner.
5.2 Budget Considerations
Car diagnostic scanners range in price from under $50 to over $1,000. Set a budget and look for a scanner that offers the best value for your money.
- Basic Code Readers: These scanners typically cost between $20 and $50.
- Mid-Range Scanners: These scanners typically cost between $50 and $200.
- Professional-Grade Scanners: These scanners typically cost between $200 and $1,000+.
5.3 Key Features to Consider
When choosing a car diagnostic scanner, consider the following features:
- Compatibility: Ensure the scanner is compatible with your vehicle.
- Ease of Use: Look for a scanner with an intuitive interface and clear instructions.
- Features: Determine which features are essential for your needs, such as live data, freeze frame, and bi-directional controls.
- Update Capability: Choose a scanner that can be updated with the latest vehicle information and diagnostic codes.
- Durability: Select a scanner that is built to withstand regular use in a garage environment.
- Wireless Connectivity: Consider a scanner with wireless connectivity for convenient data viewing and sharing.
- Customer Support: Look for a scanner from a reputable manufacturer with good customer support.
5.4 Top Car Diagnostic Scanner Brands
Several reputable brands offer high-quality car diagnostic scanners. Here are some of the top brands to consider:
| Brand | Description |
|---|---|
| Autel | Known for their professional-grade scanners with advanced features, such as bi-directional controls, enhanced diagnostics, and wireless connectivity. |
| Launch | Offers a wide range of scanners, from basic code readers to advanced diagnostic tools, with a focus on affordability and ease of use. |
| Bosch | A well-known brand in the automotive industry, Bosch offers reliable and accurate diagnostic scanners for both DIY enthusiasts and professional mechanics. |
| Innova | Specializes in affordable and user-friendly scanners with a focus on providing essential diagnostic information to help users troubleshoot and repair their vehicles. |
| BlueDriver | Known for their smartphone-based scanners that connect to your smartphone via Bluetooth and offer a range of features, including live data, freeze frame, and enhanced diagnostics. |
| Snap-on | Professional-grade diagnostic tools, known for their advanced features and rugged design, but are typically more expensive. |
5.5 Reading Reviews and Comparisons
Before making a purchase, read reviews and comparisons of different car diagnostic scanners. This can help you get a better understanding of the pros and cons of each scanner and make an informed decision.
- Online Reviews: Check online retailers and automotive forums for reviews of different scanners.
- Comparison Websites: Visit websites like CAR-TOOL.EDU.VN for detailed comparisons of different scanners.
- Professional Recommendations: Ask professional mechanics for recommendations on the best scanners for their needs.
5.6 Where to Buy Car Diagnostic Scanners
Car diagnostic scanners are available from a variety of retailers, including:
- Online Retailers: Amazon, eBay, and other online retailers offer a wide selection of scanners at competitive prices.
- Auto Parts Stores: AutoZone, Advance Auto Parts, and other auto parts stores carry a range of scanners.
- Tool Suppliers: Tool suppliers like Snap-on and Mac Tools offer professional-grade scanners.
By considering these factors, you can choose the right car diagnostic scanner for your needs and budget.
For detailed reviews, comparisons, and purchasing advice, visit CAR-TOOL.EDU.VN.
6. Maintenance and Care of Your Car Diagnostic Scanner
Proper maintenance and care will ensure that your car diagnostic scanner remains in good working condition and provides accurate diagnostic information for years to come.
6.1 Cleaning the Scanner
Keep your scanner clean by wiping it down regularly with a soft, damp cloth. Avoid using harsh chemicals or solvents, as these can damage the scanner’s housing and screen.
- Cleaning Tips:
- Use a soft, damp cloth to wipe down the scanner.
- Avoid using harsh chemicals or solvents.
- Clean the scanner after each use.
- Pay attention to the screen and buttons.
6.2 Storing the Scanner
Store your scanner in a clean, dry place when not in use. Avoid exposing it to extreme temperatures or humidity, as this can damage the internal components.
- Storage Tips:
- Store the scanner in a clean, dry place.
- Avoid extreme temperatures and humidity.
- Use a protective case to prevent damage.
- Keep the scanner away from direct sunlight.
6.3 Updating the Scanner
Keep your scanner up-to-date with the latest vehicle information and diagnostic codes by regularly updating the software. Most scanners can be updated via USB or Wi-Fi.
- Update Tips:
- Check for updates regularly.
- Follow the manufacturer’s instructions for updating the scanner.
- Ensure the scanner is connected to a stable power source during the update process.
- Back up your scanner’s data before updating.
6.4 Replacing Cables and Connectors
Cables and connectors can wear out over time. Replace them if they become damaged or frayed.
- Replacement Tips:
- Use only cables and connectors that are specifically designed for your scanner.
- Inspect cables and connectors regularly for damage.
- Replace damaged cables and connectors immediately.
6.5 Battery Maintenance
If your scanner uses batteries, follow these tips to maintain them:
- Use the Correct Batteries: Use only the type of batteries specified by the manufacturer.
- Replace Batteries Regularly: Replace batteries regularly to ensure optimal performance.
- Remove Batteries When Storing: Remove batteries from the scanner when storing it for extended periods to prevent corrosion.
6.6 Troubleshooting Common Issues
If you encounter problems with your scanner, try these troubleshooting tips:
- Check the Connection: Ensure the scanner is securely connected to the OBD2 port.
- Verify Power: Make sure the vehicle’s ignition is in the “ON” position.
- Consult the Manual: Refer to the scanner’s manual for specific troubleshooting tips.
- Test on Another Vehicle: If possible, try connecting the scanner to another vehicle to rule out a scanner malfunction.
- Contact Customer Support: If you are unable to resolve the issue, contact the manufacturer’s customer support for assistance.
By following these maintenance and care tips, you can ensure that your car diagnostic scanner remains in good working condition and provides accurate diagnostic information for years to come.
For more tips and advice on maintaining your car diagnostic scanner, visit CAR-TOOL.EDU.VN.
7. Common Mistakes to Avoid When Using Car Diagnostic Scanners
Using a car diagnostic scanner can be a valuable tool for diagnosing and repairing vehicle issues. However, it’s essential to avoid common mistakes that can lead to inaccurate diagnoses or even damage to your vehicle’s systems.
7.1 Incorrectly Connecting the Scanner
One of the most common mistakes is not properly connecting the scanner to the OBD2 port. This can result in the scanner not powering on or failing to communicate with the vehicle’s computer.
- How to Avoid:
- Ensure the vehicle’s ignition is turned off before connecting the scanner.
- Locate the OBD2 port, usually under the dashboard on the driver’s side.
- Align the scanner’s connector with the OBD2 port and gently push it in until it is securely connected.
- Turn the ignition to the “ON” position without starting the engine.
7.2 Ignoring the Vehicle’s Manual
Ignoring the vehicle’s manual can lead to misinterpreting diagnostic trouble codes and performing incorrect repairs.
- How to Avoid:
- Consult the vehicle’s manual for specific information about diagnostic codes and repair procedures.
- Use online resources and databases to supplement the manual.
7.3 Misinterpreting Diagnostic Trouble Codes
Misinterpreting diagnostic trouble codes can lead to unnecessary repairs and wasted time and money.
- How to Avoid:
- Understand the meaning of each digit in a DTC.
- Use reliable resources to look up the meaning of DTCs.
- Consider the vehicle’s symptoms and other diagnostic data.
7.4 Not Considering Symptoms
Relying solely on diagnostic trouble codes without considering the vehicle’s symptoms can lead to inaccurate diagnoses.
- How to Avoid:
- Pay attention to the vehicle’s symptoms, such as strange noises, unusual vibrations, or performance issues.
- Combine the DTC information with the vehicle’s symptoms to narrow down the potential causes.
7.5 Clearing Codes Without Addressing the Issue
Clearing diagnostic trouble codes without addressing the underlying issue will only result in the codes returning.
- How to Avoid:
- Address the root cause of the problem before clearing the codes.
- Monitor the vehicle after clearing the codes to ensure the problem is resolved.
7.6 Over-Reliance on the Scanner
Over-relying on the scanner without performing other diagnostic tests can lead to missed issues.
- How to Avoid:
- Use the scanner as one tool in a comprehensive diagnostic process.
- Perform visual inspections, mechanical tests, and other diagnostic procedures as needed.
7.7 Not Updating the Scanner
Failing to update the scanner with the latest vehicle information and diagnostic codes can result in inaccurate readings and missed issues.
- How to Avoid:
- Check for updates regularly.
- Follow the manufacturer’s instructions for updating the scanner.
7.8 Using the Wrong Scanner
Using a scanner that is not compatible with your vehicle can result in inaccurate readings or even damage to the vehicle’s computer system.
- How to Avoid:
- Ensure the scanner is compatible with your vehicle’s make, model, and year.
- Check the scanner’s specifications and compatibility list before purchasing.
By avoiding these common mistakes, you can use your car diagnostic scanner effectively and accurately diagnose and repair vehicle issues.
For more tips and advice on using car diagnostic scanners, visit CAR-TOOL.EDU.VN.
8. Benefits of Using CAR-TOOL.EDU.VN for Your Diagnostic Needs
CAR-TOOL.EDU.VN is your premier online resource for all things related to car diagnostic scanners and automotive tools. We offer a wealth of information, expert advice, and product comparisons to help you make informed decisions and maintain your vehicle effectively.
8.1 Comprehensive Product Information
At CAR-TOOL.EDU.VN, we provide detailed information about a wide range of car diagnostic scanners, from basic code readers to professional-grade tools. Our product listings include:
- Detailed Specifications: Comprehensive specifications for each scanner, including compatibility, features, and functions.
- High-Quality Images: Clear and detailed images of each scanner, allowing you to see the product from all angles.
- User Reviews: Real user reviews and ratings to help you understand the pros and cons of each scanner.
- Expert Reviews: In-depth reviews from our team of automotive experts, providing valuable insights and recommendations.
8.2 Expert Advice and Guidance
Our team of experienced automotive technicians and industry experts is dedicated to providing you with the best advice and guidance. We offer:
- Step-by-Step Guides: Detailed step-by-step guides on how to install and use car diagnostic scanners.
- Troubleshooting Tips: Practical troubleshooting tips for common scanner issues.
- Diagnostic Advice: Expert advice on interpreting diagnostic trouble codes and diagnosing vehicle problems.
- Maintenance Tips: Tips on how to maintain and care for your scanner to ensure optimal performance.
8.3 Product Comparisons
Choosing the right car diagnostic scanner can be overwhelming. That’s why we offer detailed product comparisons to help you make an informed decision. Our comparisons include:
- Side-by-Side Comparisons: Easy-to-read side-by-side comparisons of different scanners, highlighting their key features and differences.
- Feature Comparisons: Detailed comparisons of specific features, such as live data monitoring, bi-directional controls, and wireless connectivity.
- Price Comparisons: Up-to-date price comparisons from different retailers, ensuring you get the best deal.
8.4 Latest News and Updates
Stay up-to-date with the latest news and trends in the automotive industry with CAR-TOOL.EDU.VN. We provide:
- News Articles: Articles on new car diagnostic scanners and automotive tools.
- Industry Updates: Updates on changes in diagnostic standards and regulations.
- Product Announcements: Announcements of new product releases and promotions.
8.5 Community Forum
Connect with other automotive enthusiasts and experts in our community forum. Share your experiences, ask questions, and get advice from others.
- Benefits of Our Community Forum:
- Connect with other users and experts.
- Share your experiences and knowledge.
- Ask questions and get advice.
- Stay up-to-date with the latest trends.
8.6 Trusted Resource
CAR-TOOL.EDU.VN is a trusted resource for automotive enthusiasts and professionals alike. We are committed to providing accurate, reliable, and up-to-date information.
- Why Choose CAR-TOOL.EDU.VN?
- Comprehensive product information.
- Expert advice and guidance.
- Detailed product comparisons.
- Latest news and updates.
- Community forum.
- Trusted resource.
By using CAR-TOOL.EDU.VN, you can:
- Find the right car diagnostic scanner for your needs.
- Learn how to install and use your scanner effectively.
- Diagnose and repair vehicle issues quickly and accurately.
- Save time and money on automotive repairs.
- Stay up-to-date with the latest news and trends.
Visit CAR-TOOL.EDU.VN today and discover the benefits of having a trusted resource for all your car diagnostic needs.
9. FAQ: Installing and Using Car Diagnostic Scanners
Here are some frequently asked questions about installing and using car diagnostic scanners:
1. What is a car diagnostic scanner and why do I need one?
A car diagnostic scanner, also known as an OBD2 scanner, is a tool used to read diagnostic trouble codes (DTCs) from a vehicle’s computer. It helps identify potential issues with your car’s systems, allowing for timely and cost-effective repairs.
2. Where is the OBD2 port located in my car?
The OBD2 port is typically located under the dashboard on the driver’s side. In some vehicles, it may be hidden behind a panel or in the center console.
3. How do I connect a car diagnostic scanner to my car?
Turn off the ignition, locate the OBD2 port, align the scanner’s connector with the port, and gently push it in until it is securely connected. Then, turn the ignition to the “ON” position without starting the engine.
4. Do I need to start the engine to use a car diagnostic scanner?
No, in most cases, you only need to turn the ignition to the “ON” position without starting the engine. This provides power to the vehicle’s computer system and allows the scanner to communicate with it.
5. What are diagnostic trouble codes (DTCs)?
DTCs are alphanumeric codes stored in a vehicle’s computer system when a problem is detected. These codes indicate specific issues within the vehicle’s systems.
6. How do I read diagnostic trouble codes using a car diagnostic scanner?
Connect the scanner to the OBD2 port, turn on the scanner, navigate the menus to select the “Read Codes” function, and view the list of DTCs displayed on the screen.
7. How do I interpret diagnostic trouble codes?
Refer to the scanner’s manual or online resources for detailed information about each DTC. Combine the DTC information with the vehicle’s symptoms to narrow down the potential causes.
8. Can I clear diagnostic trouble codes with a car diagnostic scanner?
Yes, most car diagnostic scanners allow you to clear DTCs. However, it’s important to address the underlying issue before clearing the codes, as they will likely return if the problem is not resolved.
9. What are some common mistakes to avoid when using a car diagnostic scanner?
Common mistakes include incorrectly connecting the scanner, ignoring the vehicle’s manual, misinterpreting diagnostic trouble codes, not considering symptoms, clearing codes without addressing the issue, over-reliance on the scanner, and not updating the scanner.
10. Where can I find more information about car diagnostic scanners and automotive tools?
Visit CAR-TOOL.EDU.VN for comprehensive product information, expert advice, detailed product comparisons, and the latest news and updates on car diagnostic scanners and automotive tools.
Still have questions? Contact us today at +1 (641) 206-8880 or visit our location at 456 Elm Street, Dallas, TX 75201, United States. Let CAR-TOOL.EDU.VN help you with all your automotive diagnostic needs.
10. Call to Action: Get Expert Advice from CAR-TOOL.EDU.VN
Are you looking for the right car diagnostic scanner to maintain your vehicle and troubleshoot issues effectively? Do you need expert advice on how to install and use your scanner for