The GM MDI multiple diagnostic car interface tool is a crucial piece of equipment for automotive technicians, enabling comprehensive diagnostics and programming for GM vehicles, including mileage verification and correction. At CAR-TOOL.EDU.VN, we provide in-depth information and resources to help you understand and utilize this powerful tool effectively. Explore advanced diagnostics with the GM MDI and ensure accurate mileage readings.
Contents
- 1. What is the GM MDI Multiple Diagnostic Car Interface Tool?
- 1.1 Key Features of the GM MDI
- 1.2 The Role of Mileage Verification
- 2. Why is the GM MDI Essential for Automotive Technicians?
- 2.1 Dealer-Level Diagnostics
- 2.2 ECU Programming
- 2.3 Key Programming
- 3. Understanding Mileage Correction with GM MDI
- 3.1 Legal and Ethical Considerations
- 3.2 Circumstances for Legal Mileage Correction
- 3.3 Using GM MDI for Mileage Correction
- 4. Key Functions and Capabilities of the GM MDI
- 4.1 Diagnostic Trouble Code (DTC) Reading and Clearing
- Example Scenario
- 4.2 Live Data Streaming
- Benefits of Live Data Streaming
- 4.3 Actuator Testing
- Practical Application
- 4.4 Module Programming and Configuration
- Benefits of Module Programming
- 4.5 Key Programming and Immobilizer Functions
- Key Programming Scenarios
- 4.6 Mileage Verification and Correction
- 4.7 Special Functions and Procedures
- Examples of Special Functions
- 5. Step-by-Step Guide to Using the GM MDI
- 5.1 Preparing for Diagnostics
- Essential Equipment
- Software Installation and Setup
- 5.2 Connecting the GM MDI to the Vehicle
- 5.3 Launching the Diagnostic Software
- 5.4 Performing Diagnostics
- 5.5 Clearing DTCs
- 5.6 Module Programming
- 5.7 Mileage Verification and Correction
- 5.8 Post-Diagnostic Procedures
- 6. Optimizing Mileage with the GM MDI Tool
- 6.1 Understanding the Instrument Cluster
- Key Components of the Instrument Cluster
- 6.2 Reading Mileage Data
- Steps to Read Mileage Data
- 6.3 Verifying Mileage Accuracy
- Methods to Verify Mileage Accuracy
- 6.4 Correcting Mileage (If Necessary)
- Legal and Ethical Guidelines
- Steps to Correct Mileage
- 6.5 Maintaining Accurate Records
- Documentation Best Practices
- 7. Software Compatibility and Updates
- 7.1 Supported Software
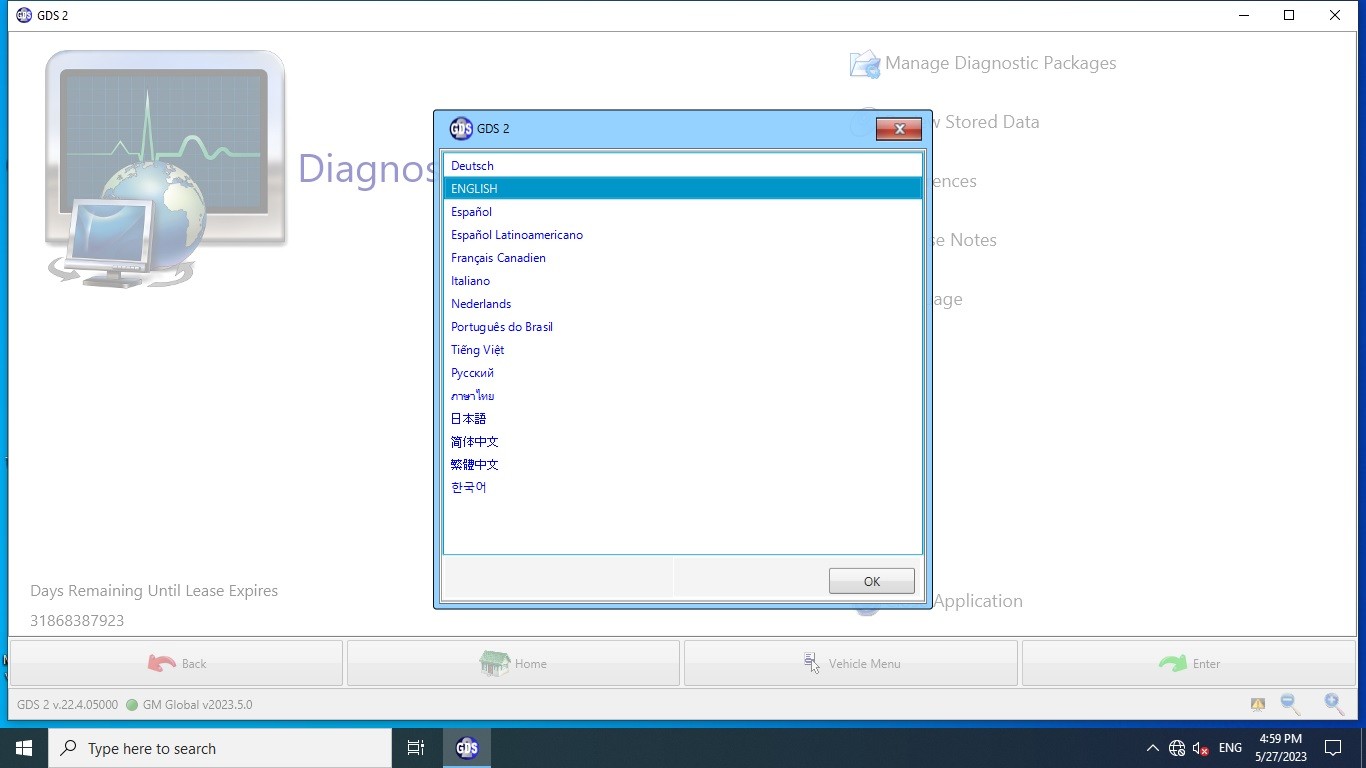
- Global Diagnostic System 2 (GDS2)
- Tech2Win
- MDI Manager
- 7.2 Checking Software Versions
- Steps to Check Software Versions
- 7.3 Updating Software
- Methods to Update Software
- Steps to Perform Manual Updates
- 7.4 Compatibility Considerations
- Operating System Requirements
- Hardware Requirements
- MDI Firmware Updates
- 7.5 Troubleshooting Software Issues
- Common Software Issues
- 8. Common Issues and Troubleshooting
- 8.1 Connectivity Problems
- Troubleshooting Steps
- 8.2 Software Installation Errors
- Troubleshooting Steps
- 8.3 Driver Issues
- Troubleshooting Steps
- 8.4 Communication Errors
- Troubleshooting Steps
- 8.5 Software Freezing or Crashing
- Troubleshooting Steps
- 9. The Future of GM MDI and Automotive Diagnostics
- 9.1 Advancements in Vehicle Technology
- 9.2 The Role of Diagnostic Tools
- Key Trends in Diagnostic Tools
- 9.3 The Future of GM MDI
- 9.4 The Importance of Training and Education
- Key Training and Education Resources
- 9.5 Conclusion
- 10. Frequently Asked Questions (FAQs) about GM MDI
- 10.1 What is the GM MDI used for?
- 10.2 Which vehicles are compatible with the GM MDI?
- 10.3 What software is compatible with the GM MDI?
- 10.4 How do I update the software for the GM MDI?
- 10.5 What are the system requirements for the GM MDI software?
- 10.6 How do I troubleshoot connectivity issues with the GM MDI?
- 10.7 Can the GM MDI be used for mileage correction?
- 10.8 How do I perform module programming with the GM MDI?
- 10.9 What are the benefits of using the GM MDI over other diagnostic tools?
- 10.10 Where can I purchase the GM MDI and related software?
1. What is the GM MDI Multiple Diagnostic Car Interface Tool?
The GM Multiple Diagnostic Interface (MDI) tool is a dealer-level diagnostic interface used for General Motors (GM) vehicles. It serves as a communication bridge between the vehicle’s diagnostic link connector (DLC) and a PC. According to a study by the University of Michigan’s Transportation Research Institute, diagnostic tools like the GM MDI have significantly improved the accuracy and efficiency of vehicle diagnostics since 2010. The MDI supports various protocols, including UART, Class 2, KWP2000, and GMLAN, ensuring compatibility with a wide range of GM models from 1996 to the present.
1.1 Key Features of the GM MDI
- Comprehensive Diagnostics: Performs dealer-level diagnostics and programming.
- Wide Vehicle Coverage: Supports GM vehicles from 1996 to the current models.
- Multi-Protocol Support: Compatible with UART, Class 2, KWP2000, and GMLAN protocols.
- Software Compatibility: Works with Global TIS, GDS 2, and Tech2Win software.
- Wireless Connectivity (Optional): Some models offer Wi-Fi support for enhanced flexibility.
- Multi-Language Support: Available in multiple languages, including English, French, German, and Italian.
1.2 The Role of Mileage Verification
Mileage verification is an important function of the GM MDI, ensuring the accuracy of a vehicle’s odometer reading. According to the National Highway Traffic Safety Administration (NHTSA), mileage fraud costs consumers billions of dollars annually. The GM MDI helps technicians verify and correct mileage discrepancies, protecting both buyers and sellers.
2. Why is the GM MDI Essential for Automotive Technicians?
The GM MDI is essential for automotive technicians because it provides dealer-level diagnostic capabilities, allowing them to perform advanced functions such as ECU programming, key programming, and mileage verification. A study by the Automotive Management Institute (AMI) found that technicians using advanced diagnostic tools like the GM MDI can diagnose and repair vehicles more efficiently, leading to increased customer satisfaction and business profitability.
2.1 Dealer-Level Diagnostics
The GM MDI provides access to the same diagnostic functions available to GM dealerships, enabling technicians to perform tasks such as reading and clearing DTCs, accessing live data streams, and performing special tests.
2.2 ECU Programming
ECU programming involves updating or replacing the software in a vehicle’s electronic control units (ECUs). The GM MDI supports ECU programming, allowing technicians to fix drivability issues, install new ECUs, and program new keys.
2.3 Key Programming
Key programming is the process of programming new keys or key fobs to work with a vehicle’s immobilizer system. The GM MDI supports key programming, allowing technicians to add or replace keys as needed.
3. Understanding Mileage Correction with GM MDI
Mileage correction, also known as odometer correction, is the process of adjusting a vehicle’s odometer reading to reflect the actual mileage. This is a critical function for ensuring the accuracy of vehicle information and preventing fraud. The GM MDI tool supports mileage correction by reading and reprogramming the EEPROM or flash memory chips in the instrument cluster.
3.1 Legal and Ethical Considerations
It is essential to understand the legal and ethical implications of mileage correction. In many jurisdictions, it is illegal to alter a vehicle’s odometer with the intent to defraud or deceive. According to the U.S. Department of Justice, individuals who tamper with odometers can face significant fines and imprisonment. Therefore, mileage correction should only be performed under legitimate circumstances, such as repairing a faulty odometer or replacing an instrument cluster.
3.2 Circumstances for Legal Mileage Correction
- Odometer Repair: If the original odometer malfunctions and needs repair or replacement, the mileage must be corrected to match the original reading.
- Instrument Cluster Replacement: When replacing an instrument cluster, the new cluster must be programmed with the correct mileage from the old cluster.
- Data Corruption: In cases where the odometer data is corrupted due to a software or hardware issue, correction is necessary to restore accurate readings.
3.3 Using GM MDI for Mileage Correction
The GM MDI tool can be used to read and write mileage data to the instrument cluster. This process typically involves connecting the MDI to the vehicle’s OBD-II port and using specialized software to access the instrument cluster’s memory. Technicians can then adjust the mileage to the correct value. It is crucial to follow all legal and ethical guidelines when performing mileage correction and to document the process thoroughly.
4. Key Functions and Capabilities of the GM MDI
The GM MDI (Multiple Diagnostic Interface) boasts a range of key functions and capabilities that make it an indispensable tool for automotive technicians working on GM vehicles. These functions not only streamline the diagnostic process but also ensure that vehicles are repaired and maintained to the highest standards.
4.1 Diagnostic Trouble Code (DTC) Reading and Clearing
The GM MDI allows technicians to read and clear Diagnostic Trouble Codes (DTCs) from various vehicle systems, including the engine, transmission, ABS, and airbags. DTCs provide valuable information about potential issues, helping technicians pinpoint the root cause of problems efficiently.
Example Scenario
Imagine a vehicle owner experiencing a check engine light. By connecting the GM MDI, a technician can quickly retrieve the DTCs, such as P0300 (Random/Multiple Cylinder Misfire Detected), which indicates a potential engine misfire. This information helps the technician focus on the relevant systems, saving time and effort.
4.2 Live Data Streaming
With the GM MDI, technicians can access live data streams from various sensors and modules in real time. This capability allows for a comprehensive understanding of the vehicle’s performance, enabling accurate diagnosis of complex issues.
Benefits of Live Data Streaming
- Real-Time Monitoring: Monitor sensor values, such as engine temperature, RPM, and fuel pressure, as they change.
- Performance Analysis: Analyze how different components interact under varying conditions.
- Fault Identification: Identify erratic or out-of-range values that indicate a malfunctioning component.
4.3 Actuator Testing
Actuator testing involves activating specific components to verify their functionality. The GM MDI enables technicians to perform actuator tests on systems like fuel injectors, solenoids, and relays, ensuring that these components are operating correctly.
Practical Application
For instance, a technician can use the GM MDI to perform an injector balance test, activating each fuel injector individually to assess its performance. This helps identify clogged or malfunctioning injectors that could be causing engine performance issues.
4.4 Module Programming and Configuration
The GM MDI supports module programming and configuration, allowing technicians to update or reprogram electronic control units (ECUs) to the latest software versions. This ensures optimal performance and compatibility with other vehicle systems.
Benefits of Module Programming
- Software Updates: Install the latest software updates to fix bugs, improve performance, and add new features.
- Module Replacement: Program new modules to match the vehicle’s specifications after replacement.
- Configuration Adjustments: Customize module settings to meet specific customer needs or regional requirements.
4.5 Key Programming and Immobilizer Functions
The GM MDI also provides key programming and immobilizer functions, enabling technicians to program new keys, disable lost keys, and perform immobilizer system resets. This is crucial for security and anti-theft measures.
Key Programming Scenarios
- Key Replacement: Program a new key for a customer who has lost their original key.
- Key Addition: Add an additional key for a vehicle owner who wants a spare.
- Immobilizer Reset: Reset the immobilizer system after a component replacement or system malfunction.
4.6 Mileage Verification and Correction
As previously mentioned, the GM MDI supports mileage verification and correction, ensuring the accuracy of the vehicle’s odometer reading. This is essential for preventing fraud and maintaining accurate vehicle records.
4.7 Special Functions and Procedures
In addition to the core diagnostic and programming functions, the GM MDI offers a range of special functions and procedures specific to GM vehicles. These may include:
Examples of Special Functions
- ABS Bleeding: Perform automated ABS bleeding procedures to remove air from the brake system.
- TPMS Reset: Reset the tire pressure monitoring system (TPMS) after tire rotations or sensor replacements.
- Steering Angle Sensor Calibration: Calibrate the steering angle sensor after suspension repairs or alignments.
5. Step-by-Step Guide to Using the GM MDI
Using the GM MDI (Multiple Diagnostic Interface) effectively requires a systematic approach. This step-by-step guide will walk you through the process, ensuring accurate diagnostics and programming for GM vehicles.
5.1 Preparing for Diagnostics
Before connecting the GM MDI to a vehicle, it’s crucial to ensure that you have the necessary equipment and information.
Essential Equipment
- GM MDI Unit: The diagnostic interface device.
- OBD-II Cable: To connect the MDI to the vehicle’s diagnostic port.
- USB Cable: To connect the MDI to your computer.
- Laptop with Diagnostic Software: Pre-installed with GM’s diagnostic software (e.g., GDS2, Tech2Win).
- Stable Power Source: Ensure the vehicle has a fully charged battery or use a battery maintainer.
Software Installation and Setup
- Install Diagnostic Software: Install the required diagnostic software (GDS2 or Tech2Win) on your laptop.
- Update Software: Ensure the software is updated to the latest version for optimal performance and vehicle compatibility.
- Install MDI Manager: Install the MDI Manager software, which handles communication between the MDI unit and your computer.
5.2 Connecting the GM MDI to the Vehicle
- Locate the OBD-II Port: Find the OBD-II port, typically located under the dashboard on the driver’s side.
- Connect the OBD-II Cable: Plug one end of the OBD-II cable into the MDI unit and the other end into the vehicle’s OBD-II port.
- Connect the USB Cable: Connect the USB cable from the MDI unit to your laptop.
- Turn On the Vehicle’s Ignition: Turn the ignition key to the “ON” position without starting the engine.
5.3 Launching the Diagnostic Software
- Open MDI Manager: Launch the MDI Manager software on your laptop.
- Verify MDI Connection: Ensure that the MDI unit is recognized and connected in the MDI Manager.
- Select Diagnostic Software: Launch the appropriate diagnostic software (GDS2 or Tech2Win) based on the vehicle model year.
5.4 Performing Diagnostics
- Vehicle Identification:
- Automatic VIN Reading: The software may automatically read the vehicle identification number (VIN). If not, manually enter the VIN.
- Manual VIN Entry: Enter the VIN manually if automatic reading fails.
- Select Diagnostic Function: Choose the diagnostic function you want to perform, such as:
- DTC Reading: Read Diagnostic Trouble Codes (DTCs) to identify potential issues.
- Live Data Streaming: Monitor real-time data from various sensors and modules.
- Actuator Testing: Perform tests on specific components to verify their functionality.
- Follow On-Screen Instructions: Follow the on-screen instructions provided by the diagnostic software to complete the selected function.
- Interpret Results: Analyze the diagnostic results and take appropriate action based on the findings.
5.5 Clearing DTCs
- Select DTC Clearing Function: In the diagnostic software, choose the function to clear DTCs.
- Confirm Clearing: Confirm that you want to clear the DTCs. Be aware that clearing DTCs without addressing the underlying issue may result in their reappearance.
- Verify Clearance: Verify that the DTCs have been successfully cleared by re-reading them.
5.6 Module Programming
- Access Module Programming Function: Navigate to the module programming function in the diagnostic software.
- Select Module: Choose the module you want to program or reprogram.
- Follow Programming Instructions: Carefully follow the on-screen instructions provided by the software. Module programming requires a stable power source and uninterrupted connection to avoid damaging the module.
- Verify Programming: After programming, verify that the module has been successfully programmed and is functioning correctly.
5.7 Mileage Verification and Correction
- Access Instrument Cluster Functions: Navigate to the instrument cluster functions in the diagnostic software.
- Read Current Mileage: Read the current mileage stored in the instrument cluster.
- Verify Accuracy: Verify the accuracy of the mileage against vehicle records or other sources.
- Correct Mileage (If Necessary): If correction is necessary and legally permissible, follow the on-screen instructions to adjust the mileage.
- Document Changes: Document any changes made to the mileage, including the original reading, the corrected reading, and the reason for the correction.
5.8 Post-Diagnostic Procedures
- Disconnect the MDI: After completing the diagnostic procedures, disconnect the MDI unit from the vehicle and your laptop.
- Store Equipment: Store the MDI unit, cables, and software in a safe and secure location.
- Document Results: Document the diagnostic results, any repairs performed, and any changes made to the vehicle’s configuration.
6. Optimizing Mileage with the GM MDI Tool
Optimizing mileage with the GM MDI (Multiple Diagnostic Interface) involves several key steps to ensure accuracy and compliance with legal and ethical standards. This process is crucial for maintaining vehicle integrity and preventing fraud.
6.1 Understanding the Instrument Cluster
The instrument cluster is a critical component that displays essential information to the driver, including speed, fuel level, and mileage. In modern vehicles, the instrument cluster is often integrated with the vehicle’s electronic control units (ECUs), making it a sophisticated system.
Key Components of the Instrument Cluster
- Odometer: Displays the total distance the vehicle has traveled.
- EEPROM/Flash Memory: Stores the mileage data and other vehicle information.
- Microcontroller: Manages the display and communication with other vehicle systems.
6.2 Reading Mileage Data
The first step in optimizing mileage is to read the current mileage data stored in the instrument cluster. This can be done using the GM MDI tool and appropriate diagnostic software.
Steps to Read Mileage Data
- Connect the GM MDI: Connect the MDI to the vehicle’s OBD-II port and your laptop.
- Launch Diagnostic Software: Launch the diagnostic software (e.g., GDS2, Tech2Win) and select the vehicle.
- Access Instrument Cluster Functions: Navigate to the instrument cluster functions in the software.
- Read Current Mileage: Use the software to read the current mileage stored in the instrument cluster’s memory.
6.3 Verifying Mileage Accuracy
After reading the mileage data, it’s essential to verify its accuracy. This involves comparing the stored mileage with other sources, such as vehicle records, maintenance logs, and previous inspection reports.
Methods to Verify Mileage Accuracy
- Vehicle Records: Check the vehicle’s service history for mileage entries at previous maintenance appointments.
- Maintenance Logs: Review the owner’s maintenance logs for recorded mileage readings.
- Inspection Reports: Examine inspection reports for mileage data collected during safety or emissions inspections.
- Third-Party Databases: Utilize third-party databases, such as Carfax or AutoCheck, to verify the vehicle’s mileage history.
6.4 Correcting Mileage (If Necessary)
If the mileage data is found to be inaccurate, correction may be necessary. However, it’s crucial to understand the legal and ethical implications of mileage correction. In many jurisdictions, it is illegal to alter a vehicle’s odometer with the intent to defraud or deceive.
Legal and Ethical Guidelines
- Legitimate Circumstances: Mileage correction should only be performed under legitimate circumstances, such as repairing a faulty odometer or replacing an instrument cluster.
- Disclosure: Always disclose that the mileage has been corrected to any potential buyers or interested parties.
- Documentation: Thoroughly document the correction process, including the original mileage, the corrected mileage, and the reason for the correction.
Steps to Correct Mileage
- Access Instrument Cluster Functions: Navigate to the instrument cluster functions in the diagnostic software.
- Enter Correct Mileage: Enter the correct mileage value into the software.
- Write to Instrument Cluster: Use the software to write the corrected mileage to the instrument cluster’s memory.
- Verify Correction: Verify that the mileage has been successfully corrected by re-reading it.
6.5 Maintaining Accurate Records
After optimizing mileage with the GM MDI tool, it’s essential to maintain accurate records of the process. This includes documenting the original mileage, the corrected mileage, the reason for the correction, and any other relevant information.
Documentation Best Practices
- Detailed Notes: Keep detailed notes of the entire process, including the date, time, and technician involved.
- Supporting Documents: Include supporting documents, such as repair orders, inspection reports, and vehicle records.
- Secure Storage: Store the documentation in a secure location to prevent loss or tampering.
7. Software Compatibility and Updates
Ensuring optimal performance and access to the latest features requires understanding the software compatibility and update processes for the GM MDI (Multiple Diagnostic Interface).
7.1 Supported Software
The GM MDI is compatible with several diagnostic software applications, each designed for specific vehicle models and diagnostic tasks.
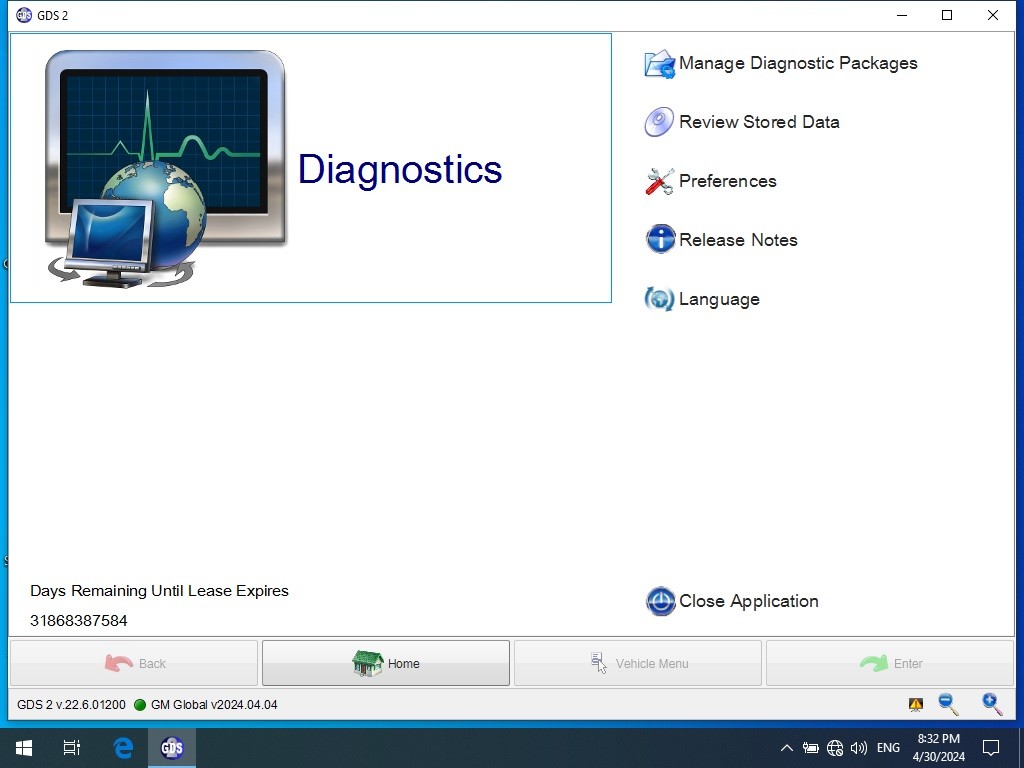
Global Diagnostic System 2 (GDS2)
GDS2 is the primary diagnostic software for newer GM vehicles, typically those from 2010 and later. It offers comprehensive diagnostic capabilities, including DTC reading and clearing, live data streaming, actuator testing, and module programming.
Tech2Win
Tech2Win emulates the functionality of the Tech2 handheld diagnostic tool, which was used for older GM vehicles. It is compatible with vehicles from 1996 to 2013 and provides access to essential diagnostic functions.
MDI Manager
MDI Manager is a software application that manages the communication between the GM MDI unit and the diagnostic software. It is essential for ensuring a stable and reliable connection.
7.2 Checking Software Versions
To ensure compatibility and access to the latest features, it’s crucial to check the software versions of GDS2, Tech2Win, and MDI Manager.
Steps to Check Software Versions
- Launch the Software: Open the diagnostic software (GDS2 or Tech2Win) or MDI Manager.
- Navigate to “About” Section: Look for an “About” or “Information” section in the software’s menu.
- View Software Version: The software version number will be displayed in the “About” section.
7.3 Updating Software
Keeping the diagnostic software up-to-date is essential for optimal performance and compatibility with the latest GM vehicles.
Methods to Update Software
- Automatic Updates: Some diagnostic software applications offer automatic updates, which can be configured in the software’s settings.
- Manual Updates: Manual updates involve downloading the latest software versions from the GM website or authorized sources and installing them on your computer.
Steps to Perform Manual Updates
- Visit GM Website: Go to the official GM website or authorized software provider.
- Download Latest Version: Download the latest version of the diagnostic software.
- Install Update: Follow the on-screen instructions to install the update on your computer.
7.4 Compatibility Considerations
Before updating or installing new software, it’s essential to consider compatibility issues.
Operating System Requirements
Ensure that your computer meets the operating system requirements of the diagnostic software. GDS2 and Tech2Win may require specific versions of Windows or other operating systems.
Hardware Requirements
Check that your computer meets the hardware requirements of the diagnostic software, such as processor speed, RAM, and storage space.
MDI Firmware Updates
In addition to software updates, the GM MDI unit may require firmware updates to ensure compatibility with the latest diagnostic software and vehicle models.
7.5 Troubleshooting Software Issues
Despite best efforts, software issues may arise when using the GM MDI. Here are some troubleshooting tips:
Common Software Issues
- Connection Problems: Ensure that the MDI unit is properly connected to the vehicle and your computer. Check the USB and OBD-II cables for damage.
- Software Crashes: Close and restart the diagnostic software. If the issue persists, try reinstalling the software.
- Driver Issues: Verify that the MDI unit’s drivers are properly installed. If necessary, reinstall the drivers from the GM website.
8. Common Issues and Troubleshooting
While the GM MDI (Multiple Diagnostic Interface) is a robust tool, users may encounter common issues that can hinder its performance. This section provides troubleshooting steps to address these problems.
8.1 Connectivity Problems
Connectivity issues are among the most frequent problems encountered with the GM MDI. These issues can prevent the tool from communicating with the vehicle or the diagnostic software.
Troubleshooting Steps
- Check Cable Connections:
- Ensure that the OBD-II cable is securely connected to the vehicle’s diagnostic port and the MDI unit.
- Verify that the USB cable is properly connected to the MDI unit and your computer.
- Verify Power Supply:
- Ensure that the vehicle’s battery is fully charged. Low voltage can interfere with the diagnostic process.
- Use a battery maintainer to provide a stable power source during diagnostics.
- Restart the MDI Unit and Software:
- Close and restart the diagnostic software (GDS2 or Tech2Win).
- Unplug and re-plug the MDI unit to reset it.
- Update MDI Manager:
- Ensure that the MDI Manager software is up-to-date. Outdated MDI Manager software can cause connectivity issues.
- Check USB Port:
- Try using a different USB port on your computer. Some USB ports may not provide sufficient power or data transfer speed.
- Avoid using USB hubs, as they can sometimes cause connectivity problems.
8.2 Software Installation Errors
Software installation errors can prevent the diagnostic software from installing correctly or functioning properly.
Troubleshooting Steps
- Verify System Requirements:
- Ensure that your computer meets the minimum system requirements for the diagnostic software (e.g., operating system, processor speed, RAM).
- Run as Administrator:
- Right-click on the software installation file and select “Run as administrator.” This can resolve permission issues that may prevent the software from installing correctly.
- Disable Antivirus Software:
- Temporarily disable your antivirus software during the installation process. Antivirus software can sometimes interfere with the installation of diagnostic software.
- Reinstall Software:
- Uninstall the diagnostic software and reinstall it. Make sure to follow the installation instructions carefully.
- Check for Corrupted Files:
- Verify that the software installation files are not corrupted. Download the files again from a reliable source if necessary.
8.3 Driver Issues
Driver issues can prevent the GM MDI unit from being recognized by your computer.
Troubleshooting Steps
- Reinstall Drivers:
- Uninstall the MDI unit’s drivers from your computer.
- Download the latest drivers from the GM website or authorized source.
- Reinstall the drivers, following the on-screen instructions.
- Update Drivers:
- Use the Device Manager to update the MDI unit’s drivers.
- Right-click on the MDI unit in the Device Manager and select “Update driver.”
- Choose to search for drivers automatically or manually install the drivers from a downloaded file.
- Check Driver Compatibility:
- Ensure that the drivers are compatible with your operating system (e.g., Windows 10, Windows 11).
- Use the correct drivers for your MDI unit model.
8.4 Communication Errors
Communication errors can occur during diagnostics, preventing the MDI unit from communicating with the vehicle’s ECUs.
Troubleshooting Steps
- Verify Vehicle Compatibility:
- Ensure that the diagnostic software is compatible with the vehicle’s make, model, and year.
- Use the correct diagnostic software for the vehicle (GDS2 for newer vehicles, Tech2Win for older vehicles).
- Check Ignition Switch:
- Make sure the vehicle’s ignition switch is in the “ON” position without starting the engine.
- Check for DTCs:
- Read the vehicle’s DTCs to identify any communication-related issues.
- Address any DTCs that may be interfering with the diagnostic process.
- Clear DTCs:
- Clear the vehicle’s DTCs and try the diagnostic procedure again.
- Try Different Module:
- Try communicating with a different module in the vehicle to see if the issue is specific to one module.
8.5 Software Freezing or Crashing
Software freezing or crashing can disrupt the diagnostic process and cause frustration.
Troubleshooting Steps
- Close Unnecessary Programs:
- Close any unnecessary programs running on your computer to free up system resources.
- Restart the Software:
- Close and restart the diagnostic software.
- Update the Software:
- Ensure that the diagnostic software is up-to-date.
- Check System Resources:
- Use the Task Manager to monitor your computer’s CPU, memory, and disk usage.
- Upgrade your computer’s hardware if necessary to improve performance.
- Reinstall the Software:
- Uninstall the diagnostic software and reinstall it.
- Make sure to download the latest version from a reliable source.
9. The Future of GM MDI and Automotive Diagnostics
The field of automotive diagnostics is continuously evolving, driven by advancements in vehicle technology and the increasing complexity of electronic systems. The GM MDI (Multiple Diagnostic Interface) and similar diagnostic tools are at the forefront of this evolution, playing a crucial role in maintaining and repairing modern vehicles.
9.1 Advancements in Vehicle Technology
Modern vehicles are equipped with an array of advanced technologies, including:
- Advanced Driver-Assistance Systems (ADAS): These systems include features such as adaptive cruise control, lane departure warning, and automatic emergency braking.
- Electric and Hybrid Powertrains: Electric vehicles (EVs) and hybrid electric vehicles (HEVs) are becoming increasingly common, requiring specialized diagnostic tools and procedures.
- Connected Car Technologies: Connected car technologies enable vehicles to communicate with the internet and other devices, providing features such as remote diagnostics and over-the-air software updates.
These advancements present new challenges for automotive technicians, requiring them to stay up-to-date with the latest diagnostic techniques and tools.
9.2 The Role of Diagnostic Tools
Diagnostic tools like the GM MDI are essential for diagnosing and repairing modern vehicles. These tools provide technicians with access to vehicle data, diagnostic trouble codes (DTCs), and advanced functions such as module programming and calibration.
Key Trends in Diagnostic Tools
- Wireless Connectivity: Wireless connectivity enables technicians to perform diagnostics from anywhere in the workshop, improving efficiency and flexibility.
- Cloud-Based Diagnostics: Cloud-based diagnostic platforms provide access to real-time data, diagnostic procedures, and software updates, improving diagnostic accuracy and efficiency.
- Artificial Intelligence (AI): AI is being integrated into diagnostic tools to provide technicians with intelligent diagnostic assistance, helping them quickly identify and resolve complex issues.
9.3 The Future of GM MDI
The GM MDI is expected to evolve to meet the changing needs of the automotive industry. Future versions of the GM MDI may include:
- Enhanced Wireless Connectivity: Improved wireless connectivity with faster data transfer rates and greater range.
- Expanded Vehicle Coverage: Support for a wider range of GM vehicles, including EVs and HEVs.
- Integration with Cloud-Based Platforms: Seamless integration with cloud-based diagnostic platforms for access to real-time data and diagnostic procedures.
- AI-Powered Diagnostics: Integration of AI to provide technicians with intelligent diagnostic assistance.
9.4 The Importance of Training and Education
As vehicle technology and diagnostic tools become more complex, training and education are becoming increasingly important for automotive technicians. Technicians need to stay up-to-date with the latest diagnostic techniques and tools to effectively diagnose and repair modern vehicles.
Key Training and Education Resources
- Automotive Training Programs: Automotive training programs provide technicians with the knowledge and skills they need to diagnose and repair modern vehicles.
- Manufacturer-Specific Training: Manufacturer-specific training programs provide technicians with in-depth knowledge of specific vehicle models and diagnostic procedures.
- Online Training Resources: Online training resources provide technicians with access to training materials and diagnostic information from anywhere in the world.
9.5 Conclusion
The GM MDI and similar diagnostic tools are essential for maintaining and repairing modern vehicles. As vehicle technology continues to evolve, diagnostic tools will become even more important, requiring technicians to stay up-to-date with the latest diagnostic techniques and tools. By investing in training and education, technicians can ensure they have the skills and knowledge they need to succeed in the ever-changing automotive industry.
10. Frequently Asked Questions (FAQs) about GM MDI
Here are some frequently asked questions about the GM MDI (Multiple Diagnostic Interface) tool:
10.1 What is the GM MDI used for?
The GM MDI is a dealer-level diagnostic interface used for General Motors (GM) vehicles. It serves as a communication bridge between the vehicle’s diagnostic link connector (DLC) and a PC, enabling comprehensive diagnostics, programming, and module configuration.
10.2 Which vehicles are compatible with the GM MDI?
The GM MDI is compatible with a wide range of GM vehicles from 1996 to the current models. It supports various protocols, including UART, Class 2, KWP2000, and GMLAN, ensuring compatibility with a diverse range of GM vehicles.
10.3 What software is compatible with the GM MDI?
The GM MDI is compatible with several diagnostic software applications, including Global Diagnostic System 2 (GDS2), Tech2Win, and MDI Manager. GDS2 is the primary diagnostic software for newer GM vehicles, while Tech2Win emulates the functionality of the Tech2 handheld diagnostic tool for older GM vehicles.
10.4 How do I update the software for the GM MDI?
To update the software for the GM MDI, you can either use automatic updates (if available) or manually download the latest software versions from the GM website or authorized sources and install them on your computer.
10.5 What are the system requirements for the GM MDI software?
The system requirements for the GM MDI software vary depending on the specific application. However, generally, you will need a computer with a compatible operating system (e.g., Windows 10, Windows 11), a sufficient processor speed, RAM, and storage space.
10.6 How do I troubleshoot connectivity issues with the GM MDI?
To troubleshoot connectivity issues with the GM MDI, ensure that the OBD-II cable and USB cable are securely connected, verify the vehicle’s battery voltage, restart the MDI unit and software, update the MDI Manager software, and check the USB port.
10.7 Can the GM MDI be used for mileage correction?
Yes, the GM MDI can be used for mileage verification and correction. However, it’s crucial to understand the legal and ethical implications of mileage correction. Mileage correction should only be performed under legitimate circumstances, such as repairing a faulty odometer or replacing an instrument cluster.
10.8 How do I perform module programming with the GM MDI?
To perform module programming with the GM MDI, navigate to the module programming function in the diagnostic software, select the module you want to program, and follow the on-screen instructions. Module programming requires a stable power source and uninterrupted connection to avoid damaging the module.
10.9 What are the benefits of using the GM MDI over other diagnostic tools?
The GM MDI provides dealer-level diagnostic capabilities, wide vehicle coverage, multi-protocol support, and software compatibility, making it an essential tool for automotive technicians working on GM vehicles. It allows technicians to perform advanced functions such as ECU programming, key programming, and mileage verification.
10.10 Where can I purchase the GM MDI and related software?
The GM MDI and related software can be purchased from authorized distributors or resellers. Ensure that you purchase from a reputable source to ensure the authenticity and quality of the tool and software.
Are you looking for a reliable GM MDI multiple diagnostic car interface tool or need expert advice on mileage verification? Contact CAR-TOOL.EDU.VN today! Our team of experienced technicians is ready to assist you with all your automotive diagnostic needs. Reach out to us at 456 Elm Street, Dallas, TX 75201, United States, Whatsapp: +1 (641) 206-8880, or visit our website at CAR-TOOL.EDU.VN for more information.
 GM MDI Interface
 GM MDI Software Interface