Diagnostic Car Check Engine Light illuminates when your vehicle’s onboard computer detects a potential issue, signaling the need for a diagnostic check; CAR-TOOL.EDU.VN is here to shed light on the check engine light and diagnostic car checks, helping you understand the underlying issues, potential solutions, and the tools you might need to resolve them, ultimately optimizing your car’s performance and longevity. We’ll cover everything from interpreting diagnostic trouble codes (DTCs) to understanding sensor malfunctions and performing routine maintenance, ensuring that you’re well-informed about automotive diagnostics and engine performance.
Contents
- 1. Understanding the Diagnostic Car Check Engine Light: An Overview
- 1.1. The Purpose of the Check Engine Light
- 1.2. How the Check Engine Light Works
- 1.3. Types of Check Engine Light Indicators
- 1.4. Why Immediate Attention Matters
- 2. Decoding Diagnostic Trouble Codes (DTCs): A Comprehensive Guide
- 2.1. What Are Diagnostic Trouble Codes?
- 2.2. Structure of a DTC
- 2.3. Common DTC Examples and Their Meanings
- 2.4. Tools for Reading DTCs
- 2.5. Where to Find Reliable Code Definitions
- 2.6. The Importance of Accurate Interpretation
- 2.7. Limitations of DTCs
- 3. Common Causes of the Diagnostic Car Check Engine Light Illuminating
- 3.1. Loose or Damaged Gas Cap
- 3.2. Oxygen Sensor Failure
- 3.3. Catalytic Converter Issues
- 3.4. Mass Airflow (MAF) Sensor Problems
- 3.5. Spark Plug or Ignition Coil Issues
- 3.6. Vacuum Leaks
- 3.7. Evaporative Emission Control System (EVAP) Leaks
- 3.8. Fuel Injector Problems
- 4. Performing a Diagnostic Car Check: Step-by-Step Guide
- 4.1. Gather Your Tools
- 4.2. Read the Diagnostic Trouble Codes
- 4.3. Research the DTCs
- 4.4. Inspect Common Problem Areas
- 4.5. Perform Basic Maintenance
- 4.6. Clear the DTCs and Test Drive
- 4.7. Monitor System Performance
- 4.8. Seek Professional Help If Needed
- 5. Essential Tools for Diagnostic Car Checks
- 5.1. OBD-II Scanner
- 5.2. Multimeter
- 5.3. Fuel Pressure Tester
- 5.4. Compression Tester
- 5.5. Vacuum Gauge
- 5.6. Timing Light
- 5.7. Smoke Machine
- 5.8. Diagnostic Software
- 5.9. Inspection Camera
- 6. When to Seek Professional Help with Your Diagnostic Car Check Engine Light
- 6.1. Complex Diagnostic Trouble Codes (DTCs)
- 6.2. Flashing Check Engine Light
- 6.3. Persistent Check Engine Light
- 6.4. Lack of Diagnostic Tools
- 6.5. Unfamiliarity with Vehicle Systems
- 6.6. Safety Concerns
- 6.7. Emissions Test Failure
- 6.8. Major Repairs
- 6.9. Warranty Concerns
- 6.10. Peace of Mind
- 7. Tips for Maintaining Your Car to Prevent Check Engine Light Issues
- 7.1. Follow the Recommended Maintenance Schedule
- 7.2. Use Quality Fluids and Parts
- 7.3. Check and Replace Filters Regularly
- 7.4. Inspect and Maintain the Ignition System
- 7.5. Monitor Tire Pressure and Condition
- 7.6. Check and Maintain the Braking System
- 7.7. Inspect and Maintain the Cooling System
- 7.8. Inspect and Maintain the Exhaust System
- 7.9. Keep the Engine Clean
- 7.10. Address Issues Promptly
- 8. Finding Reliable Automotive Diagnostic Services
- 8.1. Ask for Recommendations
- 8.2. Check Online Reviews
- 8.3. Look for Certifications
- 8.4. Inquire About Experience and Expertise
- 8.5. Ask About Diagnostic Equipment
- 8.6. Request an Estimate
- 8.7. Get a Second Opinion
- 8.8. Check for Warranty
- 8.9. Observe the Shop’s Cleanliness and Organization
- 8.10. Trust Your Gut
- 9. Understanding the Costs Associated with Diagnostic Car Check Engine Light Repairs
- 9.1. Diagnostic Fee
- 9.2. Gas Cap Replacement
- 9.3. Oxygen Sensor Replacement
- 9.4. Catalytic Converter Replacement
- 9.5. Mass Airflow (MAF) Sensor Replacement
- 9.6. Spark Plug and Ignition Coil Replacement
- 9.7. Vacuum Leak Repair
- 9.8. Evaporative Emission Control System (EVAP) Repair
- 9.9. Fuel Injector Replacement
- 9.10. Engine Repair or Replacement
- 10. The Future of Diagnostic Car Check Engine Light Technology
- 10.1. Over-the-Air (OTA) Updates
- 10.2. Enhanced Connectivity
- 10.3. Artificial Intelligence (AI) and Machine Learning (ML)
- 10.4. Advanced Sensor Technology
- 10.5. Predictive Maintenance
- 10.6. Augmented Reality (AR)
- 10.7. Blockchain Technology
- 10.8. Electric Vehicle (EV) Diagnostics
- 10.9. Remote Diagnostics
- 10.10. Standardized Diagnostic Interfaces
- FAQ: Understanding the Diagnostic Car Check Engine Light
- What does it mean when my diagnostic car check engine light comes on?
1. Understanding the Diagnostic Car Check Engine Light: An Overview
What does a diagnostic car check engine light actually mean? The diagnostic car check engine light (CEL), often referred to as the “check engine” or “service engine soon” light, is a crucial component of your vehicle’s onboard diagnostic (OBD) system; according to the Environmental Protection Agency (EPA), all cars and light trucks manufactured since 1996 are equipped with OBD-II systems to monitor engine performance and emissions. When this light appears on your dashboard, it indicates that the vehicle’s computer has detected a malfunction in one or more of its systems. But what does it mean, what causes it, and how should you respond?
1.1. The Purpose of the Check Engine Light
The primary purpose of the diagnostic car check engine light is to alert you to potential problems affecting your vehicle’s engine, emissions control systems, or other vital components. It serves as an early warning system, allowing you to address issues before they lead to significant damage or costly repairs. According to a study by the National Institute for Automotive Service Excellence (ASE), addressing issues promptly can prevent up to 50% of major engine failures.
1.2. How the Check Engine Light Works
The check engine light is connected to a network of sensors and computers that constantly monitor various aspects of your vehicle’s operation. These sensors track parameters such as engine temperature, fuel mixture, oxygen levels in the exhaust, and the performance of the catalytic converter. When one of these sensors detects a reading outside of the acceptable range, it triggers the check engine light.
 Diagnostic Car Check Engine Light
1.3. Types of Check Engine Light Indicators
The check engine light can appear in different ways, each indicating a varying level of urgency:
- Solid Light: A steady, illuminated light usually indicates a non-critical issue that requires attention. While it’s generally safe to continue driving, it’s best to have the vehicle inspected soon.
- Flashing Light: A flashing light signifies a more severe problem, often related to engine misfires. Continued driving in this condition can cause damage to the catalytic converter and other components. It’s advisable to stop driving and seek immediate professional assistance.
1.4. Why Immediate Attention Matters
Ignoring the check engine light can lead to several negative consequences:
- Reduced Fuel Efficiency: Engine problems can cause your vehicle to burn more fuel than necessary.
- Increased Emissions: Malfunctioning emissions control systems can result in higher levels of pollutants being released into the atmosphere.
- Further Damage: Minor issues can quickly escalate into major problems, leading to costly repairs.
- Safety Risks: Some problems that trigger the check engine light can affect vehicle safety, such as issues with the braking or steering systems.
2. Decoding Diagnostic Trouble Codes (DTCs): A Comprehensive Guide
How can diagnostic trouble codes help me understand what is wrong with my car? Decoding diagnostic trouble codes (DTCs) is essential for understanding what’s triggering your check engine light, as these codes provide specific information about the nature and location of the problem; according to the Society of Automotive Engineers (SAE), standardized DTCs ensure that mechanics and technicians can accurately diagnose vehicle issues regardless of the make or model. Here’s a detailed guide on how to interpret these codes.
2.1. What Are Diagnostic Trouble Codes?
Diagnostic Trouble Codes (DTCs) are alphanumeric codes that your vehicle’s onboard computer generates when it detects a problem. These codes are designed to help technicians quickly identify and resolve issues, offering a standardized way to diagnose problems across different vehicle makes and models. The codes typically start with a letter followed by four or five numbers.
2.2. Structure of a DTC
Each character in a DTC provides specific information:
- First Character (Letter): Indicates the system affected:
- P: Powertrain (engine, transmission)
- B: Body (airbags, power windows)
- C: Chassis (ABS, suspension)
- U: Network (communication systems)
- Second Character (Number): Identifies whether the code is generic or manufacturer-specific:
- 0: Generic (SAE) code applicable to all vehicles
- 1: Manufacturer-specific code
- Third Character (Number): Specifies the subsystem:
- 0: Fuel and air metering and auxiliary emission controls
- 1: Fuel and air metering
- 2: Fuel and air metering (injector circuit)
- 3: Ignition system or misfire
- 4: Auxiliary emission controls
- 5: Vehicle speed controls and idle control system
- 6: Computer output system
- 7: Transmission
- 8: Transmission
- Fourth and Fifth Characters (Numbers): Provide specific information about the fault.
2.3. Common DTC Examples and Their Meanings
Here are some common DTCs and their common meanings:
- P0171 – System Too Lean (Bank 1): Indicates that the engine is receiving too much air or not enough fuel.
- P0300 – Random/Multiple Cylinder Misfire Detected: Signifies that the engine is experiencing misfires in multiple cylinders or a random misfire.
- P0420 – Catalyst System Efficiency Below Threshold (Bank 1): Points to a problem with the catalytic converter’s efficiency.
- P0442 – Evaporative Emission Control System Leak Detected (Small Leak): Indicates a small leak in the evaporative emission control system.
- P0455 – Evaporative Emission Control System Leak Detected (Gross Leak): Indicates a large leak in the evaporative emission control system.
2.4. Tools for Reading DTCs
To read DTCs, you’ll need an OBD-II scanner or code reader. These devices connect to the OBD-II port, typically located under the dashboard on the driver’s side. Here’s how to use a scanner:
- Connect the Scanner: Plug the scanner into the OBD-II port.
- Turn on the Ignition: Turn the ignition to the “on” position without starting the engine.
- Read the Codes: Follow the scanner’s instructions to read the stored DTCs.
- Record the Codes: Write down all the codes displayed by the scanner.
- Interpret the Codes: Use a reliable online database or repair manual to look up the meaning of each code.
2.5. Where to Find Reliable Code Definitions
Several resources can help you find reliable DTC definitions:
- Vehicle Repair Manuals: Provide detailed information specific to your vehicle’s make and model.
- Online Databases: Websites like OBD-Codes.com and AutoCodes.com offer extensive DTC definitions.
- Professional Mechanics: Can provide expert interpretation of DTCs and offer diagnostic services.
2.6. The Importance of Accurate Interpretation
Accurately interpreting DTCs is crucial for diagnosing and fixing vehicle problems correctly. A misread or misunderstood code can lead to unnecessary repairs or overlooking the actual issue. According to a study by AAA, misdiagnosed vehicle problems cost consumers an estimated $11.5 billion each year.
2.7. Limitations of DTCs
While DTCs provide valuable information, they have limitations:
- DTCs Don’t Always Pinpoint the Exact Problem: A code might indicate a general area of concern rather than the specific component at fault.
- Multiple Codes Can Complicate Diagnosis: Several codes may be related, making it challenging to identify the primary issue.
- Environmental Factors: Weather conditions and other external factors can influence sensor readings and trigger false codes.
3. Common Causes of the Diagnostic Car Check Engine Light Illuminating
What are the most common culprits behind a diagnostic car check engine light? The diagnostic car check engine light can be triggered by a variety of issues, ranging from minor inconveniences to major mechanical problems; according to a survey by CarMD, the most common reasons for a check engine light include issues with the oxygen sensor, catalytic converter, and mass airflow (MAF) sensor. Let’s explore some of the most frequent causes.
3.1. Loose or Damaged Gas Cap
One of the simplest and most common reasons for the check engine light to come on is a loose or damaged gas cap. The gas cap seals the fuel system, preventing fuel vapors from escaping into the atmosphere. When the gas cap is loose, cracked, or missing, it can cause a pressure imbalance in the fuel system, triggering the check engine light.
- How to Diagnose: Check the gas cap for any visible damage or cracks. Ensure it is properly tightened after each refueling.
- Solution: Replace the gas cap if it’s damaged or worn. Ensure it is securely tightened after each fill-up.
3.2. Oxygen Sensor Failure
The oxygen sensor measures the amount of oxygen in the exhaust gas to help the engine control unit (ECU) regulate the air-fuel mixture. A faulty oxygen sensor can cause the engine to run inefficiently, leading to reduced fuel economy and increased emissions.
- How to Diagnose: Use an OBD-II scanner to check for oxygen sensor-related DTCs. Monitor the sensor’s performance using a live data stream from the scanner.
- Solution: Replace the faulty oxygen sensor. Ensure you use a high-quality replacement sensor that is compatible with your vehicle.
3.3. Catalytic Converter Issues
The catalytic converter reduces harmful emissions by converting pollutants into less toxic substances. If the catalytic converter is damaged or failing, it can trigger the check engine light.
- How to Diagnose: Look for DTCs related to catalytic converter efficiency. Inspect the converter for physical damage or excessive heat.
- Solution: Replace the catalytic converter if it’s damaged or failing. Address any underlying issues that may have caused the converter to fail, such as engine misfires or oil leaks.
3.4. Mass Airflow (MAF) Sensor Problems
The MAF sensor measures the amount of air entering the engine, which is essential for calculating the correct fuel mixture. A dirty or faulty MAF sensor can cause the engine to run poorly, resulting in reduced performance and fuel economy.
- How to Diagnose: Check for MAF sensor-related DTCs. Inspect the sensor for dirt or debris.
- Solution: Clean the MAF sensor with a specialized cleaner. Replace the sensor if cleaning doesn’t resolve the issue.
3.5. Spark Plug or Ignition Coil Issues
Spark plugs ignite the air-fuel mixture in the engine’s cylinders. Worn or damaged spark plugs can cause misfires, leading to reduced performance and increased emissions. Ignition coils provide the high-voltage spark needed to ignite the fuel mixture, and a failing coil can also cause misfires.
- How to Diagnose: Check for misfire-related DTCs. Inspect the spark plugs for wear or damage. Test the ignition coils for proper function.
- Solution: Replace worn or damaged spark plugs. Replace any failing ignition coils.
3.6. Vacuum Leaks
Vacuum leaks can disrupt the air-fuel mixture, causing the engine to run lean and trigger the check engine light. Vacuum leaks can occur in various locations, such as hoses, gaskets, and intake manifolds.
- How to Diagnose: Listen for hissing sounds near the engine. Use a smoke machine to locate the source of the leak.
- Solution: Replace any damaged or cracked vacuum hoses. Tighten or replace any loose or damaged fittings.
3.7. Evaporative Emission Control System (EVAP) Leaks
The EVAP system prevents fuel vapors from escaping into the atmosphere. Leaks in the EVAP system can trigger the check engine light.
- How to Diagnose: Check for EVAP-related DTCs. Inspect the fuel tank, fuel lines, and EVAP canister for leaks.
- Solution: Replace any damaged or leaking components in the EVAP system. Ensure the fuel cap is properly tightened.
3.8. Fuel Injector Problems
Fuel injectors spray fuel into the engine’s cylinders. A clogged or faulty fuel injector can cause the engine to run poorly, leading to reduced performance and fuel economy.
- How to Diagnose: Check for fuel injector-related DTCs. Listen for unusual noises from the fuel injectors.
- Solution: Clean the fuel injectors with a fuel injector cleaner. Replace any faulty fuel injectors.
4. Performing a Diagnostic Car Check: Step-by-Step Guide
How do I perform a diagnostic car check myself? Performing a diagnostic car check involves a systematic approach to identify and resolve the issues triggering the check engine light; according to the National Automotive Service Task Force (NASTF), following a structured diagnostic process can save time and reduce the likelihood of misdiagnosis. Here’s a step-by-step guide to conducting a diagnostic check.
4.1. Gather Your Tools
Before you begin, gather the necessary tools and equipment:
- OBD-II Scanner: Essential for reading diagnostic trouble codes (DTCs).
- Vehicle Repair Manual: Provides specific information about your vehicle’s systems and components.
- Basic Hand Tools: Wrenches, sockets, screwdrivers, and pliers for accessing and inspecting components.
- Multimeter: For testing electrical circuits and sensors.
- Cleaning Supplies: MAF sensor cleaner, throttle body cleaner, and a clean rag.
- Personal Protective Equipment (PPE): Gloves and safety glasses to protect yourself from chemicals and sharp objects.
4.2. Read the Diagnostic Trouble Codes
- Connect the Scanner: Plug the OBD-II scanner into the diagnostic port, typically located under the dashboard on the driver’s side.
- Turn on the Ignition: Turn the ignition to the “on” position without starting the engine.
- Read the Codes: Follow the scanner’s instructions to read the stored DTCs.
- Record the Codes: Write down all the codes displayed by the scanner.
4.3. Research the DTCs
Use a reliable online database or repair manual to look up the meaning of each DTC. Understand the potential causes and symptoms associated with each code.
4.4. Inspect Common Problem Areas
Based on the DTCs, inspect the most likely problem areas:
- Gas Cap: Check for damage and ensure it’s properly tightened.
- Oxygen Sensors: Inspect the sensors and wiring for damage.
- MAF Sensor: Check for dirt and debris.
- Spark Plugs and Ignition Coils: Inspect for wear or damage.
- Vacuum Hoses: Check for cracks or leaks.
- EVAP System: Inspect the fuel tank, fuel lines, and EVAP canister for leaks.
4.5. Perform Basic Maintenance
Address any basic maintenance issues that could be contributing to the problem:
- Tighten the Gas Cap: Ensure it’s properly sealed.
- Clean the MAF Sensor: Use a specialized cleaner to remove dirt and debris.
- Check and Replace Air Filter: A dirty air filter can affect engine performance.
- Inspect and Clean Battery Terminals: Corroded terminals can cause electrical issues.
4.6. Clear the DTCs and Test Drive
After addressing the identified issues, clear the DTCs using the OBD-II scanner. Take the vehicle for a test drive to see if the check engine light comes back on.
4.7. Monitor System Performance
Use the OBD-II scanner to monitor the performance of key systems and sensors while driving. Pay attention to parameters such as oxygen sensor readings, fuel trims, and engine temperature.
4.8. Seek Professional Help If Needed
If the check engine light comes back on or if you’re unsure about the diagnosis or repair process, seek professional help from a qualified mechanic.
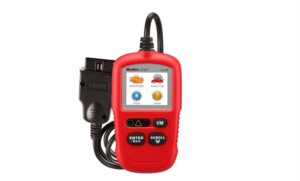
5. Essential Tools for Diagnostic Car Checks
What tools are essential for performing a diagnostic car check? Performing effective diagnostic car checks requires the right tools to accurately identify and resolve issues; according to a survey by Automotive News, technicians who use advanced diagnostic tools can resolve issues more quickly and efficiently. Here’s a list of essential tools for conducting diagnostic checks.
5.1. OBD-II Scanner
An OBD-II (On-Board Diagnostics II) scanner is the cornerstone of any diagnostic car check. It allows you to read diagnostic trouble codes (DTCs) stored in the vehicle’s computer, providing valuable information about the nature and location of the problem.
- Features to Look For:
- Code Reading and Clearing: Ability to read and clear DTCs.
- Live Data Streaming: Displays real-time data from sensors and systems.
- Freeze Frame Data: Captures data when a DTC is triggered.
- Compatibility: Supports all OBD-II protocols and vehicle makes/models.
5.2. Multimeter
A multimeter is an essential tool for testing electrical circuits and components. It can measure voltage, current, and resistance, helping you identify faulty wiring, sensors, and other electrical issues.
- Features to Look For:
- Digital Display: Provides accurate readings.
- Auto-Ranging: Automatically selects the appropriate measurement range.
- Continuity Testing: Checks for open or short circuits.
- Diode Testing: Tests the functionality of diodes.
5.3. Fuel Pressure Tester
A fuel pressure tester is used to measure the pressure in the fuel system, helping you diagnose issues such as a weak fuel pump, clogged fuel filter, or faulty fuel pressure regulator.
- Features to Look For:
- Accurate Gauge: Provides precise fuel pressure readings.
- Adapters: Includes adapters for various fuel systems.
- Relief Valve: Allows you to safely release fuel pressure.
5.4. Compression Tester
A compression tester measures the compression in each of the engine’s cylinders, helping you identify issues such as worn piston rings, damaged valves, or a blown head gasket.
- Features to Look For:
- Accurate Gauge: Provides precise compression readings.
- Adapters: Includes adapters for various spark plug sizes.
- Relief Valve: Allows you to release pressure after testing.
5.5. Vacuum Gauge
A vacuum gauge measures the vacuum in the engine’s intake manifold, helping you diagnose issues such as vacuum leaks, restricted exhaust, or timing problems.
- Features to Look For:
- Accurate Gauge: Provides precise vacuum readings.
- Adapters: Includes adapters for various vacuum ports.
- Easy-to-Read Scale: Clearly displays vacuum readings.
5.6. Timing Light
A timing light is used to check and adjust the engine’s ignition timing, ensuring optimal performance and fuel efficiency.
- Features to Look For:
- Adjustable Advance: Allows you to set the timing advance.
- Bright Flash: Provides a clear timing mark.
- Inductive Pickup: Easily connects to the spark plug wire.
5.7. Smoke Machine
A smoke machine is used to locate vacuum leaks in the engine’s intake manifold, vacuum hoses, and other components. It injects smoke into the system, making it easy to spot leaks.
- Features to Look For:
- Adjustable Smoke Output: Allows you to control the amount of smoke.
- Adapters: Includes adapters for various vacuum ports.
- Safe for Components: Won’t damage sensitive engine components.
5.8. Diagnostic Software
Diagnostic software provides access to advanced diagnostic functions, such as reading and clearing DTCs, viewing live data streams, performing component tests, and reprogramming control modules.
- Features to Look For:
- Vehicle Coverage: Supports a wide range of vehicle makes and models.
- Advanced Functions: Includes component testing and control module reprogramming.
- User-Friendly Interface: Easy to navigate and use.
- Regular Updates: Provides the latest diagnostic information and vehicle coverage.
5.9. Inspection Camera
An inspection camera, also known as a borescope, allows you to visually inspect hard-to-reach areas of the engine and other components, such as cylinders, valves, and fuel injectors.
- Features to Look For:
- High-Resolution Camera: Provides clear images and video.
- Flexible Probe: Easily navigates around obstacles.
- LED Lighting: Illuminates dark areas.
- Waterproof Design: Can be used in wet environments.
By equipping yourself with these essential tools, you’ll be well-prepared to perform comprehensive diagnostic car checks and resolve a wide range of issues, ensuring your vehicle runs smoothly and efficiently.
6. When to Seek Professional Help with Your Diagnostic Car Check Engine Light
When should I take my car to a professional for a diagnostic car check? While many minor issues can be addressed with a DIY diagnostic car check, there are situations where seeking professional help is necessary; according to a report by the Automotive Service Association (ASA), professional technicians have the training, experience, and equipment to diagnose and repair complex vehicle problems accurately. Here’s when to seek professional assistance.
6.1. Complex Diagnostic Trouble Codes (DTCs)
If your OBD-II scanner reveals complex DTCs that you’re unable to interpret or diagnose, it’s best to consult a professional mechanic. These codes may indicate issues with multiple systems or require specialized knowledge to resolve.
6.2. Flashing Check Engine Light
A flashing check engine light typically indicates a severe issue, such as an engine misfire that can damage the catalytic converter. In this case, it’s best to stop driving and seek immediate professional assistance.
6.3. Persistent Check Engine Light
If you’ve attempted basic troubleshooting steps, such as tightening the gas cap or cleaning the MAF sensor, but the check engine light persists, it’s time to consult a professional.
6.4. Lack of Diagnostic Tools
If you don’t have access to the necessary diagnostic tools, such as a multimeter, compression tester, or smoke machine, it’s best to take your vehicle to a professional who has the equipment and expertise to perform a thorough diagnostic check.
6.5. Unfamiliarity with Vehicle Systems
If you’re not familiar with the vehicle’s systems or components, it’s best to leave the diagnostic and repair work to a professional. Attempting to fix issues without the proper knowledge can lead to further damage or safety risks.
6.6. Safety Concerns
If the check engine light is accompanied by symptoms such as strange noises, smoke, or fluid leaks, it’s best to seek professional help immediately. These symptoms may indicate a safety-related issue that requires urgent attention.
6.7. Emissions Test Failure
If your vehicle fails an emissions test due to a check engine light-related issue, it’s best to consult a professional mechanic who can diagnose and repair the problem to ensure your vehicle passes the test.
6.8. Major Repairs
If the diagnostic check reveals a major repair, such as replacing the catalytic converter or repairing the engine, it’s best to entrust the work to a professional mechanic who has the experience and expertise to perform the repair correctly.
6.9. Warranty Concerns
If your vehicle is still under warranty, it’s best to take it to an authorized dealership for diagnostic and repair work. This will ensure that the repairs are covered under the warranty and performed by technicians who are trained to work on your vehicle.
6.10. Peace of Mind
Even if you’re capable of performing some diagnostic and repair work yourself, seeking professional help can provide peace of mind that the job is done correctly and that your vehicle is safe and reliable.
7. Tips for Maintaining Your Car to Prevent Check Engine Light Issues
How can I maintain my car to prevent check engine light problems? Regular maintenance is key to preventing diagnostic car check engine light issues and ensuring your vehicle runs smoothly and efficiently; according to a study by the Car Care Council, vehicles that undergo regular maintenance are less likely to experience breakdowns and costly repairs. Here are some essential maintenance tips to keep your car in top condition.
7.1. Follow the Recommended Maintenance Schedule
Consult your vehicle’s owner’s manual and follow the recommended maintenance schedule for oil changes, filter replacements, fluid checks, and other essential services.
7.2. Use Quality Fluids and Parts
Use high-quality engine oil, coolant, brake fluid, and other fluids that meet the specifications outlined in your vehicle’s owner’s manual. Use genuine or reputable aftermarket parts when replacing components.
7.3. Check and Replace Filters Regularly
Replace the engine air filter, cabin air filter, and fuel filter at the recommended intervals to ensure optimal performance and fuel efficiency.
7.4. Inspect and Maintain the Ignition System
Check the spark plugs, ignition coils, and spark plug wires for wear or damage. Replace them as needed to prevent misfires and ensure proper ignition.
7.5. Monitor Tire Pressure and Condition
Check the tire pressure regularly and maintain the recommended levels. Inspect the tires for wear, damage, or uneven tread patterns. Rotate and balance the tires as needed.
7.6. Check and Maintain the Braking System
Inspect the brake pads, rotors, calipers, and brake lines for wear, damage, or leaks. Replace the brake pads and rotors as needed. Flush and replace the brake fluid at the recommended intervals.
7.7. Inspect and Maintain the Cooling System
Check the coolant level regularly and top it off as needed. Inspect the radiator, hoses, and water pump for leaks or damage. Flush and replace the coolant at the recommended intervals.
7.8. Inspect and Maintain the Exhaust System
Check the exhaust system for leaks, damage, or corrosion. Replace any damaged components to prevent emissions issues and ensure proper engine performance.
7.9. Keep the Engine Clean
Regularly clean the engine compartment to remove dirt, grime, and debris. This can help prevent overheating and other issues.
7.10. Address Issues Promptly
If you notice any unusual symptoms, such as strange noises, smoke, or fluid leaks, address them promptly. Ignoring minor issues can lead to major problems down the road.
8. Finding Reliable Automotive Diagnostic Services
How can I find a reliable automotive diagnostic service near me? Finding a reliable automotive diagnostic service is crucial for accurately diagnosing and repairing your vehicle’s problems; according to Consumer Reports, choosing a reputable repair shop can save you time, money, and headaches. Here’s how to find a trustworthy diagnostic service.
8.1. Ask for Recommendations
Ask friends, family, and colleagues for recommendations on reliable automotive diagnostic services in your area. Personal referrals are often a great way to find trustworthy and competent mechanics.
8.2. Check Online Reviews
Check online review sites such as Google, Yelp, and Better Business Bureau to see what other customers have to say about the diagnostic services you’re considering. Look for shops with consistently high ratings and positive reviews.
8.3. Look for Certifications
Look for automotive diagnostic services that employ technicians who are certified by organizations such as the National Institute for Automotive Service Excellence (ASE). ASE certification indicates that the technicians have the training and expertise to diagnose and repair vehicles correctly.
8.4. Inquire About Experience and Expertise
Inquire about the shop’s experience and expertise in diagnosing and repairing vehicles similar to yours. Some shops specialize in certain makes or models, while others have broader expertise.
8.5. Ask About Diagnostic Equipment
Ask about the diagnostic equipment the shop uses. A reputable diagnostic service will have state-of-the-art equipment, such as OBD-II scanners, multimeters, compression testers, and smoke machines.
8.6. Request an Estimate
Request an estimate for the diagnostic service before authorizing any work. A reputable shop will provide a detailed estimate that includes the cost of labor and parts.
8.7. Get a Second Opinion
If you’re unsure about the diagnosis or estimate provided by one diagnostic service, get a second opinion from another shop. This can help ensure that you’re getting accurate information and fair pricing.
8.8. Check for Warranty
Check if the diagnostic service offers a warranty on their work. A reputable shop will stand behind their repairs and offer a warranty to protect you against defects or premature failures.
8.9. Observe the Shop’s Cleanliness and Organization
Observe the shop’s cleanliness and organization. A well-maintained shop is more likely to provide quality service.
8.10. Trust Your Gut
Trust your gut when choosing an automotive diagnostic service. If something feels off or you’re not comfortable with the shop, it’s best to go elsewhere.
9. Understanding the Costs Associated with Diagnostic Car Check Engine Light Repairs
What are the typical costs associated with diagnostic car check engine light repairs? The costs associated with diagnostic car check engine light repairs can vary widely depending on the nature and severity of the problem; according to a study by RepairPal, the average cost of check engine light-related repairs ranges from $100 to $400, but more complex issues can cost significantly more. Here’s a breakdown of the typical costs associated with common repairs.
9.1. Diagnostic Fee
Most automotive diagnostic services charge a diagnostic fee to identify the cause of the check engine light. This fee typically ranges from $50 to $150, depending on the shop and the complexity of the diagnostic process.
9.2. Gas Cap Replacement
Replacing a damaged or loose gas cap is one of the simplest and least expensive repairs. The cost of a new gas cap typically ranges from $10 to $30.
9.3. Oxygen Sensor Replacement
Replacing a faulty oxygen sensor can cost anywhere from $100 to $300, depending on the type of sensor and the location. Some vehicles have multiple oxygen sensors, which can increase the cost.
9.4. Catalytic Converter Replacement
Replacing a damaged or failing catalytic converter is one of the most expensive check engine light repairs. The cost can range from $500 to $2,000 or more, depending on the vehicle and the type of converter.
9.5. Mass Airflow (MAF) Sensor Replacement
Replacing a faulty MAF sensor typically costs between $150 and $400, depending on the vehicle and the type of sensor.
9.6. Spark Plug and Ignition Coil Replacement
Replacing worn or damaged spark plugs can cost between $50 and $200, depending on the type of plugs and the number of cylinders. Replacing a faulty ignition coil can cost between $100 and $300 per coil.
9.7. Vacuum Leak Repair
Repairing a vacuum leak can range from $50 to $300, depending on the location and severity of the leak. Some leaks can be easily repaired with a new hose or fitting, while others may require more extensive work.
9.8. Evaporative Emission Control System (EVAP) Repair
Repairing issues with the EVAP system can range from $100 to $500 or more, depending on the nature and location of the problem. Common repairs include replacing the fuel cap, charcoal canister, or purge valve.
9.9. Fuel Injector Replacement
Replacing a faulty fuel injector can cost between $100 and $300 per injector, depending on the vehicle and the type of injector. Some vehicles have multiple fuel injectors, which can increase the cost.
9.10. Engine Repair or Replacement
In some cases, the check engine light may indicate a more serious engine problem that requires extensive repair or replacement. The cost of engine repair or replacement can range from $1,000 to $10,000 or more, depending on the severity of the damage and the type of engine.
CAR-TOOL.EDU.VN offers a wide array of diagnostic tools, parts, and resources to assist you with your car check engine light repairs. Contact us at Whatsapp: +1 (641) 206-8880 or visit us at 456 Elm Street, Dallas, TX 75201, United States.
10. The Future of Diagnostic Car Check Engine Light Technology
What is the future of diagnostic car check engine light technology? The future of diagnostic car check engine light technology is evolving rapidly with advancements in connectivity, artificial intelligence, and sensor technology; according to a report by McKinsey & Company, the automotive industry is undergoing a major transformation driven by these technological advancements. Here’s a glimpse into what the future holds for diagnostic car check engine light technology.
10.1. Over-the-Air (OTA) Updates
Over-the-air (OTA) updates will become more common, allowing vehicle manufacturers to remotely update the vehicle’s software and diagnostic systems. This will enable them to address issues and improve performance without requiring a visit to the dealership.
10.2. Enhanced Connectivity
Vehicles will become more connected, allowing them to communicate with the cloud, other vehicles, and infrastructure. This will enable real-time data sharing and remote diagnostics, making it easier to identify and resolve issues.
10.3. Artificial Intelligence (AI) and Machine Learning (ML)
AI and ML will play an increasingly important role in diagnostic car check engine light technology. AI-powered diagnostic systems will be able to analyze data from multiple sensors and systems to identify complex issues and predict potential failures.
10.4. Advanced Sensor Technology
Advanced sensor technology will provide more detailed and accurate data about the vehicle’s condition. This will enable more precise diagnostics and better preventative maintenance.
10.5. Predictive Maintenance
Predictive maintenance will use data analytics to identify potential issues before they lead to a check engine light. This will allow vehicle owners to address problems proactively, reducing the risk of breakdowns and costly repairs.
10.6. Augmented Reality (AR)
Augmented reality (AR) will be used to provide technicians with step-by-step instructions and visual aids for diagnosing and repairing vehicles. This will make it easier to perform complex tasks and reduce the risk of errors.
10.7. Blockchain Technology
Blockchain technology will be used to create a secure and transparent record of vehicle maintenance and repair history. This will help prevent fraud and ensure that vehicles are properly maintained.
10.8. Electric Vehicle (EV) Diagnostics
Electric vehicle (EV) diagnostics will become more important as EVs become more common. EV diagnostic systems will need to address the unique challenges of diagnosing and repairing EVs, such as high-voltage systems and battery management.
10.9. Remote Diagnostics
Remote diagnostics will allow technicians to diagnose and repair vehicles remotely, using data and video from the vehicle. This will make it easier to provide service to customers in remote locations or those who are unable to bring their vehicle to a shop.
10.10. Standardized Diagnostic Interfaces
Standardized diagnostic interfaces will make it easier for third-party diagnostic tools and software to access vehicle data. This will promote innovation and competition in the automotive diagnostic industry.
By embracing these technological advancements, the future of diagnostic car check engine light technology promises to be more efficient, accurate, and convenient for both vehicle owners and technicians.
Understanding your diagnostic car check engine light is essential for maintaining the health and longevity of your vehicle. By using CAR-TOOL.EDU.VN, you can gain valuable insights into the potential issues, solutions, and tools needed to keep your car running smoothly.
Ready to take control of your vehicle’s health? Contact CAR-TOOL.EDU.VN today!
- Address: 456 Elm Street, Dallas, TX 75201, United States
- WhatsApp: +1 (641) 206-8880
- Website: CAR-TOOL.EDU.VN
We’re here to help you with all your automotive diagnostic needs!
FAQ: Understanding the Diagnostic Car Check Engine Light
What does it mean when my diagnostic car check engine light comes on?
When the diagnostic car check engine light illuminates, it signifies that your vehicle’s onboard computer has