The Can Diagnostic Tool For Cars Pinpoint Emission Leak Location. Yes, using a CAN diagnostic tool for cars is an effective method to pinpoint emission leak locations by retrieving diagnostic trouble codes (DTCs) and monitoring system parameters, empowering technicians and car enthusiasts to accurately identify and address EVAP system issues, improve automotive repairs. Explore how tools like OBD II scanners and smoke machines streamline the leak detection process. For reliable auto repair tools and equipment, visit CAR-TOOL.EDU.VN for more information. Boost your vehicle’s diagnostics with effective evap leak finders, advanced automotive diagnostic solutions, and specialized smoke testing equipment.
Contents
- 1. Understanding the EVAP System
- 1.1 Benefits of EVAP System
- 1.2 Common Components of EVAP System
- 2. What Is an EVAP Leak?
- 2.1 Importance of Detecting EVAP Leaks
- 2.2 Common Causes of EVAP Leaks
- 3. Dangers and Implications of EVAP Leaks
- 3.1 Environmental Impact
- 3.2 Fuel Efficiency
- 3.3 Vehicle Performance
- 4. How to Detect EVAP Leaks?
- 4.1 Conduct Visual Inspection
- 4.2 Evaluate the Gas Cap
- 4.3 Utilize Smoke Test
- 4.4 Use of an OBD II Scanner
- 4.5 Apply Pressure and Vacuum Test
- 4.6 Fuel Tank Monitoring System
- 5. Essential Tools for EVAP Leak Detection
- 5.1 OBD II Scanner
- 5.2 Smoke Machine
- 5.3 Fuel Cap Tester
- 5.4 Pressure and Vacuum Gauge
- 6. CAN Diagnostic Tools for Emission Leak Detection
- 6.1 How CAN Diagnostic Tools Work
- 6.2 Advantages of Using CAN Diagnostic Tools
- 6.3 Top CAN Diagnostic Tools for Emission Leaks
- 7. Step-by-Step Guide to Pinpointing Emission Leaks with a Diagnostic Tool
- 7.1 Step 1: Connect the Diagnostic Tool
- 7.2 Step 2: Read Diagnostic Trouble Codes (DTCs)
- 7.3 Step 3: Interpret the Codes
- 7.4 Step 4: Perform a Visual Inspection
- 7.5 Step 5: Use a Smoke Machine
- 7.6 Step 6: Conduct Pressure and Vacuum Tests
- 7.7 Step 7: Verify the Repair
- 8. Other Diagnostic Techniques
- 8.1 Using Multimeter
- 8.2 Fuel Tank Pressure Sensor Testing
- 8.3 Scan Tool Active Tests
- 8.4 Visual Inspection with UV Dye
- 9. Benefits of Regular EVAP System Maintenance
- 9.1 Improved Fuel Efficiency
- 9.2 Reduced Emissions
- 9.3 Prevention of Costly Repairs
- 9.4 Compliance with Emissions Standards
- 9.5 Extended Vehicle Lifespan
- 10. Choosing the Right Diagnostic Tool
- 10.1 Features and Capabilities
- 10.2 Vehicle Compatibility
- 10.3 User-Friendliness
- 10.4 Price and Value
- 10.5 Reviews and Ratings
- 11. Advanced Diagnostic Procedures
- 11.1 Using a Lab Scope
- 11.2 Performing a Leak-Down Test
- 11.3 Analyzing Fuel Trims
- 12. Common Mistakes to Avoid During EVAP Leak Diagnosis
- 12.1 Ignoring Basic Visual Inspection
- 12.2 Overlooking Intermittent Issues
- 12.3 Not Using the Right Diagnostic Tool
- 12.4 Not Following a Systematic Approach
- 12.5 Neglecting to Verify the Repair
- 13. DIY vs. Professional EVAP Leak Repair
- 13.1 DIY Repair
- 13.2 Professional Repair
- 14. Cost of EVAP Leak Repair
- 14.1 Gas Cap Replacement
- 14.2 Hose or Line Replacement
- 14.3 Purge Valve or Vent Valve Replacement
- 14.4 Charcoal Canister Replacement
- 14.5 Diagnostic Fees
- 15. Staying Updated with Automotive Diagnostic Technology
- 15.1 Industry Publications
- 15.2 Training Courses
- 15.3 Online Forums and Communities
- 15.4 Trade Shows and Exhibitions
- 16. FAQs
- 16.1 How do I reset the check engine light and code?
- 16.2 Is there a way to prevent EVAP leaks?
- 16.3 What causes EVAP leaks?
- 16.4 Can a bad gas cap cause an EVAP leak?
- 16.5 How often should I inspect my EVAP system?
- 16.6 What does an EVAP code mean?
- 16.7 Will an EVAP leak affect my car’s performance?
- 16.8 Can I drive with an EVAP leak?
- 16.9 How do I know if my EVAP system is working correctly?
- 16.10 Are all OBD II scanners capable of testing the EVAP system?
- 17. Conclusion
1. Understanding the EVAP System
The Evaporative Emission Control (EVAP) system in a vehicle is engineered to prevent fuel vapors from escaping into the atmosphere. It captures these vapors in a charcoal canister when the vehicle is parked and stores them until the engine is started. When the vehicle is running, these trapped vapors are drawn into the engine to be burned instead of being released unburned into the air. According to the Environmental Protection Agency (EPA), EVAP systems significantly reduce air pollution by preventing hydrocarbons from escaping into the atmosphere.
1.1 Benefits of EVAP System
The benefits of a properly functioning EVAP system include:
- Reducing air pollution.
- Increasing fuel efficiency.
- Ensuring compliance with environmental regulations.
Every modern vehicle is equipped with an EVAP system as part of its emissions control setup, making it a critical component for environmental protection and vehicle performance.
1.2 Common Components of EVAP System
The EVAP system consists of several key components:
- Fuel Tank: Stores the gasoline.
- Fuel Cap: Seals the fuel tank and prevents vapors from escaping.
- Charcoal Canister: Stores fuel vapors until they can be burned.
- Purge Valve: Controls the flow of vapors from the canister to the engine.
- Vent Valve: Allows fresh air into the system.
- Hoses and Lines: Connect all the components and carry fuel vapors.
Understanding these components is crucial for diagnosing EVAP leaks effectively.
2. What Is an EVAP Leak?
An EVAP leak refers to any breach in the Evaporative Emission Control System that allows fuel vapors to escape into the atmosphere. These leaks can occur due to cracks, loose connections in hoses, or a faulty gas cap. The check engine light often illuminates, triggered by the system’s failure to pass a pressure test conducted by the control module.
2.1 Importance of Detecting EVAP Leaks
Detecting and repairing EVAP leaks is vital for several reasons:
- Environmental Protection: Prevents hydrocarbon emissions that contribute to smog.
- Fuel Efficiency: Maintains optimal fuel consumption by preventing vapor loss.
- Vehicle Performance: Ensures the engine runs smoothly and efficiently.
- Regulatory Compliance: Avoids failing emissions tests, which are required by law in many areas.
If left unaddressed, an EVAP leak can lead to increased fuel consumption and potential failure in emissions testing.
2.2 Common Causes of EVAP Leaks
EVAP leaks can arise from various sources, including:
- Faulty Gas Cap: A loose or damaged gas cap is a common cause.
- Cracked Hoses: Rubber hoses can degrade over time, leading to cracks and leaks.
- Loose Connections: Connections between components can loosen, causing vapor escape.
- Defective Valves: Purge and vent valves can fail, leading to leaks.
- Damaged Canister: The charcoal canister can crack or become damaged, releasing vapors.
Regular inspection and maintenance of these components can help prevent EVAP leaks.
3. Dangers and Implications of EVAP Leaks
While an EVAP leak is typically not immediately dangerous to the driver or passengers in terms of exposure to harmful gases, it poses several risks and implications that should not be ignored. The vapors are managed outside the cabin, but the consequences can be significant.
3.1 Environmental Impact
EVAP leaks contribute to air pollution by allowing hydrocarbon vapors to escape into the atmosphere, which can contribute to smog formation and adversely affect air quality. Hydrocarbons are volatile organic compounds (VOCs) that react with nitrogen oxides in the presence of sunlight to form ground-level ozone, a major component of smog.
3.2 Fuel Efficiency
A leak in the EVAP system can result in decreased fuel efficiency. The system is designed to capture and reuse fuel vapors; when it leaks, those vapors are lost, slightly reducing the efficiency of fuel usage over time. Over time, this can lead to noticeable increases in fuel costs.
3.3 Vehicle Performance
In some cases, an EVAP leak might affect the vehicle’s performance. For instance, it could cause the engine to run rough or inconsistently if the leak significantly affects the fuel/air mixture. This is more likely to occur with larger leaks that significantly disrupt the system’s operation.
4. How to Detect EVAP Leaks?
Detecting an EVAP leak involves a few steps and tools, mainly because these leaks can be small and not directly observable. Here are some common methods for EVAP leak detection:
4.1 Conduct Visual Inspection
Closely examine all accessible parts of the EVAP system, including hoses, valves, and connections. Check for any cracks, holes, or signs of brittleness, especially in the rubber hoses that can degrade over time. Ensure that all connections are secure and that no components are visibly damaged or disconnected, particularly around areas like the fuel tank, purge valve, and charcoal canister.
 Visual inspection of EVAP system hoses for cracks
4.2 Evaluate the Gas Cap
The gas cap is a frequent culprit in EVAP system leaks. Ensure that the cap is not only tightened properly but also in good condition. Look for any cracks or a deteriorated rubber seal, which can compromise the cap’s ability to maintain a proper seal. Replacing a faulty gas cap is inexpensive but can resolve a persistent check engine light issue if the leak is minor.
4.3 Utilize Smoke Test
A professional-grade smoke test involves injecting smoke combined with a dye into the EVAP system while it is sealed. The smoke will seep out through any leaks, making them visible as wisps of smoke. For a more thorough examination, some mechanics might use UV smoke that glows under a black light, highlighting even the smallest leaks.
4.4 Use of an OBD II Scanner
An OBD II scanner is a diagnostic tool that interfaces with the vehicle’s onboard computer. When connected, it can retrieve diagnostic trouble codes (DTCs) that indicate specific issues, including those related to the EVAP system. Codes like P0442 or P0456 directly suggest small leaks. The scanner can also initiate a system test to further diagnose the severity and location of the leak.
4.5 Apply Pressure and Vacuum Test
This method uses specialized equipment to apply a specific pressure or vacuum to the EVAP system, then monitors it to see if the system holds the pressure or vacuum without dropping. A drop in pressure or vacuum indicates a leak. This test can be precise in determining the integrity of the system and can help verify that a repair was successful.
4.6 Fuel Tank Monitoring System
Newer vehicles often include sensors that monitor the pressure and vacuum within the fuel tank itself to manage vapor emissions effectively. If the system detects an inconsistency in pressure that doesn’t match the operational parameters, it can trigger an alarm in the form of a check engine light. This system helps in early detection, often before more noticeable symptoms arise.
5. Essential Tools for EVAP Leak Detection
EVAP leak detection requires specific tools that help diagnose and pinpoint where the leaks are occurring within the system. Here are the essential tools required for EVAP leak detection:
5.1 OBD II Scanner
This scanner interfaces with the vehicle’s onboard computer to read trouble codes and monitor real-time data. It is important for identifying codes specific to the EVAP system.
- Function: Reads diagnostic trouble codes (DTCs).
- Use: Identifies EVAP-related codes such as P0442 or P0456.
- Benefits: Provides initial insight into the nature of the leak.
5.2 Smoke Machine
A smoke machine is used to pump smoke into the EVAP system. The smoke, under light pressure, escapes from any cracks or holes, visibly showing the location of the leak.
- Function: Injects smoke into the EVAP system.
- Use: Visually identifies the location of leaks.
- Benefits: Pinpoints small and hard-to-find leaks.
5.3 Fuel Cap Tester
This tool helps determine if the vehicle’s fuel cap is maintaining an adequate seal. A fuel cap tester applies pressure to the cap and measures if it can hold the pressure, indicating if the cap is faulty and potentially the source of an EVAP leak.
- Function: Tests the integrity of the fuel cap seal.
- Use: Determines if the cap is maintaining adequate pressure.
- Benefits: Identifies faulty gas caps as a source of leaks.
5.4 Pressure and Vacuum Gauge
This gauge is used to measure the pressure and vacuum levels within the EVAP system. Accurate readings from this tool can help confirm the presence of a leak when the system cannot maintain specified pressure or vacuum levels.
- Function: Measures pressure and vacuum levels.
- Use: Confirms the presence of a leak by monitoring pressure drops.
- Benefits: Provides precise data on system integrity.
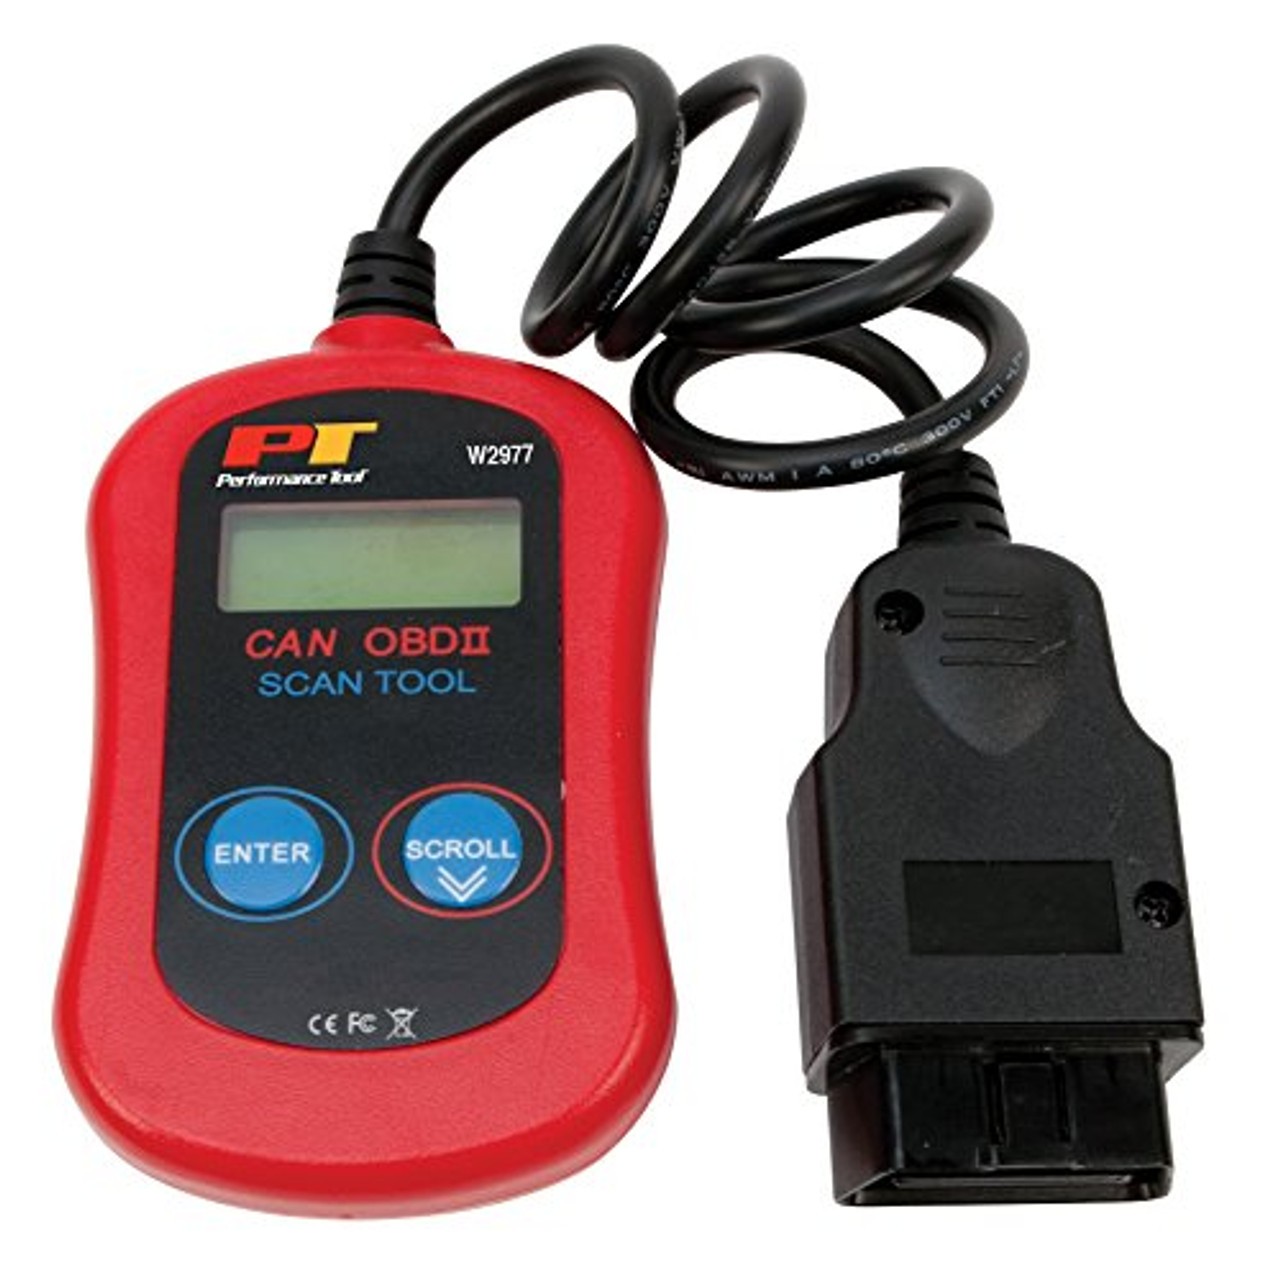
6. CAN Diagnostic Tools for Emission Leak Detection
CAN (Controller Area Network) diagnostic tools play a crucial role in modern automotive diagnostics, especially in pinpointing emission leaks. These tools communicate with the vehicle’s onboard computer to retrieve diagnostic trouble codes (DTCs) and monitor system parameters.
6.1 How CAN Diagnostic Tools Work
CAN diagnostic tools work by:
- Connecting to the Vehicle: Plugging into the OBD II port.
- Reading DTCs: Retrieving codes related to the EVAP system.
- Monitoring Parameters: Observing real-time data such as pressure and sensor readings.
- Performing System Tests: Initiating tests to assess the integrity of the EVAP system.
6.2 Advantages of Using CAN Diagnostic Tools
The advantages of using CAN diagnostic tools include:
- Accuracy: Provides precise diagnostic information.
- Efficiency: Streamlines the leak detection process.
- Comprehensive Data: Offers a wide range of data for analysis.
- User-Friendly Interface: Many tools have intuitive interfaces.
6.3 Top CAN Diagnostic Tools for Emission Leaks
Some of the top CAN diagnostic tools for emission leaks include:
- Autel MaxiSys MS906BT: Offers advanced diagnostics and wireless connectivity.
- Snap-on Solus Edge: Known for its comprehensive coverage and user-friendly interface.
- BlueDriver Bluetooth Professional OBDII Scan Tool: A portable and affordable option for DIYers.
- LAUNCH X431 V+: Provides extensive vehicle coverage and advanced diagnostic functions.
7. Step-by-Step Guide to Pinpointing Emission Leaks with a Diagnostic Tool
Pinpointing emission leaks with a diagnostic tool involves a systematic approach to ensure accurate and efficient detection. Here’s a step-by-step guide to help you through the process:
7.1 Step 1: Connect the Diagnostic Tool
- Procedure: Plug the CAN diagnostic tool into the OBD II port of your vehicle.
- Note: Ensure the vehicle’s ignition is turned on.
7.2 Step 2: Read Diagnostic Trouble Codes (DTCs)
- Procedure: Use the diagnostic tool to read any stored DTCs.
- Key Codes: Look for codes related to the EVAP system, such as P0440, P0442, P0455, P0456, and P0457.
- Example:
- P0440: EVAP Emission Control System Malfunction
- P0442: EVAP System Leak Detected (Small Leak)
- P0455: EVAP System Leak Detected (Gross Leak)
- P0456: EVAP System Leak Detected (Very Small Leak)
- P0457: EVAP System Leak Detected (Fuel Cap Loose/Off)
7.3 Step 3: Interpret the Codes
- Procedure: Understand the meaning of each code to narrow down the potential leak locations.
- Example:
- P0457 often indicates a loose or faulty gas cap.
- P0442 suggests a small leak in the EVAP system, which could be a cracked hose or a loose connection.
- P0455 indicates a large leak, which might be due to a severely damaged component.
7.4 Step 4: Perform a Visual Inspection
- Procedure: Based on the DTCs, conduct a thorough visual inspection of the EVAP system components.
- Components to Inspect:
- Gas Cap: Check for proper sealing and any visible damage.
- Hoses and Lines: Look for cracks, brittleness, or disconnections.
- Charcoal Canister: Inspect for any physical damage or leaks.
- Purge and Vent Valves: Ensure they are properly connected and functioning.
7.5 Step 5: Use a Smoke Machine
- Procedure: If the visual inspection does not reveal the leak, use a smoke machine to introduce smoke into the EVAP system.
- Steps:
- Seal the EVAP system.
- Inject smoke into the system.
- Observe where the smoke escapes to identify the leak location.
- Tip: Use a UV light to enhance visibility of the smoke, especially for small leaks.
7.6 Step 6: Conduct Pressure and Vacuum Tests
- Procedure: Use a pressure and vacuum gauge to test the integrity of the EVAP system.
- Steps:
- Apply pressure or vacuum to the system.
- Monitor the gauge for any drops, which indicate a leak.
- Note: This test can help confirm whether the system is holding pressure as it should.
7.7 Step 7: Verify the Repair
- Procedure: After repairing the identified leak, clear the DTCs using the diagnostic tool and perform a system test to ensure the issue is resolved.
- Steps:
- Clear the stored DTCs.
- Run an EVAP system test using the diagnostic tool.
- Monitor the system to ensure no new codes appear.
8. Other Diagnostic Techniques
In addition to using CAN diagnostic tools and smoke machines, there are several other diagnostic techniques that can help pinpoint emission leaks. These methods often involve specialized equipment and a thorough understanding of the EVAP system.
8.1 Using Multimeter
A multimeter can be used to check the electrical components of the EVAP system, such as the purge valve and vent valve. By measuring voltage and resistance, you can determine if these components are functioning correctly.
- Function: Measures voltage, current, and resistance.
- Use: Checks the electrical integrity of EVAP system components.
- Benefits: Helps identify faulty valves and sensors.
8.2 Fuel Tank Pressure Sensor Testing
The fuel tank pressure sensor monitors the pressure inside the fuel tank. Testing this sensor can help identify issues with pressure regulation, which can indicate a leak.
- Function: Monitors pressure inside the fuel tank.
- Use: Identifies pressure regulation issues.
- Benefits: Helps detect leaks related to pressure imbalances.
8.3 Scan Tool Active Tests
Many advanced scan tools offer active tests that allow you to control EVAP system components, such as the purge valve and vent valve. By activating these components and monitoring their response, you can identify any malfunctions.
- Function: Controls EVAP system components.
- Use: Activates valves and monitors their response.
- Benefits: Helps pinpoint specific component failures.
8.4 Visual Inspection with UV Dye
Some mechanics use UV dye in conjunction with a smoke test to enhance leak detection. The UV dye makes even the smallest leaks more visible under a UV light.
- Function: Enhances visibility of leaks.
- Use: Used with a smoke test and UV light.
- Benefits: Identifies very small and hard-to-find leaks.
9. Benefits of Regular EVAP System Maintenance
Regular maintenance of the EVAP system can prevent leaks and ensure optimal vehicle performance. Here are some benefits of keeping your EVAP system in good condition:
9.1 Improved Fuel Efficiency
A properly functioning EVAP system prevents fuel vapors from escaping, which improves fuel efficiency and saves you money on gas.
9.2 Reduced Emissions
By preventing hydrocarbon emissions, regular EVAP system maintenance helps reduce air pollution and protects the environment.
9.3 Prevention of Costly Repairs
Addressing minor issues early can prevent them from turning into more significant and expensive repairs down the road.
9.4 Compliance with Emissions Standards
Regular maintenance ensures that your vehicle meets emissions standards, helping you avoid failing emissions tests.
9.5 Extended Vehicle Lifespan
Keeping all systems in good working order contributes to the overall health and longevity of your vehicle.
10. Choosing the Right Diagnostic Tool
Selecting the right diagnostic tool is essential for effective EVAP leak detection. There are various types of tools available, ranging from basic OBD II scanners to advanced diagnostic systems. Here’s what to consider when choosing a diagnostic tool:
10.1 Features and Capabilities
Consider the features and capabilities you need for your specific diagnostic tasks. Look for tools that offer:
- DTC Reading and Clearing: Essential for identifying and resolving issues.
- Live Data Streaming: Allows you to monitor real-time system parameters.
- Active Tests: Enables you to control EVAP system components.
- EVAP System Tests: Provides specific tests for the EVAP system.
10.2 Vehicle Compatibility
Ensure that the diagnostic tool is compatible with your vehicle’s make and model. Some tools are designed for specific vehicle brands, while others offer broad compatibility.
10.3 User-Friendliness
Choose a tool with an intuitive interface and easy-to-navigate menus. A user-friendly tool will save you time and frustration during the diagnostic process.
10.4 Price and Value
Consider your budget and the value you’ll receive from the diagnostic tool. While more expensive tools often offer advanced features, there are also affordable options that can meet your basic diagnostic needs.
10.5 Reviews and Ratings
Read reviews and ratings from other users to get an idea of the tool’s performance and reliability. Look for tools with positive feedback and high ratings.
11. Advanced Diagnostic Procedures
For more complex EVAP system issues, advanced diagnostic procedures may be necessary. These procedures often require specialized equipment and expertise.
11.1 Using a Lab Scope
A lab scope can be used to analyze the waveforms of EVAP system sensors, such as the fuel tank pressure sensor. This can help identify subtle issues that are not apparent with other diagnostic methods.
- Function: Analyzes sensor waveforms.
- Use: Identifies subtle sensor issues.
- Benefits: Provides detailed insights into sensor performance.
11.2 Performing a Leak-Down Test
A leak-down test involves sealing the EVAP system and monitoring the pressure over time. This can help identify the rate of leakage and pinpoint the location of the leak.
- Function: Monitors pressure over time.
- Use: Identifies the rate of leakage.
- Benefits: Helps pinpoint the location of the leak.
11.3 Analyzing Fuel Trims
Fuel trims are adjustments made by the engine control unit (ECU) to maintain the correct air-fuel ratio. Analyzing fuel trims can provide clues about EVAP system issues, such as leaks that are affecting the air-fuel mixture.
- Function: Analyzes adjustments made by the ECU.
- Use: Provides clues about EVAP system issues.
- Benefits: Helps identify leaks affecting the air-fuel mixture.
12. Common Mistakes to Avoid During EVAP Leak Diagnosis
Diagnosing EVAP leaks can be challenging, and it’s easy to make mistakes that can lead to incorrect diagnoses and unnecessary repairs. Here are some common mistakes to avoid:
12.1 Ignoring Basic Visual Inspection
Always start with a thorough visual inspection of the EVAP system components before using any diagnostic tools. Overlooking obvious issues, such as a loose gas cap or a cracked hose, can waste time and effort.
12.2 Overlooking Intermittent Issues
Some EVAP leaks may only occur under certain conditions, such as during hot weather or after refueling. Be sure to test the system under various conditions to identify intermittent issues.
12.3 Not Using the Right Diagnostic Tool
Using an inadequate diagnostic tool can lead to inaccurate results. Ensure that you are using a tool that is compatible with your vehicle and has the necessary features for EVAP system diagnosis.
12.4 Not Following a Systematic Approach
Jumping to conclusions without following a systematic diagnostic approach can lead to incorrect diagnoses. Always follow a step-by-step process to ensure that you are thoroughly evaluating all potential causes of the leak.
12.5 Neglecting to Verify the Repair
After repairing a leak, always verify that the issue is resolved by clearing the DTCs and performing a system test. Neglecting to verify the repair can result in the issue recurring.
13. DIY vs. Professional EVAP Leak Repair
Deciding whether to tackle an EVAP leak repair yourself or take it to a professional depends on your skills, experience, and the complexity of the issue.
13.1 DIY Repair
DIY EVAP leak repair may be suitable for simple issues, such as replacing a gas cap or a cracked hose. This can save you money on labor costs, but it requires some mechanical knowledge and the right tools.
Pros:
- Cost savings
- Convenience
- Personal satisfaction
Cons:
- Requires mechanical knowledge
- May require specialized tools
- Risk of incorrect diagnosis
13.2 Professional Repair
Professional EVAP leak repair is recommended for complex issues that require advanced diagnostic equipment and expertise. A professional mechanic can accurately diagnose the leak and perform the necessary repairs to ensure that the system is functioning correctly.
Pros:
- Accurate diagnosis
- Professional repair
- Warranty on parts and labor
Cons:
- Higher cost
- Inconvenience
14. Cost of EVAP Leak Repair
The cost of EVAP leak repair can vary depending on the location and severity of the leak, as well as the type of repair required. Here’s a breakdown of the potential costs:
14.1 Gas Cap Replacement
Replacing a faulty gas cap is usually the cheapest repair, costing between $20 and $50.
14.2 Hose or Line Replacement
Replacing a cracked or damaged hose or line can cost between $50 and $200, depending on the location and complexity of the repair.
14.3 Purge Valve or Vent Valve Replacement
Replacing a faulty purge valve or vent valve can cost between $100 and $300, including parts and labor.
14.4 Charcoal Canister Replacement
Replacing a damaged charcoal canister can be one of the more expensive repairs, costing between $300 and $800, depending on the vehicle make and model.
14.5 Diagnostic Fees
If you take your vehicle to a professional mechanic for EVAP leak diagnosis, you can expect to pay diagnostic fees ranging from $75 to $150.
15. Staying Updated with Automotive Diagnostic Technology
The field of automotive diagnostics is constantly evolving, with new technologies and techniques emerging regularly. Staying updated with these advancements is essential for anyone involved in vehicle maintenance and repair.
15.1 Industry Publications
Read industry publications and technical journals to stay informed about the latest diagnostic technologies and best practices.
15.2 Training Courses
Attend training courses and workshops to learn about new diagnostic tools and techniques. Many manufacturers and industry organizations offer specialized training programs.
15.3 Online Forums and Communities
Participate in online forums and communities to exchange knowledge and experiences with other technicians and enthusiasts.
15.4 Trade Shows and Exhibitions
Attend trade shows and exhibitions to see the latest diagnostic tools and equipment in action.
16. FAQs
16.1 How do I reset the check engine light and code?
The method to reset the check engine light varies by vehicle model; typically, it involves a sequence like turning the ignition on and off or using an OBD II scanner to clear the code. Consult your vehicle’s manual or look online for specific instructions.
16.2 Is there a way to prevent EVAP leaks?
To prevent EVAP leaks, regularly inspect and maintain your vehicle’s fuel system components such as seals, O-rings, purge valves, hoses, and vent lines to catch issues before they lead to failures.
16.3 What causes EVAP leaks?
EVAP leaks are commonly caused by cracked hoses, loose or worn-out seals, faulty gas caps, or defective valves in the vehicle’s evaporative emission control system.
16.4 Can a bad gas cap cause an EVAP leak?
Yes, a loose, damaged, or deteriorated gas cap is a common cause of EVAP leaks. The gas cap is responsible for sealing the fuel tank and preventing fuel vapors from escaping.
16.5 How often should I inspect my EVAP system?
It’s a good practice to inspect your EVAP system at least once a year or during regular maintenance checks. Pay close attention to hoses, connections, and the gas cap.
16.6 What does an EVAP code mean?
An EVAP code indicates that there is a problem with your vehicle’s evaporative emission control system. The specific code can help pinpoint the location and nature of the issue.
16.7 Will an EVAP leak affect my car’s performance?
Yes, an EVAP leak can affect your car’s performance by reducing fuel efficiency and potentially causing the engine to run rough or inconsistently.
16.8 Can I drive with an EVAP leak?
While it’s generally safe to drive with a minor EVAP leak, it’s not recommended. The leak can contribute to air pollution and reduce fuel efficiency. It’s best to address the issue as soon as possible.
16.9 How do I know if my EVAP system is working correctly?
You can use an OBD II scanner to perform an EVAP system test. The scanner will monitor the system and report any issues.
16.10 Are all OBD II scanners capable of testing the EVAP system?
Not all OBD II scanners have the capability to test the EVAP system. Look for scanners that specifically mention EVAP system testing or active tests.
17. Conclusion
Using a CAN diagnostic tool for cars to pinpoint emission leak locations is an effective and efficient way to maintain vehicle performance and environmental responsibility. By understanding the EVAP system, recognizing the signs of a leak, and utilizing the right tools and techniques, you can accurately diagnose and address emission issues. Whether you choose to perform the repairs yourself or seek professional assistance, maintaining your EVAP system is crucial for ensuring your vehicle runs smoothly and complies with emissions standards.
For all your automotive diagnostic needs, visit CAR-TOOL.EDU.VN. Our team is ready to assist you with expert advice and top-quality tools. Contact us today at 456 Elm Street, Dallas, TX 75201, United States. Whatsapp: +1 (641) 206-8880 for a consultation.