Want to know how to perform a car diagnostic to check the EVAP system effectively? This comprehensive guide from CAR-TOOL.EDU.VN provides expert advice and step-by-step instructions, ensuring you can accurately diagnose and resolve EVAP system issues. We’ll cover everything from understanding EVAP systems to using diagnostic tools, helping you keep your vehicle running smoothly and efficiently.
Contents
- 1. What is the Evaporative Emission (EVAP) Control System?
- 2. Why is Checking the EVAP System Important?
- 3. Understanding Common EVAP System Problems
- 4. Essential Tools for Diagnosing the EVAP System
- 5. Step-by-Step Guide on How to Get Car Diagnostic to Check EVAP
- 5.1. Preliminary Inspection
- 5.2. Using an OBD-II Scan Tool
- 5.3. Performing a Smoke Test
- 5.4. Testing the Purge Valve
- 5.5. Testing the Vent Valve
- 5.6. Using a Vacuum/Pressure Tester
- 6. Diagnosing Specific EVAP System DTCs
- 6.1. P0440: Evaporative Emission Control System Malfunction
- 6.2. P0441: Evaporative Emission Control System Incorrect Purge Flow
- 6.3. P0442: Evaporative Emission Control System Leak Detected (Small Leak)
- 6.4. P0446: Evaporative Emission Control System Vent Control Circuit Malfunction
- 6.5. P0455: Evaporative Emission Control System Leak Detected (Gross Leak)
- 6.6. P0456: Evaporative Emission Control System Leak Detected (Very Small Leak)
- 7. Best Practices for EVAP System Maintenance
- 8. Advanced Diagnostic Techniques
- 9. Common Mistakes to Avoid When Diagnosing EVAP Systems
- 10. Case Studies: Real-World EVAP System Diagnostic Examples
- 10.1. Case Study 1: P0442 on a 2010 Toyota Corolla
- 10.2. Case Study 2: P0455 on a 2015 Ford F-150
- 10.3. Case Study 3: P0446 on a 2012 Honda Civic
- 11. EVAP System Components: Replacement and Maintenance
- 12. How CAR-TOOL.EDU.VN Can Help You Diagnose and Repair EVAP Systems
- 13. Frequently Asked Questions (FAQs) About EVAP Systems
- 14. Conclusion: Mastering EVAP System Diagnostics
1. What is the Evaporative Emission (EVAP) Control System?
The Evaporative Emission (EVAP) control system prevents fuel vapor from escaping into the atmosphere. It captures fuel vapors from the fuel tank and carburetor or fuel injection system and stores them in a charcoal canister. When the engine is running, these vapors are purged from the canister and burned in the engine. According to the Environmental Protection Agency (EPA), a properly functioning EVAP system significantly reduces hydrocarbon emissions, contributing to cleaner air.
- Fuel Tank: Stores gasoline and allows for the creation of fuel vapors.
- Charcoal Canister: Stores fuel vapors until they can be purged into the engine.
- Purge Valve: Controls the flow of fuel vapors from the canister to the engine.
- Vent Valve: Allows fresh air into the canister to aid in the purging process.
- Hoses and Lines: Connect various components, allowing vapor flow.
2. Why is Checking the EVAP System Important?
Checking the EVAP system is crucial for several reasons, impacting both vehicle performance and environmental responsibility.
- Environmental Protection: A malfunctioning EVAP system releases harmful fuel vapors into the atmosphere, contributing to smog and air pollution. The California Air Resources Board (CARB) emphasizes the importance of maintaining these systems to meet stringent emission standards.
- Fuel Efficiency: Leaks in the EVAP system can lead to a loss of fuel through evaporation, reducing your vehicle’s fuel efficiency.
- Vehicle Performance: EVAP system issues can sometimes cause rough idling, stalling, or difficulty starting the engine.
- Diagnostic Trouble Codes (DTCs): A faulty EVAP system will often trigger the Check Engine Light and store related DTCs, such as P0440, P0442, or P0455, which can be diagnosed using a diagnostic scan tool from CAR-TOOL.EDU.VN.
3. Understanding Common EVAP System Problems
Several common issues can plague the EVAP system. Identifying these problems early can save time and money on repairs.
- Gas Cap Issues: A loose, damaged, or missing gas cap is one of the most frequent causes of EVAP system leaks. It prevents the system from maintaining proper pressure, triggering the Check Engine Light.
- Purge Valve Failure: The purge valve controls the flow of fuel vapors from the charcoal canister to the engine. If it sticks open or closed, it can disrupt the system’s operation.
- Vent Valve Problems: The vent valve allows fresh air into the charcoal canister during the purge process. A malfunctioning vent valve can cause vacuum leaks or prevent proper purging.
- Charcoal Canister Damage: The charcoal canister stores fuel vapors. Over time, it can become saturated, cracked, or otherwise damaged, leading to leaks and reduced efficiency.
- Hose and Line Leaks: Cracks, breaks, or loose connections in the hoses and lines of the EVAP system can cause leaks, preventing the system from maintaining pressure.
4. Essential Tools for Diagnosing the EVAP System
To accurately diagnose EVAP system issues, certain tools are essential. These tools can help you identify leaks, monitor pressure, and interpret diagnostic trouble codes.
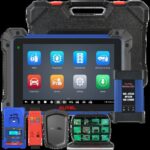
- OBD-II Scan Tool: An OBD-II scan tool is necessary to read diagnostic trouble codes (DTCs) stored in the vehicle’s computer. CAR-TOOL.EDU.VN offers a wide range of scan tools that can read and clear these codes, providing valuable insights into the nature of the problem.
- Smoke Machine: A smoke machine is used to introduce smoke into the EVAP system, making it easier to locate leaks. The smoke will escape from any cracks or loose connections, pinpointing the source of the problem.
- Vacuum/Pressure Tester: This tool is used to test the pressure and vacuum levels within the EVAP system. It can help identify whether the system is maintaining proper pressure and vacuum, indicating potential leaks or blockages.
- Multimeter: A multimeter is useful for testing the electrical components of the EVAP system, such as the purge valve and vent valve. It can help determine if these components are receiving the correct voltage and functioning properly.
- Hand Tools: Basic hand tools, such as wrenches, screwdrivers, and pliers, are necessary for accessing and inspecting the components of the EVAP system.
5. Step-by-Step Guide on How to Get Car Diagnostic to Check EVAP
Follow these steps to effectively diagnose your car’s EVAP system.
5.1. Preliminary Inspection
- Visual Inspection: Begin with a thorough visual inspection of all EVAP system components. Check the gas cap for damage or looseness. Inspect hoses and lines for cracks, breaks, or loose connections. Examine the charcoal canister for any signs of physical damage.
- Check for Fuel Odors: A strong fuel odor near the vehicle, especially after fueling, can indicate a significant leak in the EVAP system. Pay close attention to areas around the fuel tank, charcoal canister, and engine compartment.
5.2. Using an OBD-II Scan Tool
-
Connect the Scan Tool: Plug the OBD-II scan tool into the diagnostic port, typically located under the dashboard on the driver’s side.
-
Read Diagnostic Trouble Codes (DTCs): Turn the ignition key to the “ON” position (do not start the engine). Use the scan tool to read any stored DTCs. Record the codes and their descriptions. Common EVAP-related codes include:
- P0440: Evaporative Emission Control System Malfunction
- P0441: Evaporative Emission Control System Incorrect Purge Flow
- P0442: Evaporative Emission Control System Leak Detected (Small Leak)
- P0446: Evaporative Emission Control System Vent Control Circuit Malfunction
- P0455: Evaporative Emission Control System Leak Detected (Gross Leak)
- P0456: Evaporative Emission Control System Leak Detected (Very Small Leak)
-
Clear the Codes (Optional): After recording the codes, you can clear them to see if they reappear after further testing. This can help determine if the issue is intermittent or persistent.
5.3. Performing a Smoke Test
- Prepare the Vehicle: Ensure the engine is off and cool. Locate the EVAP system service port or disconnect a hose in the system where you can introduce smoke.
- Connect the Smoke Machine: Connect the smoke machine to the EVAP system. Follow the manufacturer’s instructions for setting up the machine.
- Introduce Smoke: Start the smoke machine and allow it to fill the EVAP system with smoke.
- Inspect for Leaks: Carefully inspect all components of the EVAP system, including hoses, lines, the gas cap, charcoal canister, purge valve, and vent valve. Look for smoke escaping from any cracks or loose connections.
- Repair Leaks: Once you have identified the source of the leak, repair or replace the damaged components.
5.4. Testing the Purge Valve
- Locate the Purge Valve: The purge valve is typically located in the engine compartment, often near the intake manifold.
- Disconnect the Purge Valve: Disconnect the electrical connector and vacuum lines from the purge valve.
- Test for Vacuum: With the engine running, check for vacuum at the vacuum line that connects to the intake manifold. There should be a strong vacuum present.
- Apply Voltage: Use a multimeter to check for voltage at the electrical connector when the engine is running. If there is no voltage, check the wiring and fuses.
- Test the Valve’s Operation: Apply 12 volts directly to the purge valve’s electrical connector. You should hear the valve click open. If the valve does not open, it may be faulty and need replacement.
- Check for Leaks: Use a vacuum tester to check the purge valve for leaks. It should hold vacuum when closed. If it leaks, it needs replacement.
5.5. Testing the Vent Valve
- Locate the Vent Valve: The vent valve is typically located near the charcoal canister, often in the rear of the vehicle.
- Disconnect the Vent Valve: Disconnect the electrical connector from the vent valve.
- Test the Valve’s Operation: Apply 12 volts directly to the vent valve’s electrical connector. You should hear the valve click open. If the valve does not open, it may be faulty and need replacement.
- Check for Blockages: Ensure the vent valve is not blocked or clogged. Clean or replace the valve if necessary.
5.6. Using a Vacuum/Pressure Tester
- Connect the Tester: Connect the vacuum/pressure tester to the EVAP system service port or another accessible point in the system.
- Apply Vacuum or Pressure: Use the tester to apply a specified amount of vacuum or pressure to the system, as indicated in the vehicle’s service manual.
- Monitor the Gauge: Observe the gauge on the tester to see if the system holds the vacuum or pressure. A drop in vacuum or pressure indicates a leak in the system.
- Locate the Leak: If a leak is detected, use the smoke machine to pinpoint the exact location.
6. Diagnosing Specific EVAP System DTCs
Understanding the specific diagnostic trouble codes (DTCs) can help you target the most likely causes and streamline the diagnostic process.
6.1. P0440: Evaporative Emission Control System Malfunction
- Description: This is a general EVAP system code indicating a problem within the system.
- Possible Causes:
- Loose or damaged gas cap
- Cracked or damaged hoses and lines
- Faulty purge valve
- Faulty vent valve
- Damaged charcoal canister
- Diagnostic Steps:
- Check the gas cap and ensure it is properly tightened.
- Perform a visual inspection of all hoses and lines.
- Use a smoke machine to check for leaks.
- Test the purge and vent valves.
6.2. P0441: Evaporative Emission Control System Incorrect Purge Flow
- Description: This code indicates that the purge flow is not within the expected range.
- Possible Causes:
- Faulty purge valve
- Blocked or restricted purge line
- Faulty vacuum lines
- Faulty EVAP system pressure sensor
- Diagnostic Steps:
- Test the purge valve for proper operation.
- Check the purge line for blockages or restrictions.
- Inspect the vacuum lines for leaks or damage.
- Check the EVAP system pressure sensor.
6.3. P0442: Evaporative Emission Control System Leak Detected (Small Leak)
- Description: This code indicates a small leak in the EVAP system.
- Possible Causes:
- Loose or slightly damaged gas cap
- Small cracks in hoses and lines
- Slightly faulty purge or vent valve
- Diagnostic Steps:
- Check the gas cap and ensure it is properly tightened.
- Use a smoke machine to check for small leaks in hoses and lines.
- Test the purge and vent valves.
6.4. P0446: Evaporative Emission Control System Vent Control Circuit Malfunction
- Description: This code indicates a problem with the vent control circuit.
- Possible Causes:
- Faulty vent valve
- Open or short in the vent valve circuit
- Faulty ECM (Engine Control Module)
- Diagnostic Steps:
- Test the vent valve for proper operation.
- Check the vent valve circuit for opens or shorts.
- Inspect the ECM.
6.5. P0455: Evaporative Emission Control System Leak Detected (Gross Leak)
- Description: This code indicates a large leak in the EVAP system.
- Possible Causes:
- Missing or very loose gas cap
- Large cracks or breaks in hoses and lines
- Severely faulty purge or vent valve
- Damaged charcoal canister
- Diagnostic Steps:
- Check the gas cap and ensure it is present and properly tightened.
- Perform a visual inspection of all hoses and lines.
- Use a smoke machine to check for large leaks.
- Test the purge and vent valves.
6.6. P0456: Evaporative Emission Control System Leak Detected (Very Small Leak)
- Description: This code indicates a very small leak in the EVAP system.
- Possible Causes:
- Slightly loose gas cap
- Pin-hole leaks in hoses and lines
- Slightly faulty purge or vent valve
- Diagnostic Steps:
- Check the gas cap and ensure it is properly tightened.
- Use a smoke machine to check for very small leaks in hoses and lines.
- Test the purge and vent valves.
7. Best Practices for EVAP System Maintenance
Regular maintenance can prevent many common EVAP system problems.
- Regular Gas Cap Checks: Always ensure your gas cap is properly tightened after fueling. Replace it if it’s damaged or worn.
- Inspect Hoses and Lines: Periodically inspect the hoses and lines for cracks, breaks, or loose connections. Replace any damaged components promptly.
- Avoid Overfilling the Gas Tank: Overfilling can saturate the charcoal canister with fuel, reducing its efficiency and potentially causing damage.
- Follow Recommended Service Intervals: Adhere to the vehicle manufacturer’s recommended service intervals for EVAP system components.
8. Advanced Diagnostic Techniques
For complex or intermittent EVAP system issues, advanced diagnostic techniques may be necessary.
- Using a Bi-Directional Scan Tool: A bi-directional scan tool allows you to control certain EVAP system components, such as the purge and vent valves, to test their functionality.
- EVAP System Pressure Testing with a Scan Tool: Some scan tools can monitor EVAP system pressure in real-time, providing valuable data for diagnosing leaks or blockages.
- Using an Oscilloscope: An oscilloscope can be used to analyze the electrical signals of the purge and vent valves, providing insights into their operation and identifying potential electrical issues.
9. Common Mistakes to Avoid When Diagnosing EVAP Systems
Avoiding these common mistakes can save you time and prevent misdiagnoses.
- Ignoring the Gas Cap: The gas cap is a common culprit in EVAP system issues. Always check it first.
- Skipping the Visual Inspection: A thorough visual inspection can often reveal obvious problems, such as cracked hoses or damaged components.
- Not Using a Smoke Machine: A smoke machine is essential for locating leaks in the EVAP system.
- Replacing Parts Without Proper Testing: Always test components before replacing them to avoid unnecessary expenses.
- Overlooking Intermittent Issues: Intermittent problems can be challenging to diagnose. Be patient and use advanced diagnostic techniques if necessary.
10. Case Studies: Real-World EVAP System Diagnostic Examples
10.1. Case Study 1: P0442 on a 2010 Toyota Corolla
- Problem: A 2010 Toyota Corolla came into the shop with a Check Engine Light and a P0442 code (Small Leak).
- Diagnosis: The technician started with a visual inspection and found no obvious issues. They then used a smoke machine and discovered a small crack in a hose near the charcoal canister.
- Solution: The technician replaced the cracked hose, cleared the code, and verified that the Check Engine Light did not return.
10.2. Case Study 2: P0455 on a 2015 Ford F-150
- Problem: A 2015 Ford F-150 presented with a Check Engine Light and a P0455 code (Gross Leak).
- Diagnosis: The technician immediately checked the gas cap, which was missing. Aftermarket cap was installed.
- Solution: The technician installed an OEM gas cap, cleared the code, and advised the customer to always ensure the gas cap is properly installed.
10.3. Case Study 3: P0446 on a 2012 Honda Civic
- Problem: A 2012 Honda Civic had a Check Engine Light and a P0446 code (Vent Control Circuit Malfunction).
- Diagnosis: The technician tested the vent valve and found that it was not functioning properly. They also checked the vent valve circuit and found an open circuit.
- Solution: The technician replaced the vent valve and repaired the open circuit. They cleared the code and verified that the Check Engine Light did not return.
11. EVAP System Components: Replacement and Maintenance
Knowing when to replace and how to maintain EVAP system components can extend their lifespan and prevent future issues.
- Gas Cap: Replace every 2-3 years or if damaged.
- Purge Valve: Replace if testing indicates failure or every 50,000 miles.
- Vent Valve: Replace if testing indicates failure or every 50,000 miles.
- Charcoal Canister: Replace if saturated or damaged, typically every 100,000 miles.
- Hoses and Lines: Replace if cracked, brittle, or leaking.
12. How CAR-TOOL.EDU.VN Can Help You Diagnose and Repair EVAP Systems
At CAR-TOOL.EDU.VN, we understand the complexities of automotive diagnostics and repair. Here’s how we can assist you in effectively diagnosing and repairing EVAP systems:
- Wide Range of Diagnostic Tools: We offer a comprehensive selection of OBD-II scan tools, smoke machines, vacuum/pressure testers, multimeters, and more. Our tools are designed for both professional technicians and DIY enthusiasts.
- High-Quality Parts: We provide high-quality replacement parts for EVAP systems, ensuring lasting repairs and optimal performance.
- Expert Advice: Our team of experienced technicians is available to provide expert advice and support. Contact us via WhatsApp at +1 (641) 206-8880 for personalized assistance.
- Informative Resources: CAR-TOOL.EDU.VN features a wealth of informative articles, guides, and videos to help you understand automotive systems and perform repairs effectively.
13. Frequently Asked Questions (FAQs) About EVAP Systems
Q1: What does the P0440 code mean?
A1: The P0440 code indicates a general malfunction in the Evaporative Emission Control System. It suggests that the system is not functioning as expected, and further diagnosis is needed to pinpoint the exact cause.
Q2: Can a loose gas cap cause a Check Engine Light?
A2: Yes, a loose, damaged, or missing gas cap is a common cause of EVAP system leaks and can trigger the Check Engine Light.
Q3: How often should I replace my gas cap?
A3: It is recommended to replace your gas cap every 2-3 years, or sooner if you notice any signs of damage or wear.
Q4: What is a smoke machine used for in EVAP system diagnostics?
A4: A smoke machine is used to introduce smoke into the EVAP system to locate leaks. The smoke will escape from any cracks or loose connections, making it easier to identify the source of the problem.
Q5: How do I test a purge valve?
A5: To test a purge valve, disconnect it and check for vacuum at the vacuum line. Apply voltage to the valve to see if it opens and check for leaks using a vacuum tester.
Q6: What are the symptoms of a bad charcoal canister?
A6: Symptoms of a bad charcoal canister can include a strong fuel odor, rough idling, difficulty starting, and reduced fuel efficiency.
Q7: Can I drive with an EVAP system leak?
A7: While it is generally safe to drive with a small EVAP system leak, it is not recommended to do so for an extended period. The leak can lead to reduced fuel efficiency and increased emissions.
Q8: How do I clear an EVAP system code after making repairs?
A8: After making repairs, use an OBD-II scan tool to clear the stored DTCs. If the problem is resolved, the Check Engine Light should not return.
Q9: What is a bi-directional scan tool, and how is it used for EVAP systems?
A9: A bi-directional scan tool allows you to control certain EVAP system components, such as the purge and vent valves, to test their functionality and diagnose issues more effectively.
Q10: Where can I find reliable EVAP system replacement parts?
A10: CAR-TOOL.EDU.VN offers a wide range of high-quality EVAP system replacement parts. Visit our website or contact us via WhatsApp at +1 (641) 206-8880 for assistance.
14. Conclusion: Mastering EVAP System Diagnostics
Effectively diagnosing EVAP system issues requires a combination of knowledge, the right tools, and a systematic approach. By understanding the components of the EVAP system, common problems, and diagnostic techniques, you can accurately identify and resolve issues, ensuring your vehicle runs efficiently and minimizes its environmental impact. Remember to use the resources available at CAR-TOOL.EDU.VN, including our wide range of diagnostic tools and expert advice, to help you master EVAP system diagnostics.
Ready to take control of your EVAP system diagnostics and repairs? Contact CAR-TOOL.EDU.VN today for expert advice and top-quality tools and parts. Our team is here to help you every step of the way.
Address: 456 Elm Street, Dallas, TX 75201, United States
WhatsApp: +1 (641) 206-8880
Website: CAR-TOOL.EDU.VN
Don’t let EVAP system issues slow you down. Reach out now and let CAR-TOOL.EDU.VN be your trusted partner in automotive diagnostics and repair.