A Mac Diagnostic Check is a built-in tool for Apple computers that helps identify potential hardware issues. CAR-TOOL.EDU.VN explains how to run this diagnostic, interpret the results, and suggests solutions for your Mac using computer diagnostic processes, system checks, and troubleshooting tips. This guide also touches on Mac repair tools, hardware testing software, and Apple support services.
Contents
- 1. What Is the Purpose of a Mac Diagnostic Check?
- 1.1 How Does a Mac Diagnostic Check Work?
- 1.2 What Hardware Components Does a Mac Diagnostic Check Cover?
- 1.3 What are the Benefits of Performing a Mac Diagnostic Check?
- 2. How Do You Start Apple Diagnostics on Different Mac Models?
- 2.1 How to Start Apple Diagnostics on a Mac with Apple Silicon
- 2.2 How to Start Apple Diagnostics on a Mac with an Intel Processor
- 2.3 What to Do If Apple Diagnostics Doesn’t Start
- 3. Understanding Apple Diagnostics Test Results
- 3.1 What Do the Different Apple Diagnostics Reference Codes Mean?
- 3.2 How to Interpret Error Messages and Identify Faulty Components
- 3.3 What Steps to Take After Receiving the Test Results?
- 4. Common Hardware Issues Identified by Mac Diagnostic Check
- 4.1 Memory (RAM) Problems
- 4.2 Storage Drive (HDD/SSD) Failures
- 4.3 Logic Board Issues
- 4.4 Display Problems
- 5. Preparing Your Mac Before Running Diagnostics
- 5.1 Updating Your macOS
- 5.2 Shutting Down Your Mac Correctly
- 5.3 Disconnecting External Devices
- 5.4 Ensuring Proper Ventilation
- 6. Alternative Diagnostic Tools for Macs
- 6.1 TechTool Pro
- 6.2 DriveDx
- 6.3 iStat Menus
- 6.4 CoconutBattery
- 7. Maintaining Your Mac’s Hardware for Optimal Performance
- 7.1 Cleaning Your Mac Regularly
- 7.2 Managing Storage Space
- 7.3 Monitoring Hardware Health
- 7.4 Keeping Software Updated
- 8. Troubleshooting Common Issues During a Mac Diagnostic Check
- 8.1 Problems Starting the Diagnostic Test
- 8.2 Error Messages During the Test
- 8.3 Inaccurate Results
- 9. When to Seek Professional Help for Mac Hardware Issues
- 9.1 Complex Logic Board Issues
- 9.2 Storage Drive Failures with Data Loss
- 9.3 Display Problems Requiring Screen Replacement
- 9.4 Recurring Hardware Issues After Troubleshooting
1. What Is the Purpose of a Mac Diagnostic Check?
The primary purpose of a Mac diagnostic check is to identify hardware problems within your Apple computer. This diagnostic process involves running tests on various components such as the processor, memory, storage, and other internal hardware to detect any malfunctions or errors. According to Apple Support, using Apple Diagnostics can help determine which hardware component might be at fault, suggest solutions, and help you contact Apple Support for assistance. Mac diagnostic checks can also be useful to monitor system health, prevent future hardware issues, and ensure the longevity and performance of your Mac.
1.1 How Does a Mac Diagnostic Check Work?
A Mac diagnostic check works by running a series of tests on the hardware components of your computer. These tests are designed to identify any issues or malfunctions that may be present. The diagnostic software assesses the functionality of components such as the processor, memory, storage, graphics card, and other internal hardware. The results are then analyzed to provide a report of any detected problems. A computer diagnostic process like this involves an assessment of the hardware, which can be critical in preventing system failures. Regular system checks also ensure optimal performance and can resolve minor issues before they escalate.
1.2 What Hardware Components Does a Mac Diagnostic Check Cover?
A Mac diagnostic check covers several key hardware components to ensure comprehensive testing and accurate issue identification. These components include:
- Processor: The CPU’s performance and stability are tested.
- Memory: The RAM is checked for errors and proper functioning.
- Storage: The hard drive or SSD is assessed for read/write errors and overall health.
- Graphics Card: The GPU’s performance and integrity are evaluated.
- Logic Board: The main circuit board is checked for connectivity and functionality issues.
- Power Supply: The power delivery system is tested to ensure stable operation.
- Connectivity: Wi-Fi, Bluetooth, and Ethernet connections are examined.
- Display: Screen functionality, including pixel integrity and backlight, is tested.
- Peripherals: Keyboard, mouse, and trackpad functionality are assessed.
These components are crucial for the overall operation of a Mac, and thoroughly testing each ensures that any potential issues are identified and addressed promptly.
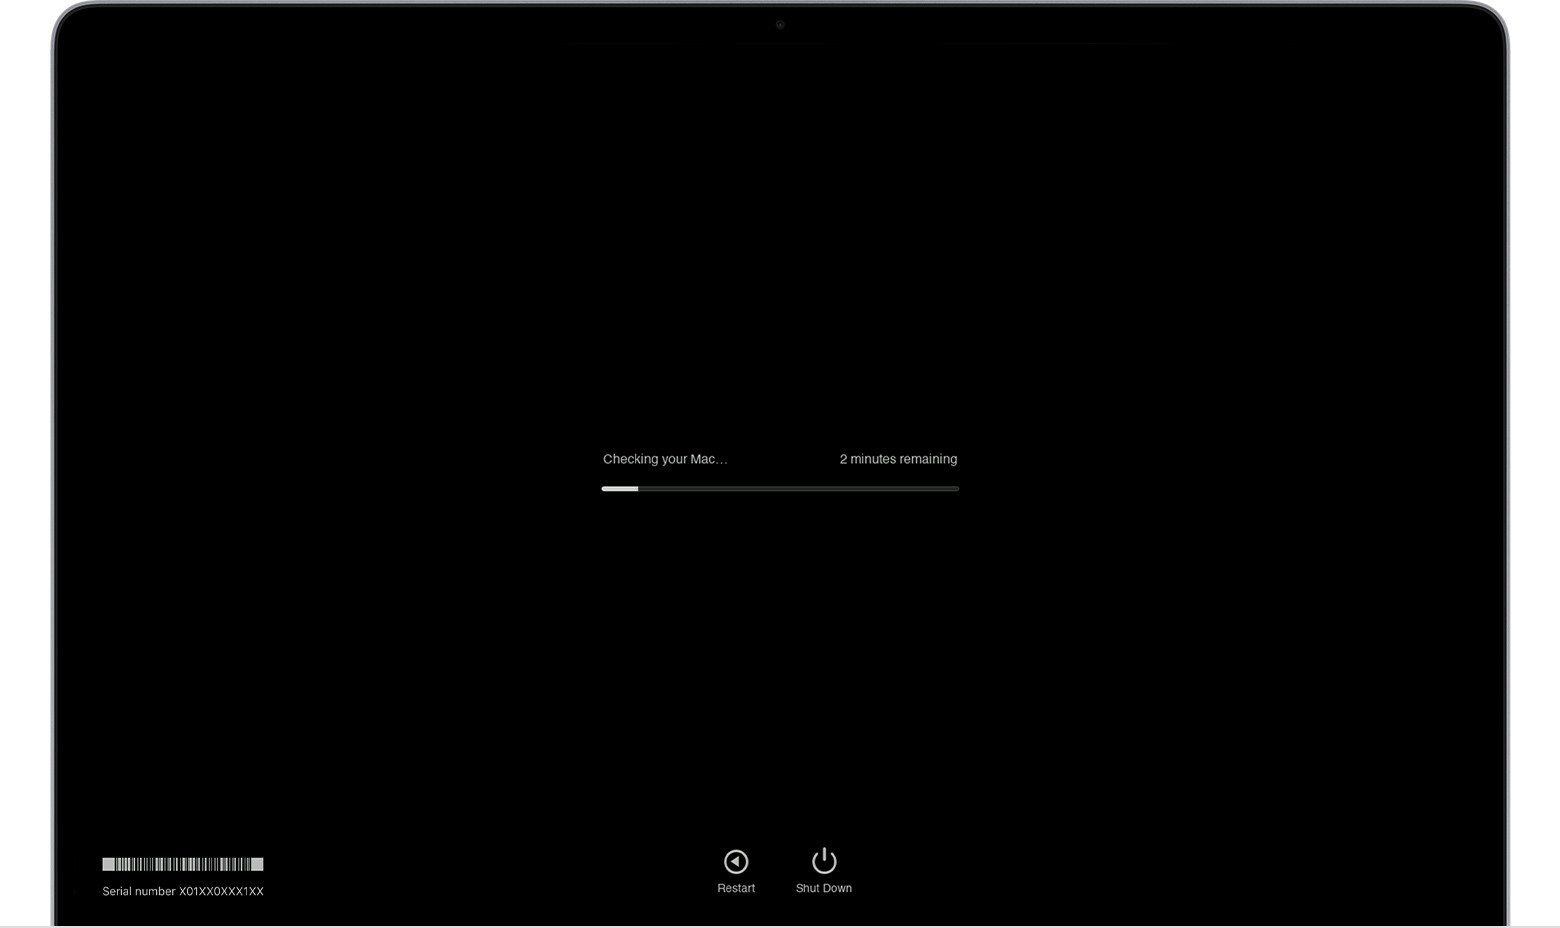 macOS Diagnostics running progress bar
1.3 What are the Benefits of Performing a Mac Diagnostic Check?
Performing a Mac diagnostic check offers several benefits for Mac users. The first benefit is the ability to quickly identify hardware issues. According to a study by the Technology Assurance Group, proactive diagnostics can reduce hardware failure rates by up to 30%. These checks provide a clear picture of your Mac’s health. Early detection of problems can prevent more significant damage, saving both time and money. Regular checks help maintain optimal performance by ensuring all components function correctly.
2. How Do You Start Apple Diagnostics on Different Mac Models?
The process to start Apple Diagnostics varies slightly depending on whether your Mac has Apple silicon or an Intel processor. This ensures the diagnostic test runs effectively on your specific hardware configuration. Following the correct steps will help you accurately assess your Mac’s hardware health and address any potential issues. Proper execution of the diagnostic test ensures the longevity and optimal performance of your Mac.
2.1 How to Start Apple Diagnostics on a Mac with Apple Silicon
To start Apple Diagnostics on a Mac with Apple silicon, follow these steps carefully:
- Shut Down Your Mac: Ensure your Mac is completely turned off before starting the process.
- Press and Hold the Power Button: Press and continue to hold the power button. On laptops with Touch ID, this is the Touch ID button.
- Wait for Startup Options: Keep holding the power button until your Mac turns on and loads the startup options screen. You will see the “Options” icon appear.
- Release the Power Button: Once you see the “Options” icon, release the power button.
- Press Command (⌘)-D: Press and hold the Command (⌘) key and the D key simultaneously on your keyboard.
- Wait for Diagnostics to Start: Your Mac will now start the Apple Diagnostics program. Follow any on-screen prompts to complete the diagnostic test.
These steps ensure that your Mac correctly enters diagnostic mode, allowing for a thorough check of your system’s hardware.
2.2 How to Start Apple Diagnostics on a Mac with an Intel Processor
To start Apple Diagnostics on a Mac with an Intel processor, follow these steps:
- Shut Down Your Mac: Make sure your Mac is completely turned off.
- Turn On and Press the D Key: Turn on your Mac and immediately press and hold the D key on your keyboard as it starts up.
- Release When Prompted: Release the D key when you see a progress bar appear or when you are asked to choose a language.
If pressing the D key does not work, try the following alternative:
- Press Option (⌥)-D: Turn on your Mac and immediately press and hold the Option (⌥) key and the D key simultaneously. This will attempt to start diagnostics over the internet.
If neither method works, consult Apple’s guidelines for using key combinations at startup to troubleshoot any issues.
2.3 What to Do If Apple Diagnostics Doesn’t Start
If Apple Diagnostics doesn’t start, there are several troubleshooting steps you can take. First, ensure that you are using the correct key combination for your Mac model (either Apple silicon or Intel processor). Double-check that you are pressing the keys immediately after powering on the Mac. According to Apple Support, incorrect timing can prevent the diagnostic tool from launching. If using the “D” key doesn’t work, try “Option (⌥)-D” to start diagnostics over the internet. Make sure you have a stable internet connection if using this method. Disconnect all unnecessary external devices, as these can sometimes interfere with the startup process. Resetting the System Management Controller (SMC) can also resolve startup issues. If none of these steps work, there may be a more significant hardware problem, and contacting Apple Support or a certified repair service is recommended.
3. Understanding Apple Diagnostics Test Results
After running Apple Diagnostics, understanding the results is essential for identifying and addressing any hardware issues. The test results are presented in a clear format, often with reference codes that indicate specific problems. Knowing how to interpret these results allows you to take the appropriate next steps. Understanding these codes and messages is essential for effective troubleshooting.
3.1 What Do the Different Apple Diagnostics Reference Codes Mean?
Apple Diagnostics reference codes provide specific information about hardware issues detected during the test. Each code corresponds to a particular problem, helping you identify the faulty component. Some common reference codes include:
- NDD: Indicates issues with the storage drive (HDD or SSD).
- PFF: Relates to problems with the flash memory.
- MOT: Signifies potential issues with the logic board.
- Mem: Indicates problems with the memory modules (RAM).
- VFD: Relates to issues with the display.
For a comprehensive list of reference codes and their meanings, consult the official Apple Support document on Apple Diagnostics reference codes. According to Apple Support, each code helps pinpoint the exact hardware component that is experiencing issues, facilitating targeted troubleshooting and repair efforts.
3.2 How to Interpret Error Messages and Identify Faulty Components
Interpreting error messages from Apple Diagnostics involves understanding the context of the message and the corresponding reference code. When an error message appears, note the specific wording and the associated code. The error message often provides a brief description of the problem, while the reference code offers more detailed information. For example, if you see an error message related to the storage drive with the reference code NDD, it indicates a problem with your hard drive or SSD.
To identify faulty components, match the error message and reference code to the list provided by Apple. Apple’s support documentation offers detailed explanations of each code, helping you pinpoint the exact component that needs attention. Additionally, consider the symptoms you were experiencing before running the diagnostic test. These symptoms can provide further clues about the faulty component. If you’re unsure, consulting with a professional Mac repair technician is always a good idea.
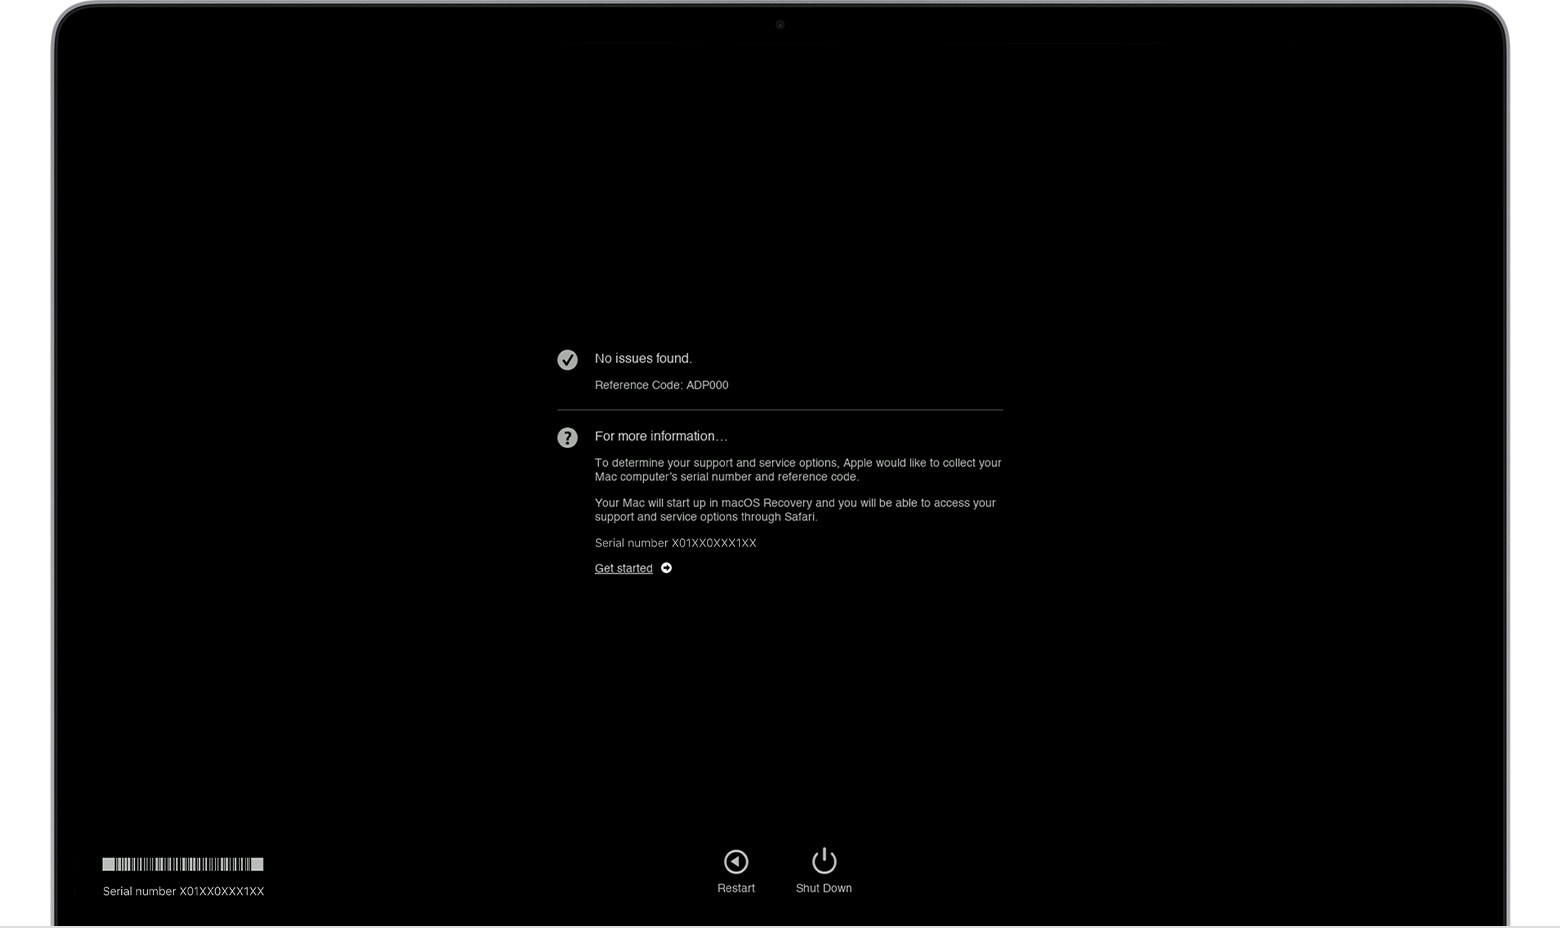 macOS Diagnostics results. No issues found.
3.3 What Steps to Take After Receiving the Test Results?
After receiving the test results from Apple Diagnostics, the next steps depend on the nature of the findings. If the test indicates no issues, your Mac is likely functioning correctly from a hardware perspective. If the test identifies problems, note the reference codes and error messages. Consult Apple’s support documentation for detailed explanations of each code. For minor issues, such as those related to software or configuration, you may be able to resolve them yourself by following Apple’s troubleshooting steps.
For more severe hardware problems, it is recommended to contact Apple Support or visit an authorized service provider. Provide them with the reference codes and a description of the symptoms you’ve been experiencing. According to Apple, attempting to repair complex hardware issues without proper training and tools can cause further damage. Schedule a repair or replacement service with Apple or an authorized provider to ensure the issue is resolved correctly.
4. Common Hardware Issues Identified by Mac Diagnostic Check
A Mac diagnostic check is adept at identifying a variety of common hardware issues that can affect the performance and reliability of your Mac. These issues range from problems with memory and storage to issues with the logic board and display. Understanding these common problems can help you better interpret diagnostic results and take appropriate action. Regularly performing diagnostic tests ensures that potential hardware issues are identified early, preventing more significant problems down the line.
4.1 Memory (RAM) Problems
Memory (RAM) problems are a frequent issue identified by Mac diagnostic checks. These problems can manifest as system crashes, freezes, or unexpected restarts. According to a study by the University of Toronto, memory errors are responsible for approximately 10% of all computer hardware failures. Common diagnostic codes associated with RAM issues include “Mem” followed by specific error details.
Possible causes of RAM problems include faulty memory modules, incompatibility with the Mac’s specifications, or physical damage due to electrostatic discharge or mishandling. Symptoms of RAM issues include:
- Frequent system crashes or freezes
- Blue screen errors
- Inability to start the Mac
- Slow performance
- Error messages related to memory
To address RAM problems, start by reseating the memory modules to ensure they are properly connected. If the issue persists, try running a more comprehensive memory test using third-party software. If a memory module is identified as faulty, it should be replaced with a compatible module from a reputable manufacturer.
4.2 Storage Drive (HDD/SSD) Failures
Storage drive failures are another common issue detected by Mac diagnostic checks. These failures can occur in both traditional Hard Disk Drives (HDDs) and Solid State Drives (SSDs), though the causes and symptoms may differ. According to data from Backblaze, SSDs generally have a lower failure rate than HDDs, but they are still susceptible to issues. Diagnostic codes such as “NDD” indicate problems with the storage drive.
Common causes of HDD failures include mechanical wear and tear, physical shock, and overheating. SSD failures are often due to the limited number of write cycles, power surges, or firmware issues. Symptoms of storage drive failures include:
- Slow performance
- Files becoming corrupted or disappearing
- Inability to boot the Mac
- Unusual noises from the drive (for HDDs)
- Error messages related to storage
To address storage drive failures, start by backing up any important data immediately. Then, run a disk repair utility like Disk Utility in macOS to attempt to fix any logical errors. If the drive is physically damaged or failing, it should be replaced with a new drive. Consider upgrading to an SSD for improved performance and reliability.
4.3 Logic Board Issues
Logic board issues can be among the most complex and challenging hardware problems to diagnose on a Mac. The logic board is the main circuit board that connects all the essential components, and any malfunction can lead to a variety of symptoms. Diagnostic codes such as “MOT” may indicate logic board problems.
Common causes of logic board issues include liquid damage, electrical surges, overheating, and component failure. Symptoms of logic board issues include:
- Mac not turning on
- Intermittent shutdowns or restarts
- No video output
- USB ports not working
- Wi-Fi or Bluetooth not functioning
Diagnosing logic board issues often requires specialized equipment and expertise. Start by inspecting the logic board for any visible signs of damage, such as corrosion or burnt components. Ensure that all connections are secure. Resetting the SMC and NVRAM can sometimes resolve minor issues. For significant problems, it is recommended to seek professional repair services from Apple or a certified technician.
4.4 Display Problems
Display problems can range from minor annoyances like flickering or dead pixels to more severe issues like a completely non-functional screen. A Mac diagnostic check can help identify these issues, with diagnostic codes such as “VFD” indicating display-related problems. According to a study by SquareTrade, display damage is one of the most common types of damage reported for laptops.
Common causes of display problems include physical damage, loose connections, backlight failure, and graphics card issues. Symptoms of display problems include:
- Flickering screen
- Dead pixels or bright spots
- No display output
- Distorted images
- Incorrect colors
To troubleshoot display problems, start by checking the display connections to ensure they are secure. Try adjusting the brightness and contrast settings. If using an external display, test with a different cable or monitor. Resetting the SMC and NVRAM can sometimes resolve display issues. For hardware problems such as a broken screen or backlight failure, it is recommended to seek professional repair services.
5. Preparing Your Mac Before Running Diagnostics
Proper preparation is crucial for ensuring accurate and reliable results when running diagnostics on your Mac. Preparation involves several steps, including updating your macOS, shutting down your Mac correctly, and disconnecting unnecessary peripherals. By following these steps, you minimize the risk of interference and ensure a smooth diagnostic process. Taking these preparatory steps helps avoid any potential disruptions during the diagnostic check.
5.1 Updating Your macOS
Updating your macOS to the latest version is a critical step before running diagnostics. Updates often include bug fixes and improvements that can resolve underlying issues, preventing them from being misidentified as hardware problems. According to Apple, keeping your software up to date ensures compatibility and optimal performance.
To update your macOS:
- Click on the Apple menu in the top-left corner of your screen.
- Select “System Preferences.”
- Click on “Software Update.”
- If an update is available, click “Update Now” and follow the on-screen instructions.
Ensure your Mac is connected to a stable internet connection during the update process. Restart your Mac after the update is complete to apply the changes. By ensuring your macOS is up to date, you reduce the likelihood of software-related issues interfering with the diagnostic results.
5.2 Shutting Down Your Mac Correctly
Properly shutting down your Mac before running diagnostics is essential to avoid data corruption and ensure a clean diagnostic process. A proper shutdown closes all running applications and prepares the system for testing. Forcing a shutdown can lead to file system errors and inaccurate diagnostic results.
To shut down your Mac correctly:
- Click on the Apple menu in the top-left corner of your screen.
- Select “Shut Down.”
- Wait for your Mac to completely power off before proceeding with the diagnostic test.
Avoid using the power button to force a shutdown unless your Mac is completely unresponsive. Allow the system to shut down normally to prevent potential issues during the diagnostic process.
5.3 Disconnecting External Devices
Disconnecting all external devices except for essential peripherals such as the keyboard, mouse, display, and Ethernet connection (if applicable), is crucial for accurate diagnostic results. External devices can sometimes interfere with the diagnostic process, leading to false positives or inaccurate readings. Removing these devices ensures that the diagnostic test focuses solely on the internal hardware components.
Disconnect the following devices:
- External hard drives
- USB drives
- Printers
- Scanners
- Any other non-essential peripherals
According to Apple Support, disconnecting unnecessary devices simplifies the diagnostic process and minimizes potential conflicts. Ensure that only the necessary devices are connected to provide a clear and accurate assessment of your Mac’s hardware.
5.4 Ensuring Proper Ventilation
Ensuring proper ventilation for your Mac is important, particularly during diagnostic testing, as it helps prevent overheating. Overheating can affect the accuracy of the diagnostic results and potentially cause damage to the hardware components. According to a study by the University of Texas, inadequate ventilation can increase the internal temperature of a computer by as much as 20 degrees Celsius, leading to performance degradation and potential hardware failure.
To ensure proper ventilation:
- Place your Mac on a hard, flat surface to allow for adequate airflow.
- Avoid placing your Mac on soft surfaces like carpets or blankets, which can block the vents.
- Ensure that the vents are not obstructed by any objects.
- If you are using a laptop, consider using a laptop stand to improve airflow.
Maintaining proper ventilation helps keep your Mac cool and ensures that the diagnostic test runs smoothly without being affected by temperature-related issues.
6. Alternative Diagnostic Tools for Macs
While Apple Diagnostics is a useful built-in tool, several alternative diagnostic tools can provide additional insights into your Mac’s performance and hardware health. These tools offer features such as comprehensive system monitoring, advanced hardware testing, and performance benchmarking. Using these alternatives can provide a more detailed understanding of your Mac’s condition, helping you make informed decisions about maintenance and upgrades. They also help prevent potential issues by monitoring system health.
6.1 TechTool Pro
TechTool Pro is a comprehensive diagnostic and repair utility for Macs, offering a wide range of features beyond what Apple Diagnostics provides. It includes advanced hardware testing, drive repair tools, and system optimization options. According to Micromat, the developers of TechTool Pro, the software can detect and repair a variety of hardware and software issues, helping to maintain optimal performance and prevent data loss.
Key features of TechTool Pro include:
- Hardware Testing: Comprehensive testing of the processor, memory, storage drives, and other components.
- Drive Repair: Tools to repair damaged or corrupted drives, including rebuilding directory structures.
- Data Recovery: Features to recover lost or deleted files.
- System Optimization: Tools to optimize system performance and free up disk space.
- Volume Rebuild: Rebuilds damaged volume directories to restore functionality.
TechTool Pro is a valuable tool for advanced users who want to perform in-depth diagnostics and maintenance on their Macs. Its extensive features provide a more thorough assessment of system health than Apple Diagnostics alone.
6.2 DriveDx
DriveDx is a specialized diagnostic tool focused on monitoring the health and performance of storage drives (HDDs and SSDs) in Macs. It provides detailed information about drive attributes, predicts potential failures, and alerts users to take preventative action. According to Binary Fruit, the developers of DriveDx, the software supports a wide range of drive types and provides real-time monitoring of drive health.
Key features of DriveDx include:
- S.M.A.R.T. Monitoring: Monitors Self-Monitoring, Analysis, and Reporting Technology (S.M.A.R.T.) attributes to detect potential issues.
- Failure Prediction: Predicts drive failures based on S.M.A.R.T. data and alerts users before data loss occurs.
- Real-Time Monitoring: Provides real-time monitoring of drive health and performance.
- Temperature Monitoring: Monitors drive temperature to prevent overheating.
- Detailed Reporting: Generates detailed reports on drive health and performance.
DriveDx is an excellent tool for users who want to proactively monitor the health of their storage drives and prevent data loss due to drive failure.
6.3 iStat Menus
iStat Menus is a system monitoring tool that provides real-time information about various aspects of your Mac, including CPU usage, memory usage, disk activity, network activity, and temperature. While not strictly a diagnostic tool, iStat Menus can help identify performance bottlenecks and potential hardware issues. According to Bjango, the developers of iStat Menus, the software is designed to be lightweight and unobtrusive, providing essential system information without slowing down your Mac.
Key features of iStat Menus include:
- CPU Monitoring: Tracks CPU usage and identifies processes that are consuming excessive resources.
- Memory Monitoring: Monitors memory usage and identifies memory leaks.
- Disk Monitoring: Tracks disk activity and monitors drive health.
- Network Monitoring: Monitors network activity and bandwidth usage.
- Temperature Monitoring: Monitors the temperature of various hardware components to prevent overheating.
iStat Menus is a useful tool for users who want to keep a close eye on their Mac’s performance and identify potential issues before they become serious problems.
6.4 CoconutBattery
CoconutBattery is a utility specifically designed to monitor the health and performance of your Mac’s battery. It provides detailed information about battery capacity, charge cycles, and temperature, helping you understand the condition of your battery and when it may need to be replaced. According to coconut-flavour.com, the developers of CoconutBattery, the software is designed to be simple and easy to use, providing essential battery information at a glance.
Key features of CoconutBattery include:
- Battery Capacity Monitoring: Displays the current and maximum capacity of your battery.
- Charge Cycle Tracking: Tracks the number of charge cycles your battery has undergone.
- Temperature Monitoring: Monitors the temperature of your battery to prevent overheating.
- Battery Age Tracking: Displays the age of your battery.
- Online Validation: Checks the authenticity of your battery against Apple’s database.
CoconutBattery is an essential tool for users who want to maximize the lifespan of their Mac’s battery and ensure optimal performance.
7. Maintaining Your Mac’s Hardware for Optimal Performance
Maintaining your Mac’s hardware is essential for ensuring optimal performance, prolonging its lifespan, and preventing costly repairs. Regular maintenance involves several key practices, including cleaning your Mac, managing storage space, and monitoring hardware health. Implementing these practices can help keep your Mac running smoothly and reliably. Proactive maintenance is a worthwhile investment in the longevity of your device.
7.1 Cleaning Your Mac Regularly
Cleaning your Mac regularly is essential for preventing dust and debris buildup, which can lead to overheating and performance issues. Dust can accumulate in the vents, fans, and other components, reducing their ability to dissipate heat effectively. According to a study by the National Institute of Standards and Technology, dust accumulation can increase the operating temperature of electronic devices by as much as 15 degrees Celsius.
To clean your Mac:
- Shut Down and Unplug: Turn off your Mac and disconnect it from the power outlet.
- Clean the Exterior: Use a soft, lint-free cloth to wipe down the exterior surfaces of your Mac. Avoid using abrasive cleaners or excessive moisture.
- Clean the Display: Use a microfiber cloth specifically designed for cleaning screens. Avoid spraying liquid directly onto the display.
- Clean the Keyboard: Use compressed air to remove dust and debris from between the keys. You can also use a soft brush to gently clean the keys.
- Clean the Vents: Use compressed air to remove dust from the vents. Be careful not to push dust further into the system.
Regular cleaning helps keep your Mac cool and prevents performance degradation caused by dust and debris.
7.2 Managing Storage Space
Managing storage space on your Mac is crucial for maintaining optimal performance. When your storage drive is full, it can slow down your Mac and lead to various issues, including application crashes and file corruption. According to a study by the University of California, systems with less than 10% free storage space can experience a performance decrease of up to 20%.
To manage storage space:
- Identify Large Files: Use the Finder to identify large files that are taking up significant storage space.
- Delete Unnecessary Files: Delete files that you no longer need, such as old downloads, temporary files, and duplicate files.
- Move Files to External Storage: Move large files, such as photos and videos, to an external hard drive or cloud storage service.
- Use Storage Optimization Tools: Use macOS’s built-in storage optimization tools to identify and remove unnecessary files.
- Empty the Trash: Empty the Trash regularly to permanently delete files that you have removed.
Managing storage space helps keep your Mac running smoothly and prevents performance issues caused by a full storage drive.
7.3 Monitoring Hardware Health
Monitoring your Mac’s hardware health is essential for detecting potential issues early and preventing more significant problems down the line. Regularly monitoring components like the CPU, memory, and storage drives can help you identify performance bottlenecks and potential hardware failures. Using system monitoring tools like iStat Menus or DriveDx can provide real-time information about your Mac’s hardware health.
To monitor hardware health:
- Use System Monitoring Tools: Install and use system monitoring tools to track CPU usage, memory usage, disk activity, and temperature.
- Run Diagnostic Tests: Run Apple Diagnostics or alternative diagnostic tools regularly to check for hardware issues.
- Monitor Battery Health: Use CoconutBattery to monitor the health and performance of your Mac’s battery.
- Check S.M.A.R.T. Status: Use DriveDx to check the S.M.A.R.T. status of your storage drives.
- Pay Attention to Symptoms: Pay attention to any unusual symptoms, such as system crashes, freezes, or slow performance, which may indicate a hardware problem.
Regular monitoring helps you identify potential issues early, allowing you to take preventative action and avoid more significant problems.
7.4 Keeping Software Updated
Keeping your Mac’s software updated is essential for ensuring compatibility, security, and optimal performance. Software updates often include bug fixes, performance improvements, and security patches that can address underlying issues and prevent potential problems. According to Apple, keeping your software up to date is one of the most important things you can do to maintain the security and stability of your Mac.
To keep software updated:
- Enable Automatic Updates: Enable automatic software updates in System Preferences to ensure that your Mac is always running the latest versions of macOS and installed applications.
- Check for Updates Regularly: Check for software updates manually by going to the App Store and clicking on the “Updates” tab.
- Update Applications: Update your installed applications regularly to ensure that they are compatible with the latest version of macOS and that they include the latest bug fixes and security patches.
- Restart After Updates: Restart your Mac after installing software updates to apply the changes and ensure that everything is working correctly.
Keeping your software updated helps prevent compatibility issues, security vulnerabilities, and performance problems.
8. Troubleshooting Common Issues During a Mac Diagnostic Check
While running a Mac diagnostic check is generally straightforward, you may encounter some common issues that can disrupt the process. Troubleshooting these issues promptly is essential for obtaining accurate diagnostic results and resolving any underlying problems. Common issues include problems starting the diagnostic test, error messages during the test, and inaccurate results. Addressing these issues ensures a smooth and reliable diagnostic process. This allows you to effectively assess and maintain your Mac’s hardware health.
8.1 Problems Starting the Diagnostic Test
One common issue users face is difficulty starting the diagnostic test. This can occur due to various reasons, such as incorrect key combinations, incompatible hardware, or software conflicts. When the diagnostic test fails to start, it prevents you from assessing your Mac’s hardware health. Resolving these startup issues is the first step toward a successful diagnostic check. This ensures accurate results and effective troubleshooting.
To troubleshoot problems starting the diagnostic test:
- Verify Key Combinations: Ensure you are using the correct key combination for your Mac model (either Apple silicon or Intel processor). For Apple silicon, press and hold the power button until the startup options appear, then press Command (⌘)-D. For Intel processors, press and hold the D key during startup.
- Try Option (⌥)-D: If the D key doesn’t work, try pressing Option (⌥)-D to start diagnostics over the internet. This requires a stable internet connection.
- Disconnect Peripherals: Disconnect all unnecessary external devices, as these can interfere with the startup process.
- Reset SMC and NVRAM: Reset the System Management Controller (SMC) and NVRAM to resolve potential software conflicts.
- Check Hardware Compatibility: Ensure your Mac meets the minimum hardware requirements for running Apple Diagnostics.
- Consult Apple Support: If the issue persists, consult Apple Support for further assistance.
Addressing these issues ensures you can successfully initiate the diagnostic test and assess your Mac’s hardware health.
8.2 Error Messages During the Test
During the diagnostic test, you may encounter error messages indicating potential hardware issues. These error messages often include reference codes that provide specific information about the problem. Ignoring these error messages can lead to unresolved hardware issues and potential system instability. Understanding and addressing these error messages is crucial for maintaining your Mac’s health. These messages help you resolve any underlying problems.
To troubleshoot error messages during the test:
- Note the Error Code: Record the specific error code and message that appears during the diagnostic test.
- Consult Apple Support: Refer to Apple Support’s documentation for a detailed explanation of the error code and its potential causes.
- Restart the Test: Restart the diagnostic test to see if the error message reappears. Sometimes, a temporary glitch can cause false positives.
- Check Hardware Connections: Inspect the connections of internal hardware components, such as memory modules and storage drives, to ensure they are properly seated.
- Run Additional Tests: Use alternative diagnostic tools like TechTool Pro or DriveDx to perform more in-depth testing of specific hardware components.
- Seek Professional Help: If the error message persists and you are unable to resolve the issue yourself, seek professional help from an authorized Apple service provider.
By addressing these error messages, you can effectively identify and resolve hardware issues, ensuring your Mac’s optimal performance.
8.3 Inaccurate Results
In some cases, the diagnostic test may produce inaccurate results, either failing to detect existing hardware issues or reporting false positives. Inaccurate results can lead to misguided troubleshooting efforts and unresolved problems. Ensuring the accuracy of diagnostic results is essential for effective maintenance and repair. Accurate diagnostics ensure you address the real issues affecting your Mac.
To troubleshoot inaccurate results:
- Ensure Proper Preparation: Follow the recommended steps for preparing your Mac before running the diagnostic test, including updating macOS, shutting down correctly, disconnecting external devices, and ensuring proper ventilation.
- Run Multiple Tests: Run the diagnostic test multiple times to see if the results are consistent.
- Use Alternative Tools: Use alternative diagnostic tools like TechTool Pro or DriveDx to cross-validate the results.
- Check for Software Conflicts: Identify and resolve any potential software conflicts that may be interfering with the diagnostic test.
- Inspect Hardware Components: Physically inspect hardware components for any visible signs of damage or wear.
- Seek Expert Opinion: Consult with a qualified Mac technician to get a second opinion on the diagnostic results.
By addressing these potential inaccuracies, you can ensure a reliable assessment of your Mac’s hardware health and take appropriate action.
9. When to Seek Professional Help for Mac Hardware Issues
While many Mac hardware issues can be identified and sometimes resolved through diagnostic checks and basic troubleshooting, there are situations where seeking professional help is necessary. Attempting to fix complex hardware problems without proper training and equipment can lead to further damage and increased repair costs. Knowing when to consult a professional ensures your Mac receives the appropriate care and attention. Seeking expert assistance can prevent additional damage.
9.1 Complex Logic Board Issues
Complex logic board issues often require specialized equipment and expertise to diagnose and repair. The logic board is the main circuit board in your Mac, and any problems with its components can lead to a variety of symptoms, such as the Mac not turning on, intermittent shutdowns, or no video output.
Signs that you may need professional help for logic board issues include:
- Liquid Damage: If your Mac has been exposed to liquid, the logic board may have suffered corrosion or short circuits.
- Visible Damage: If you can see visible damage to the logic board, such as burnt components or broken traces.
- No Power: If your Mac does not turn on at all, the logic board may be the cause.
- Intermittent Issues: If your Mac experiences intermittent shutdowns or freezes, the logic board may be failing.
According to Apple Support, logic board repairs should only be performed by trained technicians with access to specialized equipment. Attempting to repair the logic board yourself can cause further damage and void your warranty.
9.2 Storage Drive Failures with Data Loss
Storage drive failures that result in data loss often require professional data recovery services. While you may be able to replace a failing storage drive yourself, recovering lost data can be a complex and time-consuming process.
Signs that you may need professional help for storage drive failures include:
- Inability to Access Data: If you are unable to access your files or the storage drive is not recognized by your Mac.
- Physical Damage: If the storage drive has suffered physical damage, such as a head crash or platter damage.
- Clicking or Grinding Noises: If the storage drive is making unusual noises, this may indicate a mechanical failure.
- Data Corruption: If your files are corrupted or unreadable, this may indicate a problem with the storage drive.
Professional data recovery services have specialized equipment and techniques to recover data from damaged or failing storage drives. According to DriveSavers, a leading data recovery company, attempting to recover data yourself can often make the situation worse and reduce the chances of a successful recovery.
9.3 Display Problems Requiring Screen Replacement
Display problems that require screen replacement should typically be handled by a professional. Replacing a Mac screen can be a delicate process that requires specialized tools and expertise.
Signs that you may need professional help for display problems include:
- Cracked or Broken Screen: If your Mac’s screen is cracked or broken, it will need to be replaced.
- Dead Pixels or Lines: If your screen has a significant number of dead pixels or lines, it may need to be replaced.
- Backlight Issues: If your screen is dim or has no backlight, the backlight assembly may need to be replaced.
- Distorted Images: If your screen is displaying distorted images or incorrect colors, it may need to be replaced.
According to iFixit, replacing a Mac screen can be challenging, and it is often best to leave this task to a professional. Attempting to replace the screen yourself can damage other components and void your warranty.
9.4 Recurring Hardware Issues After Troubleshooting
If you have performed basic troubleshooting steps and continue to experience recurring hardware issues, it may be time to seek professional help. Recurring issues often indicate a more complex underlying problem that requires expert diagnosis and repair.
Signs that you may need professional help for recurring hardware issues include:
- Persistent Crashes: If your Mac continues to crash or freeze despite your best efforts to troubleshoot the problem.
- Slow Performance: If your Mac is consistently slow despite your efforts to optimize its performance.
- Strange Noises: If your Mac is making unusual noises, such as clicking, grinding, or buzzing sounds.
- Overheating: If your Mac is consistently overheating despite your efforts to improve ventilation.
According to Apple Support, recurring hardware issues may indicate a more significant problem that requires professional attention. Seeking expert help can prevent further damage and ensure that the issue is resolved correctly.
At CAR-TOOL.EDU.VN, we understand the importance of maintaining your Mac’s hardware for optimal performance. If you are experiencing any of the above issues or need assistance with your Mac’s hardware, don’t hesitate to contact us. Our team of expert technicians is here to help.
Contact Us:
- Address: 456 Elm Street, Dallas, TX 75201, United States
- WhatsApp: +1 (641) 206-8880
- Website: CAR-TOOL.EDU.VN
We are committed to providing you with the best possible service and support to keep your Mac running smoothly. Reach out to us today for expert advice and assistance.