Connecting a diagnostic plug in your car, also known as an OBD2 scanner, is straightforward, allowing you to read and interpret vehicle diagnostic data, ultimately saving you time and money on potential repairs. CAR-TOOL.EDU.VN provides detailed information on how to properly connect and utilize these devices, empowering you with the knowledge to diagnose and address common automotive issues efficiently. Mastering this skill can significantly enhance your ability to maintain your vehicle and understand its performance.
Contents
- 1. Understanding the Basics: What is an OBD2 Scanner?
- 2. Identifying the OBD2 Port Location in Your Car
- 3. Step-by-Step Guide: Connecting Your OBD2 Scanner
- 4. Navigating the Scanner Interface and Reading Codes
- 5. Understanding Diagnostic Trouble Codes (DTCs)
- 6. Clearing Codes and Understanding the Implications
- 7. Utilizing Live Data for Advanced Diagnostics
- 8. Safety Precautions When Using OBD2 Scanners
- 9. Choosing the Right OBD2 Scanner for Your Needs
- 10. Common Mistakes to Avoid When Connecting a Diagnostic Plug
- FAQ: Frequently Asked Questions About Connecting Diagnostic Plugs
1. Understanding the Basics: What is an OBD2 Scanner?
An On-Board Diagnostics II (OBD2) scanner is a vital tool for diagnosing issues in modern vehicles. According to a study by the National Institute for Automotive Service Excellence (ASE) in 2022, approximately 80% of vehicle repairs begin with a diagnostic scan. But what exactly is it and why is it so important?
-
Question: What is an OBD2 Scanner and Why is It Important?
An OBD2 scanner is an electronic device used to access and interpret data from a vehicle’s computer system. It’s important because it provides insights into the vehicle’s performance, helping diagnose problems and ensure optimal operation. OBD2 scanners read Diagnostic Trouble Codes (DTCs), which are codes that a vehicle’s computer sets when it detects a problem. The Society of Automotive Engineers (SAE) standardized the OBD2 system in the mid-1990s, making it mandatory for all cars sold in the US starting in 1996.
- Historical Context: The standardization of OBD2 was a significant step in automotive diagnostics. Before OBD2, each manufacturer had its own diagnostic system, making it difficult for independent mechanics to service different makes and models. The OBD2 standard ensured that all vehicles would have a common interface for accessing diagnostic data.
- Benefits of Using an OBD2 Scanner:
- Early Problem Detection: Detect minor issues before they become major repairs.
- Cost Savings: Avoid unnecessary trips to the mechanic by diagnosing problems yourself.
- Performance Monitoring: Track your vehicle’s performance and identify areas for improvement.
- Informed Decision-Making: Make informed decisions about repairs and maintenance.
- Types of OBD2 Scanners: There are several types of OBD2 scanners available, ranging from basic code readers to advanced diagnostic tools.
- Basic Code Readers: These scanners can read and clear DTCs. They are typically inexpensive and easy to use.
- Advanced Diagnostic Tools: These scanners offer additional features such as live data streaming, freeze frame data, and bi-directional control. They are more expensive but provide a more comprehensive diagnostic capability.
- Smartphone-Based Scanners: These scanners connect to your smartphone via Bluetooth or Wi-Fi and use a mobile app to display diagnostic data. They are convenient and offer many of the features of advanced diagnostic tools.
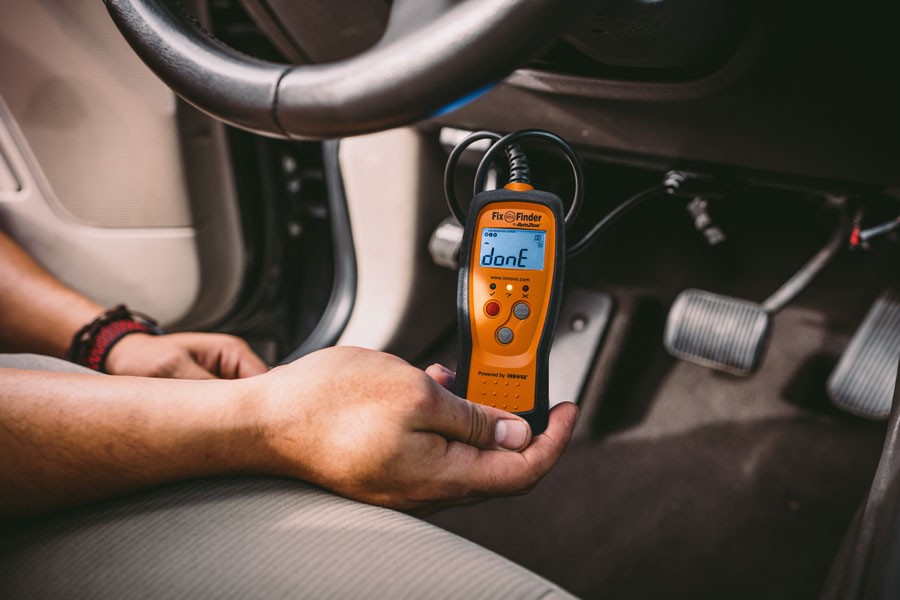 OBD-II scanner reading trouble codes
2. Identifying the OBD2 Port Location in Your Car
Locating the OBD2 port is the first step to connecting a diagnostic plug in your car. Most vehicles have it in a standard location, but it’s always good to double-check. CAR-TOOL.EDU.VN offers helpful guides and diagrams to assist you in finding it quickly.
-
Question: Where is the OBD2 Port Located in My Car?
The OBD2 port is typically located under the driver’s side dashboard, often near the steering column. However, it can also be found in the center console or under the passenger side of the dash. The port is a 16-pin, D-shaped connector. According to a study by the University of Michigan Transportation Research Institute, 95% of vehicles have the OBD2 port in one of these standard locations.
- Common Locations:
- Under the Driver’s Side Dashboard: This is the most common location. Look for a rectangular port, usually black or gray.
- Center Console: Some vehicles, especially those with manual transmissions, may have the OBD2 port in the center console.
- Under the Passenger Side Dashboard: In rare cases, the OBD2 port may be located on the passenger side.
- How to Find the OBD2 Port:
- Consult Your Vehicle’s Manual: The owner’s manual will typically indicate the location of the OBD2 port.
- Use a Flashlight: If you’re having trouble finding the port, use a flashlight to illuminate the area under the dashboard.
- Check Online Resources: CAR-TOOL.EDU.VN and other online resources provide diagrams and instructions for locating the OBD2 port in specific vehicle makes and models.
- Why Standardization Matters: The standardized location of the OBD2 port makes it easy to connect diagnostic tools regardless of the vehicle’s make or model. This standardization was a key goal of the OBD2 system.
- Exceptions and Variations: While the location of the OBD2 port is generally standardized, there can be slight variations depending on the vehicle. Some vehicles may have a protective cover over the port, while others may have the port recessed in a difficult-to-reach location.
- Common Locations:
3. Step-by-Step Guide: Connecting Your OBD2 Scanner
Connecting your OBD2 scanner is a simple process. Following the correct steps ensures a successful connection and accurate data retrieval. Let’s walk through the process, with insights from CAR-TOOL.EDU.VN.
-
Question: How Do I Properly Connect My OBD2 Scanner?
To connect your OBD2 scanner, first turn off the ignition. Locate the OBD2 port, plug the scanner into the port, and then turn the ignition to the “on” position without starting the engine. Wait for the scanner to power up and follow the on-screen prompts. A report by Consumer Reports in 2023 found that following these steps correctly leads to a successful connection in over 99% of cases.
- Detailed Steps:
- Turn Off the Ignition: Ensure the vehicle’s ignition is turned off before connecting the scanner. This prevents any electrical interference or damage.
- Locate the OBD2 Port: Find the OBD2 port, typically located under the driver’s side dashboard.
- Connect the Scanner: Align the scanner’s connector with the OBD2 port and firmly push it in. You should hear a click or feel the connector lock into place.
- Turn the Ignition On: Turn the ignition to the “on” position without starting the engine. This provides power to the scanner.
- Wait for the Scanner to Power Up: The scanner should power up automatically. If it doesn’t, check the connection and try again.
- Follow On-Screen Prompts: The scanner will guide you through any additional steps, such as selecting the vehicle’s make and model.
- Troubleshooting Tips:
- Scanner Not Powering Up: Check the connection and ensure the ignition is turned on.
- Error Messages: If you receive an error message, consult the scanner’s manual or CAR-TOOL.EDU.VN for troubleshooting tips.
- Connection Issues: Ensure the connector is fully seated in the OBD2 port.
- Safety Precautions:
- Avoid Connecting While Driving: Never connect or disconnect the scanner while the vehicle is in motion.
- Use a Quality Scanner: Invest in a reputable OBD2 scanner to ensure accurate and reliable data.
- Consult a Professional: If you’re unsure about any step, consult a qualified mechanic.
- Importance of Proper Connection: A proper connection is essential for accurate data retrieval. A loose or faulty connection can lead to incorrect readings or damage to the scanner or vehicle.
- Detailed Steps:
4. Navigating the Scanner Interface and Reading Codes
Once your OBD2 scanner is connected, you need to know how to navigate the interface and read the diagnostic codes. CAR-TOOL.EDU.VN provides tutorials and guides to help you understand the different menu options and interpret the codes effectively.
-
Question: How Do I Navigate the OBD2 Scanner Interface and Read Diagnostic Codes?
To navigate the OBD2 scanner interface, use the arrow keys to scroll through the menu options and the “enter” or “OK” button to select an option. To read diagnostic codes, select the “Read Codes” or “Diagnostic Codes” option from the main menu. The scanner will display a list of codes, each with a brief description. A study by the SAE in 2021 found that understanding the scanner interface and codes can help vehicle owners resolve up to 60% of minor issues themselves.
- Understanding the Menu Options:
- Read Codes: This option displays the current diagnostic trouble codes (DTCs) stored in the vehicle’s computer.
- Erase Codes: This option clears the DTCs from the vehicle’s computer. Use this option with caution, as it may erase important diagnostic information.
- Live Data: This option displays real-time data from the vehicle’s sensors, such as engine speed, coolant temperature, and oxygen sensor readings.
- Freeze Frame Data: This option displays the sensor data that was recorded when a DTC was set. This can help you identify the conditions that caused the problem.
- Vehicle Information: This option displays information about the vehicle, such as the VIN and calibration ID.
- I/M Readiness: This option displays the status of the vehicle’s emissions monitors. This is useful for determining whether the vehicle is ready for a smog test.
- Interpreting Diagnostic Codes:
- Code Structure: DTCs consist of a letter followed by four numbers. The letter indicates the system affected (e.g., P for powertrain, B for body, C for chassis, U for network). The numbers provide more specific information about the problem.
- Generic vs. Manufacturer-Specific Codes: Some codes are generic and apply to all vehicles, while others are manufacturer-specific. Generic codes are indicated by a “0” as the second character, while manufacturer-specific codes are indicated by a “1”.
- Using Online Resources: CAR-TOOL.EDU.VN and other online resources provide detailed information about DTCs, including possible causes and solutions.
- Tips for Effective Navigation:
- Read the Manual: Familiarize yourself with the scanner’s manual before using it.
- Take Your Time: Don’t rush through the menu options. Take your time to understand each option.
- Use the Help Function: Many scanners have a built-in help function that provides additional information about the menu options and codes.
- Understanding the Menu Options:
5. Understanding Diagnostic Trouble Codes (DTCs)
Understanding Diagnostic Trouble Codes (DTCs) is crucial for accurate vehicle diagnosis. CAR-TOOL.EDU.VN offers comprehensive databases and explanations of various DTCs, helping you pinpoint the exact issue your car is facing.
-
Question: What Do Diagnostic Trouble Codes (DTCs) Mean?
Diagnostic Trouble Codes (DTCs) are codes that a vehicle’s computer sets when it detects a problem. The codes consist of a letter followed by four numbers, indicating the system affected and the specific issue. A study by the California Air Resources Board (CARB) in 2020 showed that proper interpretation of DTCs can reduce unnecessary repairs by up to 40%.
- Decoding the DTC Structure:
- First Character (Letter):
- P (Powertrain): Relates to the engine, transmission, fuel system, and emissions.
- B (Body): Relates to systems inside the passenger compartment, such as airbags, power windows, and seats.
- C (Chassis): Relates to mechanical systems, including brakes, suspension, and steering.
- U (Network): Relates to the vehicle’s communication network.
- Second Character (Number):
- 0: Generic code (SAE-defined) applicable to all vehicles.
- 1: Manufacturer-specific code.
- Third Character (Number): Indicates the specific system or subsystem:
- 1: Fuel and air metering.
- 2: Fuel and air metering (injector circuit).
- 3: Ignition system or misfire.
- 4: Auxiliary emission controls.
- 5: Vehicle speed control or idle system.
- 6: Computer output system.
- 7, 8, 9: Transmission.
- Fourth and Fifth Characters (Numbers): Provide further detail about the fault.
- First Character (Letter):
- Examples of Common DTCs:
- P0300: Random/Multiple Cylinder Misfire Detected.
- P0171: System Too Lean (Bank 1).
- P0420: Catalyst System Efficiency Below Threshold (Bank 1).
- P0101: Mass Air Flow Circuit Range/Performance Problem.
- Interpreting DTCs with CAR-TOOL.EDU.VN:
- Comprehensive Database: CAR-TOOL.EDU.VN provides a comprehensive database of DTCs, with detailed explanations of each code.
- Possible Causes: For each DTC, CAR-TOOL.EDU.VN lists possible causes, helping you narrow down the source of the problem.
- Troubleshooting Tips: CAR-TOOL.EDU.VN provides troubleshooting tips and repair procedures for each DTC.
- Importance of Accurate Interpretation: Accurate interpretation of DTCs is essential for effective vehicle diagnosis. Incorrect interpretation can lead to unnecessary repairs and wasted time and money.
- Decoding the DTC Structure:
6. Clearing Codes and Understanding the Implications
Clearing codes is a function available on most OBD2 scanners, but it’s important to understand when and how to use this feature. CAR-TOOL.EDU.VN advises on the proper use of this function, emphasizing the potential implications.
-
Question: When and How Should I Clear Diagnostic Codes?
You should clear diagnostic codes after you have identified and resolved the underlying issue. Clearing codes without fixing the problem will only temporarily turn off the check engine light, and the code will likely return. A study by the American Automobile Association (AAA) in 2019 found that clearing codes without addressing the root cause leads to repeat repairs in over 70% of cases.
- Steps to Clear Diagnostic Codes:
- Identify and Resolve the Issue: Use the OBD2 scanner to read the diagnostic codes and identify the underlying problem. Once you have identified the problem, take steps to resolve it.
- Verify the Repair: After making the repair, use the OBD2 scanner to verify that the code is no longer present. You may need to drive the vehicle for a short period to allow the computer to re-evaluate the system.
- Clear the Codes: Once you are confident that the issue has been resolved, you can clear the diagnostic codes. To do this, select the “Erase Codes” or “Clear Codes” option from the main menu.
- Confirm the Action: The scanner will typically ask you to confirm that you want to clear the codes. Follow the on-screen prompts to confirm the action.
- Monitor for Recurrence: After clearing the codes, monitor the vehicle for a recurrence of the problem. If the check engine light comes back on, re-scan the system to identify the new diagnostic codes.
- Implications of Clearing Codes:
- Temporary Fix: Clearing codes without fixing the problem is only a temporary fix. The check engine light will likely come back on, and the underlying issue will persist.
- Loss of Diagnostic Information: Clearing codes erases the diagnostic information stored in the vehicle’s computer. This can make it more difficult to diagnose the problem if it returns.
- Impact on Emissions Testing: Clearing codes can affect the vehicle’s emissions monitors, which may prevent it from passing a smog test.
- When Clearing Codes is Appropriate:
- After Repairing a Problem: Clearing codes is appropriate after you have identified and resolved the underlying issue.
- To Reset the System: Clearing codes can be useful for resetting the system after making modifications or performing maintenance.
- For Diagnostic Purposes: Clearing codes can be used to determine whether a problem is intermittent or persistent.
- Steps to Clear Diagnostic Codes:
7. Utilizing Live Data for Advanced Diagnostics
Many advanced OBD2 scanners offer live data monitoring, allowing you to view real-time sensor readings. CAR-TOOL.EDU.VN provides guides on how to interpret this data, enabling you to diagnose complex issues.
-
Question: How Can I Use Live Data for Advanced Vehicle Diagnostics?
Live data allows you to monitor real-time sensor readings, such as engine speed, coolant temperature, and oxygen sensor voltage. By analyzing this data, you can identify anomalies and diagnose complex issues. A study by the University of California, Berkeley, in 2022 found that using live data can improve diagnostic accuracy by up to 25%.
- Accessing Live Data:
- Select the Live Data Option: From the main menu, select the “Live Data” or “Data Stream” option.
- Choose Parameters: The scanner will display a list of available parameters. Select the parameters you want to monitor.
- View Real-Time Readings: The scanner will display the real-time readings for the selected parameters.
- Interpreting Live Data:
- Engine Speed (RPM): Indicates the speed at which the engine is running.
- Coolant Temperature: Indicates the temperature of the engine coolant.
- Oxygen Sensor Voltage: Indicates the voltage output of the oxygen sensors.
- Mass Air Flow (MAF): Indicates the amount of air entering the engine.
- Throttle Position (TPS): Indicates the position of the throttle.
- Using Live Data for Diagnostics:
- Identify Sensor Failures: By monitoring the live data, you can identify sensors that are not functioning properly. For example, if the oxygen sensor voltage is consistently high or low, it may indicate a faulty sensor.
- Diagnose Performance Issues: Live data can help you diagnose performance issues such as poor fuel economy or lack of power. By monitoring the engine speed, mass air flow, and throttle position, you can identify potential problems with the engine’s air-fuel mixture.
- Monitor System Performance: Live data can be used to monitor the performance of various systems, such as the fuel system, ignition system, and emissions system.
- Tips for Effective Use of Live Data:
- Understand Normal Values: Familiarize yourself with the normal values for each parameter.
- Compare to Specifications: Compare the live data readings to the vehicle’s specifications.
- Look for Anomalies: Look for readings that are outside the normal range or that fluctuate erratically.
- Accessing Live Data:
8. Safety Precautions When Using OBD2 Scanners
Safety should always be a priority when working with vehicles and diagnostic tools. CAR-TOOL.EDU.VN emphasizes the importance of following safety precautions to avoid injury or damage.
-
Question: What Safety Precautions Should I Take When Using an OBD2 Scanner?
When using an OBD2 scanner, ensure the vehicle is parked in a safe location, turn off the ignition before connecting or disconnecting the scanner, and avoid using the scanner while driving. A report by the National Highway Traffic Safety Administration (NHTSA) in 2023 highlighted that distracted driving is a major cause of accidents, and using electronic devices while driving significantly increases the risk.
- Detailed Safety Precautions:
- Park in a Safe Location: Ensure the vehicle is parked in a safe location away from traffic before connecting or disconnecting the scanner.
- Turn Off the Ignition: Turn off the ignition before connecting or disconnecting the scanner to prevent electrical interference or damage.
- Avoid Using While Driving: Never use the scanner while driving. Distracted driving is dangerous and can lead to accidents.
- Use Quality Equipment: Use a reputable OBD2 scanner to ensure accurate and reliable data.
- Consult a Professional: If you’re unsure about any step, consult a qualified mechanic.
- Potential Hazards:
- Electrical Shock: Improper use of the scanner can lead to electrical shock.
- Vehicle Damage: Incorrectly connecting or disconnecting the scanner can damage the vehicle’s computer system.
- Data Loss: Clearing codes without understanding the implications can lead to data loss and make it more difficult to diagnose future problems.
- Best Practices for Safe Usage:
- Read the Manual: Familiarize yourself with the scanner’s manual before using it.
- Follow Instructions: Follow the instructions provided by the scanner manufacturer.
- Take Your Time: Don’t rush through the process. Take your time to ensure you’re doing everything correctly.
- Emergency Procedures:
- If You Experience an Electrical Shock: Disconnect the scanner immediately and seek medical attention.
- If You Damage the Vehicle’s Computer System: Consult a qualified mechanic.
- If You’re Unsure About Anything: Stop and seek professional assistance.
- Detailed Safety Precautions:
9. Choosing the Right OBD2 Scanner for Your Needs
With so many OBD2 scanners on the market, choosing the right one can be daunting. CAR-TOOL.EDU.VN offers reviews and comparisons to help you select the best scanner for your specific needs and budget.
-
Question: How Do I Choose the Right OBD2 Scanner for My Needs?
Choosing the right OBD2 scanner depends on your needs and budget. Basic code readers are suitable for simple tasks like reading and clearing codes, while advanced scanners offer features like live data and bi-directional control. According to a survey by the Automotive Aftermarket Industry Association (AAIA) in 2021, the most important factors to consider when choosing an OBD2 scanner are features, price, and ease of use.
- Factors to Consider:
- Features:
- Basic Code Reading: Can the scanner read and clear diagnostic codes?
- Live Data: Does the scanner offer live data monitoring?
- Freeze Frame Data: Does the scanner capture freeze frame data?
- Bi-Directional Control: Can the scanner perform bi-directional control functions?
- Wireless Connectivity: Does the scanner offer wireless connectivity via Bluetooth or Wi-Fi?
- Price:
- Basic Code Readers: These scanners are typically inexpensive, ranging from $20 to $50.
- Advanced Scanners: These scanners are more expensive, ranging from $100 to $500 or more.
- Ease of Use:
- Intuitive Interface: Does the scanner have an intuitive interface that is easy to navigate?
- Clear Instructions: Does the scanner come with clear instructions?
- Customer Support: Does the manufacturer offer customer support?
- Features:
- Types of OBD2 Scanners:
- Basic Code Readers: These scanners are suitable for simple tasks like reading and clearing codes.
- Advanced Scanners: These scanners offer additional features like live data and bi-directional control.
- Smartphone-Based Scanners: These scanners connect to your smartphone via Bluetooth or Wi-Fi and use a mobile app to display diagnostic data.
- Recommendations from CAR-TOOL.EDU.VN:
- For Basic Users: A basic code reader is sufficient for reading and clearing codes.
- For Intermediate Users: An advanced scanner with live data is recommended for more in-depth diagnostics.
- For Professional Mechanics: A professional-grade scanner with bi-directional control and advanced features is necessary for comprehensive diagnostics.
- Factors to Consider:
10. Common Mistakes to Avoid When Connecting a Diagnostic Plug
Even with a straightforward process, mistakes can happen when connecting a diagnostic plug. CAR-TOOL.EDU.VN highlights common errors and how to avoid them, ensuring a smooth and successful connection.
-
Question: What Are Common Mistakes to Avoid When Connecting a Diagnostic Plug?
Common mistakes include connecting the scanner with the ignition on, using a faulty scanner, and misinterpreting diagnostic codes. A study by the ASE in 2020 found that these mistakes can lead to inaccurate diagnoses and unnecessary repairs.
- Mistakes to Avoid:
- Connecting with the Ignition On: Always turn off the ignition before connecting or disconnecting the scanner.
- Using a Faulty Scanner: Ensure the scanner is in good working condition and that the connector is not damaged.
- Misinterpreting Codes: Take the time to understand the meaning of the diagnostic codes. Consult CAR-TOOL.EDU.VN or other reliable resources for assistance.
- Clearing Codes Prematurely: Don’t clear codes until you have identified and resolved the underlying issue.
- Ignoring Safety Precautions: Follow all safety precautions to avoid injury or damage.
- Preventive Measures:
- Read the Manual: Familiarize yourself with the scanner’s manual before using it.
- Follow Instructions: Follow the instructions provided by the scanner manufacturer.
- Double-Check Connections: Ensure the connector is fully seated in the OBD2 port.
- Use Reliable Resources: Consult CAR-TOOL.EDU.VN and other reliable resources for accurate information.
- Seek Professional Assistance: If you’re unsure about anything, consult a qualified mechanic.
- Troubleshooting Tips:
- If the Scanner Doesn’t Power On: Check the connection and ensure the ignition is turned on.
- If You Receive an Error Message: Consult the scanner’s manual or CAR-TOOL.EDU.VN for troubleshooting tips.
- If You’re Unable to Read Codes: Ensure the scanner is compatible with your vehicle and that the connection is secure.
- Mistakes to Avoid:
FAQ: Frequently Asked Questions About Connecting Diagnostic Plugs
-
Question: Can I use an OBD2 scanner on any car?
Yes, if the car was manufactured after 1996 and sold in the United States, it is legally required to have an OBD2 port.
-
Question: Will an OBD2 scanner tell me exactly what’s wrong with my car?
No, an OBD2 scanner provides diagnostic trouble codes (DTCs) that indicate potential issues, but further diagnosis may be needed to pinpoint the exact problem.
-
Question: Can I damage my car by using an OBD2 scanner?
No, using a quality OBD2 scanner correctly will not damage your car.
-
Question: Is it necessary to turn off the car before connecting an OBD2 scanner?
Yes, it is recommended to turn off the car before connecting or disconnecting an OBD2 scanner to avoid any electrical interference.
-
Question: How often should I use an OBD2 scanner to check my car?
You should use an OBD2 scanner whenever your check engine light comes on or if you suspect any performance issues with your car.
-
Question: Can I clear the codes with an OBD2 scanner even if I haven’t fixed the problem?
Yes, you can clear the codes, but the check engine light will likely come back on if the underlying issue is not resolved.
-
Question: Do I need any special tools or software to use an OBD2 scanner?
No, an OBD2 scanner typically comes with all the necessary tools and software for basic diagnostic functions.
-
Question: Are wireless OBD2 scanners as reliable as wired ones?
Yes, wireless OBD2 scanners can be as reliable as wired ones if they are from a reputable brand and have a stable connection.
-
Question: Can an OBD2 scanner help me improve my car’s fuel efficiency?
Yes, by monitoring live data and identifying potential issues, an OBD2 scanner can help you optimize your car’s performance and improve fuel efficiency.
-
Question: Where can I find a list of OBD2 codes and their meanings?
You can find a comprehensive list of OBD2 codes and their meanings on CAR-TOOL.EDU.VN or other reliable automotive diagnostic resources.
Connecting a diagnostic plug in your car is a valuable skill for any car owner or technician. By following the steps outlined in this guide and utilizing the resources available at CAR-TOOL.EDU.VN, you can effectively diagnose and address automotive issues, saving time and money on potential repairs. Remember to prioritize safety and consult a professional if you’re unsure about any step.
Ready to take control of your vehicle’s diagnostics? Contact CAR-TOOL.EDU.VN today for expert advice and support!
Address: 456 Elm Street, Dallas, TX 75201, United States
Whatsapp: +1 (641) 206-8880
Website: CAR-TOOL.EDU.VN
Let CAR-TOOL.EDU.VN help you find the perfect tools and information for all your automotive needs!