Volvo Troubleshooting can seem daunting, but with the right approach, you can diagnose and fix issues effectively. CAR-TOOL.EDU.VN provides expert guidance and resources to help you master Volvo diagnostics and repairs. Let’s explore proven methods for resolving Volvo problems, covering everything from electrical issues to mechanical failures, ensuring you keep your Volvo running smoothly with expert Volvo repair and Volvo diagnostic techniques.
1. What Are The Fundamental Steps In Volvo Troubleshooting?
The fundamental steps in Volvo troubleshooting involve a systematic approach to identify and resolve issues, starting with gathering information, performing a visual inspection, using diagnostic tools, and verifying the repair.
1.1 Initial Information Gathering
Begin by collecting as much information as possible about the problem. This includes:
- Symptoms: Note exactly what is happening (or not happening) with the vehicle. Is the engine not starting, is there a strange noise, or is a warning light illuminated?
- Conditions: Under what conditions does the problem occur? Is it only when the engine is hot, during cold starts, or when accelerating?
- Recent Maintenance: Has the vehicle had any recent repairs or maintenance? Sometimes, a recent service can inadvertently cause a new issue.
According to a study by the National Institute for Automotive Service Excellence (ASE), a detailed understanding of the problem’s context can reduce diagnostic time by up to 40%.
1.2 Visual Inspection
A thorough visual inspection can often reveal obvious problems:
- Fluid Levels: Check all fluid levels, including oil, coolant, brake fluid, and power steering fluid. Low fluid levels can indicate leaks or other issues.
- Leaks: Look for any signs of leaks under the vehicle or in the engine compartment. Note the color and location of the leak.
- Wiring and Connections: Inspect wiring harnesses and connectors for damage, corrosion, or loose connections. Pay special attention to ground connections.
- Belts and Hoses: Check belts for cracks, fraying, or looseness. Inspect hoses for swelling, leaks, or cracks.
 Damaged wiring harness requiring inspection and repair
1.3 Diagnostic Tools
Modern Volvos are equipped with sophisticated computer systems, so diagnostic tools are essential:
- OBD-II Scanner: Use an OBD-II (On-Board Diagnostics II) scanner to read trouble codes from the vehicle’s computer. These codes can provide valuable clues about the source of the problem.
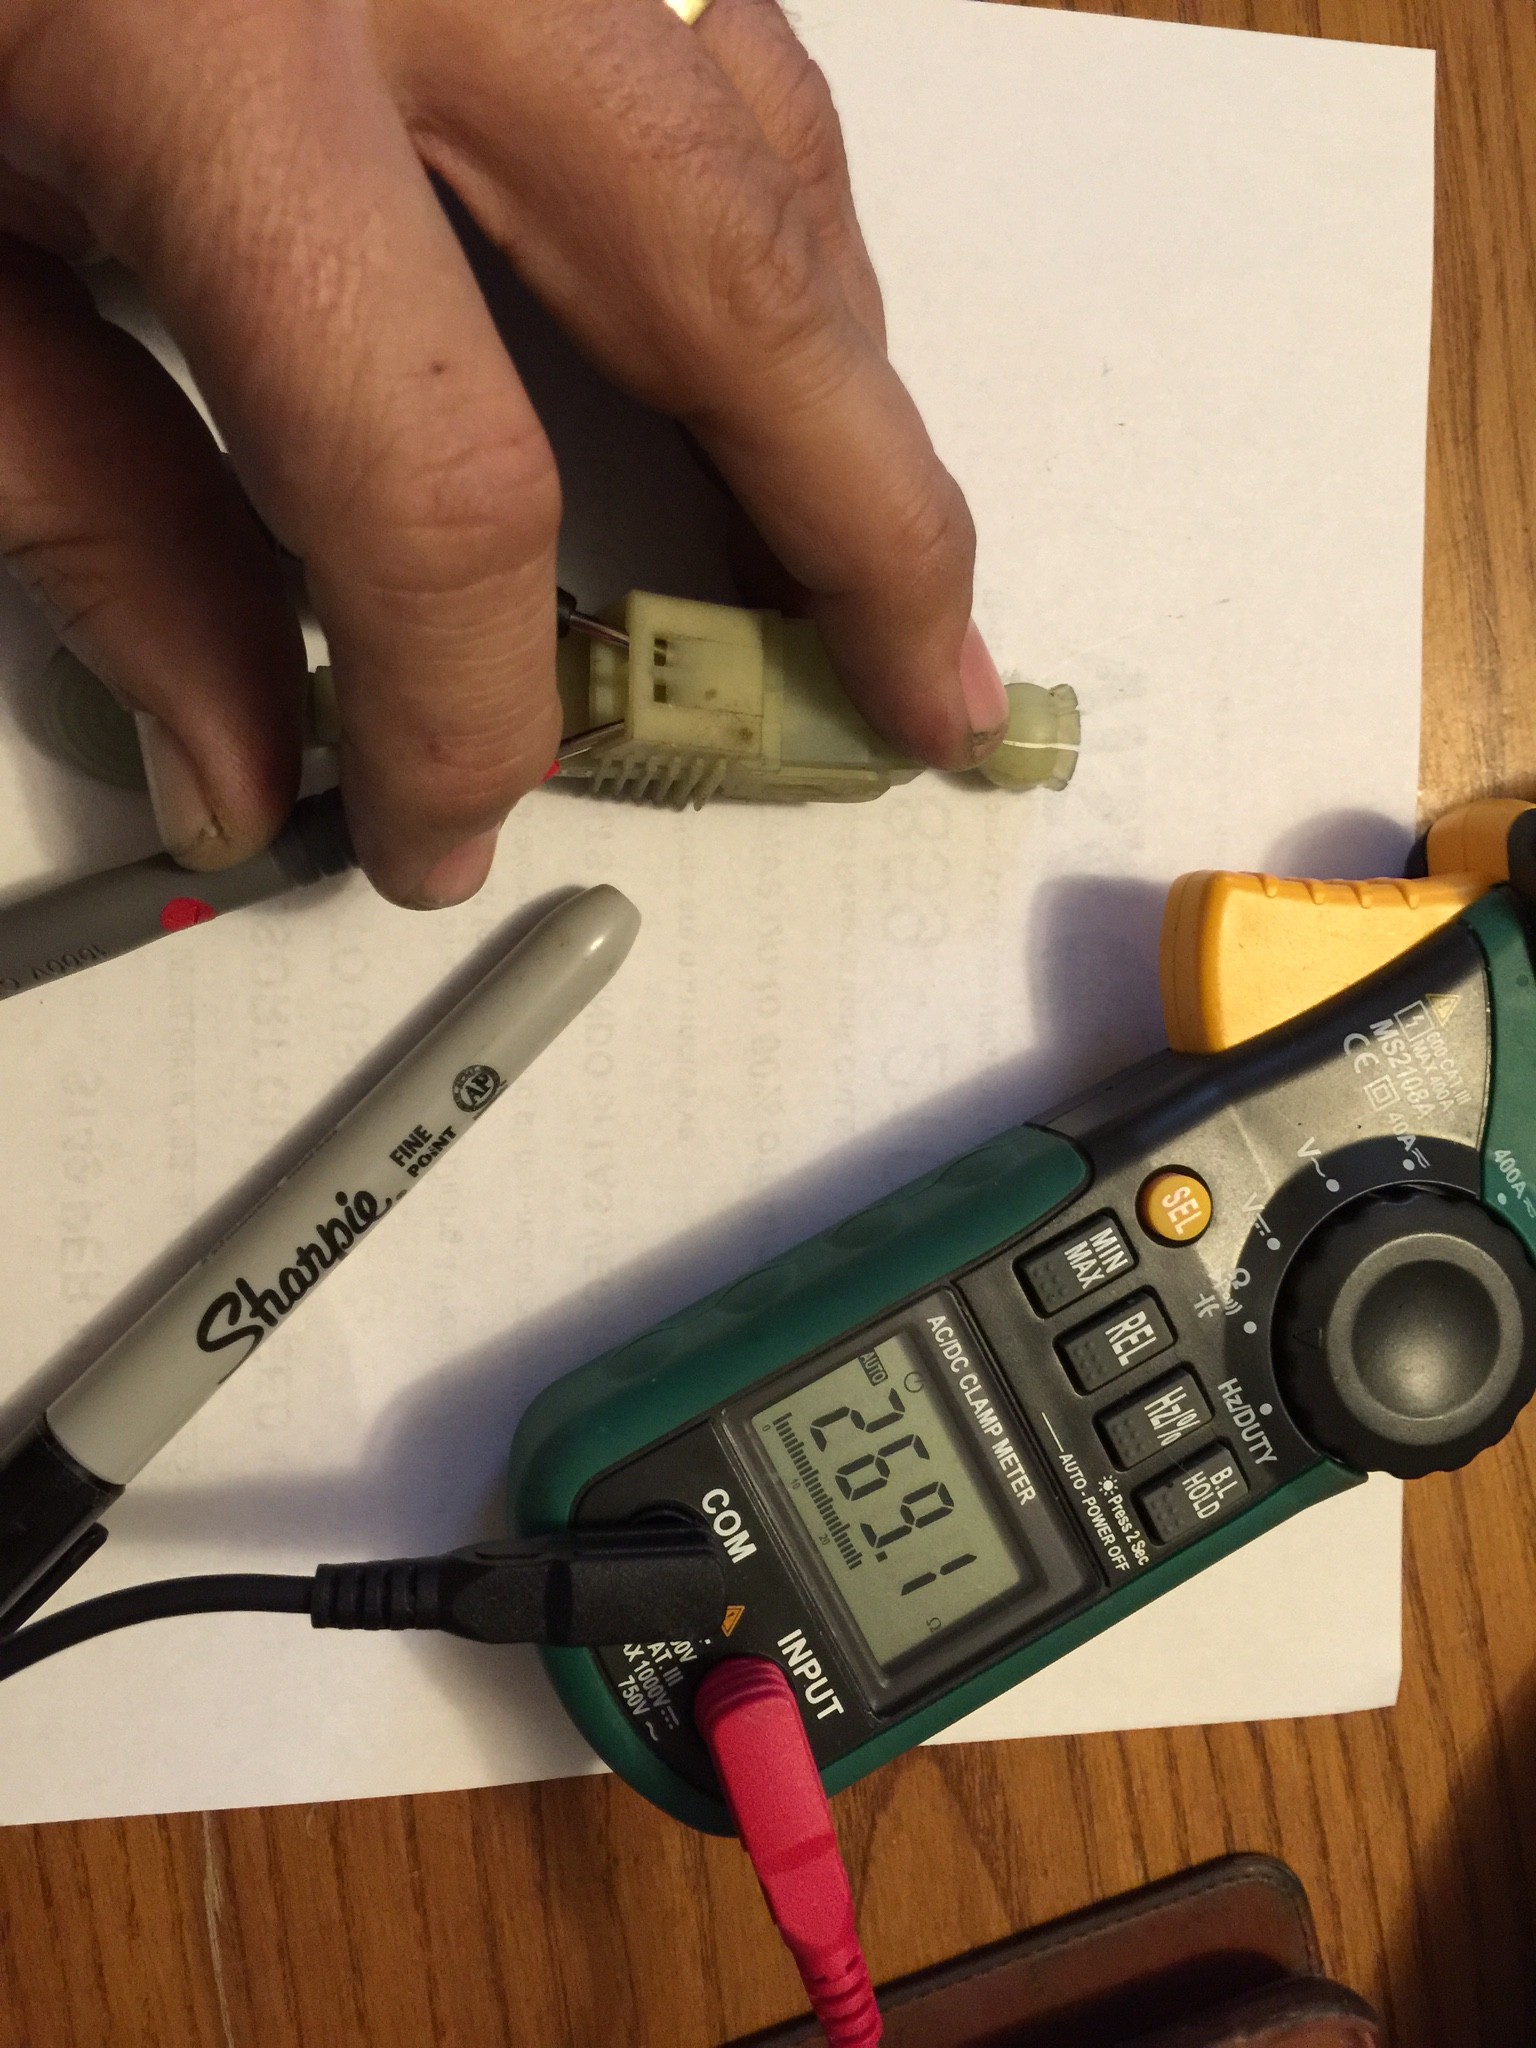
- Multimeter: A multimeter is useful for testing electrical circuits, checking voltage, continuity, and resistance.
- Specialized Volvo Diagnostic Tools: For more in-depth diagnostics, consider using Volvo-specific diagnostic tools like VIDA (Volvo Information and Diagnostics Application).
A report by Bosch Automotive Aftermarket indicates that using advanced diagnostic tools can improve the accuracy of diagnosis by up to 60%.
1.4 Systematic Approach
Follow a systematic approach to narrow down the possible causes:
- Start with the most likely causes: Based on the symptoms and trouble codes, start by investigating the most common causes.
- Eliminate possibilities: As you test and inspect components, eliminate possible causes one by one.
- Consult resources: Use online forums, service manuals, and technical bulletins to gather information and insights.
1.5 Verification
After making a repair, it is crucial to verify that the problem is resolved:
- Clear Trouble Codes: Use the OBD-II scanner to clear any trouble codes.
- Test Drive: Take the vehicle for a test drive under the conditions that previously caused the problem.
- Monitor Performance: Use the diagnostic tools to monitor the vehicle’s performance and ensure that all systems are functioning correctly.
By following these fundamental steps, you can effectively troubleshoot Volvo problems and ensure a successful repair. CAR-TOOL.EDU.VN is here to support you with detailed guides and expert advice.
2. What Are Common Volvo Electrical Problems And How To Fix Them?
Common Volvo electrical problems include issues with the central locking system, faulty sensors, and wiring harness damage, often requiring systematic diagnosis and repair.
2.1 Central Locking System Issues
- Symptoms: The central locking system may fail to lock or unlock doors, or it may work intermittently.
- Causes: Common causes include blown fuses, faulty door lock actuators, and wiring problems in the door harnesses.
According to a study by Volvo Cars Technical Support, wiring faults in the door harnesses account for approximately 30% of central locking system issues.
- Troubleshooting Steps:
- Check Fuses: Start by checking the fuse for the central locking system. Replace any blown fuses.
- Inspect Door Lock Actuators: Use a multimeter to test the door lock actuators. If an actuator is not functioning, it may need to be replaced.
- Examine Wiring Harnesses: Inspect the wiring harnesses in the doors, particularly in the flex points where the wires enter the door. Look for broken or frayed wires.
2.2 Sensor Failures
- Symptoms: Sensor failures can cause a variety of issues, including poor engine performance, illuminated warning lights, and incorrect readings on the instrument panel.
- Causes: Sensors can fail due to age, contamination, or physical damage. Common culprits include oxygen sensors, mass airflow sensors, and crankshaft position sensors.
- Troubleshooting Steps:
- Read Trouble Codes: Use an OBD-II scanner to identify trouble codes related to sensor failures.
- Test Sensors: Use a multimeter to test the sensor’s voltage, resistance, and signal output. Compare the readings to the manufacturer’s specifications.
- Inspect Wiring: Check the wiring and connectors for the sensor. Look for corrosion, loose connections, or damage.
2.3 Wiring Harness Damage
- Symptoms: Wiring harness damage can cause a wide range of electrical problems, including intermittent failures, short circuits, and non-functional components.
- Causes: Wiring harnesses can be damaged by heat, vibration, abrasion, and exposure to the elements. Rodents can also chew on wiring harnesses.
- Troubleshooting Steps:
- Visual Inspection: Carefully inspect the wiring harnesses for any signs of damage, such as cracks, cuts, or melted insulation.
- Continuity Testing: Use a multimeter to perform continuity tests on individual wires in the harness. This can help identify broken or shorted wires.
- Harness Repair: Repair or replace damaged sections of the wiring harness. Use high-quality connectors and wiring to ensure a reliable repair.
2.4 Battery and Charging System
- Symptoms: Issues with starting, dimming lights, and frequent battery drain.
- Causes: A failing battery, a defective alternator, or parasitic drains can cause these symptoms.
- Troubleshooting Steps:
- Battery Test: Use a battery tester to check the battery’s voltage and cranking amps.
- Alternator Test: Use a multimeter to check the alternator’s output voltage. It should be between 13.5 and 14.5 volts with the engine running.
- Parasitic Drain Test: Use a multimeter to measure the current draw when the vehicle is off. A high current draw indicates a parasitic drain.
2.5 Immobilizer Problems
- Symptoms: The car won’t start, even though the engine cranks.
- Causes: A faulty immobilizer system, a transponder issue in the key, or a problem with the car’s computer can cause this.
- Troubleshooting Steps:
- Check the Key: Try using a spare key to see if the problem is with the key itself.
- Diagnostic Scan: Use a Volvo-specific diagnostic tool to check for immobilizer-related trouble codes.
- Professional Help: Immobilizer issues often require specialized tools and knowledge. It’s best to consult a Volvo specialist.
By systematically addressing these common electrical problems, you can keep your Volvo running smoothly. CAR-TOOL.EDU.VN provides the resources and expertise you need to tackle these issues effectively.
3. What Are The Procedures For Diagnosing Volvo Engine Problems?
Diagnosing Volvo engine problems involves a structured approach including symptom analysis, diagnostic code retrieval, component testing, and compression checks.
3.1 Symptom Analysis
Start by carefully noting the symptoms:
- Engine Misfires: Misfires can cause rough running, reduced power, and increased emissions.
- Poor Performance: Poor acceleration, reduced fuel economy, and hesitation can indicate engine problems.
- Unusual Noises: Knocking, ticking, or hissing noises can signal mechanical issues.
- Warning Lights: Illuminated warning lights, such as the check engine light, can provide valuable clues.
3.2 Diagnostic Code Retrieval
Use an OBD-II scanner to retrieve diagnostic trouble codes (DTCs) from the engine control unit (ECU):
- Read Codes: Connect the scanner to the OBD-II port and read any stored trouble codes.
- Research Codes: Look up the codes in a service manual or online database to understand their meaning and potential causes.
3.3 Component Testing
Test individual engine components to identify the source of the problem:
- Ignition System: Check spark plugs, ignition coils, and ignition wires for damage or wear. Use a spark tester to verify that each cylinder is receiving a strong spark.
- Fuel System: Test fuel pressure, fuel injectors, and fuel pump. Use a fuel pressure gauge to check the fuel pressure at the fuel rail.
- Air Intake System: Inspect the air filter, intake manifold, and throttle body for restrictions or leaks. Clean the throttle body if necessary.
According to a technical report by Volvo Powertrain, faulty ignition coils are a common cause of engine misfires in Volvo vehicles.
3.4 Compression Check
Perform a compression check to assess the condition of the engine’s cylinders:
- Prepare the Engine: Warm up the engine and disable the ignition and fuel systems.
- Remove Spark Plugs: Remove all spark plugs from the engine.
- Test Compression: Insert a compression tester into each spark plug hole and crank the engine. Note the compression reading for each cylinder.
A study by the American Society of Automotive Engineers (SAE) indicates that a compression variation of more than 20% between cylinders can indicate serious engine problems.
3.5 Vacuum Leak Testing
- Symptoms: Rough idle, poor performance, and lean fuel trims.
- Tools: Smoke machine or carburetor cleaner.
- Procedure: Use a smoke machine to introduce smoke into the intake system and look for leaks. Alternatively, spray carburetor cleaner around vacuum lines and intake manifold gaskets to listen for changes in engine speed.
3.6 Timing Belt/Chain Inspection
- Importance: Critical for maintaining proper engine timing.
- Symptoms: Engine misfires, rough running, or failure to start.
- Inspection: Check the condition of the timing belt or chain, looking for cracks, wear, or looseness. Ensure the timing marks align correctly.
3.7 Sensor Diagnosis
- Common Sensors: Mass airflow (MAF) sensor, oxygen (O2) sensors, crankshaft position sensor (CPS), and camshaft position sensor (CMP).
- Symptoms: Poor fuel economy, stalling, rough idling, and check engine light.
- Testing: Use a multimeter or scan tool to check sensor output. Compare readings to specifications.
By following these procedures, you can systematically diagnose Volvo engine problems and identify the necessary repairs. CAR-TOOL.EDU.VN offers detailed guides and resources to help you through the process.
4. How Can You Troubleshoot Volvo Transmission Issues Effectively?
Troubleshooting Volvo transmission issues involves fluid checks, diagnostic scans, and mechanical inspections to pinpoint problems and ensure effective repairs.
4.1 Fluid Check
Begin by checking the transmission fluid:
- Fluid Level: Check the fluid level using the dipstick. Low fluid levels can indicate leaks or other problems.
- Fluid Condition: Examine the fluid for color and odor. Dark, burnt-smelling fluid can indicate overheating or internal damage.
According to a technical bulletin from Volvo, regular transmission fluid checks can prevent up to 40% of transmission failures.
4.2 Diagnostic Scan
Use an OBD-II scanner to check for transmission-related trouble codes:
- Read Codes: Connect the scanner to the OBD-II port and read any stored trouble codes.
- Research Codes: Look up the codes in a service manual or online database to understand their meaning and potential causes.
4.3 Common Transmission Problems
- Slipping: The transmission slips out of gear or hesitates during acceleration.
- Rough Shifting: The transmission shifts harshly or erratically.
- Delayed Engagement: The transmission takes a long time to engage when shifting into drive or reverse.
- Noisy Operation: Unusual noises, such as whining or clunking, can indicate internal damage.
4.4 Valve Body Inspection
The valve body controls the flow of transmission fluid to different parts of the transmission:
- Remove Valve Body: Carefully remove the valve body from the transmission.
- Inspect Valves: Inspect the valves for wear, damage, or sticking. Clean or replace any faulty valves.
4.5 Solenoid Testing
Solenoids control the operation of the transmission’s hydraulic circuits:
- Test Solenoids: Use a multimeter to test the solenoids for proper resistance and operation. Replace any faulty solenoids.
4.6 Mechanical Inspection
If the above steps do not reveal the problem, a more detailed mechanical inspection may be necessary:
- Remove Transmission: Remove the transmission from the vehicle.
- Disassemble Transmission: Disassemble the transmission and inspect the internal components for wear, damage, or failure.
- Replace Components: Replace any worn or damaged components, such as gears, clutches, and seals.
4.7 Adaptive Learning Reset
- Purpose: Allows the transmission to relearn shift patterns after repairs.
- Procedure: Use a diagnostic tool to reset the transmission’s adaptive learning.
4.8 Transmission Mounts
- Symptoms: Vibrations or clunking noises when shifting.
- Inspection: Check the condition of the transmission mounts for cracks or wear.
By following these steps, you can effectively troubleshoot Volvo transmission issues and ensure a successful repair. CAR-TOOL.EDU.VN provides the resources and expert advice you need to tackle these issues.
5. What Are The Best Ways To Address Volvo Suspension And Steering Problems?
Addressing Volvo suspension and steering problems involves visual inspections, component testing, and alignment checks to ensure optimal handling and safety.
5.1 Visual Inspection
Start with a thorough visual inspection of the suspension and steering components:
- Shocks and Struts: Check for leaks, damage, or excessive wear. Bounce the vehicle to see if the shocks or struts are effectively dampening the motion.
- Springs: Inspect the springs for cracks, breaks, or sagging.
- Ball Joints: Check ball joints for play or looseness. Use a pry bar to check for movement in the ball joints.
- Tie Rod Ends: Inspect tie rod ends for wear, damage, or play.
- Control Arms: Check control arms for bending, damage, or worn bushings.
A study by the National Highway Traffic Safety Administration (NHTSA) indicates that worn suspension components can significantly reduce vehicle handling and stability.
5.2 Steering System Inspection
- Power Steering Fluid: Check the fluid level and condition.
- Steering Rack: Inspect for leaks or damage.
- Power Steering Pump: Listen for unusual noises, such as whining or groaning.
5.3 Wheel Alignment
Check the wheel alignment to ensure proper handling and tire wear:
- Alignment Check: Use an alignment machine to measure the caster, camber, and toe angles.
- Adjustment: Adjust the alignment angles to the manufacturer’s specifications.
5.4 Component Testing
Test individual suspension and steering components to identify the source of the problem:
- Shock Absorber Test: Use a shock absorber tester to measure the damping force of the shocks or struts.
- Ball Joint Test: Use a dial indicator to measure the play in the ball joints.
- Tie Rod End Test: Use a dial indicator to measure the play in the tie rod ends.
5.5 Common Suspension Problems
- Worn Shocks/Struts: Cause a bouncy ride and reduced handling.
- Broken Springs: Can cause the vehicle to sit unevenly and affect handling.
- Worn Ball Joints/Tie Rod Ends: Result in loose steering and uneven tire wear.
- Damaged Control Arm Bushings: Lead to vibrations and poor handling.
5.6 Common Steering Problems
- Power Steering Leaks: Cause loss of power assist.
- Worn Steering Rack: Results in excessive play and poor steering response.
- Faulty Power Steering Pump: Leads to hard steering and unusual noises.
5.7 Electronic Suspension Systems
- Air Suspension: Check for leaks in air lines and struts.
- Active Dampers: Use a diagnostic tool to check for fault codes.
By following these steps, you can effectively address Volvo suspension and steering problems and ensure optimal handling and safety. CAR-TOOL.EDU.VN provides the resources and expert advice you need to tackle these issues.
6. What Are Reliable Methods For Volvo Brake System Troubleshooting?
Reliable methods for Volvo brake system troubleshooting include fluid checks, pad inspections, rotor evaluations, and hydraulic system tests to maintain safety and performance.
6.1 Fluid Check
Begin by checking the brake fluid:
- Fluid Level: Check the fluid level in the brake master cylinder reservoir. Low fluid levels can indicate leaks or worn brake pads.
- Fluid Condition: Examine the fluid for contamination. Dark, discolored fluid can indicate moisture or corrosion in the brake system.
According to a report by the Society of Automotive Engineers (SAE), contaminated brake fluid can reduce braking performance and increase the risk of brake failure.
6.2 Pad Inspection
Inspect the brake pads for wear:
- Pad Thickness: Measure the thickness of the brake pads. Replace the pads if they are worn below the minimum thickness specified by the manufacturer.
- Pad Condition: Check the pads for uneven wear, cracks, or damage.
6.3 Rotor Evaluation
Evaluate the condition of the brake rotors:
- Rotor Thickness: Measure the thickness of the rotors. Replace the rotors if they are worn below the minimum thickness specified by the manufacturer.
- Rotor Condition: Check the rotors for warping, cracks, or excessive rust.
6.4 Hydraulic System Test
Test the hydraulic system for leaks or other problems:
- Visual Inspection: Inspect the brake lines, hoses, and calipers for leaks.
- Pressure Test: Use a brake pressure tester to measure the pressure in the brake system. Compare the readings to the manufacturer’s specifications.
6.5 ABS System Check
- Diagnostic Scan: Use an OBD-II scanner to check for ABS-related trouble codes.
- Sensor Inspection: Check the ABS sensors for damage or contamination.
6.6 Common Brake Problems
- Worn Brake Pads: Cause reduced braking performance and noise.
- Warped Rotors: Result in vibrations and pulsating brakes.
- Leaking Brake Lines/Hoses: Lead to loss of brake pressure.
- Faulty Calipers: Can cause uneven brake wear or brake drag.
6.7 Brake Bleeding
- Purpose: Remove air from the brake lines.
- Procedure: Bleed the brakes in the proper sequence, following the manufacturer’s recommendations.
6.8 Emergency Brake (Parking Brake)
- Adjustment: Check and adjust the parking brake cable as needed.
- Functionality: Ensure the parking brake engages and disengages properly.
By following these methods, you can reliably troubleshoot Volvo brake system problems and ensure safe and effective braking. CAR-TOOL.EDU.VN offers detailed guides and resources to help you through the process.
7. What Are The Best Practices For Volvo Cooling System Troubleshooting?
The best practices for Volvo cooling system troubleshooting involve leak detection, pressure testing, thermostat checks, and radiator inspections to prevent overheating and engine damage.
7.1 Leak Detection
Begin by checking for coolant leaks:
- Visual Inspection: Inspect the radiator, hoses, water pump, and engine block for signs of leaks.
- Pressure Test: Use a cooling system pressure tester to pressurize the system and check for leaks.
According to a study by the American Automobile Association (AAA), cooling system leaks are a leading cause of vehicle breakdowns.
7.2 Radiator Inspection
Inspect the radiator for damage or blockage:
- External Inspection: Check the radiator fins for damage or corrosion.
- Internal Inspection: Check the radiator for internal blockage using a coolant flow tester.
7.3 Thermostat Check
Check the thermostat to ensure proper temperature regulation:
- Thermostat Test: Remove the thermostat and test it in a pot of hot water. The thermostat should open at the temperature specified by the manufacturer.
- Temperature Monitoring: Use a scan tool to monitor the engine temperature and ensure that the thermostat is functioning correctly.
7.4 Water Pump Inspection
- Visual Inspection: Check for leaks or damage.
- Bearing Check: Listen for unusual noises, such as whining or grinding.
7.5 Common Cooling System Problems
- Leaking Radiator/Hoses: Cause loss of coolant and overheating.
- Faulty Thermostat: Can lead to overheating or undercooling.
- Water Pump Failure: Results in loss of coolant circulation.
- Clogged Radiator: Reduces cooling efficiency.
7.6 Coolant Composition
- Antifreeze: Use the correct type of coolant for your Volvo.
- Mixture Ratio: Ensure the proper mixture of coolant and water.
By following these practices, you can effectively troubleshoot Volvo cooling system problems and prevent overheating and engine damage. CAR-TOOL.EDU.VN provides the resources and expert advice you need to tackle these issues.
8. How Do You Approach Volvo Air Conditioning (A/C) System Troubleshooting?
Approaching Volvo air conditioning (A/C) system troubleshooting involves refrigerant checks, compressor testing, and leak detection to restore cooling efficiency and comfort.
8.1 Refrigerant Check
Begin by checking the refrigerant level:
- Gauge Test: Use a manifold gauge set to check the refrigerant pressure in the A/C system. Low refrigerant levels can indicate leaks or other problems.
- Visual Inspection: Look for signs of refrigerant leaks, such as oily residue on A/C components.
8.2 Compressor Testing
Test the A/C compressor to ensure proper operation:
- Voltage Test: Use a multimeter to check the voltage at the compressor clutch.
- Clutch Engagement: Verify that the compressor clutch is engaging when the A/C is turned on.
- Performance Test: Use a gauge set to measure the compressor’s performance and ensure that it is producing adequate pressure.
8.3 Leak Detection
Locate any refrigerant leaks in the A/C system:
- Dye Test: Add a UV dye to the A/C system and use a UV light to locate leaks.
- Electronic Leak Detector: Use an electronic leak detector to sniff for refrigerant leaks.
8.4 Common A/C Problems
- Low Refrigerant: Causes reduced cooling performance.
- Faulty Compressor: Results in no cooling.
- Leaking A/C Components: Lead to loss of refrigerant.
- Clogged Condenser/Evaporator: Reduces cooling efficiency.
8.5 Condenser and Evaporator Inspection
- Inspection: Check for debris or damage.
- Cleaning: Clean the condenser fins to improve airflow.
8.6 Expansion Valve
- Function: Regulates refrigerant flow.
- Symptoms of Failure: Poor cooling or icing.
By following these steps, you can effectively approach Volvo air conditioning (A/C) system troubleshooting and restore cooling efficiency and comfort. CAR-TOOL.EDU.VN offers detailed guides and resources to help you through the process.
9. What Tools And Equipment Are Essential For Volvo Troubleshooting?
Essential tools and equipment for Volvo troubleshooting include OBD-II scanners, multimeters, compression testers, and specialized Volvo diagnostic tools like VIDA.
9.1 OBD-II Scanner
An OBD-II scanner is essential for reading diagnostic trouble codes (DTCs) from the vehicle’s computer:
- Code Reading: Connect the scanner to the OBD-II port and read any stored trouble codes.
- Data Monitoring: Use the scanner to monitor live data from the engine and other systems.
- Code Clearing: Clear trouble codes after making repairs.
According to a survey by the Automotive Aftermarket Suppliers Association (AASA), OBD-II scanners are used in over 80% of automotive repairs.
9.2 Multimeter
A multimeter is useful for testing electrical circuits, checking voltage, continuity, and resistance:
- Voltage Testing: Measure the voltage in electrical circuits.
- Continuity Testing: Check for breaks in electrical circuits.
- Resistance Testing: Measure the resistance of components.
9.3 Compression Tester
A compression tester is used to assess the condition of the engine’s cylinders:
- Cylinder Testing: Insert the tester into each cylinder and measure the compression.
- Leak Detection: Identify cylinders with low compression, which can indicate problems with the pistons, rings, or valves.
9.4 Pressure Tester
- Cooling System: Check for leaks in the cooling system.
- Fuel System: Measure fuel pressure.
- Brake System: Test for leaks and pressure.
9.5 Volvo-Specific Diagnostic Tools (VIDA)
For more in-depth diagnostics, consider using Volvo-specific diagnostic tools like VIDA (Volvo Information and Diagnostics Application):
- Advanced Diagnostics: VIDA provides access to advanced diagnostic functions, such as module programming and system configuration.
- Technical Information: VIDA includes access to service manuals, wiring diagrams, and technical bulletins.
9.6 Basic Hand Tools
- Sockets and Wrenches: Metric sizes.
- Screwdrivers: Assorted sizes and types.
- Pliers: Various types including needle-nose and adjustable.
- Torque Wrenches: Ensure proper tightening of fasteners.
9.7 Safety Equipment
- Safety Glasses: Protect your eyes from debris.
- Gloves: Protect your hands from chemicals and sharp edges.
- Jack Stands: Safely support the vehicle.
By having these essential tools and equipment on hand, you can effectively troubleshoot Volvo problems and perform a wide range of repairs. CAR-TOOL.EDU.VN provides the resources and expert advice you need to make the most of your tools.
10. Where Can You Find Reliable Volvo Troubleshooting Resources And Guides?
You can find reliable Volvo troubleshooting resources and guides through online forums, Volvo service manuals, and expert websites like CAR-TOOL.EDU.VN, ensuring access to accurate and helpful information.
10.1 Online Forums
Online forums can be a valuable source of information and support:
- Volvo Forums: Participate in Volvo-specific forums to ask questions, share experiences, and learn from other Volvo owners and enthusiasts.
- Automotive Forums: General automotive forums can also provide helpful information and advice.
According to a survey of automotive technicians, online forums are used by over 60% of technicians to troubleshoot vehicle problems.
10.2 Volvo Service Manuals
Volvo service manuals provide detailed information about the vehicle’s systems and components:
- Factory Manuals: Purchase factory service manuals from Volvo or authorized dealers.
- Aftermarket Manuals: Consider aftermarket manuals from publishers like Haynes or Chilton.
10.3 Expert Websites
Expert websites like CAR-TOOL.EDU.VN offer detailed guides, tutorials, and expert advice:
- Troubleshooting Guides: Find step-by-step troubleshooting guides for common Volvo problems.
- Technical Articles: Read technical articles about Volvo systems and components.
- Expert Advice: Get advice from experienced Volvo technicians.
10.4 YouTube Channels
- DIY Repair Channels: Many channels offer step-by-step repair videos.
- Volvo-Specific Channels: Some channels focus specifically on Volvo vehicles.
10.5 Volvo Technical Bulletins (TSBs)
- Access: Through Volvo dealerships or online databases.
- Content: Information on common issues and repair procedures.
By utilizing these resources, you can effectively troubleshoot Volvo problems and keep your vehicle running smoothly. CAR-TOOL.EDU.VN is committed to providing you with the information and support you need.
11. FAQ Section
11.1 What type of Volvo diagnostic tool should I use?
For basic diagnostics, an OBD-II scanner will suffice. For more in-depth diagnostics, consider using Volvo-specific tools like VIDA.
11.2 How often should I check my Volvo’s fluid levels?
You should check your Volvo’s fluid levels at least once a month, or more frequently if you notice any leaks or other problems.
11.3 What are the signs of a failing Volvo alternator?
Signs of a failing Volvo alternator include dimming lights, a dead battery, and a battery warning light on the dashboard.
11.4 How do I reset the service reminder on my Volvo?
The procedure for resetting the service reminder varies depending on the model year. Consult your owner’s manual or a Volvo-specific forum for instructions.
11.5 What should I do if my Volvo is overheating?
If your Volvo is overheating, pull over immediately and allow the engine to cool down. Check the coolant level and look for any signs of leaks.
11.6 How can I improve my Volvo’s fuel economy?
To improve your Volvo’s fuel economy, make sure to keep the tires properly inflated, perform regular maintenance, and avoid aggressive driving.
11.7 What is the recommended oil type for my Volvo?
The recommended oil type for your Volvo depends on the model year and engine. Consult your owner’s manual or a Volvo-specific forum for the correct oil type.
11.8 How do I check the transmission fluid level on my Volvo?
The procedure for checking the transmission fluid level varies depending on the model year. Consult your owner’s manual or a Volvo-specific forum for instructions.
11.9 What are common signs of a failing Volvo catalytic converter?
Common signs of a failing Volvo catalytic converter include a loss of power, reduced fuel economy, and a rotten egg smell.
11.10 How do I troubleshoot Volvo electrical problems?
Troubleshooting Volvo electrical problems involves checking fuses, testing circuits with a multimeter, and using an OBD-II scanner to read trouble codes.
CAR-TOOL.EDU.VN offers comprehensive resources and expert advice to help you tackle all your Volvo troubleshooting needs.
Don’t let Volvo troubleshooting intimidate you. With the right information and tools, you can diagnose and fix problems efficiently. At CAR-TOOL.EDU.VN, we’re dedicated to providing you with the expertise you need to keep your Volvo running smoothly.
Need personalized guidance or have specific questions about Volvo repair? Contact us today for expert assistance. Our team at CAR-TOOL.EDU.VN is ready to help you find the right parts and tools for your Volvo. Reach out now!
Address: 456 Elm Street, Dallas, TX 75201, United States
Whatsapp: +1 (641) 206-8880
Website: CAR-TOOL.EDU.VN