Check engine light illumination indicates that your vehicle has detected a potential issue impacting engine performance, fuel efficiency, or emissions. Resetting the check engine light can be done in a few minutes using a scan tool, or automatically after a certain number of drive cycles, according to CAR-TOOL.EDU.VN experts. This comprehensive guide will detail how to reset the check engine light, discuss potential issues if it doesn’t reset, and offer maintenance tips to prevent future occurrences, covering everything from diagnostic tools to emission control.
Contents
- 1. Understanding the Check Engine Light
- 1.1. Common Reasons for Check Engine Light Activation
- 1.2. Impact of Ignoring the Check Engine Light
- 2. How Long Does It Take for a Check Engine Light to Reset Automatically?
- 2.1. Definition of a Drive Cycle
- 2.2. Factors Affecting Reset Time
- 2.3. Average Number of Drive Cycles Required
- 2.4. Monitoring the Reset Progress
- 3. Methods to Reset the Check Engine Light Manually
- 3.1. Using an OBD2 Scanner
- 3.2. Disconnecting the Car Battery
- 3.3. Risks and Precautions
- 4. What to Do If the Check Engine Light Doesn’t Reset
- 4.1. Common Reasons for Persistent Illumination
- 4.2. Diagnostic Steps to Identify the Issue
- 4.3. Seeking Professional Assistance
- 5. Common Problems That Trigger the Check Engine Light
- 5.1. Fuel Cap Issues
- 5.2. Oxygen Sensor Failure
- 5.3. Catalytic Converter Problems
- 5.4. Mass Airflow (MAF) Sensor Issues
- 5.5. Spark Plug and Ignition Coil Problems
- 6. Preventative Maintenance to Avoid Check Engine Light Issues
- 6.1. Regular Oil Changes
- 6.2. Routine Inspection of Sensors
- 6.3. Checking and Replacing Spark Plugs
- 6.4. Maintaining Fuel System Cleanliness
- 6.5. Monitoring Vehicle Performance
- 7. Understanding Diagnostic Trouble Codes (DTCs)
- 7.1. Reading DTCs with an OBD2 Scanner
- 7.2. Common DTC Categories
- 7.3. Interpreting DTCs
- 7.4. Using DTCs for Diagnosis
- 8. The Role of Emission Control Systems
- 8.1. Components of Emission Control Systems
- 8.2. Impact of Faulty Emission Control Systems
- 8.3. Maintenance Tips for Emission Control Systems
- 9. Advanced Diagnostic Tools and Techniques
- 9.1. Using Scan Tools with Live Data
- 9.2. Performing Sensor Testing
- 9.3. Smoke Testing for Vacuum Leaks
- 9.4. Fuel System Testing
- 10. Finding Reliable Auto Repair Services
- 10.1. Researching Local Repair Shops
- 10.2. Checking for Certifications
- 10.3. Asking for Recommendations
- 10.4. Getting a Written Estimate
- 10.5. Verifying Warranty Information
- 11. Frequently Asked Questions (FAQ)
- 11.1. How long can I drive with the check engine light on?
- 11.2. Will disconnecting the battery always reset the check engine light?
- 11.3. Can a loose gas cap really cause the check engine light to come on?
- 11.4. How much does it cost to diagnose a check engine light issue?
- 11.5. What does it mean if the check engine light is flashing?
- 11.6. Can I reset the check engine light myself, or do I need a mechanic?
- 11.7. Are there any additives that can help turn off the check engine light?
- 11.8. How often should I have my car’s computer scanned for diagnostic codes?
- 11.9. Can a bad oxygen sensor affect my gas mileage?
- 11.10. Where can I find reliable information about diagnostic trouble codes?
- 12. Call to Action
1. Understanding the Check Engine Light
The check engine light, also known as the malfunction indicator lamp (MIL), is a component of your vehicle’s onboard diagnostics (OBD) system. When the engine control unit (ECU) detects a problem, it illuminates the check engine light to alert the driver.
The Society of Automotive Engineers (SAE) standardized OBD-II diagnostic trouble codes (DTCs) to ensure consistency across vehicle manufacturers. This standardization allows mechanics to accurately identify and address issues using the same codes.
1.1. Common Reasons for Check Engine Light Activation
Several common issues can trigger the check engine light. Understanding these can help you diagnose and address the problem more effectively.
- Loose Fuel Cap: A loose or damaged fuel cap is one of the simplest reasons for the light to come on. The fuel cap maintains pressure in the fuel system, and when it’s loose, fuel vapors can escape, triggering the light.
- Oxygen Sensor Issues: Oxygen sensors monitor the amount of oxygen in the exhaust. Faulty sensors can lead to incorrect fuel mixture readings, reducing fuel efficiency and potentially damaging the catalytic converter.
- Catalytic Converter Failure: The catalytic converter reduces harmful emissions. If it fails, the vehicle’s emissions will increase, and the check engine light will illuminate.
- Mass Airflow (MAF) Sensor Problems: The MAF sensor measures the amount of air entering the engine. A dirty or failing MAF sensor can cause the engine to run poorly.
- Spark Plug or Ignition Coil Issues: Worn or damaged spark plugs and ignition coils can cause misfires, leading to a rough-running engine and the check engine light.
1.2. Impact of Ignoring the Check Engine Light
Ignoring the check engine light can lead to more severe and costly repairs. For example, a minor issue like a faulty oxygen sensor can, over time, damage the catalytic converter, resulting in a much more expensive repair. Regular maintenance and prompt attention to warning lights can prevent these issues.
2. How Long Does It Take for a Check Engine Light to Reset Automatically?
The check engine light typically resets automatically after driving for a specific number of drive cycles without the issue reoccurring. A drive cycle includes starting the engine, driving under various conditions, and then turning the engine off.
2.1. Definition of a Drive Cycle
A drive cycle is a series of driving conditions that allows the vehicle’s computer to run all its diagnostic tests. This usually involves a mix of city and highway driving, allowing the system to check all sensors and components.
2.2. Factors Affecting Reset Time
Several factors can affect how long it takes for the check engine light to reset:
- Type of Vehicle: Different vehicles have different diagnostic systems and reset parameters.
- Nature of the Problem: Some issues require more extensive testing and may take longer to clear.
- Driving Conditions: Consistent driving conditions that allow for complete diagnostic tests can speed up the reset process.
2.3. Average Number of Drive Cycles Required
On average, it takes about 10 to 20 drive cycles for the check engine light to reset automatically, according to automotive experts. This can translate to driving between 50 and 100 miles, depending on the specific driving conditions.
2.4. Monitoring the Reset Progress
You can monitor the reset progress by observing the check engine light after each drive cycle. If the light remains on after several cycles, it indicates the problem persists or another issue has arisen. In such cases, professional diagnostic services are recommended.
3. Methods to Reset the Check Engine Light Manually
While waiting for the light to reset automatically is an option, several manual methods can expedite the process. However, it’s crucial to address the underlying issue before resetting the light to avoid further problems.
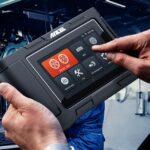
3.1. Using an OBD2 Scanner
An OBD2 scanner is a diagnostic tool that reads and clears diagnostic trouble codes (DTCs) from the vehicle’s computer. Here’s how to use one:
- Locate the OBD2 Port: The OBD2 port is typically located under the dashboard on the driver’s side.
- Plug in the Scanner: Connect the scanner to the OBD2 port.
- Turn on the Ignition: Turn the ignition to the “on” position without starting the engine.
- Read the Codes: Follow the scanner’s instructions to read the stored DTCs.
- Clear the Codes: Select the option to clear the codes. This will reset the check engine light.
- Verify the Reset: Turn off the ignition and then restart the vehicle to ensure the light has been reset.
OBD2 scanners vary in price and functionality. Basic models can read and clear codes, while more advanced scanners offer features like live data streaming and enhanced diagnostics.
3.2. Disconnecting the Car Battery
Disconnecting the car battery can also reset the check engine light, as it clears the vehicle’s computer memory. Follow these steps:
- Ensure Vehicle is Off: Turn off the ignition and remove the keys.
- Locate the Battery: Open the hood and locate the car battery.
- Disconnect the Negative Terminal: Use a wrench to loosen the nut on the negative (black) terminal and remove the cable.
- Wait: Allow the vehicle to sit for 15-20 minutes to ensure the computer memory is cleared.
- Reconnect the Negative Terminal: Reattach the negative cable to the battery terminal and tighten the nut.
- Restart the Vehicle: Start the vehicle to see if the check engine light has been reset.
Caution: Disconnecting the battery can also reset other electronic systems, such as the radio and security system, requiring you to re-enter codes or reprogram settings.
3.3. Risks and Precautions
While manual reset methods are convenient, they come with certain risks:
- Masking Underlying Issues: Resetting the light without addressing the problem can lead to more severe damage over time.
- Loss of Diagnostic Data: Clearing the codes removes valuable information that can help diagnose the problem accurately.
- Potential System Reset Issues: Disconnecting the battery can sometimes cause issues with other electronic systems.
It’s crucial to use these methods responsibly and consult a professional mechanic when in doubt.
4. What to Do If the Check Engine Light Doesn’t Reset
If the check engine light persists after attempting to reset it, it indicates the underlying problem has not been resolved. Further diagnostic steps are necessary to identify and fix the issue.
4.1. Common Reasons for Persistent Illumination
Several common reasons can cause the check engine light to remain on:
- Recurring Issues: The initial problem may still be present or has returned.
- Multiple Problems: There may be more than one issue triggering the light.
- Sensor Malfunctions: Faulty sensors can provide incorrect readings, keeping the light on.
- Wiring Problems: Damaged or corroded wiring can disrupt sensor signals.
4.2. Diagnostic Steps to Identify the Issue
To accurately diagnose the problem, consider the following steps:
- Read the Codes Again: Use an OBD2 scanner to read the diagnostic trouble codes (DTCs).
- Research the Codes: Look up the codes to understand the potential causes.
- Inspect Common Problem Areas: Check the fuel cap, oxygen sensors, MAF sensor, and spark plugs for any signs of damage or wear.
- Check Wiring and Connections: Inspect the wiring and connections related to the sensors and components identified by the codes.
4.3. Seeking Professional Assistance
If you’re unable to identify the problem or feel uncomfortable performing the repairs yourself, it’s best to seek professional assistance. Certified mechanics have the expertise and equipment to accurately diagnose and repair complex automotive issues.
5. Common Problems That Trigger the Check Engine Light
Understanding the most common problems that trigger the check engine light can help you anticipate and address potential issues more effectively.
5.1. Fuel Cap Issues
A loose or damaged fuel cap is a frequent cause of the check engine light. The fuel cap maintains pressure in the fuel system, preventing fuel vapors from escaping.
- Symptoms: The check engine light illuminates, and you may notice a fuel smell around the vehicle.
- Solution: Tighten the fuel cap or replace it if it’s damaged. A new fuel cap typically costs around $15 to $30.
5.2. Oxygen Sensor Failure
Oxygen sensors monitor the amount of oxygen in the exhaust. Faulty sensors can lead to incorrect fuel mixture readings, reducing fuel efficiency and potentially damaging the catalytic converter.
- Symptoms: Reduced fuel economy, rough idling, and the check engine light.
- Solution: Replace the faulty oxygen sensor. Oxygen sensors range in price from $50 to $200, depending on the vehicle and sensor type.
5.3. Catalytic Converter Problems
The catalytic converter reduces harmful emissions. If it fails, the vehicle’s emissions will increase, and the check engine light will illuminate.
- Symptoms: Reduced engine performance, dark exhaust fumes, and the check engine light.
- Solution: Replace the catalytic converter. Replacement costs can range from $200 to $600 or more, depending on the vehicle.
5.4. Mass Airflow (MAF) Sensor Issues
The MAF sensor measures the amount of air entering the engine. A dirty or failing MAF sensor can cause the engine to run poorly.
- Symptoms: Poor engine performance, stalling, and the check engine light.
- Solution: Clean or replace the MAF sensor. Cleaning can sometimes resolve the issue, but replacement is often necessary. MAF sensors typically cost between $100 and $300.
5.5. Spark Plug and Ignition Coil Problems
Worn or damaged spark plugs and ignition coils can cause misfires, leading to a rough-running engine and the check engine light.
- Symptoms: Rough idling, misfires, reduced power, and the check engine light.
- Solution: Replace the spark plugs and/or ignition coils. Spark plugs cost around $10 to $30 each, while ignition coils can range from $50 to $200 each.
6. Preventative Maintenance to Avoid Check Engine Light Issues
Regular maintenance is essential to prevent check engine light issues. Adhering to a maintenance schedule can help you avoid costly repairs and keep your vehicle running smoothly.
6.1. Regular Oil Changes
Regular oil changes are crucial for engine health. Clean oil lubricates engine components, reduces friction, and helps dissipate heat.
- Benefits: Prevents engine wear, improves fuel efficiency, and reduces the risk of check engine light issues related to engine performance.
- Recommendation: Change your oil every 3,000 to 7,500 miles, depending on your vehicle and driving conditions.
6.2. Routine Inspection of Sensors
Regularly inspect your vehicle’s sensors, such as oxygen sensors and MAF sensors, to ensure they are functioning correctly.
- Benefits: Detects potential issues early, prevents sensor failure, and reduces the risk of check engine light activation.
- Recommendation: Have sensors inspected during routine maintenance visits.
6.3. Checking and Replacing Spark Plugs
Replace spark plugs according to the manufacturer’s recommended schedule to maintain optimal engine performance.
- Benefits: Improves engine efficiency, reduces misfires, and prevents check engine light issues related to ignition problems.
- Recommendation: Replace spark plugs every 30,000 to 100,000 miles, depending on the vehicle and spark plug type.
6.4. Maintaining Fuel System Cleanliness
Use quality fuel and fuel additives to keep the fuel system clean and prevent issues with fuel injectors and other components.
- Benefits: Improves fuel efficiency, reduces the risk of fuel system clogs, and prevents check engine light issues related to fuel delivery.
- Recommendation: Use quality fuel and consider using fuel additives periodically to clean the fuel system.
6.5. Monitoring Vehicle Performance
Pay attention to your vehicle’s performance and address any issues promptly.
- Benefits: Detects potential problems early, prevents minor issues from escalating, and reduces the risk of check engine light activation.
- Recommendation: Be aware of changes in engine performance, fuel efficiency, and any unusual noises or vibrations.
7. Understanding Diagnostic Trouble Codes (DTCs)
Diagnostic trouble codes (DTCs) are codes stored in the vehicle’s computer that identify specific issues. Understanding these codes can help you diagnose and address problems more effectively.
7.1. Reading DTCs with an OBD2 Scanner
An OBD2 scanner is essential for reading DTCs. Follow these steps:
- Connect the Scanner: Plug the scanner into the OBD2 port.
- Turn on the Ignition: Turn the ignition to the “on” position without starting the engine.
- Read the Codes: Follow the scanner’s instructions to read the stored DTCs.
- Record the Codes: Write down the codes for further research.
7.2. Common DTC Categories
DTCs are categorized into different groups based on the system affected:
- P0XXX: Powertrain codes related to the engine, transmission, and fuel system.
- B0XXX: Body codes related to systems like airbags, power windows, and locks.
- C0XXX: Chassis codes related to the braking system, suspension, and steering.
- U0XXX: Network codes related to communication between electronic control units (ECUs).
7.3. Interpreting DTCs
Each DTC consists of a letter followed by four numbers. The letter indicates the system affected, and the numbers provide more specific information about the problem. For example:
- P0171: System Too Lean (Bank 1) – Indicates the engine is not receiving enough fuel.
- P0420: Catalyst System Efficiency Below Threshold (Bank 1) – Indicates a problem with the catalytic converter.
7.4. Using DTCs for Diagnosis
DTCs provide valuable clues for diagnosing problems, but they should not be the only basis for repairs. Always verify the code with additional testing and inspection to ensure accurate diagnosis.
8. The Role of Emission Control Systems
Emission control systems are essential for reducing harmful pollutants released into the atmosphere. Problems with these systems often trigger the check engine light.
8.1. Components of Emission Control Systems
Key components of emission control systems include:
- Catalytic Converter: Converts harmful gases into less toxic substances.
- Oxygen Sensors: Monitor the amount of oxygen in the exhaust.
- EGR Valve: Recirculates exhaust gas to reduce nitrogen oxide emissions.
- Evaporative Emission Control (EVAP) System: Prevents fuel vapors from escaping into the atmosphere.
8.2. Impact of Faulty Emission Control Systems
Faulty emission control systems can lead to increased pollution, reduced fuel efficiency, and potential engine damage. Addressing these issues promptly is crucial for environmental protection and vehicle performance.
8.3. Maintenance Tips for Emission Control Systems
- Regular Inspections: Have emission control systems inspected during routine maintenance visits.
- Prompt Repairs: Address any issues with emission control systems promptly to prevent further damage.
- Quality Parts: Use quality replacement parts to ensure proper function and longevity.
9. Advanced Diagnostic Tools and Techniques
For complex issues, advanced diagnostic tools and techniques may be necessary to accurately identify and address the problem.
9.1. Using Scan Tools with Live Data
Scan tools with live data capabilities allow you to monitor sensor readings and other parameters in real-time. This can help you identify intermittent problems and pinpoint the source of the issue.
9.2. Performing Sensor Testing
Testing sensors with a multimeter or oscilloscope can help you determine if they are functioning correctly. This involves measuring voltage, resistance, and other parameters to verify sensor performance.
9.3. Smoke Testing for Vacuum Leaks
Smoke testing involves introducing smoke into the intake system to identify vacuum leaks. This can help you find leaks that are difficult to detect visually.
9.4. Fuel System Testing
Fuel system testing involves measuring fuel pressure, injector pulse width, and other parameters to diagnose fuel-related issues. This can help you identify problems with the fuel pump, injectors, and fuel pressure regulator.
10. Finding Reliable Auto Repair Services
Finding a reliable auto repair service is essential for accurate diagnosis and quality repairs.
10.1. Researching Local Repair Shops
Research local repair shops online and read reviews from other customers. Look for shops with certified technicians and a good reputation.
10.2. Checking for Certifications
Look for shops with technicians certified by the National Institute for Automotive Service Excellence (ASE). ASE certification indicates that the technicians have met specific standards of knowledge and competence.
10.3. Asking for Recommendations
Ask friends, family, and colleagues for recommendations. Personal referrals can be a valuable source of information about reliable auto repair services.
10.4. Getting a Written Estimate
Before authorizing any repairs, get a written estimate that includes a breakdown of the costs. This will help you avoid unexpected charges and ensure transparency.
10.5. Verifying Warranty Information
Verify the warranty information for any replacement parts or repairs. This will protect you in case of future issues.
11. Frequently Asked Questions (FAQ)
11.1. How long can I drive with the check engine light on?
Driving with the check engine light on is not recommended, as it indicates a potential issue that could lead to further damage. Have the vehicle diagnosed and repaired as soon as possible.
11.2. Will disconnecting the battery always reset the check engine light?
Disconnecting the battery will usually reset the check engine light, but it will also clear other electronic systems’ memory. It’s essential to address the underlying issue before resetting the light.
11.3. Can a loose gas cap really cause the check engine light to come on?
Yes, a loose gas cap is a common cause of the check engine light. Tighten the gas cap or replace it if it’s damaged.
11.4. How much does it cost to diagnose a check engine light issue?
The cost to diagnose a check engine light issue typically ranges from $75 to $150. This may vary depending on the repair shop and the complexity of the problem.
11.5. What does it mean if the check engine light is flashing?
A flashing check engine light indicates a severe problem, such as an engine misfire, that could cause significant damage. Stop driving the vehicle immediately and have it towed to a repair shop.
11.6. Can I reset the check engine light myself, or do I need a mechanic?
You can reset the check engine light yourself using an OBD2 scanner or by disconnecting the battery. However, it’s essential to address the underlying issue to prevent further damage. If you’re unsure, consult a mechanic.
11.7. Are there any additives that can help turn off the check engine light?
Some fuel additives claim to clean fuel injectors and improve engine performance, which may help resolve issues that trigger the check engine light. However, these additives are not a substitute for proper diagnosis and repair.
11.8. How often should I have my car’s computer scanned for diagnostic codes?
It’s a good idea to have your car’s computer scanned for diagnostic codes during routine maintenance visits or whenever you notice a problem.
11.9. Can a bad oxygen sensor affect my gas mileage?
Yes, a bad oxygen sensor can affect your gas mileage by causing the engine to run too rich or too lean.
11.10. Where can I find reliable information about diagnostic trouble codes?
You can find reliable information about diagnostic trouble codes on automotive websites, forums, and databases, such as the National Institute for Automotive Service Excellence (ASE) website.
12. Call to Action
Facing a persistent check engine light? Don’t let minor issues turn into major repairs. At CAR-TOOL.EDU.VN, we understand the importance of timely and accurate diagnostics. Whether you’re a seasoned mechanic or a DIY enthusiast, having access to the right tools and information can make all the difference. Our website offers detailed specifications, product comparisons, and user reviews to help you find the perfect tools and parts for your needs.
Need Expert Advice? Contact our team of skilled professionals at CAR-TOOL.EDU.VN for personalized support. We offer:
- Comprehensive Diagnostic Assistance: Get help interpreting diagnostic trouble codes and identifying the root cause of your vehicle’s issues.
- Tool Recommendations: Discover the best OBD2 scanners, multimeters, and other diagnostic tools tailored to your specific requirements.
- Part Selection Guidance: Ensure you’re choosing high-quality, reliable replacement parts for your vehicle.
Reach Out Today:
- Address: 456 Elm Street, Dallas, TX 75201, United States
- WhatsApp: +1 (641) 206-8880
- Website: CAR-TOOL.EDU.VN
Let CAR-TOOL.EDU.VN be your trusted partner in automotive maintenance and repair. Contact us now for expert advice and solutions that keep your vehicle running smoothly.