A Coolant Temperature Sensor Test is a diagnostic procedure used to evaluate the functionality of the coolant temperature sensor, which is crucial for regulating engine performance. CAR-TOOL.EDU.VN can provide you with detailed information on how to accurately perform this test, ensuring your engine operates efficiently and prevents potential damage, with resources that detail the function of the CTS, testing methods, and necessary tools. By understanding how to conduct this test, you can maintain optimal engine temperature, improve fuel economy, and reduce emissions with guidance from CAR-TOOL.EDU.VN.
Contents
- 1. Understanding the Coolant Temperature Sensor
- 1.1 What is a Coolant Temperature Sensor?
- 1.2 Function of the Coolant Temperature Sensor
- 1.3 Location of the Coolant Temperature Sensor
- 1.4 Types of Coolant Temperature Sensors
- 2. Why Perform a Coolant Temperature Sensor Test?
- 2.1 Identifying Common Symptoms of a Faulty Coolant Temperature Sensor
- 2.2 The Importance of Accurate Coolant Temperature Readings
- 2.3 Preventing Potential Engine Damage
- 2.4 Improving Fuel Efficiency and Reducing Emissions
- 3. Tools and Materials Needed for a Coolant Temperature Sensor Test
- 3.1 Essential Tools for Testing
- 3.2 Additional Materials for Testing
- 3.3 Safety Precautions
- 4. Step-by-Step Guide to Performing a Coolant Temperature Sensor Test
- 4.1 Visual Inspection of the Coolant Temperature Sensor
- 4.2 Testing the Coolant Temperature Sensor with a Multimeter
- 4.3 Testing the Coolant Temperature Sensor Voltage
- 4.4 Using a Scan Tool to Read Coolant Temperature Data
- 5. Interpreting Coolant Temperature Sensor Test Results
- 5.1 Understanding Resistance Values
- 5.2 Analyzing Voltage Readings
- 5.3 Diagnosing Common Issues Based on Test Results
- 5.4 When to Replace the Coolant Temperature Sensor
- 6. Coolant Temperature Sensor Replacement
- 6.1 Steps to Replace the Coolant Temperature Sensor
- 6.2 Choosing the Right Replacement Sensor
- 6.3 Post-Replacement Testing
- 6.4 Tips for a Successful Replacement
- 7. Advanced Diagnostic Techniques
- 7.1 Using an Oscilloscope for Advanced Testing
- 7.2 Checking the Wiring Harness for Continuity and Shorts
- 7.3 Testing the ECU for Proper Signal Processing
- 7.4 Diagnosing Intermittent Coolant Temperature Sensor Problems
- 8. Common Mistakes to Avoid During Coolant Temperature Sensor Testing
- 8.1 Not Allowing the Engine to Cool Down
- 8.2 Using the Wrong Tools
- 8.3 Not Consulting the Vehicle Service Manual
- 8.4 Overlooking Visual Inspection
- 8.5 Not Disconnecting the Battery
- 8.6 Misinterpreting Test Results
- 9. Maintaining Your Vehicle’s Cooling System
- 9.1 Regular Coolant Flushes
- 9.2 Inspecting Hoses and Clamps
- 9.3 Checking the Radiator Cap
- 9.4 Monitoring Coolant Levels
- 9.5 Professional Cooling System Inspections
- 10. Frequently Asked Questions (FAQs) About Coolant Temperature Sensors
- 10.1 What Does a Coolant Temperature Sensor Do?
- 10.2 How Do I Know If My Coolant Temperature Sensor Is Bad?
- 10.3 Can I Drive with a Bad Coolant Temperature Sensor?
- 10.4 How Much Does It Cost to Replace a Coolant Temperature Sensor?
- 10.5 Where Is the Coolant Temperature Sensor Located?
- 10.6 How Often Should I Replace My Coolant Temperature Sensor?
- 10.7 What Happens If the Coolant Temperature Sensor Is Not Working?
- 10.8 Can a Bad Coolant Temperature Sensor Cause a Check Engine Light?
- 10.9 How Do I Test a Coolant Temperature Sensor?
- 10.10 What Is the Difference Between a Coolant Temperature Sensor and a Coolant Temperature Switch?
1. Understanding the Coolant Temperature Sensor
1.1 What is a Coolant Temperature Sensor?
The coolant temperature sensor (CTS) is a thermistor that monitors the temperature of the engine coolant. According to a study by the University of Michigan’s Automotive Research Center, accurate temperature readings are essential for the engine control unit (ECU) to manage fuel injection, ignition timing, and other critical functions. The CTS typically consists of a resistor that changes its resistance value based on the coolant temperature, providing the ECU with real-time data to optimize engine performance.
1.2 Function of the Coolant Temperature Sensor
The primary function of the CTS is to measure the coolant temperature and send this data to the ECU. The ECU uses this information to adjust various engine parameters, such as:
- Fuel Injection: The ECU adjusts the air-fuel mixture based on the coolant temperature. When the engine is cold, the ECU enriches the mixture to improve start-up and driveability.
- Ignition Timing: The ECU modifies the ignition timing to ensure efficient combustion at different temperatures.
- Idle Speed: The ECU controls the idle speed to maintain a stable engine idle, especially during cold starts.
- Cooling Fan Operation: The ECU activates the cooling fan based on the coolant temperature to prevent overheating.
According to research from the Society of Automotive Engineers (SAE), a faulty CTS can lead to significant issues, including poor fuel economy, rough idling, and increased emissions.
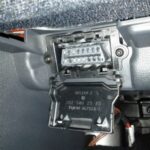
1.3 Location of the Coolant Temperature Sensor
The CTS is typically located in the engine block or cylinder head, where it comes into direct contact with the engine coolant. The exact location can vary depending on the vehicle make and model. Common locations include:
- Near the Thermostat Housing: This is a frequent location, as it provides a direct reading of the coolant temperature as it exits the engine.
- In the Cylinder Head: Some vehicles have the CTS directly mounted in the cylinder head for accurate temperature measurement.
- In the Engine Block: The CTS may also be found in the engine block, providing an overall temperature reading of the engine.
Consulting the vehicle’s service manual or using online resources like CAR-TOOL.EDU.VN can help you locate the CTS in your specific vehicle model.
1.4 Types of Coolant Temperature Sensors
There are primarily two types of CTS, each with different characteristics and applications:
- Negative Temperature Coefficient (NTC) Thermistors: These are the most common type of CTS. Their resistance decreases as the temperature increases. This means that at lower temperatures, the resistance is high, and at higher temperatures, the resistance is low.
- Positive Temperature Coefficient (PTC) Thermistors: In contrast to NTC thermistors, PTC thermistors increase in resistance as the temperature increases. These are less commonly used in automotive applications but can be found in some specific systems.
Understanding the type of CTS used in your vehicle can help you interpret the test results accurately, with expert guidance available at CAR-TOOL.EDU.VN.
2. Why Perform a Coolant Temperature Sensor Test?
2.1 Identifying Common Symptoms of a Faulty Coolant Temperature Sensor
A faulty CTS can lead to a variety of engine performance issues. Recognizing these symptoms early can help you diagnose and address the problem before it causes further damage. Common symptoms include:
- Poor Fuel Economy: The ECU may miscalculate the air-fuel mixture, leading to increased fuel consumption.
- Rough Idling: The engine may idle erratically, especially when cold.
- Difficulty Starting: The engine may be hard to start, particularly in cold weather.
- Engine Overheating: The cooling fan may not activate properly, leading to overheating.
- Check Engine Light: The check engine light may illuminate, indicating a problem with the CTS or related systems.
- Black Smoke from Exhaust: A rich fuel mixture can cause black smoke to come from the exhaust pipe.
- Engine Hesitation or Stalling: The engine may hesitate or stall, particularly during acceleration.
If you experience any of these symptoms, performing a coolant temperature sensor test is a crucial step in diagnosing the issue, with resources at CAR-TOOL.EDU.VN providing detailed diagnostic procedures.
2.2 The Importance of Accurate Coolant Temperature Readings
Accurate coolant temperature readings are vital for the ECU to manage engine performance effectively. Incorrect readings can lead to:
- Suboptimal Fuel Injection: The ECU may inject too much or too little fuel, affecting fuel economy and emissions.
- Incorrect Ignition Timing: Improper timing can lead to reduced power and increased wear on engine components.
- Inefficient Cooling Fan Operation: The cooling fan may not activate when needed, leading to overheating, or it may run constantly, wasting energy.
According to a study by the Oak Ridge National Laboratory, maintaining accurate engine temperature is essential for optimizing fuel efficiency and reducing emissions. Regular testing and maintenance of the CTS can help ensure these benefits.
2.3 Preventing Potential Engine Damage
A malfunctioning CTS can contribute to severe engine damage if left unaddressed. Overheating, in particular, can cause:
- Cylinder Head Damage: Excessive heat can warp or crack the cylinder head.
- Blown Head Gasket: Overheating can cause the head gasket to fail, leading to coolant leaks and compression loss.
- Piston Damage: High temperatures can cause pistons to expand and seize in the cylinders.
- Engine Block Damage: In extreme cases, overheating can crack the engine block, requiring a complete engine replacement.
Regularly testing the CTS and addressing any issues promptly can prevent these costly repairs. CAR-TOOL.EDU.VN offers resources and expert advice to help you maintain your engine’s cooling system.
2.4 Improving Fuel Efficiency and Reducing Emissions
An accurate CTS ensures that the engine operates at its optimal temperature, which is essential for:
- Efficient Combustion: Proper temperature control ensures complete combustion of fuel, maximizing power and minimizing emissions.
- Reduced Fuel Consumption: The ECU can precisely control the air-fuel mixture, reducing fuel waste.
- Lower Emissions: Complete combustion reduces harmful emissions, such as hydrocarbons, carbon monoxide, and nitrogen oxides.
According to the Environmental Protection Agency (EPA), maintaining your vehicle’s cooling system can significantly improve fuel efficiency and reduce your environmental impact.
3. Tools and Materials Needed for a Coolant Temperature Sensor Test
3.1 Essential Tools for Testing
To perform a coolant temperature sensor test, you will need the following essential tools:
- Digital Multimeter: This is used to measure the resistance and voltage of the CTS. A high-quality multimeter is essential for accurate readings.
- Socket Set or Wrench: You may need a socket set or wrench to remove the CTS from the engine for testing. Ensure you have the correct size for your vehicle.
- Scan Tool (Optional): A scan tool can read the coolant temperature data from the ECU and check for diagnostic trouble codes (DTCs) related to the CTS.
- Infrared Thermometer (Optional): This can be used to verify the actual coolant temperature for comparison with the CTS readings.
CAR-TOOL.EDU.VN offers detailed guides and reviews of these tools, helping you select the best options for your needs.
3.2 Additional Materials for Testing
In addition to the essential tools, you may also need the following materials:
- Vehicle Service Manual: This provides specific information about your vehicle’s CTS, including its location, wiring diagram, and testing procedures.
- Coolant: If you need to remove the CTS for testing, have some coolant on hand to top off the system.
- Distilled Water: Mix the coolant with distilled water according to the manufacturer’s recommendations.
- Clean Rags: Use clean rags to wipe off any spills or dirt.
- Safety Glasses: Protect your eyes from coolant splashes.
- Gloves: Wear gloves to protect your hands from chemicals and hot surfaces.
3.3 Safety Precautions
Before starting any automotive repair, it’s crucial to follow safety precautions:
- Disconnect the Battery: Disconnect the negative battery terminal to prevent electrical shocks.
- Work in a Well-Ventilated Area: Ensure adequate ventilation to avoid inhaling harmful fumes.
- Allow the Engine to Cool: Never work on a hot engine. Allow it to cool down completely before starting any repairs.
- Wear Safety Gear: Always wear safety glasses and gloves to protect yourself from potential hazards.
- Dispose of Coolant Properly: Coolant is toxic and should be disposed of according to local regulations.
Following these safety precautions will help ensure a safe and successful coolant temperature sensor test.
4. Step-by-Step Guide to Performing a Coolant Temperature Sensor Test
4.1 Visual Inspection of the Coolant Temperature Sensor
Before conducting any electrical tests, start with a visual inspection of the CTS:
- Locate the CTS: Refer to your vehicle’s service manual or CAR-TOOL.EDU.VN to find the CTS location.
- Check for Damage: Look for any visible signs of damage, such as cracks, corrosion, or broken wires.
- Inspect the Connector: Ensure the connector is securely attached and free from corrosion.
- Clean the Area: Use a clean rag to wipe off any dirt or debris from the CTS and its connector.
If you find any visible damage, the CTS may need to be replaced before proceeding with further testing.
4.2 Testing the Coolant Temperature Sensor with a Multimeter
Using a multimeter to test the CTS is a straightforward process:
- Disconnect the CTS: Disconnect the electrical connector from the CTS.
- Set the Multimeter: Set the multimeter to the resistance (ohms) setting.
- Connect the Leads: Connect the multimeter leads to the terminals of the CTS.
- Record the Resistance: Note the resistance value displayed on the multimeter.
- Compare to Specifications: Compare the reading to the specifications in your vehicle’s service manual or the information available on CAR-TOOL.EDU.VN.
The resistance value should change as the temperature changes. For example, at room temperature (around 68°F or 20°C), a typical CTS might read between 2,000 and 3,000 ohms.
4.3 Testing the Coolant Temperature Sensor Voltage
Testing the voltage at the CTS connector can help identify wiring issues:
- Locate the CTS Connector: Find the electrical connector for the CTS.
- Set the Multimeter: Set the multimeter to the DC voltage setting.
- Turn on the Ignition: Turn the ignition key to the “ON” position, but do not start the engine.
- Connect the Leads: Connect the multimeter leads to the terminals of the CTS connector.
- Record the Voltage: Note the voltage value displayed on the multimeter.
Typically, you should see a reference voltage of around 5 volts. If the voltage is significantly different, there may be a wiring issue or a problem with the ECU.
4.4 Using a Scan Tool to Read Coolant Temperature Data
A scan tool can provide real-time coolant temperature data from the ECU:
- Connect the Scan Tool: Plug the scan tool into the OBD-II port of your vehicle.
- Turn on the Ignition: Turn the ignition key to the “ON” position, but do not start the engine.
- Select Live Data: Navigate to the live data or sensor data menu on the scan tool.
- Monitor Coolant Temperature: Look for the coolant temperature parameter and monitor the reading.
- Compare to Actual Temperature: Compare the reading to the actual coolant temperature using an infrared thermometer.
If the scan tool reading is significantly different from the actual temperature, the CTS may be faulty.
5. Interpreting Coolant Temperature Sensor Test Results
5.1 Understanding Resistance Values
The resistance value of the CTS changes with temperature. Generally:
- High Resistance: Indicates a low temperature (e.g., cold engine).
- Low Resistance: Indicates a high temperature (e.g., warm engine).
Consult your vehicle’s service manual or CAR-TOOL.EDU.VN for specific resistance values at different temperatures. Deviations from these values indicate a faulty CTS.
5.2 Analyzing Voltage Readings
A reference voltage of around 5 volts should be present at the CTS connector. If the voltage is significantly different:
- Low Voltage: May indicate a short circuit or a wiring issue.
- High Voltage: May indicate an open circuit or a problem with the ECU.
Further diagnostic steps may be needed to identify and resolve any voltage issues.
5.3 Diagnosing Common Issues Based on Test Results
Based on the test results, you can diagnose common issues:
- Inaccurate Resistance Readings: Replace the CTS.
- Incorrect Voltage Readings: Check the wiring and the ECU.
- Scan Tool Data Discrepancies: Verify the actual temperature and replace the CTS if needed.
CAR-TOOL.EDU.VN provides detailed troubleshooting guides to help you diagnose and resolve these issues effectively.
5.4 When to Replace the Coolant Temperature Sensor
Replace the CTS if:
- Resistance Values are Out of Range: The resistance values do not match the specifications at different temperatures.
- Voltage Readings are Incorrect: The voltage at the CTS connector is not within the specified range.
- Scan Tool Data is Inaccurate: The scan tool reading is significantly different from the actual coolant temperature.
- Visual Inspection Reveals Damage: The CTS is visibly damaged or corroded.
Replacing the CTS can restore proper engine performance and prevent potential damage.
6. Coolant Temperature Sensor Replacement
6.1 Steps to Replace the Coolant Temperature Sensor
Replacing the CTS is a straightforward process:
- Gather Tools and Materials: Collect the necessary tools, including a socket set, wrench, new CTS, coolant, and distilled water.
- Disconnect the Battery: Disconnect the negative battery terminal to prevent electrical shocks.
- Drain Some Coolant: Drain a small amount of coolant from the radiator to prevent spills.
- Disconnect the Electrical Connector: Disconnect the electrical connector from the old CTS.
- Remove the Old CTS: Use a socket or wrench to remove the old CTS from the engine.
- Install the New CTS: Install the new CTS and tighten it to the specified torque.
- Reconnect the Electrical Connector: Reconnect the electrical connector to the new CTS.
- Refill Coolant: Refill the coolant system with a mixture of coolant and distilled water.
- Reconnect the Battery: Reconnect the negative battery terminal.
- Start the Engine: Start the engine and check for leaks.
6.2 Choosing the Right Replacement Sensor
When choosing a replacement CTS, consider the following factors:
- Compatibility: Ensure the new CTS is compatible with your vehicle make and model.
- Quality: Choose a high-quality CTS from a reputable brand to ensure reliability and accuracy.
- Specifications: Verify that the new CTS meets the specifications for your vehicle.
CAR-TOOL.EDU.VN offers detailed product reviews and compatibility guides to help you select the right replacement sensor.
6.3 Post-Replacement Testing
After replacing the CTS, perform the following tests to ensure it is functioning correctly:
- Check for Leaks: Inspect the area around the CTS for any coolant leaks.
- Monitor Coolant Temperature: Use a scan tool to monitor the coolant temperature data from the ECU.
- Verify Engine Performance: Ensure the engine starts easily, idles smoothly, and performs normally.
If you encounter any issues after replacing the CTS, consult a qualified mechanic for further assistance.
6.4 Tips for a Successful Replacement
Follow these tips for a successful CTS replacement:
- Use the Correct Tools: Using the correct tools can prevent damage to the CTS and surrounding components.
- Tighten to the Specified Torque: Tighten the new CTS to the specified torque to prevent leaks.
- Use New Coolant: Use new coolant when refilling the system to ensure proper cooling and corrosion protection.
- Bleed the Cooling System: Bleed the cooling system to remove any air pockets.
These tips can help ensure a successful CTS replacement and prevent potential issues.
7. Advanced Diagnostic Techniques
7.1 Using an Oscilloscope for Advanced Testing
An oscilloscope can be used for more advanced testing of the CTS signal:
- Connect the Oscilloscope: Connect the oscilloscope leads to the CTS signal wire and ground.
- Monitor the Signal: Monitor the CTS signal as the engine warms up.
- Analyze the Waveform: Analyze the waveform for any anomalies, such as spikes, drops, or flat spots.
An oscilloscope can provide valuable insights into the performance of the CTS and help identify subtle issues that may not be apparent with a multimeter or scan tool.
7.2 Checking the Wiring Harness for Continuity and Shorts
Wiring issues can cause problems with the CTS signal. Use a multimeter to check the wiring harness for:
- Continuity: Ensure there is a continuous connection between the CTS connector and the ECU.
- Shorts: Check for shorts to ground or other circuits.
Repairing any wiring issues can restore proper CTS function and resolve related engine performance problems.
7.3 Testing the ECU for Proper Signal Processing
In rare cases, the ECU may be the cause of CTS-related issues. Use a scan tool or oscilloscope to:
- Monitor the CTS Signal at the ECU: Verify that the ECU is receiving the correct signal from the CTS.
- Check for ECU Fault Codes: Look for any ECU fault codes related to the CTS or cooling system.
If the ECU is not processing the CTS signal correctly, it may need to be reprogrammed or replaced.
7.4 Diagnosing Intermittent Coolant Temperature Sensor Problems
Intermittent CTS problems can be challenging to diagnose. Try the following techniques:
- Monitor the CTS Signal Over Time: Use a scan tool or oscilloscope to monitor the CTS signal over an extended period, looking for any intermittent issues.
- Check for Loose Connections: Inspect the CTS connector and wiring harness for any loose connections.
- Test the CTS Under Different Conditions: Test the CTS under different engine temperatures and operating conditions to see if the problem occurs consistently.
Documenting the conditions under which the problem occurs can help narrow down the cause and identify the appropriate solution.
8. Common Mistakes to Avoid During Coolant Temperature Sensor Testing
8.1 Not Allowing the Engine to Cool Down
Working on a hot engine can be dangerous and can lead to inaccurate test results. Always allow the engine to cool down completely before starting any repairs or testing.
8.2 Using the Wrong Tools
Using the wrong tools can damage the CTS or surrounding components. Ensure you have the correct tools for the job, including a socket set, wrench, multimeter, and scan tool. CAR-TOOL.EDU.VN provides detailed guides on selecting the right tools for automotive repairs.
8.3 Not Consulting the Vehicle Service Manual
The vehicle service manual provides specific information about your vehicle’s CTS, including its location, wiring diagram, and testing procedures. Not consulting the manual can lead to incorrect diagnoses and repairs.
8.4 Overlooking Visual Inspection
A visual inspection can often reveal obvious problems, such as damage or corrosion, that may be causing the issue. Always perform a thorough visual inspection before conducting any electrical tests.
8.5 Not Disconnecting the Battery
Disconnecting the battery is a crucial safety precaution that can prevent electrical shocks and damage to the vehicle’s electrical system. Always disconnect the negative battery terminal before starting any repairs.
8.6 Misinterpreting Test Results
Misinterpreting test results can lead to incorrect diagnoses and unnecessary repairs. Ensure you understand the specifications for your vehicle’s CTS and how to interpret the resistance and voltage readings. CAR-TOOL.EDU.VN offers detailed guides and expert advice to help you accurately interpret test results.
9. Maintaining Your Vehicle’s Cooling System
9.1 Regular Coolant Flushes
Regular coolant flushes are essential for maintaining the health of your vehicle’s cooling system. Over time, coolant can become contaminated with rust, scale, and other debris, reducing its ability to cool the engine effectively. Follow the manufacturer’s recommended coolant flush interval to ensure optimal cooling system performance.
9.2 Inspecting Hoses and Clamps
Regularly inspect the hoses and clamps in your vehicle’s cooling system for signs of wear, cracks, or leaks. Replace any damaged hoses or clamps to prevent coolant leaks and potential engine overheating.
9.3 Checking the Radiator Cap
The radiator cap is an important component of the cooling system that helps maintain pressure and prevent coolant loss. Check the radiator cap regularly for signs of damage or wear, and replace it if necessary.
9.4 Monitoring Coolant Levels
Monitor the coolant level in your vehicle’s radiator and overflow tank regularly. Low coolant levels can lead to engine overheating and damage. Add coolant as needed to maintain the proper level.
9.5 Professional Cooling System Inspections
Consider having your vehicle’s cooling system inspected by a professional mechanic on a regular basis. A professional inspection can identify potential problems early and help prevent costly repairs down the road.
10. Frequently Asked Questions (FAQs) About Coolant Temperature Sensors
10.1 What Does a Coolant Temperature Sensor Do?
The coolant temperature sensor measures the temperature of the engine coolant and sends this information to the ECU, which uses it to adjust fuel injection, ignition timing, and other engine parameters.
10.2 How Do I Know If My Coolant Temperature Sensor Is Bad?
Common symptoms of a bad CTS include poor fuel economy, rough idling, difficulty starting, engine overheating, and a check engine light.
10.3 Can I Drive with a Bad Coolant Temperature Sensor?
While it may be possible to drive with a bad CTS, it is not recommended. A faulty CTS can lead to engine overheating, poor fuel economy, and other performance issues that can damage your engine.
10.4 How Much Does It Cost to Replace a Coolant Temperature Sensor?
The cost to replace a CTS can vary depending on the vehicle make and model, as well as the labor costs in your area. Generally, you can expect to pay between $50 and $200 for the replacement.
10.5 Where Is the Coolant Temperature Sensor Located?
The CTS is typically located in the engine block or cylinder head, near the thermostat housing. Refer to your vehicle’s service manual or CAR-TOOL.EDU.VN to find the exact location.
10.6 How Often Should I Replace My Coolant Temperature Sensor?
There is no specific replacement interval for the CTS. However, it is recommended to inspect the CTS regularly and replace it if you notice any symptoms of a problem.
10.7 What Happens If the Coolant Temperature Sensor Is Not Working?
If the CTS is not working, the ECU may not be able to accurately adjust fuel injection, ignition timing, and other engine parameters, leading to poor performance and potential damage.
10.8 Can a Bad Coolant Temperature Sensor Cause a Check Engine Light?
Yes, a bad CTS can cause a check engine light to illuminate. The ECU will typically store a diagnostic trouble code (DTC) related to the CTS, which can be read using a scan tool.
10.9 How Do I Test a Coolant Temperature Sensor?
You can test a CTS using a multimeter to measure its resistance and voltage, or with a scan tool to read the coolant temperature data from the ECU. Refer to the step-by-step guide in this article for detailed instructions.
10.10 What Is the Difference Between a Coolant Temperature Sensor and a Coolant Temperature Switch?
A coolant temperature sensor provides a variable resistance signal to the ECU based on the coolant temperature, while a coolant temperature switch is a simple on/off switch that activates at a specific temperature, typically to control the cooling fan.
Ensuring the CTS is functioning correctly is crucial for maintaining optimal engine performance and preventing potential damage. CAR-TOOL.EDU.VN provides comprehensive resources and expert advice to help you test, diagnose, and replace your CTS effectively.
Are you facing issues with your car’s performance and suspect a faulty coolant temperature sensor? Don’t wait for the problem to escalate. Contact CAR-TOOL.EDU.VN today for expert advice and the best tools and parts to diagnose and fix your vehicle. Call us at +1 (641) 206-8880 or visit our shop at 456 Elm Street, Dallas, TX 75201, United States. Let us help you keep your engine running smoothly and efficiently.