The Car Diagnostic Port Not Working can be a frustrating issue, preventing you from accessing vital vehicle data and performing necessary maintenance. At CAR-TOOL.EDU.VN, we provide clear solutions to diagnose and fix this problem, ensuring you can quickly get back to troubleshooting your car. Discover effective troubleshooting steps, from checking connections to testing fuses, and keep your diagnostic process smooth and efficient.
Contents
- 1. What Causes a Car Diagnostic Port Not to Work?
- 2. How Do I Know If My OBD2 Port Is Not Working?
- 3. How to Diagnose a Non-Functioning Car Diagnostic Port
- 4. What Tools Do I Need to Fix a Car Diagnostic Port?
- 5. Step-by-Step Guide: Fixing a Car Diagnostic Port
- 6. Common Mistakes to Avoid When Fixing a Car Diagnostic Port
- 7. How Much Does It Cost to Fix an OBD2 Port?
- 8. Can I Drive with a Faulty OBD2 Port?
- 9. Preventing Future OBD2 Port Issues
- 10. FAQ: Car Diagnostic Port Not Working
1. What Causes a Car Diagnostic Port Not to Work?
A car diagnostic port not working can stem from several issues, including blown fuses, wiring problems, or a malfunctioning scan tool. Start by examining the most common culprits to streamline your troubleshooting.
- Blown Fuse: The OBD-II port shares a fuse with other vehicle systems; a short circuit can blow this fuse, cutting power to the port.
- Wiring Issues: Damaged or corroded wires can disrupt the connection between the port and the car’s computer.
- Faulty Scan Tool: A malfunctioning diagnostic tool can prevent communication, even if the port is functioning correctly.
- Pin Damage: Bent or broken pins inside the OBD-II port can impede proper connection.
- Software Glitches: Sometimes, the car’s computer system may have a software glitch that prevents communication through the port.
- OBD-II Port Damage: Physical damage to the port itself can also cause it to fail.
2. How Do I Know If My OBD2 Port Is Not Working?
Recognizing the symptoms of a malfunctioning OBD2 port is crucial for timely diagnosis and repair. Look for common signs such as:
- Scan Tool Won’t Power On: The diagnostic tool fails to power up when connected to the OBD2 port.
- No Communication: The scan tool powers on but cannot establish a connection with the vehicle’s computer.
- Error Messages: The scan tool displays error messages like “Link Error” or “Cannot Connect.”
- Inability to Read Codes: The scan tool connects, but fails to retrieve diagnostic trouble codes (DTCs).
- Intermittent Connection: The connection between the scan tool and the OBD2 port is unstable, dropping frequently.
- Check Engine Light Issues: The check engine light may not illuminate, even when there are known issues with the vehicle.
3. How to Diagnose a Non-Functioning Car Diagnostic Port
Diagnosing a non-functioning car diagnostic port requires a systematic approach to identify the root cause of the problem. Here’s a step-by-step guide:
-
Check the Fuses:
- Locate the fuse box: Consult your vehicle’s owner’s manual to find the location of the fuse box, typically under the dashboard or in the engine compartment.
- Identify the OBD-II fuse: Look for the fuse labeled “OBD,” “Diagnostic,” or “Cigar Lighter,” as these often share the same circuit.
- Inspect the fuse: Remove the fuse and visually inspect it. If the filament inside is broken or the fuse appears blackened, it has blown and needs replacement.
- Replace the fuse: Install a new fuse with the same amperage rating as the original.
-
Inspect the OBD-II Port:
- Visual inspection: Check the port for any visible damage, such as bent or broken pins, corrosion, or debris.
- Pin alignment: Ensure all pins are straight and properly aligned. Use a small tool, like a needle-nose pliers, to gently straighten any bent pins.
- Clean the port: Use a contact cleaner to remove any corrosion or debris from the port.
-
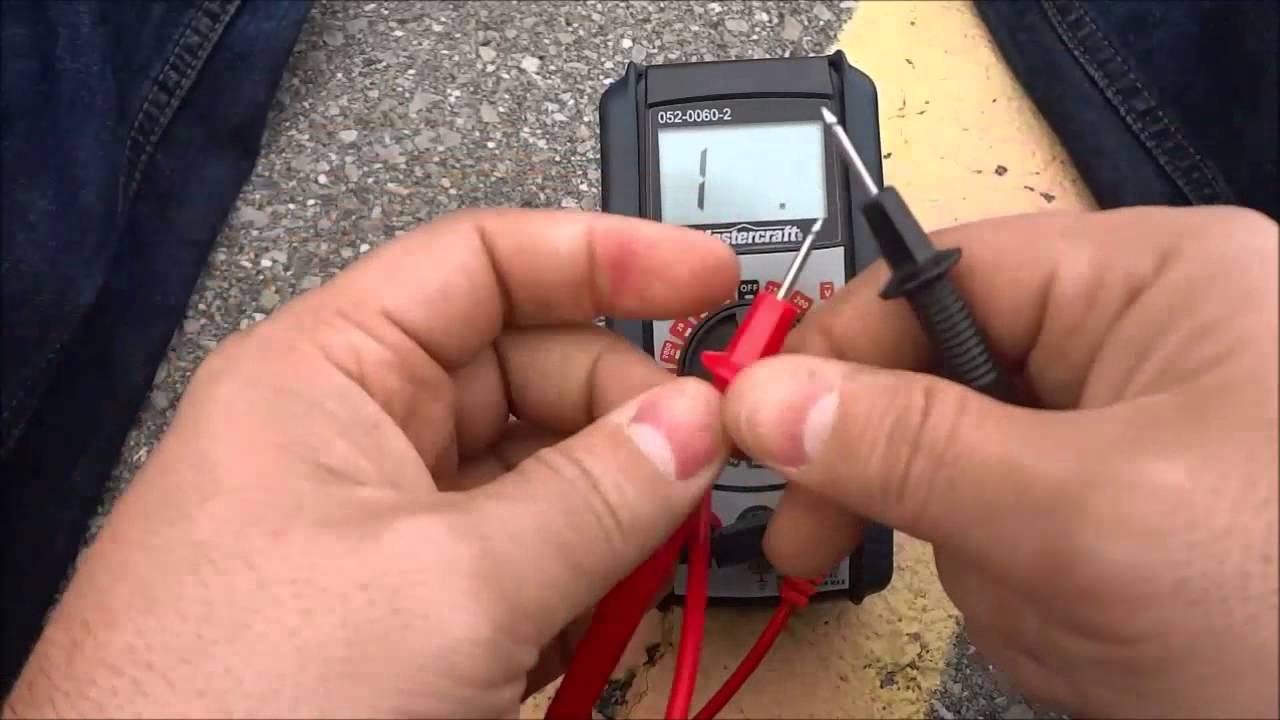
Test the OBD-II Port with a Multimeter:
- Prepare the multimeter: Set your multimeter to measure DC voltage.
- Locate the power and ground pins: Refer to an OBD-II pinout diagram to identify the power (pin 16) and ground (pins 4 and 5) on the port.
- Test for voltage: Connect the positive (red) lead of the multimeter to pin 16 and the negative (black) lead to pin 4 or 5. You should read approximately 12 volts with the ignition on.
- Interpret the results:
- If you read 12 volts, the port is receiving power and the ground connection is good.
- If you read 0 volts, there is a power or ground issue.
-
Check for Wiring Issues:
- Inspect the wiring harness: Examine the wires connected to the OBD-II port for any signs of damage, such as cuts, fraying, or corrosion.
- Test continuity: Use a multimeter to test the continuity of the wires between the OBD-II port and the vehicle’s computer. Refer to the vehicle’s wiring diagram for the correct wire locations.
- Repair or replace damaged wires: Repair any damaged wires by splicing in new sections or replace the entire wiring harness if necessary.
-
Test with Another Scan Tool:
- Try a different scan tool: Connect a different scan tool to the OBD-II port to rule out a problem with your original tool.
- Check compatibility: Ensure the scan tool is compatible with your vehicle’s make and model.
- Interpret the results:
- If the second scan tool works, the original scan tool is likely faulty.
- If the second scan tool also fails, the problem is likely with the OBD-II port or the vehicle’s computer.
-
Check the Vehicle’s Computer (ECU/PCM):
- Inspect the ECU/PCM: Check the vehicle’s computer for any visible damage, such as corrosion or water damage.
- Check the connections: Ensure all connections to the ECU/PCM are secure and free of corrosion.
- Consider professional diagnosis: If you suspect a problem with the ECU/PCM, it is best to seek professional diagnosis, as this component is complex and requires specialized tools to test.
Example Table: OBD-II Port Troubleshooting Checklist
| Step | Action | Expected Result | Possible Cause |
|---|---|---|---|
| Check Fuses | Inspect and replace the OBD-II fuse. | Fuse is intact or new fuse resolves the issue. | Blown fuse due to short circuit. |
| Inspect OBD-II Port | Look for damaged pins, corrosion, or debris. | Port is clean and pins are straight. | Damaged or dirty port. |
| Test with Multimeter | Check voltage between pin 16 and pins 4/5. | Approximately 12 volts. | Power or ground issue. |
| Check Wiring | Inspect wires for damage and test continuity. | Wires are intact and have continuity. | Damaged or disconnected wires. |
| Test Another Scan Tool | Try a different scan tool. | Second scan tool connects and reads data. | Faulty original scan tool. |
| Check ECU/PCM | Inspect for damage and secure connections. | ECU/PCM appears undamaged and well-connected. | Faulty ECU/PCM (requires professional diagnosis). |
By following these steps, you can systematically diagnose and address the issues causing your car’s diagnostic port to fail. Remember to consult your vehicle’s repair manual for specific instructions and wiring diagrams to ensure accurate troubleshooting.
4. What Tools Do I Need to Fix a Car Diagnostic Port?
Having the right tools can make diagnosing and fixing a car diagnostic port not working much easier. Here’s a list of essential tools:
-
Digital Multimeter:
- Function: Measures voltage, current, and resistance to test the power supply and continuity of circuits.
- Use: Check for voltage at pin 16 of the OBD-II port and test the continuity of the wiring.
-
Fuse Puller:
- Function: Safely removes fuses from the fuse box without damaging them or the surrounding components.
- Use: Remove and inspect the OBD-II fuse without causing damage.
-
OBD-II Scan Tool:
- Function: Connects to the OBD-II port to read diagnostic trouble codes (DTCs) and monitor vehicle data.
- Use: Verify if the port is communicating with the vehicle’s computer and retrieve any error codes.
-
Contact Cleaner:
- Function: Cleans electrical contacts and removes corrosion, improving connectivity.
- Use: Clean the pins in the OBD-II port to ensure good contact with the scan tool.
-
Wiring Diagram:
- Function: Provides a detailed layout of the vehicle’s electrical system, including the OBD-II port wiring.
- Use: Identify the correct wires to test for continuity and ensure proper connections.
-
Needle-Nose Pliers:
- Function: Grips, bends, and manipulates small components in tight spaces.
- Use: Straighten any bent pins in the OBD-II port.
-
Wire Strippers/Crimpers:
- Function: Strips insulation from wires and crimps connectors for secure electrical connections.
- Use: Repair or replace damaged wiring connected to the OBD-II port.
-
Electrical Tape:
- Function: Insulates and protects electrical connections.
- Use: Wrap any spliced or repaired wires to prevent shorts.
-
Replacement Fuses:
- Function: Replaces blown fuses to restore power to the OBD-II port.
- Use: Replace the OBD-II fuse with a new one of the same amperage rating.
-
OBD-II Port Breakout Box:
- Function: Allows easy access to each pin in the OBD-II port for testing.
- Use: Connect a multimeter or oscilloscope to test individual pins and diagnose wiring issues.
Example Table: Essential Tools for Fixing a Car Diagnostic Port
| Tool | Function | Use |
|---|---|---|
| Digital Multimeter | Measures voltage, current, and resistance. | Check power and continuity. |
| Fuse Puller | Safely removes fuses. | Remove and inspect fuses. |
| OBD-II Scan Tool | Reads diagnostic trouble codes (DTCs). | Verify port communication and retrieve error codes. |
| Contact Cleaner | Cleans electrical contacts. | Clean pins in the OBD-II port. |
| Wiring Diagram | Provides electrical system layout. | Identify correct wires for testing. |
| Needle-Nose Pliers | Grips and manipulates small components. | Straighten bent pins. |
| Wire Strippers/Crimpers | Strips insulation and crimps connectors. | Repair or replace damaged wiring. |
| Electrical Tape | Insulates and protects electrical connections. | Wrap spliced or repaired wires. |
| Replacement Fuses | Replaces blown fuses. | Restore power to the OBD-II port. |
| OBD-II Breakout Box | Provides easy access to each pin for testing. | Connect multimeter or oscilloscope to test individual pins. |
By having these tools on hand, you can efficiently diagnose and repair most issues related to a non-functional car diagnostic port, ensuring you can keep your vehicle running smoothly.
5. Step-by-Step Guide: Fixing a Car Diagnostic Port
Follow this detailed guide to troubleshoot and fix a car diagnostic port not working, ensuring you address common issues effectively.
Step 1: Preliminary Checks
- Turn off the Ignition: Ensure the vehicle’s ignition is turned off before starting any diagnostic work.
- Locate the OBD-II Port: The OBD-II port is typically located under the dashboard on the driver’s side. Refer to your vehicle’s manual if you cannot find it.
- Visual Inspection: Check the port for any visible damage, such as bent or broken pins, corrosion, or debris. Clean the port with a contact cleaner if necessary.
Step 2: Check the Fuses
-
Locate the Fuse Box: Consult your vehicle’s owner’s manual to find the location of the fuse box, usually under the dashboard or in the engine compartment.
-
Identify the OBD-II Fuse: Look for the fuse labeled “OBD,” “Diagnostic,” or “Cigar Lighter,” as they often share the same circuit. The amperage rating is typically between 10A and 20A.
-
Inspect the Fuse: Use a fuse puller to remove the fuse and visually inspect it. If the filament inside is broken or the fuse appears blackened, it has blown and needs replacement.
 Blown Fuse
 -
Replace the Fuse: Install a new fuse with the same amperage rating as the original. Ensure the new fuse is firmly seated in the fuse holder.
Step 3: Test the OBD-II Port with a Multimeter
-
Prepare the Multimeter: Set your multimeter to measure DC voltage.
-
Locate the Power and Ground Pins: Refer to an OBD-II pinout diagram to identify the power (pin 16) and ground (pins 4 and 5) on the port.
-
Test for Voltage:
- Connect the positive (red) lead of the multimeter to pin 16.
- Connect the negative (black) lead to pin 4 or 5.
- Turn the ignition to the “ON” position (do not start the engine).
- You should read approximately 12 volts.
-
Interpret the Results:
- If you read 12 volts, the port is receiving power and the ground connection is good. Proceed to the next step.
- If you read 0 volts, there is a power or ground issue. Check the wiring and connections.
Step 4: Check for Wiring Issues
-
Inspect the Wiring Harness: Examine the wires connected to the OBD-II port for any signs of damage, such as cuts, fraying, or corrosion. Pay close attention to the areas where the wires are exposed or near sharp edges.
-
Test Continuity:
- Disconnect the battery: Disconnect the negative terminal of the battery to prevent electrical damage.
- Locate the wiring diagram: Refer to the vehicle’s wiring diagram for the correct wire locations.
- Set the multimeter to continuity mode: This mode will beep if there is a continuous connection between two points.
- Test the continuity of each wire: Place one lead of the multimeter on the pin in the OBD-II port and the other lead on the corresponding pin at the vehicle’s computer (ECU/PCM).
-
Repair or Replace Damaged Wires: Repair any damaged wires by splicing in new sections or replace the entire wiring harness if necessary. Use wire strippers/crimpers and electrical tape to ensure secure and insulated connections.
Step 5: Test with Another Scan Tool
- Try a Different Scan Tool: Connect a different scan tool to the OBD-II port to rule out a problem with your original tool.
- Check Compatibility: Ensure the scan tool is compatible with your vehicle’s make and model.
- Interpret the Results:
- If the second scan tool works, the original scan tool is likely faulty. Replace or repair the original scan tool.
- If the second scan tool also fails, the problem is likely with the OBD-II port or the vehicle’s computer.
Step 6: Check the Vehicle’s Computer (ECU/PCM)
-
Inspect the ECU/PCM: Check the vehicle’s computer for any visible damage, such as corrosion or water damage. Ensure all connections to the ECU/PCM are secure and free of corrosion.
-
Consider Professional Diagnosis: If you suspect a problem with the ECU/PCM, it is best to seek professional diagnosis, as this component is complex and requires specialized tools to test.
Example Table: Step-by-Step Troubleshooting Checklist
| Step | Action | Expected Result | Possible Cause |
|---|---|---|---|
| Preliminary Checks | Inspect the OBD-II port for damage. | Port is clean and pins are straight. | Damaged or dirty port. |
| Check Fuses | Inspect and replace the OBD-II fuse. | Fuse is intact or new fuse resolves the issue. | Blown fuse due to short circuit. |
| Test with Multimeter | Check voltage between pin 16 and pins 4/5. | Approximately 12 volts. | Power or ground issue. |
| Check Wiring | Inspect wires for damage and test continuity. | Wires are intact and have continuity. | Damaged or disconnected wires. |
| Test Another Scan Tool | Try a different scan tool. | Second scan tool connects and reads data. | Faulty original scan tool. |
| Check ECU/PCM | Inspect for damage and secure connections. | ECU/PCM appears undamaged and well-connected. | Faulty ECU/PCM (requires professional diagnosis). |
By following these steps, you can systematically diagnose and address the issues causing your car’s diagnostic port to fail. Remember to consult your vehicle’s repair manual for specific instructions and wiring diagrams to ensure accurate troubleshooting.
6. Common Mistakes to Avoid When Fixing a Car Diagnostic Port
When fixing a car diagnostic port, it’s easy to make mistakes that can complicate the process. Here are some common pitfalls to avoid:
-
Skipping Preliminary Checks:
- Mistake: Not visually inspecting the OBD-II port for damage or debris before starting other tests.
- Consequence: Overlooking obvious issues like bent pins or corrosion, leading to unnecessary troubleshooting steps.
- Solution: Always begin with a thorough visual inspection of the port to identify and address any visible problems.
-
Using the Wrong Fuse:
- Mistake: Replacing a blown fuse with one of a different amperage rating.
- Consequence: Using a fuse with too high amperage can damage the circuit, while a fuse with too low amperage may blow immediately.
- Solution: Always use a replacement fuse with the exact same amperage rating as the original. Consult your vehicle’s manual for the correct fuse specifications.
-
Incorrect Multimeter Settings:
- Mistake: Setting the multimeter to the wrong mode (e.g., resistance instead of voltage) when testing the OBD-II port.
- Consequence: Obtaining inaccurate readings, leading to misdiagnosis of the problem.
- Solution: Ensure the multimeter is set to the correct mode (DC voltage) when testing for power at the OBD-II port.
-
Neglecting Wiring Diagrams:
- Mistake: Attempting to test or repair wiring without consulting the vehicle’s wiring diagram.
- Consequence: Incorrectly identifying wires, leading to further damage or short circuits.
- Solution: Always refer to the vehicle’s wiring diagram to ensure you are testing or repairing the correct wires.
-
Ignoring Grounding Issues:
- Mistake: Focusing solely on the power supply and overlooking potential grounding problems.
- Consequence: A poor ground connection can prevent the scan tool from communicating with the vehicle’s computer, even if the power supply is good.
- Solution: Check the ground connections at pins 4 and 5 of the OBD-II port to ensure they are clean and secure.
-
Forgetting to Disconnect the Battery:
- Mistake: Working on the electrical system without disconnecting the battery.
- Consequence: Risk of short circuits, electrical shocks, and damage to sensitive electronic components.
- Solution: Always disconnect the negative terminal of the battery before working on the electrical system.
-
Overlooking Scan Tool Compatibility:
- Mistake: Using a scan tool that is not compatible with the vehicle’s make and model.
- Consequence: The scan tool may not be able to communicate with the vehicle’s computer, leading to inaccurate readings or a failed connection.
- Solution: Ensure the scan tool is compatible with your vehicle before attempting to use it.
-
Applying Excessive Force:
- Mistake: Using excessive force when inserting or removing fuses or connectors.
- Consequence: Damaging fuses, connectors, or the OBD-II port itself.
- Solution: Use gentle, controlled movements when working with delicate components. Use a fuse puller to remove fuses and ensure connectors are properly aligned before inserting them.
-
Ignoring Intermittent Issues:
- Mistake: Dismissing intermittent connection problems as insignificant.
- Consequence: Intermittent issues can be caused by loose connections or damaged wiring, which can worsen over time.
- Solution: Thoroughly investigate any intermittent connection problems to identify and address the underlying cause.
-
Failing to Seek Professional Help:
- Mistake: Continuing to troubleshoot without success and not seeking professional help when needed.
- Consequence: Further damage to the vehicle or unnecessary expenses on parts and tools.
- Solution: If you are unable to diagnose or repair the problem, seek assistance from a qualified automotive technician.
By avoiding these common mistakes, you can troubleshoot and repair a car diagnostic port not working more efficiently and effectively.
7. How Much Does It Cost to Fix an OBD2 Port?
The cost to fix an OBD2 port can vary widely depending on the underlying issue. Here’s a breakdown of potential costs:
-
Blown Fuse:
- Cost: $1 – $5
- Details: Replacing a blown fuse is the simplest and cheapest fix. Fuses are inexpensive and can be easily replaced by the vehicle owner.
-
Damaged OBD2 Port Pins:
- Cost: $20 – $50
- Details: If the pins in the OBD2 port are bent or damaged, they may need to be straightened or the entire port replaced. Straightening pins can be done with basic tools, but replacing the port requires more skill and may involve soldering.
-
Wiring Issues:
- Cost: $50 – $200
- Details: Wiring problems can range from simple repairs to more complex replacements. Repairing a damaged wire may involve splicing and taping, while replacing a section of the wiring harness can be more expensive.
-
OBD2 Port Replacement:
- Cost: $100 – $300
- Details: Replacing the entire OBD2 port can be necessary if it is severely damaged or corroded. This typically involves removing the old port, wiring in a new one, and securing it in place. Labor costs can vary depending on the complexity of the job.
-
Scan Tool Issues:
- Cost: $50 – $500+
- Details: If the problem lies with the scan tool, the cost depends on whether it can be repaired or needs to be replaced. Basic scan tools can be relatively inexpensive, while professional-grade tools can cost hundreds of dollars.
-
ECU/PCM Problems:
- Cost: $500 – $1500+
- Details: In rare cases, a non-functioning OBD2 port can be caused by a problem with the vehicle’s ECU/PCM. Repairing or replacing the ECU/PCM is a major repair and can be very expensive.
-
Professional Diagnostic Fee:
- Cost: $75 – $150
- Details: If you are unable to diagnose the problem yourself, you may need to take the vehicle to a professional mechanic. Diagnostic fees typically range from $75 to $150, but can be higher depending on the shop and the complexity of the issue.
Example Table: Estimated Costs for Fixing an OBD2 Port
| Issue | Estimated Cost | Details |
|---|---|---|
| Blown Fuse | $1 – $5 | Simple fuse replacement. |
| Damaged Port Pins | $20 – $50 | Straightening or replacing damaged pins. |
| Wiring Issues | $50 – $200 | Repairing or replacing damaged wiring. |
| Port Replacement | $100 – $300 | Replacing the entire OBD2 port. |
| Scan Tool Issues | $50 – $500+ | Repairing or replacing the scan tool. |
| ECU/PCM Problems | $500 – $1500+ | Repairing or replacing the vehicle’s computer. |
| Diagnostic Fee | $75 – $150 | Professional diagnostic service to identify the issue. |
These costs are estimates and can vary depending on the specific circumstances and location. Always get a quote from a reputable mechanic before proceeding with any repairs.
8. Can I Drive with a Faulty OBD2 Port?
Driving with a faulty OBD2 port is generally safe, but it can limit your ability to diagnose and address potential vehicle issues. Here’s what you need to know:
-
Safety Considerations:
- No Direct Impact on Driving: A faulty OBD2 port typically does not directly affect the vehicle’s drivability or safety. The engine, brakes, and other critical systems will continue to function normally.
- Loss of Diagnostic Information: The primary concern is the loss of access to diagnostic information. The OBD2 port is used to read trouble codes, monitor engine performance, and perform emissions testing. Without a functioning port, you won’t be able to identify potential problems early on.
-
Check Engine Light:
- Inability to Read Codes: If the check engine light comes on, you won’t be able to read the trouble codes to determine the cause. This can make it difficult to address the issue and may lead to further damage if left unchecked.
- Potential for Serious Issues: Ignoring a check engine light can result in more serious problems, such as decreased fuel efficiency, engine damage, or failure to pass emissions tests.
-
Emissions Testing:
- Failed Emissions Test: In many states, vehicles are required to pass emissions tests to be registered. A faulty OBD2 port can prevent the vehicle from being tested, resulting in a failed test.
-
Troubleshooting:
- Difficulty Diagnosing Problems: Without access to the OBD2 port, it can be more challenging to diagnose and repair vehicle issues. Mechanics may need to use alternative methods, which can be more time-consuming and expensive.
-
Recommendations:
- Address the Issue Promptly: It’s best to address the faulty OBD2 port as soon as possible. This will ensure you can monitor the vehicle’s performance and identify potential problems early on.
- Professional Inspection: If you are unsure about the cause of the faulty port, take the vehicle to a professional mechanic for inspection. They can diagnose the issue and recommend the appropriate repairs.
Example Table: Driving with a Faulty OBD2 Port
| Aspect | Consideration | Recommendation |
|---|---|---|
| Safety | Typically does not directly affect driving safety. | Continue to drive cautiously, but address the issue as soon as possible. |
| Check Engine Light | Inability to read trouble codes. | Schedule a diagnostic check to identify the cause of the light. |
| Emissions Testing | May result in a failed emissions test. | Repair the OBD2 port before the next emissions test. |
| Troubleshooting | Makes diagnosing problems more difficult. | Seek professional help if you are unable to diagnose the issue yourself. |
| Overall Recommendation | It is generally safe to drive, but addressing the faulty OBD2 port promptly is recommended to ensure you can monitor and maintain your vehicle. | Schedule a diagnostic check and repair as soon as possible to avoid potential issues and ensure compliance with emissions testing requirements. |
While driving with a faulty OBD2 port is not inherently dangerous, it’s essential to address the issue promptly to ensure you can monitor your vehicle’s health and avoid potential problems.
9. Preventing Future OBD2 Port Issues
Preventing future OBD2 port issues involves regular maintenance and careful usage. Here are some tips to keep your OBD2 port in good working condition:
-
Regular Visual Inspections:
- Frequency: Perform visual inspections of the OBD2 port at least every six months or during routine vehicle maintenance.
- What to Look For: Check for any signs of damage, such as bent or broken pins, corrosion, or debris. Address any issues promptly to prevent further damage.
-
Use a Protective Cover:
- Purpose: A protective cover can shield the OBD2 port from dust, moisture, and physical damage.
- How to Use: Purchase a cover designed for OBD2 ports and keep it in place when the port is not in use.
-
Handle Scan Tools with Care:
- Insertion and Removal: When connecting or disconnecting a scan tool, do so gently and ensure it is properly aligned. Avoid forcing the connector, as this can damage the pins in the port.
- Proper Storage: Store scan tools in a safe place when not in use to prevent damage to the connector.
-
Avoid Overloading the Circuit:
- Multiple Devices: Avoid plugging multiple devices into the OBD2 port simultaneously, as this can overload the circuit and blow a fuse.
- High-Power Devices: Be cautious when using high-power devices that draw current from the OBD2 port, such as some diagnostic tools or aftermarket accessories.
-
Keep the Port Clean:
- Cleaning Frequency: Clean the OBD2 port periodically to remove any dirt, dust, or corrosion.
- How to Clean: Use a contact cleaner specifically designed for electrical components. Spray the cleaner onto the pins and wipe away any residue with a clean cloth.
-
Check for Wiring Issues:
- Regular Inspections: Inspect the wiring connected to the OBD2 port for any signs of damage, such as cuts, fraying, or corrosion.
- Professional Inspection: If you notice any wiring issues, have them addressed by a professional mechanic to prevent further damage.
-
Protect Against Moisture:
- Avoid Water Exposure: Keep the interior of the vehicle dry to prevent moisture from damaging the OBD2 port.
- Dehumidifiers: Use dehumidifiers or moisture absorbers in the vehicle to reduce humidity levels.
-
Use Quality Scan Tools and Adapters:
- Reliable Brands: Invest in high-quality scan tools and adapters from reputable brands. These are less likely to cause damage to the OBD2 port.
- Compatibility: Ensure the scan tool or adapter is compatible with your vehicle’s make and model.
-
Avoid DIY Electrical Modifications:
- Professional Installation: If you need to make any electrical modifications to your vehicle, have them done by a professional mechanic.
- Risk of Damage: Incorrectly installed electrical components can damage the OBD2 port and other vehicle systems.
Example Table: Tips for Preventing OBD2 Port Issues
| Tip | Description | Frequency/Action |
|---|---|---|
| Regular Visual Inspections | Check for damage, corrosion, or debris. | Every six months or during routine maintenance. |
| Use a Protective Cover | Shield the port from dust and damage. | Keep the cover in place when the port is not in use. |
| Handle Scan Tools Carefully | Align and gently insert/remove scan tools. | Avoid forcing the connector. Store scan tools safely. |
| Avoid Overloading | Don’t plug multiple devices in simultaneously. | Be cautious with high-power devices. |
| Keep the Port Clean | Remove dirt and corrosion with contact cleaner. | Clean periodically. |
| Check for Wiring Issues | Inspect wires for damage. | Regularly inspect and have any issues addressed by a professional. |
| Protect Against Moisture | Keep the interior dry. | Use dehumidifiers or moisture absorbers. |
| Use Quality Tools | Invest in reliable scan tools and adapters. | Ensure compatibility with your vehicle. |
| Avoid DIY Modifications | Have electrical modifications done by a professional. | Prevent damage from incorrect installations. |
By following these preventive measures, you can minimize the risk of OBD2 port issues and keep your vehicle’s diagnostic system functioning properly.
10. FAQ: Car Diagnostic Port Not Working
Here are some frequently asked questions about what to do if your car diagnostic port is not working:
1. What is the OBD2 port used for?
The OBD2 (On-Board Diagnostics II) port is a standardized interface in your vehicle used to access diagnostic information. Mechanics and vehicle owners use it to read trouble codes, monitor engine performance, and perform emissions testing.
2. Where is the OBD2 port located in my car?
The OBD2 port is typically located under the dashboard on the driver’s side. However, the exact location can vary depending on the vehicle’s make and model. Consult your vehicle’s owner’s manual for the precise location.
3. What are the common reasons why my OBD2 port might not be working?
Common reasons include a blown fuse, damaged or bent pins in the port, wiring issues, a faulty scan tool, or problems with the vehicle’s computer (ECU/PCM).
4. How can I check if my OBD2 port is receiving power?
You can use a digital multimeter to check for voltage at pin 16 of the OBD2 port. With the ignition on, you should read approximately 12 volts between pin 16 and pins 4 or 5 (ground).
5. What should I do if I find bent pins in my OBD2 port?
If you find bent pins, use a small tool, such as needle-nose pliers, to gently straighten them. Be careful not to break the pins. If the pins are severely damaged, the entire port may need to be replaced.
6. Can a blown fuse cause my OBD2 port to stop working?
Yes, a blown fuse is a common cause of a non-functioning OBD2 port. The OBD2 port often shares a fuse with other vehicle systems, such as the cigarette lighter or auxiliary power outlets. Check the fuse box and replace any blown fuses with ones of the same amperage rating.
7. How do I know if my scan tool is the problem, not the OBD2 port?
Try using a different scan tool to connect to the OBD2 port. If the second scan tool works, the original scan tool is likely faulty. Also, ensure that your scan tool is compatible with your vehicle’s make and model.
8. Is it safe to drive my car if the OBD2 port is not working?
Yes, it is generally safe to drive with a non-functioning OBD2 port, as it typically does not affect the vehicle’s drivability or safety. However, you won’t be able to read trouble codes or monitor engine performance, so it’s best to address the issue as soon as possible.
9. How much does it cost to fix a non-working OBD2 port?
The cost to fix a non-working OBD2 port can range from a few dollars for a replacement fuse to several hundred dollars for more complex repairs, such as replacing the port or repairing wiring issues. Diagnostic fees from a professional mechanic can also add to the cost.
10. Can I replace the OBD2 port myself, or do I need a professional?
Replacing the OBD2 port can be a DIY job if you have experience with electrical work and access