Diagnostic Water Test On Car is a method used to identify the source of water leaks in a vehicle’s interior, helping to prevent mold, corrosion, and electrical damage. CAR-TOOL.EDU.VN provides comprehensive information on how to perform this test and address common leak sources, ensuring your vehicle remains dry and well-maintained by using leak detection and water intrusion diagnostic tools. Understanding these tests and their applications will help you prevent costly repairs by addressing potential issues early.
Contents
- 1. What is a Diagnostic Water Test on a Car?
- 1.1. Why Perform a Diagnostic Water Test?
- 1.2. Tools and Materials Needed
- 1.3. Safety Precautions
- 2. Step-by-Step Guide to Performing a Diagnostic Water Test
- 2.1. Preparation
- 2.2. Testing the Windshield
- 2.3. Checking the Sunroof
- 2.4. Examining the Doors and Windows
- 2.5. Inspecting the Cabin Air Filter
- 2.6. Testing the Firewall and Underbody
- 3. Common Leak Sources and How to Address Them
- 3.1. Windshield Leaks
- 3.2. Sunroof Leaks
- 3.3. Door and Window Seal Leaks
- 3.4. Cabin Air Filter Leaks
- 3.5. Firewall and Underbody Leaks
- 4. Advanced Diagnostic Techniques
- 4.1. Smoke Testing
- 4.2. UV Dye Testing
- 4.3. Pressure Testing
- 5. Drying the Car After Finding and Fixing Leaks
- 5.1. Removing Excess Water
- 5.2. Drying the Interior
- 5.3. Preventing Mold and Mildew
- 6. Maintaining Your Car to Prevent Future Leaks
- 6.1. Regular Inspections
- 6.2. Cleaning and Maintenance
- 6.3. Prompt Repairs
- 7. CAR-TOOL.EDU.VN: Your Partner in Automotive Care
- 7.1. Comprehensive Guides
- 7.2. High-Quality Products
- 7.3. Expert Support
- 8. Real-World Examples of Diagnostic Water Tests
- 8.1. Example 1: Identifying a Windshield Leak
- 8.2. Example 2: Locating a Sunroof Leak
- 8.3. Example 3: Diagnosing a Door Seal Leak
- 9. The Science Behind Water Leaks in Cars
- 9.1. Capillary Action
- 9.2. Pressure Differential
- 9.3. Thermal Expansion and Contraction
- 9.4. Material Degradation
- 10. FAQ: Diagnostic Water Test on Car
1. What is a Diagnostic Water Test on a Car?
A diagnostic water test on a car involves systematically applying water to different areas of the vehicle’s exterior to identify the source of leaks into the interior. This process helps pinpoint the exact location where water is entering the car, allowing for targeted repairs.
The diagnostic water test is a crucial step in identifying and resolving water leaks in a vehicle. According to a study by the National Highway Traffic Safety Administration (NHTSA), water leaks can lead to significant corrosion and electrical damage, reducing the lifespan and safety of the vehicle. The test involves simulating rainfall conditions to observe where water penetrates the car’s interior. This method is particularly useful because it mimics real-world conditions, making it easier to find elusive leaks.
1.1. Why Perform a Diagnostic Water Test?
Performing a diagnostic water test is essential for several reasons:
- Preventing Corrosion: Water leaks can cause rust and corrosion, which can compromise the structural integrity of the car.
- Avoiding Electrical Damage: Water can damage electrical components, leading to malfunctions and costly repairs.
- Maintaining Interior Health: Dampness promotes mold and mildew growth, which can cause health problems and unpleasant odors.
- Preserving Vehicle Value: Addressing leaks promptly helps maintain the car’s resale value by preventing long-term damage.
According to a report by the Environmental Protection Agency (EPA), mold growth in vehicles can trigger allergic reactions and respiratory issues. Early detection and repair of water leaks are therefore vital for maintaining a healthy environment inside the car.
1.2. Tools and Materials Needed
To perform a diagnostic water test effectively, gather the following tools and materials:
- Water Source: A garden hose with an adjustable nozzle or a large bucket of water.
- Assistant: Having someone to observe the interior while you apply water can speed up the process.
- Flashlight: To inspect dark areas of the car’s interior.
- Dry Towels: For wiping down surfaces and identifying the path of water entry.
- Painter’s Tape: To mark areas where leaks are suspected.
- Camera: To document the location and severity of leaks.
- Screwdrivers and Basic Hand Tools: For removing interior panels if necessary.
- CAR-TOOL.EDU.VN Leak Detection Kit: Optional, but highly recommended for accurate leak detection.
Using the right tools ensures an accurate diagnosis and prevents further damage to the vehicle during the testing process. CAR-TOOL.EDU.VN offers a range of leak detection kits designed to simplify the process and provide reliable results.
1.3. Safety Precautions
Before starting the water test, keep these safety precautions in mind:
- Electrical Components: Avoid spraying water directly onto electrical components to prevent short circuits.
- Interior Protection: Cover sensitive interior surfaces with plastic sheeting to minimize potential water damage.
- Ventilation: Ensure adequate ventilation to prevent moisture buildup inside the car.
- Slip Resistance: Work on a non-slip surface to avoid accidents.
By following these safety guidelines, you can perform the diagnostic water test safely and effectively, protecting both yourself and your vehicle.
2. Step-by-Step Guide to Performing a Diagnostic Water Test
Follow these steps to perform a diagnostic water test and identify the source of leaks in your car:
2.1. Preparation
Before starting the water test, prepare the vehicle by:
- Cleaning the Car: Wash and dry the car thoroughly to remove dirt and debris that might mask leaks.
- Interior Inspection: Inspect the interior for any signs of water damage, such as damp carpets, stains, or mold.
- Removing Valuables: Remove any valuable items from the car to prevent water damage.
- Sealing Openings: Close all windows, doors, and the sunroof tightly.
A clean car makes it easier to spot water entry points and ensures accurate test results.
2.2. Testing the Windshield
The windshield is a common source of leaks due to damaged or deteriorated seals.
- Apply Water: Use a hose to spray water along the top and sides of the windshield.
- Interior Observation: Have an assistant inside the car observe for any water entry.
- Mark Leaks: If a leak is detected, mark the area with painter’s tape.
- Inspect Seal: Examine the windshield seal for cracks, gaps, or damage.
According to the Auto Glass Safety Council (AGSC), proper windshield installation and maintenance are crucial for preventing leaks and ensuring structural integrity.
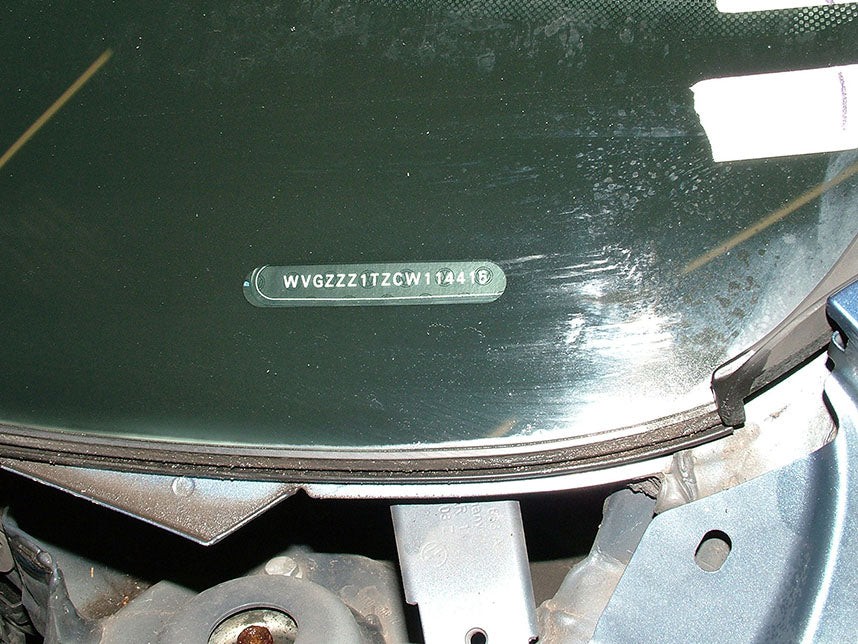 Windshield rubber
2.3. Checking the Sunroof
Sunroofs often leak due to clogged drain tubes or damaged seals.
- Open Sunroof: Carefully open the sunroof and inspect the drain channels for debris.
- Pour Water: Pour a small amount of water into the drain channels.
- Observe Drainage: Check if the water drains properly through the drain tubes.
- Test Seal: Close the sunroof and spray water around the edges, observing for leaks inside the car.
If the water does not drain properly, the drain tubes may be clogged and need to be cleaned.
 Sunroof
2.4. Examining the Doors and Windows
Door and window seals can deteriorate over time, leading to leaks.
- Spray Water: Spray water along the top and sides of the doors and windows.
- Check Interior: Have an assistant check the interior for water entry, particularly along the door panels and floor.
- Inspect Seals: Examine the door and window seals for damage, cracks, or gaps.
The Insurance Institute for Highway Safety (IIHS) emphasizes the importance of maintaining door and window seals to prevent water intrusion and maintain vehicle safety.
2.5. Inspecting the Cabin Air Filter
A poorly installed or damaged cabin air filter can allow water to enter the car.
- Locate Filter: Find the cabin air filter housing, typically located under the hood or behind the glove compartment.
- Remove Filter: Remove the cabin air filter and inspect it for signs of water damage.
- Check Housing: Inspect the filter housing for cracks or gaps that could allow water to enter.
- Apply Water: Spray water around the filter housing and check for leaks inside the car.
Replacing a damaged cabin air filter and ensuring a proper seal can prevent water from entering the car’s interior.
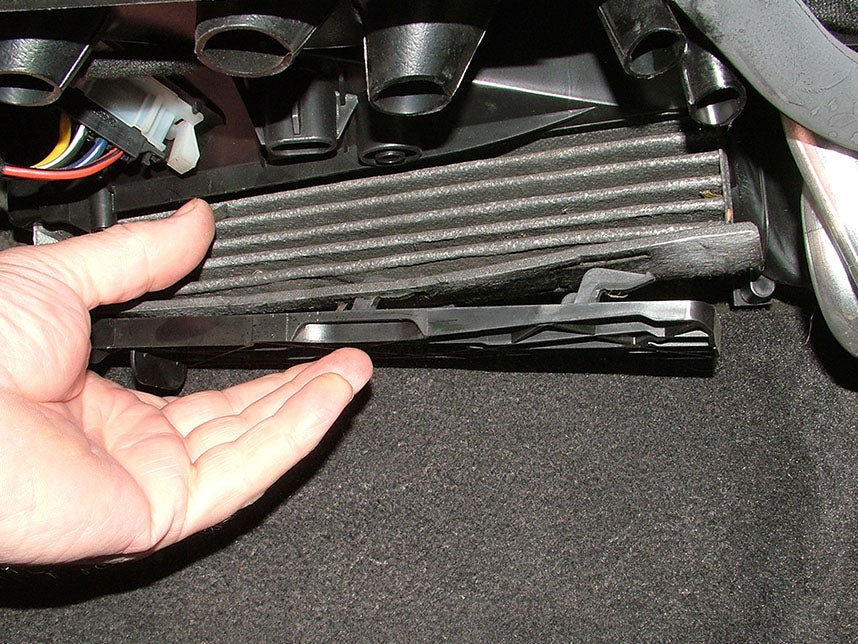 Cabin filter
2.6. Testing the Firewall and Underbody
The firewall and underbody can develop leaks due to corrosion or damage.
- Spray Water: Spray water along the firewall and underbody, focusing on areas with visible rust or damage.
- Interior Check: Check the interior for water entry, particularly in the footwells.
- Inspect Seals: Examine any seals or grommets in the firewall for damage or deterioration.
Addressing leaks in the firewall and underbody is crucial for preventing long-term damage and maintaining the vehicle’s structural integrity.
3. Common Leak Sources and How to Address Them
Identifying the leak source is only the first step; you must also know how to address it. Here are some common leak sources and solutions:
3.1. Windshield Leaks
Problem: Damaged or deteriorated windshield seals.
Solution:
- Clean the Area: Clean the windshield and surrounding area to remove dirt and debris.
- Apply Sealant: Apply a high-quality windshield sealant to fill any gaps or cracks in the seal.
- Replace Seal: If the seal is severely damaged, consider replacing it entirely.
Professional windshield replacement services ensure a proper seal, preventing future leaks.
3.2. Sunroof Leaks
Problem: Clogged sunroof drain tubes.
Solution:
- Locate Drain Tubes: Find the drain tubes in the corners of the sunroof.
- Clear Debris: Use compressed air or a flexible wire to clear any debris from the drain tubes.
- Test Drainage: Pour water into the drain channels to ensure proper drainage.
Regularly cleaning the sunroof drain tubes can prevent water from backing up and leaking into the car.
3.3. Door and Window Seal Leaks
Problem: Damaged or deteriorated door and window seals.
Solution:
- Clean Seals: Clean the seals with a mild detergent to remove dirt and grime.
- Apply Sealant: Apply a rubber sealant to rejuvenate and protect the seals.
- Replace Seals: If the seals are severely damaged, replace them with new ones.
Maintaining door and window seals helps ensure a tight, waterproof seal, preventing leaks and drafts.
3.4. Cabin Air Filter Leaks
Problem: Improperly installed or damaged cabin air filter housing.
Solution:
- Inspect Housing: Check the filter housing for cracks or gaps.
- Replace Filter: Replace the cabin air filter with a new one.
- Seal Housing: Apply sealant to the filter housing to ensure a proper seal.
Proper installation and maintenance of the cabin air filter housing prevent water from entering the car’s ventilation system.
3.5. Firewall and Underbody Leaks
Problem: Corrosion or damage to the firewall and underbody.
Solution:
- Clean Area: Clean the affected area to remove rust and debris.
- Apply Sealant: Apply a rust-resistant sealant to protect the metal.
- Repair Damage: For severe damage, consider welding or patching the area.
Addressing firewall and underbody leaks promptly can prevent further corrosion and maintain the structural integrity of the vehicle.
4. Advanced Diagnostic Techniques
For complex or hard-to-find leaks, consider these advanced diagnostic techniques:
4.1. Smoke Testing
Smoke testing involves using a smoke machine to introduce smoke into the car’s interior. By observing where the smoke escapes, you can identify the location of leaks.
How it Works:
- Seal Car: Seal all windows and doors tightly.
- Introduce Smoke: Use a smoke machine to pump smoke into the car’s interior.
- Observe Leaks: Watch for smoke escaping from any cracks or gaps in the seals.
Smoke testing is particularly useful for finding leaks in hard-to-reach areas, such as around wiring harnesses or under the dashboard.
4.2. UV Dye Testing
UV dye testing involves adding a fluorescent dye to the water and using a UV light to trace the path of the leak.
How it Works:
- Add Dye: Add a UV fluorescent dye to the water.
- Apply Water: Spray the dyed water onto the suspected leak areas.
- Use UV Light: Use a UV light to inspect the interior for traces of the dye.
UV dye testing makes it easier to identify the exact path of the water, even in dark or hidden areas.
4.3. Pressure Testing
Pressure testing involves pressurizing the car’s interior with air and using a soapy solution to identify leaks.
How it Works:
- Seal Car: Seal all windows and doors tightly.
- Pressurize Interior: Use an air compressor to pressurize the car’s interior.
- Apply Soapy Solution: Apply a soapy solution to the suspected leak areas.
- Observe Bubbles: Watch for bubbles forming in the soapy solution, indicating the location of leaks.
Pressure testing is effective for finding small leaks that might be difficult to detect with other methods.
5. Drying the Car After Finding and Fixing Leaks
Once you have identified and fixed the leaks, it is crucial to dry the car thoroughly to prevent mold and mildew growth.
5.1. Removing Excess Water
Start by removing any standing water from the car’s interior:
- Use Towels: Use absorbent towels to soak up as much water as possible.
- Wet/Dry Vacuum: Use a wet/dry vacuum to extract water from carpets and upholstery.
Removing excess water speeds up the drying process and prevents water from soaking deeper into the car’s interior.
5.2. Drying the Interior
Use these methods to dry the car’s interior:
- Air Drying: Open all windows and doors on a dry, sunny day to allow the car to air dry.
- Dehumidifier: Place a dehumidifier inside the car to remove moisture from the air.
- Heater: Use the car’s heater to warm the interior and promote evaporation.
Combining these methods ensures thorough drying and prevents mold and mildew growth.
5.3. Preventing Mold and Mildew
To prevent mold and mildew growth:
- Clean Interior: Clean the interior with a mold-killing solution.
- Ventilate Car: Ensure adequate ventilation to prevent moisture buildup.
- Use Absorbents: Place moisture-absorbing products, such as silica gel packets, inside the car.
Taking these steps helps maintain a healthy and odor-free environment inside the car.
6. Maintaining Your Car to Prevent Future Leaks
Preventing leaks is better than fixing them. Follow these maintenance tips to keep your car dry:
6.1. Regular Inspections
Conduct regular inspections of your car’s seals, windows, and sunroof:
- Check Seals: Inspect door, window, and windshield seals for damage or deterioration.
- Inspect Sunroof: Check the sunroof for proper drainage and any signs of leaks.
- Inspect Cabin Air Filter: Ensure the cabin air filter is properly installed and the housing is sealed.
Regular inspections allow you to identify and address potential issues before they become major problems.
6.2. Cleaning and Maintenance
Keep your car clean and well-maintained:
- Wash Car Regularly: Wash the car regularly to remove dirt and debris that can damage seals.
- Clean Drain Tubes: Clean the sunroof drain tubes regularly to prevent clogs.
- Apply Sealant: Apply sealant to seals to keep them pliable and waterproof.
Proper cleaning and maintenance extend the life of your car’s seals and prevent leaks.
6.3. Prompt Repairs
Address any leaks or damage promptly:
- Fix Leaks: Repair any leaks as soon as they are detected to prevent further damage.
- Replace Damaged Parts: Replace any damaged seals or components to ensure a proper seal.
Prompt repairs minimize the risk of long-term damage and maintain the value of your vehicle.
7. CAR-TOOL.EDU.VN: Your Partner in Automotive Care
CAR-TOOL.EDU.VN is dedicated to providing you with the best information and tools for maintaining your vehicle.
7.1. Comprehensive Guides
We offer comprehensive guides on a wide range of automotive topics, including leak detection and repair:
- Detailed Instructions: Step-by-step instructions for performing diagnostic tests and repairs.
- Expert Advice: Tips and advice from experienced automotive professionals.
- Troubleshooting Tips: Solutions to common problems and issues.
Our guides are designed to empower you to take care of your vehicle and save money on repairs.
7.2. High-Quality Products
CAR-TOOL.EDU.VN offers a wide range of high-quality products for automotive maintenance and repair:
- Leak Detection Kits: Comprehensive kits for identifying and locating leaks.
- Sealants and Adhesives: High-quality sealants and adhesives for repairing seals and preventing leaks.
- Tools and Equipment: A wide range of tools and equipment for automotive maintenance and repair.
Our products are carefully selected to ensure quality and reliability, helping you get the job done right.
7.3. Expert Support
Our team of automotive experts is available to provide you with support and advice:
- Technical Assistance: Help with troubleshooting and repairs.
- Product Recommendations: Guidance on selecting the right products for your needs.
- Customer Service: Assistance with orders and inquiries.
We are committed to providing you with the best possible support and helping you keep your vehicle in top condition.
8. Real-World Examples of Diagnostic Water Tests
Understanding how diagnostic water tests are applied in real-world scenarios can provide valuable insights.
8.1. Example 1: Identifying a Windshield Leak
Scenario: A car owner notices a damp spot on the floor after heavy rain.
Diagnostic Water Test: The owner sprays water along the windshield while an assistant checks the interior.
Findings: Water is entering through a gap in the windshield seal.
Solution: The owner applies windshield sealant to fill the gap, resolving the leak.
8.2. Example 2: Locating a Sunroof Leak
Scenario: A car owner finds water dripping from the headliner after using the sunroof.
Diagnostic Water Test: The owner pours water into the sunroof drain channels and observes that the water is not draining properly.
Findings: The drain tubes are clogged with debris.
Solution: The owner clears the drain tubes with compressed air, restoring proper drainage and stopping the leak.
8.3. Example 3: Diagnosing a Door Seal Leak
Scenario: A car owner notices water pooling on the floor after washing the car.
Diagnostic Water Test: The owner sprays water along the door seals while an assistant checks the interior.
Findings: Water is entering through a damaged section of the door seal.
Solution: The owner replaces the damaged door seal, preventing further leaks.
9. The Science Behind Water Leaks in Cars
Understanding the scientific principles behind water leaks can help you better diagnose and prevent them.
9.1. Capillary Action
Capillary action is the ability of a liquid to flow in narrow spaces without the assistance of, and even in opposition to, external forces like gravity.
Application: Water can seep through tiny cracks and gaps in seals due to capillary action, making it difficult to detect leaks.
9.2. Pressure Differential
Pressure differential refers to the difference in pressure between two areas.
Application: Wind and movement can create pressure differentials that force water into the car through small openings.
9.3. Thermal Expansion and Contraction
Thermal expansion and contraction occur when materials change in volume in response to temperature changes.
Application: Seals and components can expand and contract with temperature changes, leading to cracks and gaps that allow water to enter.
9.4. Material Degradation
Material degradation is the process by which materials lose their desirable properties over time due to environmental factors.
Application: Seals and rubber components can degrade over time due to exposure to sunlight, heat, and chemicals, leading to leaks.
10. FAQ: Diagnostic Water Test on Car
1. What is a diagnostic water test on a car?
A diagnostic water test on a car is a procedure used to identify the source of water leaks in a vehicle’s interior by systematically applying water to different areas of the exterior and observing where it enters the car. This helps in pinpointing the exact location of the leak for targeted repairs.
2. Why is it important to perform a water test on my car?
Performing a water test is important to prevent corrosion, avoid electrical damage, maintain interior health by preventing mold and mildew, and preserve the car’s resale value by addressing leaks promptly. Early detection and repair of water leaks are vital for maintaining a healthy environment inside the car.
3. What tools do I need to perform a diagnostic water test?
To perform a diagnostic water test, you’ll need a water source (garden hose or bucket), an assistant, a flashlight, dry towels, painter’s tape, a camera, and basic hand tools. A leak detection kit from CAR-TOOL.EDU.VN is also highly recommended for accurate leak detection.
4. How do I test the windshield for leaks?
To test the windshield, spray water along the top and sides while an assistant observes the interior for any water entry. Mark any leaks with painter’s tape and inspect the windshield seal for cracks or damage.
5. What causes sunroof leaks, and how can I fix them?
Sunroof leaks are often caused by clogged drain tubes or damaged seals. To fix them, open the sunroof and inspect the drain channels for debris. Pour a small amount of water into the drain channels to check if it drains properly. If not, clear the drain tubes with compressed air or a flexible wire.
6. How can I check for leaks in the doors and windows?
Spray water along the top and sides of the doors and windows, and have an assistant check the interior for water entry, particularly along the door panels and floor. Inspect the door and window seals for damage, cracks, or gaps.
7. Why is it important to check the cabin air filter for leaks?
A poorly installed or damaged cabin air filter can allow water to enter the car. Locate the filter housing, remove the filter, and inspect it for signs of water damage. Check the housing for cracks or gaps that could allow water to enter.
8. What are some advanced diagnostic techniques for finding hard-to-find leaks?
Advanced techniques include smoke testing, which uses a smoke machine to introduce smoke into the car’s interior to identify leaks; UV dye testing, which adds a fluorescent dye to the water and uses a UV light to trace the path of the leak; and pressure testing, which pressurizes the car’s interior with air and uses a soapy solution to identify leaks.
9. What should I do after fixing a water leak in my car?
After fixing the leak, dry the car thoroughly to prevent mold and mildew growth. Remove any standing water, use towels and a wet/dry vacuum to extract water, and use air drying, a dehumidifier, or the car’s heater to dry the interior.
10. How can I prevent future leaks in my car?
To prevent future leaks, conduct regular inspections of your car’s seals, windows, and sunroof; keep your car clean and well-maintained; and address any leaks or damage promptly by repairing leaks and replacing damaged parts.
Water leaks in your car can cause significant damage if left unaddressed. By performing a diagnostic water test, identifying the leak source, and taking appropriate action, you can protect your vehicle and maintain its value. CAR-TOOL.EDU.VN is here to support you with expert guides, high-quality products, and expert assistance. Don’t let water leaks compromise your car’s health—take action today.
Ready to take control of your car’s maintenance? Contact CAR-TOOL.EDU.VN now for expert advice and the best leak detection kits on the market. Our team is ready to assist you in finding the right solutions for your needs. Reach out today and let us help you keep your vehicle in top condition! Address: 456 Elm Street, Dallas, TX 75201, United States. Whatsapp: +1 (641) 206-8880. Website: CAR-TOOL.EDU.VN