Diagnostics Cars are essential for identifying and resolving automotive issues, ensuring vehicles run efficiently and safely. At CAR-TOOL.EDU.VN, we offer comprehensive resources to help you master car diagnostics, from understanding fault codes to utilizing advanced diagnostic tools. Learn how to efficiently diagnose and repair your vehicle with our detailed guides, enhancing your auto repair skills and ensuring optimal performance.
Contents
- 1. What is the Importance of Diagnostics Cars in Modern Vehicle Repair?
- 2. What are the Key Components of a Car Diagnostics System?
- 3. How Does an OBD-II Scanner Work in Car Diagnostics?
- 4. What are Common Diagnostic Trouble Codes (DTCs) and Their Meanings?
- 5. What Diagnostic Tools are Essential for Auto Repair Shops?
- 6. How Can I Use a Multimeter for Diagnostics Cars?
- 7. What Role Does an Oscilloscope Play in Car Diagnostics?
- 8. How Can I Perform a Compression Test for Engine Diagnostics?
- 9. What is the Procedure for Diagnosing a Car’s Electrical System?
- 10. How Can I Diagnose Issues with a Car’s Fuel System?
- 11. What Steps Should I Take to Diagnose a Car’s Transmission Problems?
- 12. How Do I Diagnose Issues with a Car’s Braking System?
- 13. What are the Best Practices for Diagnosing Suspension Problems?
- 14. How Can I Diagnose Air Conditioning (AC) Issues in a Car?
- 15. What are the Best Ways to Diagnose a Car’s Starting Problems?
- 16. How Do I Diagnose a Car’s Charging System Issues?
- 17. What is the Role of Software in Diagnostics Cars?
- 18. How Can I Keep Up with the Latest Diagnostics Cars Technologies?
- 19. What are the Benefits of Regular Diagnostics Cars Maintenance?
- 20. What are the Legal and Ethical Considerations in Diagnostics Cars?
1. What is the Importance of Diagnostics Cars in Modern Vehicle Repair?
Diagnostics cars are crucial in modern vehicle repair because they enable technicians to quickly and accurately identify the root cause of issues, leading to efficient and effective repairs. Diagnostics cars, or vehicle diagnostics, have become indispensable in modern automotive repair. According to a 2023 report by the Auto Care Association, 96% of auto repair shops use diagnostic tools to service vehicles, underscoring their importance in the industry. The increasing complexity of modern vehicles, with their integrated computer systems and sensors, makes traditional troubleshooting methods inadequate. Diagnostic tools allow technicians to access the vehicle’s onboard computer, read fault codes, and analyze data to pinpoint the source of the problem. This not only saves time but also ensures that repairs are targeted and effective, reducing the likelihood of misdiagnosis and unnecessary part replacements.
Here are some key reasons diagnostics cars are important:
- Accuracy: Diagnostic tools provide precise information about the vehicle’s condition, reducing the chances of human error.
- Efficiency: They quickly identify problems, saving time compared to manual inspection.
- Cost-Effectiveness: By accurately diagnosing issues, they prevent unnecessary repairs and part replacements.
- Complexity: Modern vehicles rely heavily on electronic systems, making diagnostics essential for troubleshooting.
- Data Analysis: Technicians can analyze real-time data to identify intermittent issues and performance trends.
2. What are the Key Components of a Car Diagnostics System?
The key components of a car diagnostics system include the OBD-II scanner, diagnostic software, and vehicle sensors, all working together to identify and report issues within the vehicle. A car diagnostics system consists of several key components that work together to monitor and maintain the vehicle’s performance. The primary components include:
- OBD-II Scanner: This is the main tool used to interface with the vehicle’s computer and retrieve diagnostic information.
- Diagnostic Software: This software interprets the data from the OBD-II scanner and provides insights into the vehicle’s condition.
- Vehicle Sensors: These sensors monitor various parameters such as engine temperature, speed, and oxygen levels.
- ECU (Engine Control Unit): The ECU is the car’s central computer that processes data from the sensors and controls engine functions.
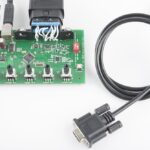
- Data Cables and Connectors: These connect the OBD-II scanner to the vehicle’s diagnostic port.
- Display Unit: This can be a built-in screen on the scanner or a connected device like a laptop or tablet.
According to a study by the National Institute for Automotive Service Excellence (ASE), understanding these components is crucial for accurate diagnostics. The OBD-II scanner, mandated in the US since 1996, provides a standardized way to access the vehicle’s diagnostic data. Modern diagnostic systems often include advanced features like wireless connectivity, cloud-based data storage, and real-time data analysis.
3. How Does an OBD-II Scanner Work in Car Diagnostics?
An OBD-II scanner works by connecting to the vehicle’s diagnostic port, reading fault codes stored in the ECU, and providing insights into the vehicle’s operational status. The On-Board Diagnostics II (OBD-II) scanner is a vital tool for diagnosing issues in modern vehicles. It works by connecting to the vehicle’s diagnostic port, typically located under the dashboard. Once connected, the scanner communicates with the vehicle’s Engine Control Unit (ECU) to retrieve stored fault codes and live data.
Here’s a breakdown of how an OBD-II scanner works:
- Connection: The scanner is plugged into the OBD-II port, establishing a communication link with the vehicle’s computer.
- Data Retrieval: The scanner sends a request to the ECU for diagnostic information.
- Fault Code Reading: The ECU responds by transmitting any stored Diagnostic Trouble Codes (DTCs), which indicate specific issues.
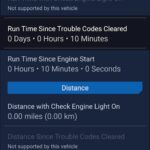
- Live Data Monitoring: The scanner can also display real-time data from various sensors, such as engine temperature, RPM, and oxygen sensor readings.
- Interpretation: The technician uses the scanner’s display or connected software to interpret the data and identify the problem.
According to SAE International, the OBD-II standard ensures that all vehicles sold in the US since 1996 have a standardized diagnostic port and a common set of fault codes. This standardization simplifies the diagnostic process, allowing technicians to use a single tool to diagnose a wide range of vehicles.
4. What are Common Diagnostic Trouble Codes (DTCs) and Their Meanings?
Common Diagnostic Trouble Codes (DTCs) include P0300 (misfire), P0171 (lean fuel mixture), and P0420 (catalyst system efficiency below threshold), each indicating specific issues that need attention. Diagnostic Trouble Codes (DTCs) are standardized codes used to identify specific problems in a vehicle’s system. These codes are crucial for diagnosing and repairing issues efficiently. Here are some common DTCs and their meanings:
- P0300: Random/Multiple Cylinder Misfire Detected – Indicates that the engine is misfiring in one or more cylinders.
- P0171: System Too Lean (Bank 1) – Suggests that the air-fuel mixture is too lean, meaning there is too much air or not enough fuel.
- P0420: Catalyst System Efficiency Below Threshold (Bank 1) – Indicates that the catalytic converter is not functioning efficiently.
- P0101: Mass Air Flow (MAF) Sensor Circuit Range/Performance – Signifies a problem with the MAF sensor, which measures the amount of air entering the engine.
- P0301: Cylinder 1 Misfire Detected – Similar to P0300 but specific to cylinder 1.
- P0505: Idle Air Control System Malfunction – Indicates an issue with the idle air control system, which regulates the engine’s idle speed.
- P0401: Exhaust Gas Recirculation (EGR) Flow Insufficient Detected – Suggests a problem with the EGR system, which reduces emissions by recirculating exhaust gases.
According to the Environmental Protection Agency (EPA), understanding and addressing these codes promptly can help maintain vehicle performance and reduce emissions. Modern diagnostic tools often provide detailed descriptions and possible causes for each DTC, aiding technicians in their diagnostic efforts.
5. What Diagnostic Tools are Essential for Auto Repair Shops?
Essential diagnostic tools for auto repair shops include advanced OBD-II scanners, multimeters, oscilloscopes, and specialized software, enabling comprehensive and accurate vehicle diagnostics. For auto repair shops, having the right diagnostic tools is essential for providing accurate and efficient service. Here are some of the most important tools:
- Advanced OBD-II Scanners: These scanners go beyond basic code reading, offering features like live data streaming, bidirectional control, and advanced system testing.
- Multimeters: Used to measure voltage, current, and resistance, helping diagnose electrical issues.
- Oscilloscopes: These tools display electrical signals as waveforms, allowing technicians to analyze complex circuits and identify intermittent problems.
- Diagnostic Software: Software packages provide detailed information on vehicle systems, wiring diagrams, and repair procedures.
- Specialized Tools: Depending on the shop’s focus, specialized tools like compression testers, fuel pressure gauges, and smoke machines can be invaluable.
- Battery Testers: Essential for diagnosing battery and charging system issues.
According to a survey by the Automotive Management Institute (AMI), shops that invest in advanced diagnostic tools see a significant improvement in diagnostic accuracy and repair efficiency. Brands like Snap-on, Bosch, and Autel are known for producing high-quality diagnostic equipment trusted by professionals in the automotive industry.
6. How Can I Use a Multimeter for Diagnostics Cars?
To use a multimeter for diagnostics cars, set it to the appropriate measurement mode (voltage, current, or resistance), connect the probes to the circuit being tested, and interpret the readings to identify electrical issues. A multimeter is an essential tool for diagnosing electrical problems in vehicles. It can measure voltage, current, and resistance, helping you identify issues such as shorts, open circuits, and faulty components. Here’s how to use a multimeter for diagnostics cars:
- Safety First: Always wear safety glasses and gloves when working with electrical systems. Disconnect the negative battery terminal to prevent accidental shorts.
- Set the Meter: Turn the multimeter on and select the appropriate measurement mode (voltage, current, or resistance) based on what you need to test.
- Voltage Measurement: To measure voltage, set the meter to DC voltage mode. Connect the black probe to a ground point on the vehicle and the red probe to the circuit you want to test. The meter will display the voltage reading.
- Current Measurement: To measure current, set the meter to amperage mode. You’ll need to break the circuit and connect the meter in series. Connect the red probe to one end of the break and the black probe to the other. The meter will display the current flowing through the circuit.
- Resistance Measurement: To measure resistance, set the meter to ohms mode. Make sure the circuit is de-energized. Connect the probes to the component you want to test. The meter will display the resistance value.
- Interpreting Readings: Compare the readings to the vehicle’s specifications. Unusual readings can indicate a problem with the circuit or component.
According to Fluke Corporation, a leading manufacturer of multimeters, understanding how to use a multimeter effectively can significantly improve your ability to diagnose and repair electrical issues in vehicles.
7. What Role Does an Oscilloscope Play in Car Diagnostics?
An oscilloscope plays a crucial role in car diagnostics by visualizing electrical signals, allowing technicians to analyze complex circuits and identify intermittent faults that a multimeter might miss. An oscilloscope is an advanced diagnostic tool that displays electrical signals as waveforms, providing a visual representation of voltage changes over time. This allows technicians to analyze complex circuits and identify intermittent faults that a multimeter might miss. Here’s how an oscilloscope is used in car diagnostics:
- Signal Analysis: Oscilloscopes can capture and display rapid changes in voltage, current, and frequency, allowing technicians to see the shape and timing of electrical signals.
- Component Testing: They can be used to test sensors, actuators, and other electronic components, verifying that they are functioning correctly.
- Intermittent Faults: Oscilloscopes are particularly useful for diagnosing intermittent faults, which can be difficult to detect with other tools.
- Circuit Analysis: By analyzing the waveform patterns, technicians can identify issues such as signal distortion, noise, and timing errors.
- Advanced Diagnostics: Modern oscilloscopes often come with pre-set tests and guided diagnostics, making them easier to use.
According to Tektronix, a leading manufacturer of oscilloscopes, these tools are essential for diagnosing complex electronic systems in modern vehicles. They provide a level of detail and insight that other diagnostic tools cannot match, helping technicians resolve even the most challenging issues.
8. How Can I Perform a Compression Test for Engine Diagnostics?
To perform a compression test for engine diagnostics, disable the ignition and fuel systems, remove all spark plugs, insert a compression tester into each cylinder, and crank the engine to measure the compression pressure. A compression test is a diagnostic procedure used to evaluate the condition of an engine’s cylinders. It measures the amount of pressure each cylinder can build, providing insights into the health of the piston rings, valves, and cylinder head. Here’s how to perform a compression test:
- Preparation: Warm up the engine to operating temperature. Turn off the ignition and fuel systems to prevent the engine from starting.
- Spark Plug Removal: Remove all spark plugs from the engine. This allows you to insert the compression tester into each cylinder.
- Compression Tester Installation: Insert the compression tester into the spark plug hole of the first cylinder. Make sure it is securely sealed.
- Engine Cranking: Crank the engine for about 5-7 seconds. Watch the gauge on the compression tester to see the maximum pressure reached.
- Recording Results: Record the compression reading for each cylinder. Compare the readings to the manufacturer’s specifications.
- Repeat: Repeat the process for each cylinder.
- Interpretation: Low compression in one or more cylinders can indicate worn piston rings, damaged valves, or a blown head gasket.
According to a study by the American Society of Mechanical Engineers (ASME), a compression test is a reliable method for assessing engine health. Comparing the compression readings across all cylinders can help identify specific issues and guide further diagnostic steps.
9. What is the Procedure for Diagnosing a Car’s Electrical System?
The procedure for diagnosing a car’s electrical system involves visual inspection, voltage and continuity testing, and using a diagnostic scanner to identify and resolve issues. Diagnosing a car’s electrical system involves a systematic approach to identify and resolve issues. Here’s a step-by-step procedure:
- Visual Inspection: Start by visually inspecting the electrical system for obvious signs of damage, such as frayed wires, corroded terminals, and blown fuses.
- Battery Test: Check the battery voltage and condition using a battery tester. A weak battery can cause a variety of electrical problems.
- Fuse Check: Inspect all fuses to ensure they are intact. Use a multimeter to test for continuity across each fuse.
- Voltage Testing: Use a multimeter to measure voltage at various points in the circuit. Compare the readings to the vehicle’s wiring diagram to identify voltage drops or open circuits.
- Continuity Testing: Use a multimeter to test for continuity in wires and circuits. This helps identify breaks or shorts in the wiring.
- Grounding Check: Ensure that all ground connections are clean and secure. Poor grounding can cause a variety of electrical issues.
- Diagnostic Scanner: Use a diagnostic scanner to check for any stored fault codes in the vehicle’s computer.
- Component Testing: Test individual components, such as sensors, actuators, and relays, to ensure they are functioning correctly.
According to the National Automotive Service Task Force (NASTF), a thorough understanding of electrical systems and the proper use of diagnostic tools are essential for effective electrical diagnostics.
10. How Can I Diagnose Issues with a Car’s Fuel System?
To diagnose issues with a car’s fuel system, check fuel pressure, inspect fuel injectors, test the fuel pump, and use a diagnostic scanner to identify potential problems. Diagnosing issues with a car’s fuel system requires a systematic approach to identify and resolve problems. Here’s a step-by-step procedure:
- Fuel Pressure Test: Start by testing the fuel pressure at the fuel rail using a fuel pressure gauge. Compare the readings to the vehicle’s specifications.
- Fuel Injector Inspection: Inspect the fuel injectors for leaks, clogs, or damage. Use a stethoscope to listen to the injectors and verify that they are firing correctly.
- Fuel Pump Test: Test the fuel pump to ensure it is delivering adequate fuel flow and pressure. Use a multimeter to check the voltage at the fuel pump.
- Fuel Filter Inspection: Inspect the fuel filter to see if it is clogged or dirty. A clogged fuel filter can restrict fuel flow and cause performance issues.
- Diagnostic Scanner: Use a diagnostic scanner to check for any stored fault codes related to the fuel system.
- Fuel Line Inspection: Inspect the fuel lines for leaks, kinks, or damage.
- Fuel Quality Check: Check the quality of the fuel. Contaminated or stale fuel can cause a variety of problems.
According to the Automotive Service Association (ASA), a thorough understanding of fuel systems and the proper use of diagnostic tools are essential for effective fuel system diagnostics.
11. What Steps Should I Take to Diagnose a Car’s Transmission Problems?
Diagnosing a car’s transmission problems involves checking fluid levels, inspecting for leaks, performing a stall test, and using a diagnostic scanner to identify fault codes. Diagnosing transmission problems requires a systematic approach to identify and resolve issues. Here’s a step-by-step procedure:
- Fluid Level Check: Start by checking the transmission fluid level. Low fluid levels can cause a variety of transmission problems.
- Fluid Condition Inspection: Inspect the condition of the transmission fluid. Look for signs of contamination, such as a dark color or a burnt smell.
- Leak Inspection: Inspect the transmission for leaks. Leaks can cause low fluid levels and transmission damage.
- Stall Test: Perform a stall test to evaluate the overall condition of the transmission. This involves putting the vehicle in drive and applying the brakes while accelerating.
- Diagnostic Scanner: Use a diagnostic scanner to check for any stored fault codes related to the transmission.
- Shift Linkage Inspection: Inspect the shift linkage to ensure it is properly adjusted.
- Test Drive: Perform a test drive to evaluate the transmission’s performance. Pay attention to any unusual noises, shifting problems, or slipping.
According to the Transmission Repair Association (TRA), a thorough understanding of transmission systems and the proper use of diagnostic tools are essential for effective transmission diagnostics.
12. How Do I Diagnose Issues with a Car’s Braking System?
To diagnose issues with a car’s braking system, inspect brake pads and rotors, check brake fluid levels, test the brake lines for leaks, and use a diagnostic scanner to assess ABS functionality. Diagnosing issues with a car’s braking system requires a systematic approach to identify and resolve problems. Here’s a step-by-step procedure:
- Visual Inspection: Start by visually inspecting the brake pads, rotors, and calipers for wear, damage, or leaks.
- Brake Fluid Level Check: Check the brake fluid level in the master cylinder. Low fluid levels can indicate a leak in the system.
- Brake Line Inspection: Inspect the brake lines for leaks, cracks, or damage.
- Brake Pedal Test: Test the brake pedal for excessive travel or a spongy feel.
- ABS Check: Use a diagnostic scanner to check the Anti-lock Braking System (ABS) for any stored fault codes.
- Brake Bleeding: Bleed the brakes to remove any air from the system.
- Test Drive: Perform a test drive to evaluate the braking performance. Pay attention to any unusual noises, vibrations, or pulling to one side.
According to the National Highway Traffic Safety Administration (NHTSA), regular brake system inspections and maintenance are essential for ensuring vehicle safety.
13. What are the Best Practices for Diagnosing Suspension Problems?
Best practices for diagnosing suspension problems include visual inspection, bounce testing, and using specialized tools to identify worn components and alignment issues. Diagnosing suspension problems requires a systematic approach to identify and resolve issues. Here’s a step-by-step procedure:
- Visual Inspection: Start by visually inspecting the suspension components, such as shocks, struts, springs, and bushings, for wear, damage, or leaks.
- Bounce Test: Perform a bounce test by pushing down on each corner of the vehicle and observing how it rebounds. Excessive bouncing can indicate worn shocks or struts.
- Steering Inspection: Inspect the steering components, such as tie rods, ball joints, and control arms, for play or looseness.
- Alignment Check: Check the vehicle’s alignment to ensure that the wheels are properly aligned.
- Road Test: Perform a road test to evaluate the suspension’s performance. Pay attention to any unusual noises, vibrations, or handling problems.
- Specialized Tools: Use specialized tools, such as ball joint testers and spring compressors, to further evaluate the suspension components.
According to the Suspension and Steering Repair Association (SSRA), regular suspension inspections and maintenance are essential for ensuring vehicle safety and handling.
14. How Can I Diagnose Air Conditioning (AC) Issues in a Car?
To diagnose Air Conditioning (AC) issues in a car, check refrigerant levels, inspect the compressor and condenser, test for leaks, and use a diagnostic scanner to assess the system’s performance. Diagnosing air conditioning (AC) issues in a car requires a systematic approach to identify and resolve problems. Here’s a step-by-step procedure:
- Refrigerant Level Check: Start by checking the refrigerant level in the AC system. Low refrigerant levels can cause poor cooling performance.
- Compressor Inspection: Inspect the AC compressor for leaks, damage, or unusual noises.
- Condenser Inspection: Inspect the AC condenser for damage or blockages.
- Leak Test: Use a leak detector to check for leaks in the AC system.
- Pressure Test: Use a manifold gauge set to measure the pressure in the AC system. Compare the readings to the vehicle’s specifications.
- Diagnostic Scanner: Use a diagnostic scanner to check for any stored fault codes related to the AC system.
- Component Testing: Test individual components, such as the AC compressor clutch, expansion valve, and blower motor, to ensure they are functioning correctly.
According to the Mobile Air Conditioning Society (MACS), regular AC system inspections and maintenance are essential for ensuring optimal cooling performance.
15. What are the Best Ways to Diagnose a Car’s Starting Problems?
The best ways to diagnose a car’s starting problems involve checking the battery, starter motor, and ignition system, and using a diagnostic scanner to identify potential issues. Diagnosing a car’s starting problems requires a systematic approach to identify and resolve issues. Here’s a step-by-step procedure:
- Battery Check: Start by checking the battery voltage and condition. A weak battery is a common cause of starting problems.
- Starter Motor Test: Test the starter motor to ensure it is functioning correctly. Use a multimeter to check the voltage at the starter motor.
- Ignition System Check: Check the ignition system for spark. If there is no spark, the problem may be with the ignition coil, distributor, or spark plugs.
- Fuel System Check: Check the fuel system to ensure that fuel is being delivered to the engine.
- Diagnostic Scanner: Use a diagnostic scanner to check for any stored fault codes related to the starting system.
- Wiring Inspection: Inspect the wiring for any signs of damage or corrosion.
According to the Electrical and Electronic Systems Committee (EESC), a thorough understanding of starting systems and the proper use of diagnostic tools are essential for effective diagnostics.
16. How Do I Diagnose a Car’s Charging System Issues?
To diagnose a car’s charging system issues, check the battery voltage, test the alternator’s output, inspect the drive belt, and use a diagnostic scanner to identify potential problems. Diagnosing a car’s charging system issues requires a systematic approach to identify and resolve problems. Here’s a step-by-step procedure:
- Battery Voltage Check: Start by checking the battery voltage with a multimeter. A fully charged battery should read around 12.6 volts.
- Alternator Output Test: Test the alternator’s output voltage with the engine running. The alternator should be producing around 13.5 to 14.5 volts.
- Drive Belt Inspection: Inspect the drive belt for wear, damage, or looseness. A loose or worn belt can cause the alternator to not function properly.
- Wiring Inspection: Inspect the wiring for any signs of damage or corrosion.
- Diagnostic Scanner: Use a diagnostic scanner to check for any stored fault codes related to the charging system.
- Load Test: Perform a load test on the battery and alternator to evaluate their performance under load.
According to the Battery Council International (BCI), regular charging system inspections and maintenance are essential for ensuring reliable vehicle operation.
17. What is the Role of Software in Diagnostics Cars?
Software in diagnostics cars plays a crucial role by interpreting data from the vehicle’s computer, providing detailed fault information, and guiding technicians through repair procedures. Software is essential in modern diagnostics cars, playing a crucial role in interpreting data and guiding technicians through the repair process. Here’s how software is used in diagnostics cars:
- Data Interpretation: Diagnostic software interprets the data from the OBD-II scanner, providing detailed information about the vehicle’s condition.
- Fault Code Analysis: The software analyzes fault codes, providing descriptions, possible causes, and recommended solutions.
- Live Data Streaming: Software can display real-time data from various sensors, allowing technicians to monitor the vehicle’s performance.
- Guided Diagnostics: Some software packages provide guided diagnostic procedures, walking technicians through the steps needed to diagnose and repair specific issues.
- Wiring Diagrams: Software often includes wiring diagrams, helping technicians trace circuits and identify electrical problems.
- Repair Procedures: Many software packages include detailed repair procedures, providing step-by-step instructions for fixing common issues.
- Updates: Regular software updates ensure that the diagnostic tools are compatible with the latest vehicle models and have the most up-to-date information.
According to a report by the Automotive Aftermarket Suppliers Association (AASA), diagnostic software is a critical component of modern auto repair, helping technicians diagnose and repair vehicles quickly and accurately.
18. How Can I Keep Up with the Latest Diagnostics Cars Technologies?
To keep up with the latest diagnostics cars technologies, attend industry conferences, take training courses, read trade publications, and participate in online forums. Keeping up with the latest diagnostics cars technologies requires a commitment to ongoing learning and professional development. Here are some ways to stay current:
- Industry Conferences: Attend industry conferences and trade shows to learn about the latest diagnostic tools and technologies.
- Training Courses: Take training courses and workshops offered by manufacturers and industry organizations.
- Trade Publications: Read trade publications and online resources to stay informed about the latest trends and best practices.
- Online Forums: Participate in online forums and discussion groups to connect with other technicians and share knowledge.
- Manufacturer Updates: Stay informed about software updates and new diagnostic tools from leading manufacturers.
- Certifications: Pursue certifications from organizations like the National Institute for Automotive Service Excellence (ASE) to demonstrate your expertise.
- Continuous Learning: Commit to continuous learning and professional development to stay ahead of the curve.
According to the Automotive Training Managers Council (ATMC), ongoing training and professional development are essential for technicians to keep up with the rapid pace of technological change in the automotive industry.
19. What are the Benefits of Regular Diagnostics Cars Maintenance?
The benefits of regular diagnostics cars maintenance include early detection of potential problems, improved vehicle performance, increased fuel efficiency, and extended vehicle lifespan. Regular diagnostics cars maintenance offers numerous benefits, including:
- Early Problem Detection: Regular diagnostics can identify potential problems before they become major issues, saving you time and money.
- Improved Performance: By addressing minor issues promptly, you can ensure that your vehicle continues to perform at its best.
- Increased Fuel Efficiency: Regular maintenance can improve fuel efficiency by ensuring that the engine is running optimally.
- Extended Lifespan: By keeping your vehicle in good condition, you can extend its lifespan and reduce the need for costly repairs.
- Safety: Regular diagnostics can identify safety-related issues, such as brake problems or faulty lights, helping to keep you and your passengers safe.
- Resale Value: A well-maintained vehicle with a history of regular diagnostics and maintenance will have a higher resale value.
According to a study by the AAA, regular vehicle maintenance can significantly reduce the likelihood of breakdowns and costly repairs.
20. What are the Legal and Ethical Considerations in Diagnostics Cars?
Legal and ethical considerations in diagnostics cars include data privacy, proper disposal of hazardous materials, and honest communication with customers about repair needs. Legal and ethical considerations are important in diagnostics cars, ensuring that technicians and repair shops operate responsibly and in compliance with regulations. Here are some key considerations:
- Data Privacy: Technicians must protect the privacy of customer data stored in vehicle computers.
- Proper Disposal: Hazardous materials, such as used oil and coolant, must be disposed of properly to protect the environment.
- Honest Communication: Technicians must communicate honestly with customers about the condition of their vehicles and the need for repairs.
- Warranty Compliance: Repairs must be performed in compliance with warranty requirements to avoid voiding the warranty.
- Safety Standards: Technicians must adhere to safety standards to protect themselves and their customers.
- Environmental Regulations: Repair shops must comply with environmental regulations, such as those related to emissions testing and refrigerant handling.
- Consumer Protection Laws: Technicians must be aware of consumer protection laws, such as those related to fair pricing and disclosure of information.
According to the Automotive Ethics Foundation (AEF), ethical behavior is essential for maintaining trust and credibility in the automotive industry.
For more information on diagnostics cars, visit CAR-TOOL.EDU.VN.
Do you need assistance with diagnostics cars or finding the right auto repair tools? Contact us today for expert advice and solutions at 456 Elm Street, Dallas, TX 75201, United States. Whatsapp: +1 (641) 206-8880. Our team at CAR-TOOL.EDU.VN is ready to help you with all your automotive needs.